Showing posts with label Party Knick Knacks. Show all posts

Friday, 16 August 2013

Chocolate and hazelnut laddoo (truffles)

IMG_0389
First of all a huuuuge thanks to all those who left comments on the ad post. I am a wee bit embarrassed and at the same time overwhelmed at the outcome. Its weird watching myself on telly and I hope I get used to it soon :)

Those who attended Bloggers' Buzz beginning of this year might remember Devnaa who sponsored a box of sweets for the goody bag? Or let me put it this way, those of you who attended BB will not forget Devnaa and that amazing box of Indian-inspired sweets in the goody bag. I remember a lot of you writing back and saying that was the best part of the goody bag- the well packaged, colourful box with delicate chocolates. Started by brother-sister duo Roopa and Jay Rawal, the journey of Devnaa began at their kitchen table with praises flowing in about Roopa's home made sweets. They decided to take this interest further by starting Devnaa, a collection of sweets and desserts combining authentic Indian recipes and artisan chocolate techniques. 

Now, I am not a big fan of Indian sweets and desserts, with maybe gulab jamun and gajjar ka halwa being an exception. So in all honesty I was not too excited about the box of chocolates. But of course I had to give it a try and must say I wasn't too disappointed. I mean i did have a few favourites like the saffron and pistachio caramel and the cinnamon praline, and my not so favourite were the ones with ginger. Ginger or not, I think the whole concept of Devnaa is quite interesting.
IMG_0477
They also sent me their cookbook and ingredients for two recipes. I have bookmarked a whole bunch of recipes from the book, but like a million other recipes I have bookmarked, God alone knows when they will actually make an appearance on the blog. The recipes are pretty descriptive, but being a big fan of food photography, I would have liked some better pictures. I mean desserts are so pretty to photograph and I would have loved to see some cool styling and stuff. 

These chocolate and hazelnut laddoos did not disappoint, but i would def try them with dark chocolate next time. Gave it to some friends at a party and they loved it. They are really easy to make a do a good job of being pretty, presentable and tasty. Do some cool packaging, and they would double up as return gifts for guests. 

IMG_0397 
Condensed milk- 200 gms
Cocoa powder- 1 tbsp
Milk- 2 tbsp
Milk powder- 100gms
Milk chocolate- 100 gms
Chocolate-hazelnut spread- 1 tbsp (say like Nutella or equivalent)
Hazelnuts- 60 gms, slightly roasted and crushed or chopped finely
Dessicated coconut- 20 to 25 gms (optional)
IMG_0383 
Mix together the condensed milk, cocoa powder and milk in a saucepan and heat gently. (It would make it a lot more easier if you sift the cocoa powder into the condensed milk, because it was a bit of a trouble for me with small bits of cocoa powder dotting the mix. I had to use my spatula to break them down and still couldn't manage to do it all. So my mix was speckled with cocoa).
Keeping the heat on low-medium, add the milk powder and stir until the mixture starts forming a smooth dough that comes away easily from the sides of the pan. This may take about 4 to 5 minutes. Make sure you don't leave it unattended and that you keep stirring till you get the desired consistency.
Take the mix off heat and leave aside to cool in the refrigerator. The recipe called for just leaving it aside to cool, but still warm and pliable. I did as mentioned, but the dough was just too loose to work with. So I chucked it into the refrigerator for about 15 minutes, and waited for it to become completely cold (like with truffles) and then it was easier to handle.
Scoop out 1 tbsp of the dough at a time and roll into a smooth ball. Mine were slightly bigger in size so I got a total of 12. Leave on a tray lined with baking paper.
Meanwhile, melt the chocolate in a microwave.
Stir in the chocolate-hazelnut spread and make sure that the mix is not too hot, but warm and runny. If it hardens up when you are ready to dip, then just give a burst or two in the microwave and stir again to mix well.
Arrange the chopped/crushed hazelnuts on a plate.
Dip the rolled dough balls into the melted chocolate, trying to coat them evenly on all sides, followed by generously rolling them in the chopped hazelnuts.
Carefully place them back on the same lined baking tray. Continue with all the dough balls and chuck the tray back into the refrigerator till the chocolate hardens, say about 30 minutes.
Serve them at room temperature.
IMG_0429
Notes: I generously rolled the dough balls in hazelnuts, so I didn't have enough to roll the entire batch. So i used dessicated coconut and did the same rolling process.
Feel free to use chocolate of any type for the dipping...dark, white, flavoured etc.

With thanks to Devnaa for sending me the book and the ingredients to make two recipes from the book.

Wednesday, 9 January 2013

Jalapeño popper dip

IMG_6098
I had major plans of starting off the new year on a sweet note, but 2 cake baking disasters back to back left me disinterested in the same. I am pretty sure I've lost my cake baking mojo and poor Ro is bearing the brunt of it, along with eating the severely dry mocha cupcakes I baked (and couldn't get myself to dump).

Instead I thought I'll blog one of my recent favourites, the jalapeno popper dip. I love Jalapeno poppers, but unlike the US, its very difficult to get your hands on some fresh Jalapenos and even if you do its ridiculously expensive. But when I do have this craving for poppers I head on over to Borough market and pick some up, but of late I have been using the pickled jalapenos for my cooking requirements. It cant be used to make poppers, but I do generously use them in my Mexican dishes as well as dips and such. 
07
Penn State Snacks had sent me their Christmas (pretzel) range to review a while back and their challenge was to incorporate it into a recipe. They sent me 3 different flavours, each good it its own way. The sour cream and chive was deemed my favourite and I can very proudly say I myself finished off 3/4th of the pack. Their popular salted giant stars were perfect for Christmas entertaining and I served it with a sweet apricot chutney at one of my Christmas parties. The kids enjoyed it and that does say a lot about the flavour doesn't it :). Their brand new flavour- Maple bacon pretzel knots were used in this jalapeño popper dip and I must say it was a pleasant discovery. Instead of using bread crumbs to sprinkle on top of the dip, I crushed the maple bacon pretzels and used that instead. The subtle sweetness of the maple was a good addition to the creaminess of the cheese and heat from jalapenos. I still have half a pack of pretzels left and I may use it up to coat some chicken drumsticks and bake them. 

The jalapeño dip was served as a starter along with some carrots and cucumber sticks and tortilla chips at a party we had at home and everyone loved it. I wouldn't claim this dip to be healthy in any way, but serving it with some chopped veggies kinda makes it a wee bit acceptable. Oh well, who am I kidding, its an uber cheesy dip- hot and spicy- and I don't think anyone would say no to it. So go on, give it a try and see what I'm talking about.

Recipe adapted from here (serves 8, as a starter)
IMG_6125 
Cream cheese- 225 gms, at room temperature (I used Philadelphia cream cheese)
Mayonnaise- 1/2 cup
Cheddar cheese- 1/2 cup (coarsely grated)
Parmigiano Reggiano- 1/4 cup (coarsely grated)
Pickled jalapeños- 90 to 100 gms, drained and roughly chopped
Maple bacon pretzels- 3 tbsp (crushed *)
Parmigiano Reggiano- 2 tbsp (finely grated)
IMG_6094
In a mixing bowl mix together the cream cheese, mayo, cheddar and parmiggiano reggiano until well combined.
Add the chopped jalapeños and continue mixing till you get a smooth-ish mix. 
Transfer this mix into a baking dish and smoothen out the top as much as possible. Keep aside.
Meanwhile, preheat the oven to 175C.
*Transfer the pretzels into a zip lock bag and using a rolling pin crush them as finely as possible. Alternatively, transfer them into a spice grinder and grind till fine. 
Mix the Parmigiano cheese into the pretzel mix and sprinkle over the cheese mix, as evenly as possible. Tap the bowl on the kitchen counter to evenly distribute it,
Place on a baking tray and chuck into the oven for about 20 to 25 minutes or till the cheese starts bubbling from the sides and the crushed mix on top becomes a light golden colour.
Serve right out of the oven.
IMG_6134
Notes: Replace the maple bacon pretzels with equal amount of bread crumbs. I have tried it both ways and cant pick a favourite. Love both equally. You can also use any other crisp/ chips in its place as well.
I dont like too fine a crumb so I left a few chunks here and there.
Feel free to halve the recipe and bake it for only about 12 to 15 minutes.
Use more jalapeños if you want it spicier. Add one fresh one along with the pickled ones for some extra kick. The heat was just perfect for us.
Add flavourings like garlic powder, thyme etc. to give it more oomph.

With thanks to Penn State Snacks for sending me a sample pack of pretzels

Wednesday, 28 March 2012

Nanaimo bars

IMG_0068
BBC2 airs a baking competition called 'The Great British Bake Off' and I love it. I have been religiously watching it since it started airing and wait for the cook book to come out after the season, just to gawk at all the pics and maybe try something if its not too complicated. The winner of the first series was food blogger Edd Kimber of The Boy Who Bakes. He, of course, came out with a book full of fabulous bakes and such. I picked it up from the library only to flip through it, but unlike all other cookbooks, this one actually inspired me to make quite a few things...well actually 2 things..which turned out perfectly well.

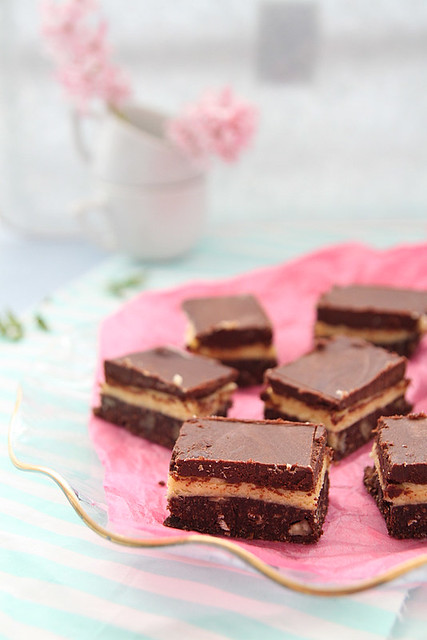
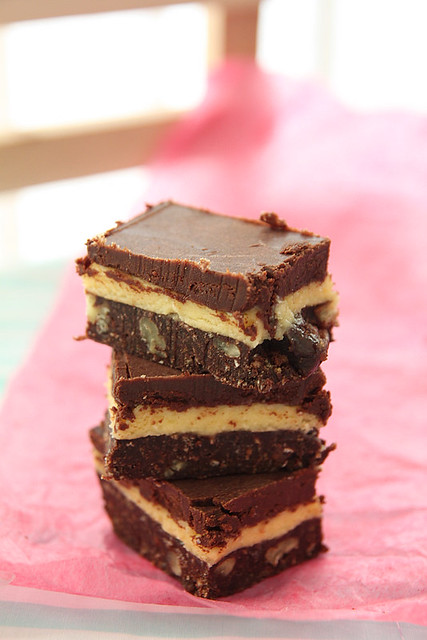
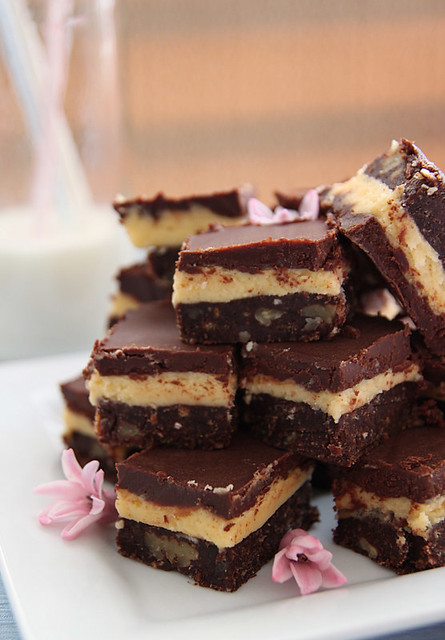
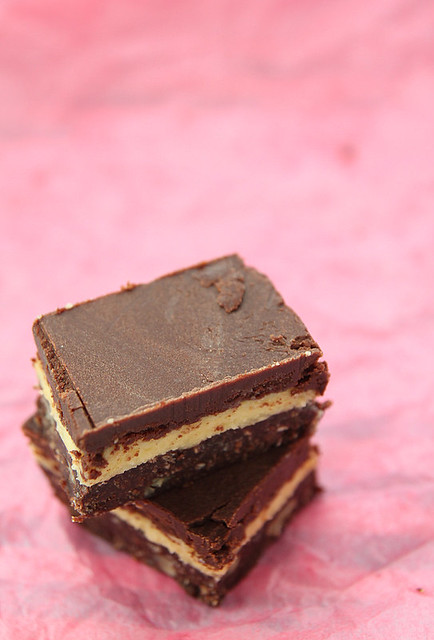
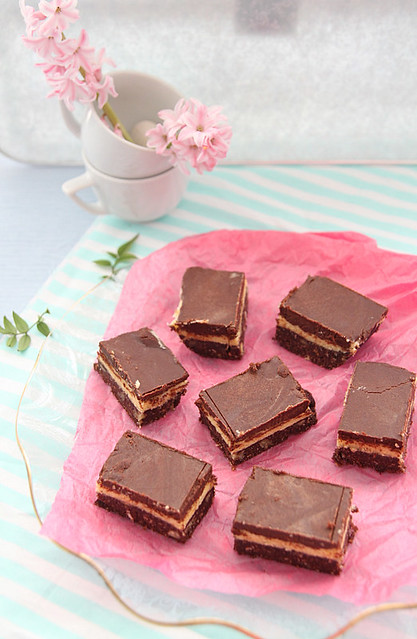
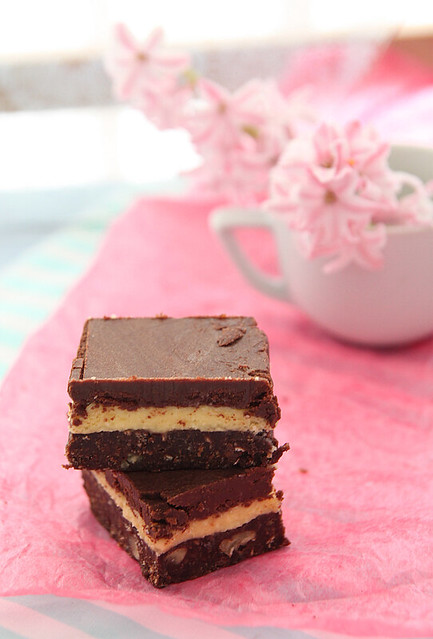
Nanaimo bars (you can read the history and all about it on Wikipedia) were one of them and although I have seen it cafe's and bakeries, I never bothered trying it for the simple reason it had chocolate in it. It also gave me the feeling of a super rich dessert, high in calories and the various recipes proved that. I didn't want to make a huge batch and end up throwing out most of it or even worse, eating it all up on our own. So when we were asked to a friends place for Sunday lunch, I thought I'll make some and take half of it there. Since its a setting process, I spread the entire procedure over a couple of days and had it ready 2 days before the party. I had sliced one piece to check if it tasted nice, and it did, but not in an 'oh my god why the hell did I wait so long to make this orgasmic dessert' way but more in a 'hmm its a nice thing to munch on' way.
IMG_0095
I left it in the refrigerator, nicely covered and headed to a movie during which time the husband got home and dug into it. Not one piece, but 3 squares he had, all in one go. I did not notice this because Ro does not have the habit of raiding the fridge and cupboards looking for things to eat (unlike me) and I didn't think I should warn him about NOT touching what's in the ceramic tray. Then the day before the party I take the tray out and half of it has disappeared. Greediness got the better of me and I tried one slice. At that point it was certainly an 'oh my god.....orgasmic dessert' moment. I decided to not take it to that friends place and we enjoyed it all to ourselves. Ro is even pleading to make another batch soon. I cant get myself to do so (considering the huge amounts of yumm stuff that went into it) but I shall sometime, or when I have another party I need to take something to :)

On a completely different note, I finally managed to get my recipe index intact. Its still in the work-in-progress state, but its well on its way to completion. Have updated the side bar with my fb, twitter, flicker accounts. So if you want to hear more of my brags and complaints and such please feel free to connect with me there. Phew! who said food blogging was child's play? No one? (I think I did when I initially started the blog) ;)
IMG_9757
Recipe adapted from The Boy Who Bakes (makes around 20 to 25 squares)
Bottom layer
Digestive biscuits- 150 gms (I used McVities, but any rich tea biscuits should do)
Butter- 85 gms
Caster sugar- 38 gms
Cocoa powder- 23 gms
Egg- 1 large
Vanilla extract- 1/2 tsp
Desiccated coconut- 50 gms
Pecans- 37 gms, roughly chopped

Middle layer
Butter- 50 gms
Icing sugar- 170 gms
Custard powder- 1 1/2 tbsp
Double cream- 50 ml

Top layer
Dark chocolate- 113 gms, finely chopped
Double cream- 50 ml
Unsalted butter- 20 gms, softened
IMG_0089
Get a large baking pan (I used a 23 x 13 rectangle casserole dish) ready and line the bottom and up the sides with aluminium foil. Leave some extra hanging over the sides, so its easy to take it out as a whole for convenience of slicing.
Place the biscuits in a plastic bag and use a rolling pin to crush them to resemble bread crumbs. If you have a food processor, then just pulse a couple of times to get the desired consistency. 
Transfer the biscuit crumbs into a mixing bowl and add the desiccated coconut and chopped pecans. Mix well and keep aside.
Melt the butter in a sauce pan over medium heat.
Then remove from heat and whisk in the sugar and cocoa powder, followed by the egg. Beat it into the mixture.
Place the pan back on heat and cook for about a minute, or until the mixture thickens, making sure to whisk constantly.
Remove from heat and stir in vanilla extract.
Pour this into the biscuit mixture and give it a good mix
Tip it into the baking tray, spread it out and press it in as evenly and tightly as possible, so it wont crumble when cut into.
Cover with a cling film and chill for a minimum of 1 hr.

While that's chilling, get the middle layer going.
Beat the butter, using a hand mixer or in a free standing mixer, until light and fluffy.
Gradually beat in the icing sugar until you get a smooth mix.
Add custard powder and cream and beat on low until just combined.
Then increase speed and beat well till you get a light and fluffy mixture.
Spread this evenly on top of the biscuit base.
Cover and chill for another hour or so.
IMG_0062
Finally, for the top layer, make a ganache.
Keep the chopped chocolate ready in a bowl.
Bring the double cream to a boil and pour over the chocolate pieces.
Leave to stand for about 2 minutes and then stir well until you get a smooth mix.
Add the melted butter and stir further to get a silky ganache.
Pour this over the butter cream layer and spread as evenly as possible.
Cover and chill until ready to serve.

To prevent the chocolate layer from cracking, take the baking pan out of the refrigerator about 10 minutes prior to slicing. Then run a clean, sharp knife under hot water, wipe dry and slice. It would be far easier and less messier.
IMG_0079
Notes: I used our Indian desiccated coconut for this. Was a bit wary about how it would turn out, but it worked out just fine. Feel free to use the one meant for baking.
The original recipe called for walnuts, but since I didn't have any, I used pecans. Any kind of nuts should be fine.
I made the base and chilled it for a whole night. I basically took my own sweet time to do the layers which was a very good idea, because patience is not my thing. I probably would have ruined it, if I made it all the same day.
I sliced them up and stored in a container for a week. It was absolutely fine. 
Make sure you slice them into small pieces, because this is super rich and you don't want to over do with a big piece.

Wednesday, 31 August 2011

Chocolate crinkle cookies (Snow caps)

IMG_4405
I am back from my holiday and it sucks. It means back to daily chores like cooking, cleaning and writing and having nothing much too look forward to. Well life must go on right? Anyways, we had a lovely time down at the coast and pigged out so much, I can assure you I have gained a few pounds. Cornwall is known for the cream tea's and just looking at the clotted cream served with scones will gain you a few calories, seriously! But on another note they were probably the best cream tea's I've ever had. All the while Ro kept dabbing huge amounts of cream on to his scone I kept chanting heart attacks and cholesterol levels which fell on deaf ears. So we left all those behind and indulged in food on all 5 days.

I haven't yet sorted through the pictures, but will try and do so at the earliest and post a few as well. There were a couple of interesting food items I wanted to try, but Cornwall being the fish central, most of it had to do with fish and I am not that big a fish fan as you all might already know. Convincing Ro was too much of an effort so i let it pass. But seriously how interesting would the Stargazy Pie have been? I think a darn interesting one to at least photograph. Ro thought otherwise, and so we decided Cornish Pasty instead. So we went all the way down south to the tip of England to actually eat the best Cornish Pasty evah. Not overrated people, not overrated at all. I loved it. I am thinking of actually trying it out at home "some day."
IMG_4385
Coming back to the cookies', since it was a 6 hour drive from London, I decided to pack some goodies for the road trip. My husband, yes the one who is such a sucka for anything chocolate, pleaded with me to make some chocolate cake. Of course I didn't listen, because as we all know, I am not the awesome wife who will listen to stuff the husband says. Instead I went ahead and made a cake of my choice and was happily packing it when I realised I had a wee bit of butter left over from my previous expeditions which would expire in a couple of days. So I googled and googled and googled and landed on a picture of crinkled cookies which looked so darn pretty, I had to make it. 
IMG_4351
So I searched for a recipe and came up with one that was really easy, but didn't need butter. But by then I was so excited at the prospect of photographing the crinkle cookies, butter was the least of my problems. Made the cookies in a jiffy and gosh they were the prettiest ever. I ate one or two right out of the oven and it was nice. Taste wise, well I would say it's a wannabe brownie/ cake. Its somewhere in between a cake and a cookie to be precise. The husband and friends who were travelling with us actually thought they were bought from some bakery (I'm wondering if that's a compliment or not) and happily gorged on them as well. I took a bite from a few leftover cookies the next day and actually hated it, to be honest. I decided to give chocolate one more chance but it failed me. So sorry chocolate, you and me need to part ways. We obviously want different things. (Ro claims that's like saying he and I need different things, because his ultimate aim in life is to die and go to chocolate heaven). 

So anyhoo, the recipe is a keeper cos I'm sure those chocolate lovers out there would fall for it and if not a chocolate lover, then it would at least grab the attention of the photographer in you. Either ways, its easy to make and is perfect to gift for Christmas or serve for kids' parties. I don't intend to do either, but decided to keep the recipe, just in case I became a convert!
IMG_4442
Recipe adapted from here (makes about 24 to 26 cookies)
Dark chocolate- 1/2 cup, broken into medium slices (I used Green & Blacks, 70 percent choc.)
Brown sugar- 1/2 cup, packed
Oil- 2 1/2 tbsp
Egg- 1 large
Vanilla essence- 1/2 tsp
Plain flour- 1/2 cup
Baking powder- 1/2 tsp
Salt- a pinch
Icing sugar- 1/4 cup
IMG_4346
In a bowl stir together the flour, baking powder and salt.
Melt the chocolate in a saucepan over low heat.
Remove from heat and add sugar and oil and mix well till the sugar has dissolved, somewhat.
Add the egg and vanilla and mix well till you no longer see any traces.
Mix in the flour and stir till you form a smooth batter.
Close the bowl with a lid and chill in the refrigerator for at least 2 hours.
The batter would have hardened a bit. If not keep it for some more time.
When you are ready to bake, line a baking tray with parchment paper or foil paper and put the powdered sugar in a plate large enough to roll the cookie balls.
Using a 1/2 tbsp measuring spoon scoop out the dough and make balls. 
Roll in the icing sugar and place on the tray, about an inch apart. This is what cracks when the cookies are baking and gives the crinkled effect. 
Bake in an oven preheated at 175C for about 10 minutes for a chewy one or 12 to 13 minutes for a crunchier version. 
Once done, cool completely on the rack and then store in air tight containers or zip loc bags

IMG_4437
Notes: You can add any nut of choice (walnuts, hazelnuts etc) right after mixing the flour. Just chop them up and fold it in.
By the time you finish rolling the entire batch, the first few might have no icing sugar visible because it gets absorbed. No problem, just lightly roll it again and place into the oven immediately.
I thought 1/4 cup icing sugar was a little too much, as I ended up wasting a bit once I was done.
I preferred the chewier version better.

Thursday, 16 June 2011

Grilled chicken wings- the Indian way

IMG_2586
About 2 weeks back, we had some friends over for dinner and I did a Mexican theme with buffalo wings, quesadillas, ranch dressing and guava mojitos..a little Cuban influence there, but who cares? 

So having discovered cleaned, skinless chicken wings at another grocery store nearby, I was pretty much over joyed, to say the least. The problem is, they get over really fast (which is probably why I never knew they existed in the first place) and so if you are not lucky (in my case early enough) you may not get it. I had stocked up on 2 sets of wings the last time I chanced upon them and was very happy when the others who came by looking for them were disappointed (yup, totally mean, if you're wondering)

One set I used for the lunch party and the other set, I made some Indian inspired chicken wings which were served with a baked potato and a tomato salad. Now that's my kinda dinner. I have posted a recipe for buffalo wings and quesadillas here, here and here, if you're interested

Recipe has been adapted from here
IMG_2583
To marinate
Thick curd- 3/4 cup
Ginger paste- 1/2 tbsp
Garlic paste- 1/2 tbsp
Turmeric powder- 1/2 tsp
Cumin powder- 1/2 tsp
Coriander powder- 1 1/2 tsp
Chilli powder- 1/2 tsp
Lemon juice- 1 tbsp
Dried fenugreek leaves- 1 1/2 tsp
Ground black pepper- 1/4 tsp
Oil- 1 tbsp
Salt- to taste
Coriander leaves- to garnish (optional)
Skinless chicken wings, tips removed- 1 kg, cleaned and dried with a kitchen towel

Sauce:
Onions- 1 medium, finely chopped
Tomato- 1 medium, finely chopped
Garlic- 5 largish pods, peeled and roughly chopped
Ginger- 2 inch piece, finely chopped
Salt- to taste
Water- 1/4 cup (optional)
Oil- 1/2 tbsp
IMG_2576
Mix together all the ingredients under the 'to marinate' section in a bowl until well combined.
Pour over the chicken wings, toss well, cover and marinate over night or for at least an hour.
When ready to grill, line a baking tray with aluminium foil and place the chicken wings in rows. Don't over crowd. 
Save the remaining marinade for basting and for the sauce
Preheat the grill for about 10 minutes on high and grill the chicken for a total of 10 to 12 minutes. Take it out after about 5 minutes, baste it with more marinade (if required), turn it over and cook for the remaining 5 or 6 minutes. Repeat with the remaining wings.
Once they are all grilled, transfer them into a clean mixing bowl.
IMG_2581
To make the sauce, heat a frying pan with oil and throw in the onions, ginger and garlic.
Saute on medium-low heat till they are slightly wilted.
Throw in the tomatoes and salt and cook till the oil starts separating. 
Add the remaining marinade from the chicken and cook till oil starts resurfacing again. Do this on low heat to prevent the curds from curdling.
Once completely cooked, pour the sauce over the cooked chicken wings, toss to coat well and garnish with coriander leaves. Alternatively, if the sauce is cooked in a vessel large enough to hold all the wings, then throw in the chicken and toss it around in the same pan itself.
IMG_2597
Notes: Grilling chicken on high heat takes no time at all...be careful not to burn it (as you can see, i did manage 2 burn it)
The sauce is completely optional, I didn't want it to be too dry, so opted for a sauce. If serving it dry, then probably a dipping sauce on the side would be a good idea.

Sunday, 22 May 2011

Potato bhajias (fritters)

IMG_1760
I think this is probably the second recipe I would be posting from a recipe book taken from the library, the first being Amritsari dal, again from a Madhur Jaffrey book. For some strange reason, both the libraries in my Borough seem to have a lot of Madhur Jaffrey Books. I'm wondering its because most of her recipes cater to the locals, or so I think!

The book I have with me now, Simple Indian Cookery, has a bunch of neat recipes, but most of which I think are nothing great, just average and a little bland considering they are curry recipes. The potato bhajias, along with a flaky flat bread with cumin seeds were the only two recipes I thought were worth noticing.
IMG_1734
These bhajias are pretty simple and straightforward and I wouldn't have given it a go if it wasn't for the cold, windy weather we experienced a couple of days back. It was so sunny and bright the first half of the week and then suddenly it became very unpleasant. 

I was craving some banana fritters and Ro wanted English scones. Too bad  that I was the one with the upper hand in the kitchen and he had no idea how to make scones. But with no bananas at hand, I was left with the option of something savoury. These potato bhajias served the purpose...I mean it was deep fried, it was hot and paired with a cuppa it was bliss.

IMG_1765
Potatoes- 2 large, well scrubbed and peeled 
Besan/ Chickpea flour- 100 gms
Soda powder- 1/2 tsp
Turmeric powder- 1/2 tsp
Chilli/ Cayenne powder- 1/2 tsp
Coriander powder- 1/2 tsp
Cumin seeds- 1 tsp
Salt- to taste
Water- about 100-150ml
Vegetable oil- for deep frying
IMG_1740
Sift together all the dry ingredients and the cumin seeds.
Pour in the water bit by bit stirring as you go, to make a smooth batter.
Cut the peeled potatoes into rounds, about 1/4 inch thick and drop into the batter.
Stir to coat them well.
Heat the oil in a kadai or deep frying pan. test to see if batter is hot by dropping a wee bit of batter into the oil and it should fizzle to the top immediately.
Take as many potato pieces as will fit in a single layer and scatter them evenly in hot oil.
Fry, stirring occasionally, until they are golden brown in colour on either sides.
remove them with a slotted spoon and drain on kitchen towels.
repeat the process till you are done with the entire batch.
Serve hot with some chutney. I did an array of dips like a tamarind chutney, a mustard relish and chilli ketchup.
IMG_1731
Notes: The potatoes need not be peeled. I just did it by accident :)
Try the same with courgettes or even brinjal/ eggplant

Wednesday, 27 April 2011

Appetizer ideas

Raspberry-lemon spritzer recipe here

Cool Lassie kinda inspired me to try and post a recipe every day for a week. I know its already mid-week but then you have to start somewhere right? :)

Another reason being...my computer is low on disc space and I need to move all my pics on to an external drive in fear of losing it if something happened to my comp. So probably for the next couple of days I shall post stuff from my archives..stuff that I have either been too lazy to post or have refrained from posting because the pics haven't come out great. The recipes however are too good to lose, so here are a few appetizer ideas that I have borrowed from other blogs. The weather is back to being awful and I have been sneezing like mad for some strange reason. Hope it is not the hay fever that Ro is now going through and being a baby about.
Oh and one more thing..this is for the anonymous lurker out there. Please leave me a name and address I can reply to the next time you decide to grace my blog with your comment because I can then directly address you personally and not have to write shit like this in public (a major waste of time). If you find it incredibly painful to read my blog..please stop doing so instead of sending me anonymous messages. First of all you are spamming me and second no one out here is forcing you to read on..I really couldn't care less if you are not interested in the fact that I use words and messages that might make you uneasy. Its my blog and sadly I can post whatever I want. 

See I don't take blogging seriously and I didn't want to impose restrictions and things like that. I don't mind being criticised or whatever as long as you say who you are. Judge me all you want but I don't owe anyone explanations. Posting nasty stuff unnecessarily is like back stabbing and I am too bored and lazy to create an issue about this. But these anonymous messages are getting to me and I have allowed only registered users to post comments. Sorry about this. I have some lovely readers who post anonymously but still give their name at the end (thanks you guys), sorry that you will have to now use your email id to post comments. I had to write this out because I didn't want you to suddenly realize that you are not able to post comments. Hope you understand.

Anyways, coming back to the kick-ASS recipes.

Chicken 65
Numerous bloggers have posted recipes and reasons as to why it is called Chicken 65, so I am not gonna ramble. I found this recipe on vahrehvah, but Nashira of Plateful has described it gracefully and I followed her recipe to the dot, except I used boneless chicken thighs and didn't have the chilli-garlic paste so I substituted that with chilli ketchup. It was a nice substitute and I don't think it made that much of a difference to the final outcome. I also omitted the ajinomoto and red food colour. The next time however, I am gonna try and bake/ grill the chicken instead of deep frying because I kinda detest the whole idea and I somehow end up making a mess. Do hop on to her blog or to the vahchefs website for the recipe. Pics are horrid because we were still having longer nights then.

Tortilla cups with meat filling
A blogger that I recently got introduced to is Kankana of Sunshine & Smile. Her pics are gorgeous and her recipes versatile. The moment I saw her Tortilla cups recipe, I knew I would try it and it was such a big hit. You can basically fill it with whatever you want and serve as an appetiser or as a snack at a picnic. I followed her procedure for the tortilla cups, but filled it with mince meat (this recipe) and topped it with some cheddar cheese and grilled it for about 8 to 10 minutes, just to get the cheese melted. Topped it with an jalapeño and it was a great starter to our Mexican inspired dinner.

Pigs in a blanket
The quintessential British favourite especially during Christmas time, is this easy peasy starter. I had a friend over for lunch a few weeks back and I made this with some leftover puff pastry sheets. It is so easy to make and I'm sure it will be a big hit among all, kids especially.

Rolled puff pastry sheet- half of one (I used jusrol)
Chicken or any sausage- 8 (I used small frankfurters)
Egg- 1, (for wash)
Ketchup- to serve
If you are not using the rolled out pastry, then roll it out and cut into two. Store away the other half.
Place the pastry sheet on to a lightly floured surface and cut them into four equal halves and then each half into two. So basically you get 8 medium rectangles.
Place the sausage on each pastry and roll/ fold over and seal the edges lightly with your hand. If it doesn't stick, brush the beaten egg and stick it. Repeat with all the sausages.
if you want you can serve the sausage as a single one, but I sliced each of it into 4 small ones which looked incredibly cute.
Place them on a baking sheet lined with baking paper and so an egg wash for that light golden colour.
Bake in an oven preheated at 220C for about 12 to 15 minutes.
Serve with some ketchup.

Sending the Raspberry-lemon spritzer to Food Palette series- Pink over at Torviewtoronto

Saturday, 26 March 2011

Nigella's sweet and salty Crunch Bars

We were invited to a birthday party of a one yr old fella last weekend and this was on the menu. It tasted so good, I actually ate quite a bit of it. Even Ro for that matter kept going back and taking two or three pieces each time and I had to ask our host how it was made. She said she saw it on Nigella's show and gave me an outline of what it was, and some tips as well.

A few days later, I wrote to her asking if she had a concrete recipe and she passed on the details. Exchanged a few emails, googled a bit and there, I was ready to make the yummiest chocolate bar ever!
I mean I gasped when I saw the amount of butter it used, but what the hell...when its a one time thing, its OK to go a bit berserk right? I made this a couple of days back and have stored it in an air tight container in the fridge and its perfectly fine. Ro takes it to work for his sweet intake after lunch and I munch on it when I'm desperate for a sugar high. I am thinking this will make perfect 'take to a friends house' gift or do it up it small colourful wrappers and it would be great at parties as well.
The recipe has been adapted from her show and from here
Dark chocolate- 200 gms
Milk chocolate- 100 gms
Butter- 125 gms
Golden syrup- 3 tbsp
Unsalted peanuts- 250 gms
Cadbury's Crunchie bars- 4 x 40 gms
Salt- 1/4 tsp
Place a saucepan on low-medium heat, break the chocolate into smaller chunks, add butter and golden syrup and melt.
While that's taken care of, in another bowl break the Crunchie bars into smaller chunks and add the peanuts to it. Add the salt and mix well.
Take the chocolate-butter off the heat and stir to check if you have a smooth mix. Tip in the peanut-Crunchie bar mix into the chocolate and stir gently to coat the nut mix. 
Pour on to a foil tray (which is ideal) or on to any baking dish and smoothen it out evenly.
Refrigerate for a minimum of 4 hours.
After the bars have set well, remove them from the foil tray and cut into smaller pieces and store in an air tight container.
Notes: The original recipe calls for salted peanuts, but I was advised that they were a tad too salty and so I went with regular peanuts and added the salt just to get that salty feel.
The chocolate too, you can make it all milk, all dark or equal quantities. We prefer dark choc to milk ones, but since I was a little concerned about it being too bitter, I decided to use 100 gms of milk chocolate.
You can also use any nut of your choice...hazelnuts, cashew nuts, walnuts etc
Using a foil tray is great because the whole thing just comes off as a large bar and you can chop it up on a cutting board.
Updated to add: A lot of you wrote in asking what Crunchie bars are..well they are like a honey comb coated in chocolate and is made by Cadburys in the UK. It may be available elsewhere as well but for those who cant get a hold of it, Nigella has her own version of the Crunchie bars called Hokey Pokey and you can make it on your own. Its super easy, here is the link http://www.nigella.com/recipes/view/hokey-pokey-36
Sending this to Food Palette series brown over at Torviewtoronto

Thursday, 17 March 2011

Smoked Salmon bread pin wheels (easy appetizer alert!)

I was not a Sushi fan, till recently. Well, a pseudo sushi fan really, cos i actually like the veggie ones and the smoked salmon ones for some strange reason.

I had guests a couple of days back and bought smoked salmon to serve with blinis' as appetizers, but the plan never materialized due to, lets just say, lack of planning:)
The smoked salmon did cost a bit and the expiry date was nearing and I didn't know what to do with it. That's when I stumbled upon this recipe on foodgawker and decided to give it a shot. Must say its so darn easy, looks fancy and tastes awesome with just soy sauce (like how you eat Sushi) or on its own.
Smoked salmon- 120gms (approx. 6 to 8 thin slivers)
White or brown bread- 4 slices
Any spreadable cheese of your choice (cream cheese) or crème fraiche or even salsa - 4 tbsp (or more if you want it strong)
Cut off the edges from the bread and thin it out using a rolling pin.
Spread the cheese generously 9esp if you don't want that raw fish taste), place two slices of salmon and roll it up gently from one end.
Place a cling wrap ready. Keep the rolled bread on one end and roll it up tightly.
Refrigerate for at least 3 hrs.
Just before serving, remove cling wrap, slice it up and arrange on a fancy plate.
See I told you it was easy.
Notes: Replace the salmon with ham or corned beef or mushroom pate or anything roll-able
Stick it on toothpicks and you don't have to get your hands dirty

Friday, 24 September 2010

Shall we 'wrap it up?'

Oh don't panic, I'm not talking about wrapping up my blog, I'm talking about a chicken wrap which tasted so goddamn lovely and was so easy to prepare. See, being in London has its perks....there are so so many free festivals all over the place and if you are into cultural stuff, this is the place to be. I love London for all that and more...and now honestly I just cannot think of settling elsewhere...even a one month vacation to India makes me miss this place.

So whole of last year we did all the cultural stuff, the festivals, the food shows, the jazz concerts and everything London had to offer in Summer. This year, we did a selected few things only because we were super busy with guests and travelling- a weekend at home meant staying put and catching a movie or so. The last of the summer festivals here are the open air movies or 'Movies under the stars' as they call it..again free movie screenings and if you didn't go early enough, you'd be stuck in a very sad corner of the amphitheatre or park. We decided to catch three movies this time, since we'd seen all the others. Last week we saw 'The Kite Runner' and we loved, loved, loved it. Yesterday we saw 'North by Northwest,' an Alfred Hitchcock movie from the 1950's and next week we are catching 'Invictus.' I have always loved the old Hollywood movies, with Gone with the Wind topping the charts (after I had to do a presentation for my film studies class) and this one we loved for the hilarious one liners and of course the suspense thriller, Hitchcock was known for. 

A night out meant packing blankets, cushions (oh yes we did and we were the ones with the least obvious of them) and definitely food and wine. Last week we had sandwiches and so this time I decided to make some wraps with left over chicken roast. Smothered the wheat tortillas with some spicy yoghurt sauce, topped it with onion rings and shredded chicken, rolled it up and we were ready to go.
This chicken roast recipe is one that I learned just after coming to England. I was new to the whole blogging scene and this recipe was passed on by a friend and from then, its been a favourite of ours. It never fails and the flavours are just brilliant. I have posted the recipe here. It is definitely a meal on its own and I'm telling you, you'd love it if you try it once (now you gotta believe me, cos I very seldom say things like that about my dishes).

Yoghurt sauce (adapted from Sig)
Greek yoghurt- 3 tbsp
Red chilli flakes- 1/2 to 1 tsp (depending on your heat in take)
Garlic pods- 2, thinly sliced and crushed
Lime juice- 1/2 tsp
Salt- to taste

For the wraps:
Whole wheat tortillas- 6, small ones
Onion rings- as required
Lettuce or rocket - a few leaves (optional)
Mix all the ingredients for the sauce in a ramekin and place in the refrigerator for the flavours to infuse..say for about 15 mins and shred the chicken in the mean time.

Assembling:
Warm the tortillas lightly and place on a chopping board.
Place about 1/2 a tbsp of the yoghurt sauce on to the centre of the tortilla and spread it out like how you'd make a dosa..ok that's irritatingly dramatic..just spread it out however you like, just make sure its goes out to the edges.
Place a few spoons full of shredded chicken on one side, followed by the lettuce (if using) and onion rings and roll it up tightly.
You can wrap it up with a foil paper or just leave as it is (I did) and for convenience, I sliced it in half.
Notes: You can use any filling, paneer and mushrooms would be a good option and you can use the exact same masala
If you have over done the sauce, it might ooze out which, if were having at home, would be awesome to lick, but since i was taking it out to a public place I made sure it wasn't a messy affair.
If I hadn't used the sauce, I would have gone for some shredded cheddar cheese.