Showing posts with label snack. Show all posts

Monday, 27 February 2017

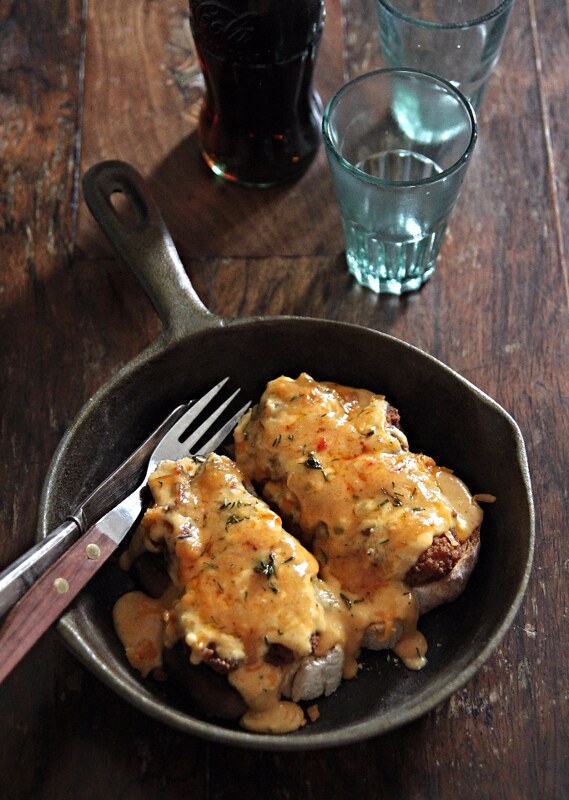
Stuffed Welsh Rarebit

878f7098-1681-4e9b-a2fe-288c9d97a8f6 
Serves 4
For the cheese sauce
Grated mature Cheddar cheese- 1 heaped cup + enough to top the slices of bread
Goats cheese- 3 heaped tbsp
Double cream- 1/2 cup
Milk- a generous splash
Paprika- 1/2 tsp (optional)
Mustard- a generous pinch
Worcestershire sauce- 1/2 tsp
Pepper- to taste

4 slices of chunky bread
Leftover roasted chicken- 3/4th cup, shredded (or any chicken, I've used breaded ones from the supermarket)
Thyme leaves- a sprig, to garnish

Mix together all the ingredients for the cheese sauce in a saucepan.
Keep the heat on medium and keep cooking till all of the cheese is melted and the mixture becomes thick. 
Keep stirring at intervals to make sure the sauce doesn't stick to base, and keep scraping the sides while you go.
IMG_2676
Simultaneously, toast the slices of bread either in a toaster or under the oven grill. Make sure you don't burn them.
Place the toasted slices in an oven proof tray or a cast iron skillet and top them with shredded chicken.
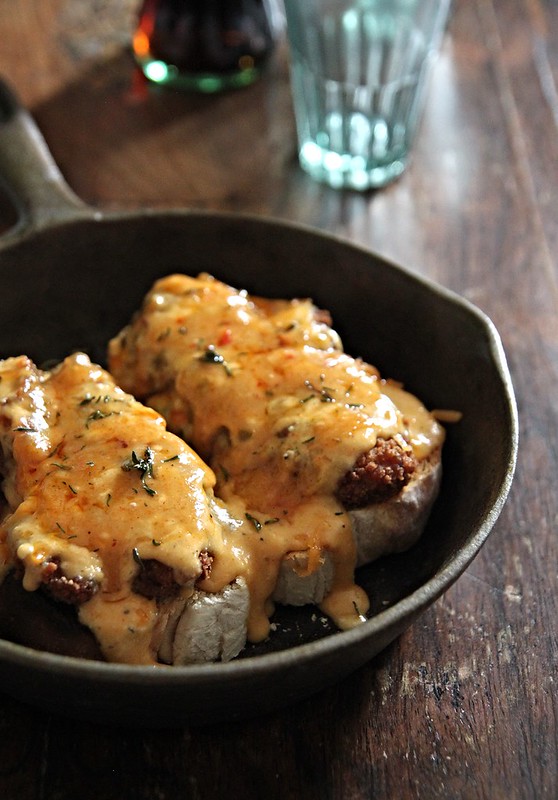
Pour the cheese sauce on top of the chicken and bread slices, to cover them quite generously. Its ok if the sauce drips along the sides.
Grate some more cheese on top, sprinkle some thyme leaves on top and place under the oven grill for about 5 minutes, just to melt the cheese and warm the chicken a bit.
Dig into this devilishly decadent dish  straight out of the oven and with a salad side if needed.

Notes: You can use any cheese of choice. I once tried it with spicy Mexican cheese and it was bloody brilliant. 
The goats cheese is also purely optional, but that little bit does make a difference in taste.
Stuff it with any meat of choice, pulled pork would be a great alternative as will be prawns.

Wednesday, 4 November 2015

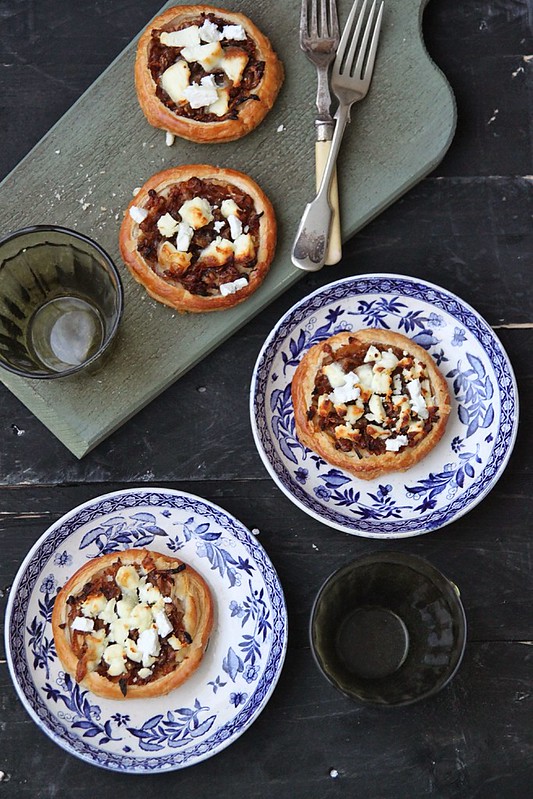
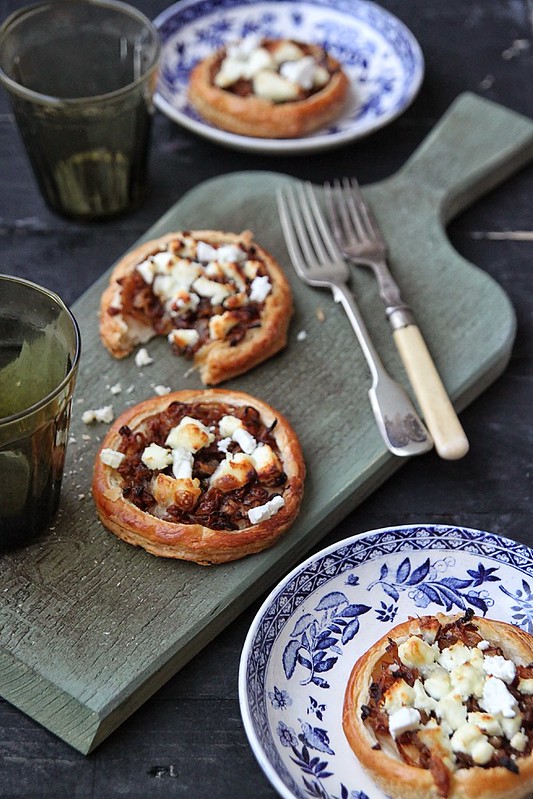
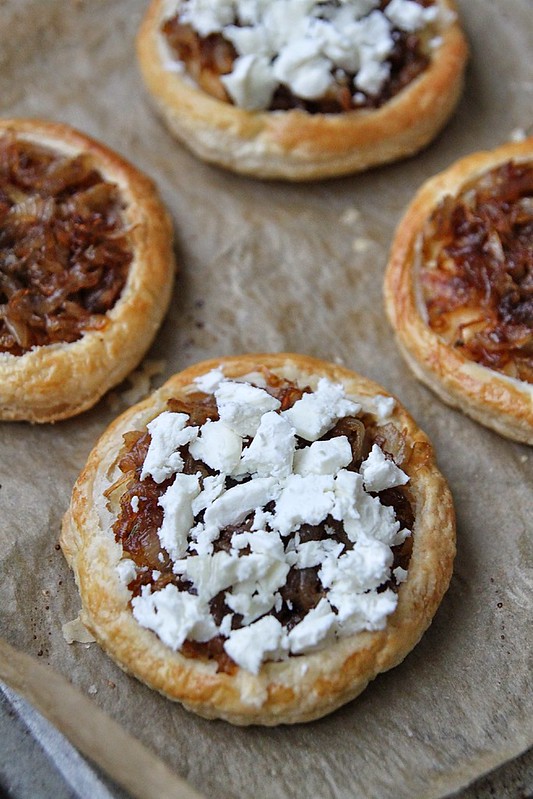
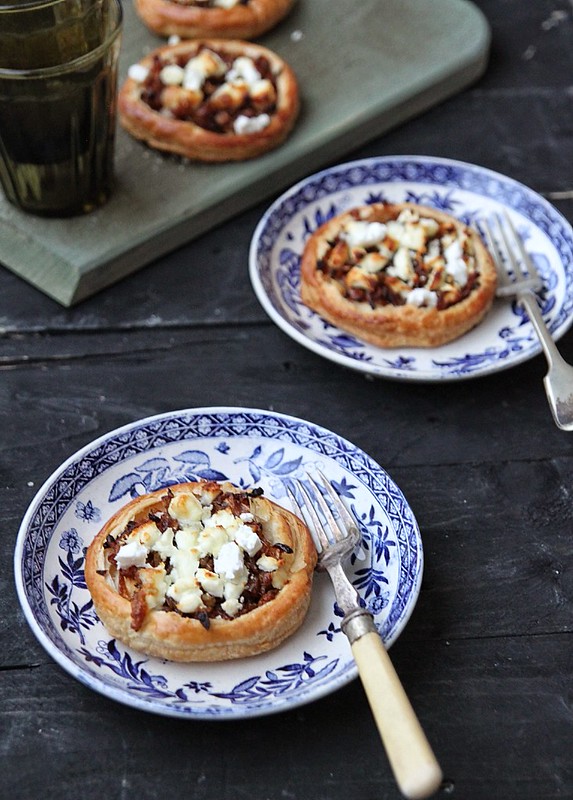
Caramelised onion and French goats cheese tartlets

IMG_8724 
The weather in this part of the world is turning cold and wintry and its our first Autumn since we've moved out into the suburbs so I'm quite enjoying the fall colours around us. We drove around a bit last weekend to take in the colours and was completely in awe of how gorgeous the Chilterns were. The mist started rolling in out of nowhere and I couldn't help but stop and take some pictures. Even more impressed with my new OnePlus 2 phone camera that has done justice to the scene. I just shot these on HDR mode, no post processing or filters and some pretty cool features to play around with.

IMG_20151101_163636

IMG_20151101_163509
Moving on to today's recipe, goats cheese is not something I've always loved. It was more like an acquired taste and now I've begun to enjoy it quite a bit. That said, it doesn't make its way through to my dishes at home that often and its only when a recipe particularly calls for it, that i pick it up. I had no idea there were a few varieties of goats cheese until The French Goats Cheese team got in touch explaining about the different varieties available and most importantly how versatile they were. Till now, all i knew was it was used it salads. I couldn't be more wrong- you can whip them up for a mousse, melt on vegetables, spread on toasts and so on. 
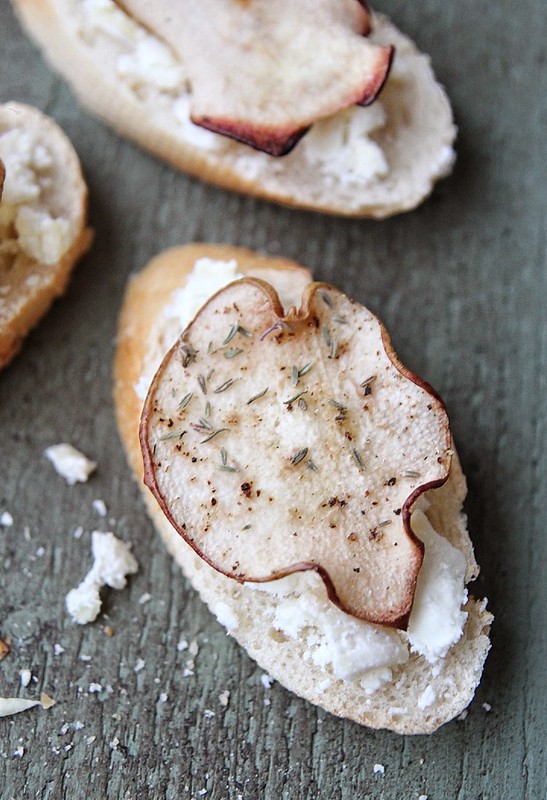
IMG_8701
One of my favourite ways to comsume goats cheese is to slice up a fresh baguette, toast it lightly, crumble some goats cheese and top with a slice of roasted pear with honey and thyme. Its delicious and you just cant stop at one. I was put forth with a challenge to encourage people to think outside the box when it comes to using French Goat's cheese. I don't know if this recipe can be called thinking outside the box, but it worked wonders for us. Caramelised onions and goats cheese is a match made in heaven and I couldn't think of a better way to put the cheese that was sent to me to good use.
CX1211
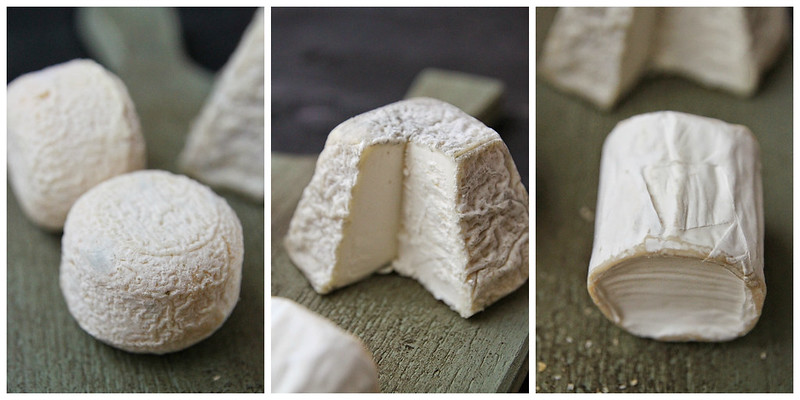
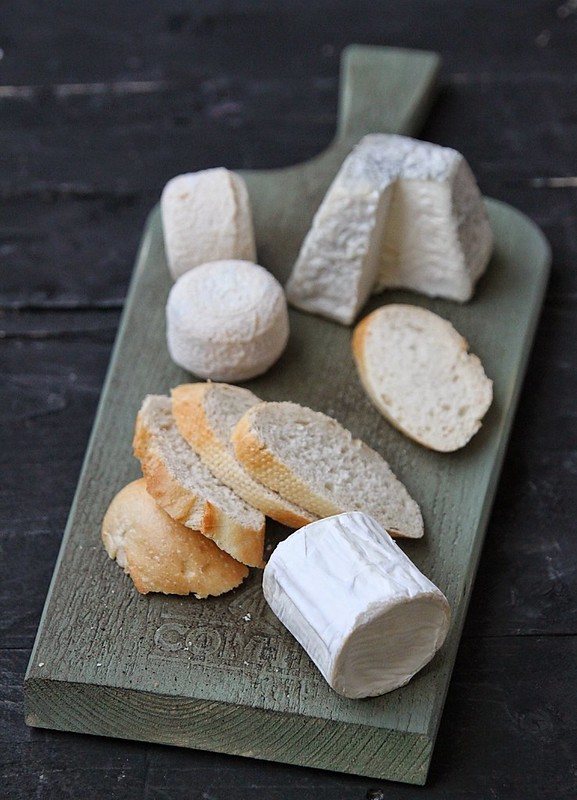
The Crottin de Chavignol is slightly crumbly but gorgeous, and was used in my pear crostini. The Valencay, a creamy white soft cheese is perfect in salads, but i decided to use it atop my tart and the mini log which is the most popular was used up melted on a toast. To discover more about French Goat's cheese and recipe inspiration please visit the website.

Recipe inspiration here
IMG_8730 
Olive oil- 2 tbsp
White onions- 2 large, thinly sliced
Dark brown sugar- 2 tbsp
Thyme- a few sprigs (dried or fresh)
Salt and pepper- to taste
White wine vinegar- 2 tbsp

Puff pastry- 1 sheet, thawed and rolled out to a rectangle and about 1 inch thick (I got a ready rolled one)
Goats cheese- around 100gms, crumbled (I used Valencay, a French goats cheese)
Milk- 2 tbsp, to brush the pastry
IMG_8679
Heat the olive oil in a large frying pan on low-medium heat, and throw in the onions.
Cook till they soften and turns a golden brown in colour, but doesn't burn. This could take around 15 to 20 minutes.
Keep stirring in between to prevent the onions from sticking to the bottom.
Once you attain the brown colour, add the dark brown sugar and mix well with the onions.
Continue cooking to allow the sugar to caramelise and the colour to change to a darker brown, another 10 minutes or so. Again make sure you keep stirring to stop the onions from burning.
Pour in the vinegar and de-glaze the pan after which you add the thyme, and season with salt and pepper.
Give a good stir and take the mix off the heat. Keep aside.
IMG_8687
Preheat oven to 100C and cut out 8 circles or rectangles from the rolled out puff pastry.
Place them on a baking tray lined with baking paper and score the outer edge of the pastry, about 1 in inside with a sharp knife. Don't go all the way to the base, this is to just give a sort of rim.
Brush all over with the milk and bake in the oven for 12 to 15 minutes, or till golden brown and puffed.
Remove from the oven and press down the inner circle leaving the outer in tact. This sort of gives it a vol-au-vent look.
Fill the pastry cases with caramelised onions and top with the crumbled goats cheese.
Place it back in the oven for another 10 minutes, after which you can take it out and serve warm.
IMG_8719
Notes: The caramelising bit takes a bit of time, I agree which is why its a good idea to do it a day or so ahead and use as required for the tarts
Instead of making tartlets, you can of course use the entire puff pastry as it is and once done slice into squares and serve.
White wine vinegar can be replaced with red wine vinegar or balsamic vinegar.

With thanks to French Goats Cheese for sending over samples and accompaniments. 

Sunday, 25 September 2011

Chilli, ginger and coriander focaccia

IMG_5575-1
Its unbelievable that we are having awesome weather and apparently it continues on to next week. We have been enjoying it thoroughly and as we do every year we also went for the open air movies at the London Scoop. We have one more coming up on Wednesday and that should officially end our summer sojourns :)

I am also super thrilled, I've managed to post another recipe without much of a gap, thanks to a 'no working on weekends' rule Ro has come up with. So while he's spread out on the sofa reading Asterix and watching the F1 highlights, here I am typing out a recipe. Its been ages since we've spent a weekend at home and today also would have been no different if it wasn't for the Greenwich marathon that passes through our place and they've shut down all transport and even the tube station.
IMG_5584
So all day we lazed around, got drunk and the initial plan was to just not do any cooking, but the past few days we've been eating out and so I got down to it and cooked. This focaccia was the outcome and we dunked it in olive oil and munched away with a chicken roast. Discovered this fab website with a lot of baking tips and recipe ideas and I have already bookmarked a few. Do head over and check it out when time permits.

I must admit that the first time I tried out a focaccia recipe, it flopped on me, big time. This time however, I was determined to follow instructions properly and although a couple of ingredient substitutions did leave me confused, I managed to pull it back together. The coriander leaves add a great flavour to the bread and you know the chillies are present, but not in an over powering sort of way.
IMG_5573
Recipe has been adapted from here
Plain flour- 200 gms
Sea salt- 1/2 tsp + enough to sprinkle
Chillies- 3, finely chopped
Coriander leaves- a small bunch, finely chopped
Ginger- 1/2 tbsp, grated
Active dry yeast- 3.5 gms
Water- 112ml (roughly 4oz), warm
Olive oil- 1/2 tbsp
IMG_5582
Slightly warm the water and add the yeast. Whisk to dissolve and leave aside for 6 to 7 minutes to reactivate.
In the meantime whisk together the flour, salt, half of the chillies and coriander leaves and ginger in a mixing bowl.
Once the yeast has frothed, add it to the flour mix and knead using a dough hook attachment for about 5 to 6 minutes or if using your hands, flour the work top and knead well for 10 minutes, till the dough is no longer sticky, but smooth and pliable.
Lightly grease a bowl, place the dough in it, cover with a wet cloth and set aside in a warm place to rise.
After about 2 hours, the dough would have doubled in size, so punch it down, knead for about 2 to 3 minutes and make it into a presentable round shape. Roll it out if you cant really stretch it, but don't thin it a lot.
Place on a baking tray lined with parchment paper and dimple it at intervals with your finger.
Top with the remaining coriander leaves and chillies and keep aside for an hour or so to proof again.
Once the dough has risen again, brush with olive oil generously, sprinkle some sea salt and place in an oven preheated at 190C.
Bake for 17 to 20 minutes or till golden brown.
Take it out, cool on a rack for about 5 minutes and then slice and serve.
IMG_5586
Notes: The ginger was a wee bit over powering for my liking, so id go easy on it or maybe even avoid it altogether next time.
The original recipe called for a mix of very strong and strong bread flour. Didn't have any, so used plain flour instead. I'm sure the outcome would have been much better if I'd used bread flour.
If using instant yeast, then add everything together to the mixing bowl and knead. You can also go directly to the second proofing stage if using instant yeast.
Replace the toppings with garlic, sun dried tomatoes, olives etc. if you want variety.

Monday, 13 June 2011

Sable Viennois by Pierre Herme

IMG_2454
One of my favourite things to do of late is to walk around the food halls of Harvey Nichols, Harrods and Selfridges and generally gawk at all the glamorous food they have to offer. Everything is just so expensive, so gawking is all I do and maybe once in a while relish the occasional Laduree macaron.  I was in Selfridges the other day and came across the Pierre Herme section in their food hall. The macarons and pastries and all things French were so pretty that I actually spent a good 10 minutes taking it all in. These tiny biscuits were packaged well and I had half a mind to pick it up, but again, the price almost made me blind and so I chucked the idea, mentally making a note to do a search online and make it myself.
IMG_2441
Days passed and I completely forgot about it, and that's when the lovely Shirley of Kokken 69 blogged about a similar looking biscuit on her blog. Didn't think twice and so set about making a batch. I must say they are the easiest biscuits to make and are so delicate and pretty, I didn't even want to eat them, but just go on clicking pictures.
IMG_2437
Recipe adapted from here
Salted butter- 95 gms (at room temp.)
Table/ sea salt- 2 gms
Powdered sugar- 40 gms
Vanilla extract- 1 tsp
Egg white- 30 gms
Plain flour- 125 gms
IMG_2452
In a mixing bowl cream together the butter, salt and sugar till smooth. You can use a wire whisk, no need for a mixer.
Add the egg white and whisk to combine well. Like Shirley says, the mix may look a bit curdled, but its fine, really!
Whisk in the vanilla extract and then fold in the flour making sure you have a smooth, lump free dough an the end.
Scoop the batter into a piping bag fit with the nozzle of your choice and pipe away on to a baking tray lined with parchment paper. Make circles or any shape you prefer. Not a concern, they are gonna be awesome whichever shape  :)
Bake in an oven pre-heated at 180C for about 10 to 12 minutes or lightly brown. Please don't keep it longer than that.
Notes: The original recipe calls for Fleur de Sel, but obviously I didn't have it and so added some extra sea salt which did give out a nice salty taste, but if you have fds use that instead.
I accidentally ended up with 30gms of egg white when the original said 15 gms. I don think it made a difference though..to me at least!

Sunday, 22 May 2011

Potato bhajias (fritters)

IMG_1760
I think this is probably the second recipe I would be posting from a recipe book taken from the library, the first being Amritsari dal, again from a Madhur Jaffrey book. For some strange reason, both the libraries in my Borough seem to have a lot of Madhur Jaffrey Books. I'm wondering its because most of her recipes cater to the locals, or so I think!

The book I have with me now, Simple Indian Cookery, has a bunch of neat recipes, but most of which I think are nothing great, just average and a little bland considering they are curry recipes. The potato bhajias, along with a flaky flat bread with cumin seeds were the only two recipes I thought were worth noticing.
IMG_1734
These bhajias are pretty simple and straightforward and I wouldn't have given it a go if it wasn't for the cold, windy weather we experienced a couple of days back. It was so sunny and bright the first half of the week and then suddenly it became very unpleasant. 

I was craving some banana fritters and Ro wanted English scones. Too bad  that I was the one with the upper hand in the kitchen and he had no idea how to make scones. But with no bananas at hand, I was left with the option of something savoury. These potato bhajias served the purpose...I mean it was deep fried, it was hot and paired with a cuppa it was bliss.

IMG_1765
Potatoes- 2 large, well scrubbed and peeled 
Besan/ Chickpea flour- 100 gms
Soda powder- 1/2 tsp
Turmeric powder- 1/2 tsp
Chilli/ Cayenne powder- 1/2 tsp
Coriander powder- 1/2 tsp
Cumin seeds- 1 tsp
Salt- to taste
Water- about 100-150ml
Vegetable oil- for deep frying
IMG_1740
Sift together all the dry ingredients and the cumin seeds.
Pour in the water bit by bit stirring as you go, to make a smooth batter.
Cut the peeled potatoes into rounds, about 1/4 inch thick and drop into the batter.
Stir to coat them well.
Heat the oil in a kadai or deep frying pan. test to see if batter is hot by dropping a wee bit of batter into the oil and it should fizzle to the top immediately.
Take as many potato pieces as will fit in a single layer and scatter them evenly in hot oil.
Fry, stirring occasionally, until they are golden brown in colour on either sides.
remove them with a slotted spoon and drain on kitchen towels.
repeat the process till you are done with the entire batch.
Serve hot with some chutney. I did an array of dips like a tamarind chutney, a mustard relish and chilli ketchup.
IMG_1731
Notes: The potatoes need not be peeled. I just did it by accident :)
Try the same with courgettes or even brinjal/ eggplant

Saturday, 26 March 2011

Nigella's sweet and salty Crunch Bars

We were invited to a birthday party of a one yr old fella last weekend and this was on the menu. It tasted so good, I actually ate quite a bit of it. Even Ro for that matter kept going back and taking two or three pieces each time and I had to ask our host how it was made. She said she saw it on Nigella's show and gave me an outline of what it was, and some tips as well.

A few days later, I wrote to her asking if she had a concrete recipe and she passed on the details. Exchanged a few emails, googled a bit and there, I was ready to make the yummiest chocolate bar ever!
I mean I gasped when I saw the amount of butter it used, but what the hell...when its a one time thing, its OK to go a bit berserk right? I made this a couple of days back and have stored it in an air tight container in the fridge and its perfectly fine. Ro takes it to work for his sweet intake after lunch and I munch on it when I'm desperate for a sugar high. I am thinking this will make perfect 'take to a friends house' gift or do it up it small colourful wrappers and it would be great at parties as well.
The recipe has been adapted from her show and from here
Dark chocolate- 200 gms
Milk chocolate- 100 gms
Butter- 125 gms
Golden syrup- 3 tbsp
Unsalted peanuts- 250 gms
Cadbury's Crunchie bars- 4 x 40 gms
Salt- 1/4 tsp
Place a saucepan on low-medium heat, break the chocolate into smaller chunks, add butter and golden syrup and melt.
While that's taken care of, in another bowl break the Crunchie bars into smaller chunks and add the peanuts to it. Add the salt and mix well.
Take the chocolate-butter off the heat and stir to check if you have a smooth mix. Tip in the peanut-Crunchie bar mix into the chocolate and stir gently to coat the nut mix. 
Pour on to a foil tray (which is ideal) or on to any baking dish and smoothen it out evenly.
Refrigerate for a minimum of 4 hours.
After the bars have set well, remove them from the foil tray and cut into smaller pieces and store in an air tight container.
Notes: The original recipe calls for salted peanuts, but I was advised that they were a tad too salty and so I went with regular peanuts and added the salt just to get that salty feel.
The chocolate too, you can make it all milk, all dark or equal quantities. We prefer dark choc to milk ones, but since I was a little concerned about it being too bitter, I decided to use 100 gms of milk chocolate.
You can also use any nut of your choice...hazelnuts, cashew nuts, walnuts etc
Using a foil tray is great because the whole thing just comes off as a large bar and you can chop it up on a cutting board.
Updated to add: A lot of you wrote in asking what Crunchie bars are..well they are like a honey comb coated in chocolate and is made by Cadburys in the UK. It may be available elsewhere as well but for those who cant get a hold of it, Nigella has her own version of the Crunchie bars called Hokey Pokey and you can make it on your own. Its super easy, here is the link http://www.nigella.com/recipes/view/hokey-pokey-36
Sending this to Food Palette series brown over at Torviewtoronto

Saturday, 4 December 2010

Vanilla custard yo-yo- biscuits

Another borrowed recipe. I know Ive been having too many of those, blame it on the weather or just the laziness in me to type out a whole recipe post. This way I just need too link it to someone else's blog and be done with it. The picture taking bit, I am obsessed with and with exactly about 3 or 4 hours of bearable daylight, I actually struggle to do that as well.

The initial hype of snow lasted exactly for 2 days...this was when we were in Chicago about 4 years back..and hence been dreading heading out when its so. Especially, the day after a heavy snow fall is pathetic with the roads being slippery and slushy and horrid. Being in London city, we have no choice but to make use of the local buses, subways and trams to get to wherever which on a normal day I love since the buses have a bus lane where we breeze through and the cars are all piled up in the next lane. The tube gets you anywhere in no time again. But the case is a tad worse in adverse weather conditions, but we have no choice but to go out in the weather anyway, if we needed to get our acts done. I actually was taking baby steps yesterday when I went out because it was so slippery and was so scared Id fall down.
London very rarely gets snow this time of the year and its usually Jan/ Feb when we are mostly snowed in. But past two days its been snowing quite a bit and yesterday I woke up to a surrounding in white. It was all so magical and in spite of me dreading going out, I was all excited at 9am to bake something. The easiest thing that came to my mind was Nithya's yo-yo biscuits. Well another reason being I had custard powder left over from my Custard cake episode and had to use it up in some way or the other. 
These were so nice to eat right out of the oven and I actually didn't wait for it to cool down on a rack (I love my cookies and biscuits and cake all crumbly and hot straight out of the oven). My huge floor to top windows in my living room are the best feature in my tiny apartment and so I made use of it thoroughly yesterday. Grabbed my book, coffee and these biscuits and enjoyed the morning reading, and most of the time day dreaming and watching people walk by (which is my fav. past time btw). Not many mornings of mine are as enjoyable as this because most of the time I'm all groggy and need at least 3 hours 2 settle, but this was a morning I loved. It all changed this morning when I looked out and say slush and ice. Case closed!
Self raising flour- 3/4 cup
Vanilla flavoured custard powder- 1/4 cup
Butter- 125 gms
Powdered sugar (icing sugar)- 1/2 cup
Vanilla extract- 1 tsp

Mix together the flour and custard powder in a bowl. Keep aside.
In a mixing bowl, using a hand whisk or an electric one, cream together the sugar, butter and vanilla till light and fluffy.
Add the flour mix and beat on low until just combined.
Line a baking tray and preheat the oven to 180C.
Pinch off small portions from the dough and roll them into balls, place on the baking tray at about 2 inches apart and with a fork, slightly press them down for that design to appear on top. This will flatten the ball a bit, but that's really the point.
Bake for about 12 to 14 minutes or till light golden brown.
Cool them on a rack and then store in an air tight container.
  Notes: The original recipe calls for Ap flour. Didn't have any so used self raising instead
I didn't bother to cool the dough in the refrigerator..no patience whatsoever. Tasted good anyway:)

Friday, 24 September 2010

Shall we 'wrap it up?'

Oh don't panic, I'm not talking about wrapping up my blog, I'm talking about a chicken wrap which tasted so goddamn lovely and was so easy to prepare. See, being in London has its perks....there are so so many free festivals all over the place and if you are into cultural stuff, this is the place to be. I love London for all that and more...and now honestly I just cannot think of settling elsewhere...even a one month vacation to India makes me miss this place.

So whole of last year we did all the cultural stuff, the festivals, the food shows, the jazz concerts and everything London had to offer in Summer. This year, we did a selected few things only because we were super busy with guests and travelling- a weekend at home meant staying put and catching a movie or so. The last of the summer festivals here are the open air movies or 'Movies under the stars' as they call it..again free movie screenings and if you didn't go early enough, you'd be stuck in a very sad corner of the amphitheatre or park. We decided to catch three movies this time, since we'd seen all the others. Last week we saw 'The Kite Runner' and we loved, loved, loved it. Yesterday we saw 'North by Northwest,' an Alfred Hitchcock movie from the 1950's and next week we are catching 'Invictus.' I have always loved the old Hollywood movies, with Gone with the Wind topping the charts (after I had to do a presentation for my film studies class) and this one we loved for the hilarious one liners and of course the suspense thriller, Hitchcock was known for. 

A night out meant packing blankets, cushions (oh yes we did and we were the ones with the least obvious of them) and definitely food and wine. Last week we had sandwiches and so this time I decided to make some wraps with left over chicken roast. Smothered the wheat tortillas with some spicy yoghurt sauce, topped it with onion rings and shredded chicken, rolled it up and we were ready to go.
This chicken roast recipe is one that I learned just after coming to England. I was new to the whole blogging scene and this recipe was passed on by a friend and from then, its been a favourite of ours. It never fails and the flavours are just brilliant. I have posted the recipe here. It is definitely a meal on its own and I'm telling you, you'd love it if you try it once (now you gotta believe me, cos I very seldom say things like that about my dishes).

Yoghurt sauce (adapted from Sig)
Greek yoghurt- 3 tbsp
Red chilli flakes- 1/2 to 1 tsp (depending on your heat in take)
Garlic pods- 2, thinly sliced and crushed
Lime juice- 1/2 tsp
Salt- to taste

For the wraps:
Whole wheat tortillas- 6, small ones
Onion rings- as required
Lettuce or rocket - a few leaves (optional)
Mix all the ingredients for the sauce in a ramekin and place in the refrigerator for the flavours to infuse..say for about 15 mins and shred the chicken in the mean time.

Assembling:
Warm the tortillas lightly and place on a chopping board.
Place about 1/2 a tbsp of the yoghurt sauce on to the centre of the tortilla and spread it out like how you'd make a dosa..ok that's irritatingly dramatic..just spread it out however you like, just make sure its goes out to the edges.
Place a few spoons full of shredded chicken on one side, followed by the lettuce (if using) and onion rings and roll it up tightly.
You can wrap it up with a foil paper or just leave as it is (I did) and for convenience, I sliced it in half.
Notes: You can use any filling, paneer and mushrooms would be a good option and you can use the exact same masala
If you have over done the sauce, it might ooze out which, if were having at home, would be awesome to lick, but since i was taking it out to a public place I made sure it wasn't a messy affair.
If I hadn't used the sauce, I would have gone for some shredded cheddar cheese.

Sunday, 19 September 2010

Spiced apple loaf

Is it apple time or what??? I can see them on trees and even worse, squashed on the road side and I think its now a hindrance more than a 'pretty sight'. Last year we went to an apple orchard, well it was actually a cider tasting trip, and honestly, I've never seen so many apples in my life!!! If you don't believe me, take a look at these...

We were done eating so many varieties of apples, not to mention the amount of cider we drank:)

I have never made an apple pie or strudel or galette or anything because we get so many yummliscious pies at the super market...pop it in the oven for 15 mins and there you have amazing hot pie, with custard and cream on the side. It was a fav of ours when we had just moved to UK...and Pub lunches are never ever complete without apple pie and custard. Also, I'm very wary when it comes to working with dough, which has actually put me off pies and tarts. The next best thing to make with apple was a cake and that, I'm always game to do. So a spiced apple cake it was and boy it came out super duper moist and majestic with bits of apple slices and the cinnamon-nutmeg-clove flavour nicely blended in. So here is another dessert or tea time snack to welcome Autumn.

All purpose flour- 200 gms
Baking powder- 1/2 tsp
Baking soda- 1/2 tsp
Salt- a pinch
Cinnamon powder- 1/2 tsp
Ground cloves- a pinch
Ground nutmeg- a pinch

Granulated Sugar- 100 gms
Brown sugar- 50 gms
Butter- 45 gms
Egg- 1 large
Vanilla extract- 1/2 tsp
Bramley apple- 1 cup, cored, peeled and diced
Apple sauce- 3/4 cup

In a large bowl sift together the dry ingredients. Keep aside.
In a mixing bowl cream the butter and sugars (brown and white) with a hand held electric mixer or using a whisk till light and fluffy.
Add the egg and vanilla extract and mix again till well combined.
Now fold in the dry ingredients, alternating with the apple sauce*..starting and ending with the flour mix.
Fold in the diced apples as well.
Get a loaf pan ready, do the buttering, lining and the works and pour the batter into it. Its not really runny, so you'd have to smoothen it out to the edges a bit.
Pop it into an oven pre heated at 180C and bake for about 1 hr or till a skewer comes out clean.
Take it out and after about 5 mins, insert on to a cooling rack. 
Serve with a dab of vanilla ice cream.
Notes: *Now I didn't have apple sauce and I wasn't really in the mood to make it, so used flavourless oil instead...super moist it turned out to be.
Bramley apples can be substituted with Granny Smith if you prefer that
I used self raising flour, so omitted the soda bicarb.
You can make the same in muffin cases as well..you'd probably yield about 12.

Sunday, 5 September 2010

Brinjal and spring onion bhajis

The weather sure has started changing this side of the world and I'm completely dreading winter. This morning we had a wee bit of sunshine and made use of it by having coffee on our balcony. About an hour after that it was super windy and started drizzling....ladies and gentlemen, that's the UK weather for you, although...it turned out to be perfect weather for hot bhajji and chai.

Anyhoo, a cousin of mine was leaving London for good and I went over to her place to flick all her unwanted things and I found a cookbook she had kept aside to throw. I flicked it from her saying Id just keep it to fill the 3/4th empty bookshelf in our living room, knowing for a fact I'd never be cooking a single thing from the book. Well, well..surprised I was when I ended up flipping through it last night and stumbled upon this spring onion bhajji recipe and was a wee bit interested in finding out how it tasted. I am not a fan of bhajji at all, and was pretty sure I wouldn't really like it, but decided Ro might (he actually hates it too, kinda) and went about making it. I also suddenly decided it was 'finish everything in the fridge' day and so decided to use one brinjal which was crying out to me for attention. So I have basically adapted the recipe to use brinjal too. The outcome was pretty satisfying and a perfect accompaniment to an evening tea, especially if the rain is pitter pattering on your roof. Enjoy!

Recipe loosely adapted from River Cottage Everyday by Hugh Fearnley-Whittingstall
Brinjal/ Eggplant- 1 large, washed, patted dry and sliced into rounds
Spring onions- 100gms, trimmed and diagonally chopped
Gram/ Besan flour- 60gms
Plain flour- 20
Chilli powder- 1/2 tsp
Coriander powder- 1/2 tsp
Fresh coriander leaves- 3 tbsp, finely chopped + enough to garnish
Water/ Beer- enough to make a thick batter
Salt- to taste
Pepper powder- to taste
OIl- to deep fry (I used about 3 tbsp to shallow fry)
In a big bowl sift together the flours, coriander powder, chilli powder, pepper powder and salt.
Mix in the spring onions and the coriander leaves and then add enough water or beer to until you get a smooth, thick batter. Not too loose though.
Add the brinjal slices to the batter and stir until well coated.
Heat the oil in a frying pan and keep it on medium heat. Getting the oil to the perfect temperature is a trick I suppose. The book says, drop a slice of bread and it should turn crisp in about a minute, no faster.
Scoop in about 4 to 5 slices of brinjal into the oil and fry for 3 to 4 minutes, till cooked through. Do not over crown the pan and cook in batches if required.
Drain on paper towels, sprinkle some coriander leaves and serve with raita or chilli sauce.
Notes: If you are not using brinjal, Its fine...just that instead of adding the spring onions along with the coriander leaves, do it only after you make the smooth batter and then drop heaped teaspoons into the oil and fry.
I would add about a half tsp cumin powder as well the next time.

Tuesday, 31 August 2010

Chinese Spring Rolls (lumpia)


My mother in law used to freeze these spring rolls and send it down through various people when we were in Chennai. She is such an expert at making these and I had to ask her for the recipe. Its been over a year since I got the recipe, but it was just a couple of weeks back that I finally got down to making them. 
Since I decided to buy the wrapper, it wasn't that difficult at all and came in handy on those rainy evenings when you wanted to have something hot with your tea.
Thanks mama for the wonderful recipe, it definitely is a keeper.

On another note: How is my new header??? A cousin told me he didn't feel like it was a food blog and to incorporate something on to my header so I spent a whole day figuring out a photo shop like software called GIMP on my comp and this is the best I could come up with. I seriously lost it after a while and just didn't care. There are still so many options I have and it seriously requires patience to go through those numerous tutorial pages and figure out how the darn thing works. So don't be surprised if I keep playing around with the fonts and colours and header once in a while...You haven't navigated to another page or anything...just another of my antics, that's all :)

For the wrapper:
Cornflour- 1 tbsp
All purpose flour/ maida- 2 tbsp
Eggs- 4
Water- 1/4 cup
Salt- to taste

Filling:
Chicken- 1/2 cup, boiled and shredded. I used chicken breasts
Cabbage- 1 cup minced
Carrot- 1 cup grated
Celery- 1 cup minced
Onion- 1 cup
Soy sauce- 1 tbsp
Pepper powder- 1/2 tsp
Oil- 2 tbsp  + enough to fry
Getting the wrapper ready:
Beat the eggs and mix all the other ingredients into that. (Keep a wee bit aside for the egg wash)
Smear a saucepan with oil and make medium size pancakes.

For the filling:
Fry the onions in oil till translucent and then add all the vegetables, soy sauce and cover and cook for about 2 to 3 minutes.
Add salt and pepper, mix well and remove from fire. Keep aside to cool.

Assembling:
Smear the edges with some egg, put the filling in the centre, fold the sides , roll and deep fry in hot oil.
Drain on paper towels and serve with some chilli sauce.
I used store bought spring roll wrapper which was huge and square, rather than circular which the recipe would yield. I had to cut them a bit, but it still was much easier and tasted just the same. This is a pictorial representation of my hard labour. (Please ignore the shabby kitchen).

Notes: The same an be done in a veg version by avoiding the chicken. Use paneer instead.
You can freeze them in zip lock bags for as long as you want.
Baking them is a good idea, but I would have to explore that option another time
I also didn't deep fry it, but shallow fried it, and it was good enough.
Pardon the picture, I had no patience to fancy it after that laborious effort.