Showing posts with label Italian it is. Show all posts

Tuesday, 9 August 2016

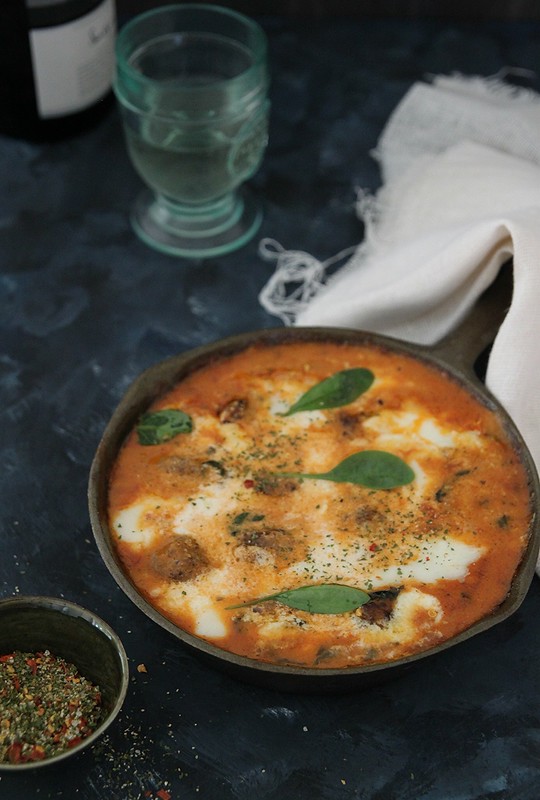
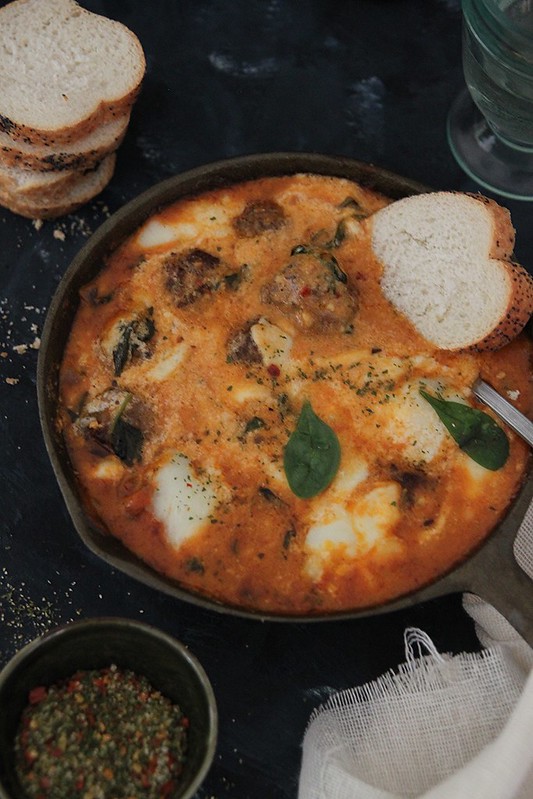
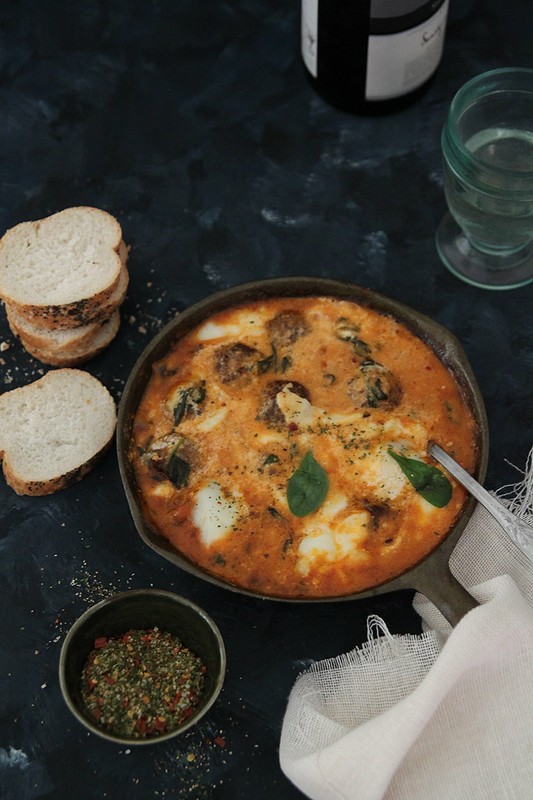
Cheesy Mascarpone and Mozzarella meatball bake

IMG_0729 
I'm clearly in Italy mode still and have been whipping up some Tuscan dishes. The only dish we were quite glad to give a miss for a while were pizzas, but otherwise still enjoying a good pasta and bruschetta. This meatball bake ended up being so darn good, I finished almost half of it on my own. The sauce is really thick and dunking a good slice of bread into it and letting it soak for a while before savouring it, gosh, the thought is making me hungry again.

Serves 4 as a main dish
Ground beef- 500 gms
Onion-  1 small, finely chopped
Italian seasoning- 1 tbsp
Oregano- 1 tsp
Garlic powder- 1 1/2 tsp
Worcestershire sauce- 1 tsp
Pepper- to taste
Salt- to taste
Oil- 3 tbsp, or enough, to fry the meatballs

Onion- 1 large
Baby spinach- 3 cups
Chilli flakes- 1 tsp
Tomato based Pasta sauce- 1 cup
Mascarpone cheese- 100 + 100 to scatter
Garlic- 3 pods, grated
Salt- to taste
Mozzarella cheese- 100 gms, grated
IMG_0698
Mix together the ground beef, onion, Italian seasoning, oregano, garlic powder, Worcestershire sauce, salt and pepper together in a mixing bowl. Either using your hands or a wooden spoon, but over work it or the beef turns brown. Bring together until just mixed.
Make small balls out of the mix, around the size of a small lime, and keep ready. I got 25 meatballs out of the mix.
Heat oil in a frying pan and fry the meatballs in batched, till just done. If the oil temperature is right, it would take you around 2  minutes per side for a batch of meatballs. Of course this is dependent on how big the meatballs are.
Drain on paper towels and continue frying all the meatballs.

Into the same pan, add more oil if needed, add the onions and baby spinach and cook till the spinach is wilted and all the water has evaporated.
Stir in the chilli flakes and pasta sauce. 
Spoon 100gms of the mascarpone cheese into the sauce and mix well.
Add the grated garlic and salt to taste and bring the whole sauce to a gentle boil. If you feel the sauce is too thick, add water to loosen it a bit.
Add the meatballs into the sauce and simmer for a couple of minutes and take the pot off heat.
IMG_0737
Preheat oven to 180C and transfer the meatball mix into an oven safe casserole/baking dish.
Scatter around scoops of the remaining mascarpone cheese and grated mozzarella cheese. Try to spread it around evenly.
Place in the oven for about 20 minutes or till the cheese has melted and the sauce is bubbling.
Remove from the oven and keep aside for 10 minutes before dunking your crusty bread into it.

Notes: You can do the entire cooking and baking in a single pot if you use an oven safe container to do the frying, sauce and baking. I used my cast iron pan.
You can use any store bought pasta sauce or make your own and even omit the mascarpone if you dont want it to be creamy.
The bake freezes well.

Tuesday, 26 February 2013

Eggless Tiramisu and Kopi Coffee review

IMG_7087
Life's been crazy busy over the last couple of weeks and I haven't taken a food photograph in a while. I haven't even recharged my camera battery which died on me 2 weeks back, to be precise, right after I took pics of the Tiramisu. I had my two BB team mates over 2 weeks back to sort out our goody bags etc etc for the event and I made an Italian spread. I usually make Tiramisu in a baking dish, but this time decided to do individual portions. I think its more convenient, both to serve and to eat, when its just 3 or 4 that you need to make. 

I have been making Tiramisu for a really really long time, and I think its one of the most easiest dessert recipes ever..that is, if you can get ready made sponge fingers (Savoiardi) and mascarpone cheese easily. I would never attempt it in India where I know I will have to make them both from scratch. Its possible, and there are loads of bloggers who have done the same. Just google it and you will not be disappointed. I had tried a recipe with eggs before and as good as it is, I somehow prefer the one without eggs, since you know the eggs are not cooked and such. I recently attended a bloggers day where we had to make the "authentic" tiramisu and boy we sweated it out whipping egg whites using a whisk. So that recipe used both egg yolk and egg white, and the outcome was really good, with absolutely no taste of the eggs obvious, and it was as creamy and silky as you'd imagine it to be. I shall try that out another time.
IMG_6817
I also decided it was the best way to make use of the Kopi coffee samples that were sent to me, which I must say are simply amazing. The husband and I are hard core coffee drinkers and I for one need a really really good cuppa first thing in the morning. Kopi is an exclusive monthly subscription coffee club wherein each month the experts hand pick the finest single-origin coffee, freshly roast it and sends it over for you to enjoy. You can choose from different types of subscriptions and since the coffee is ground just 14 days before delivery, you can be sure of how fresh it would be. I was sent two different roasts to try. The Kenya Micro-lot Gatomboya AB with festive notes of marzipan, caramel, nutmeg and redcurrant is the kind of the coffee you'd like to wake up to on a Christmas morning. But my favourite however was the Java Jampit Estate Arabica which had very faint chocolate flavours, perfect for those after dinner coffee sessions. I decided to use the Arabica in my Tiramisu and it was a winner. The fact that the coffee packs can be sealed well even after they are opened, impressed me, and each time I opened the pack a strong whiff of the freshly powdered coffee used to hit me. Now that's what a good wake up call should be like :)

Coming back to the recipe...it is so easy to put together and the best part, you can make it a day or two ahead and keep it covered in the refrigerator. Serve it cold or leave it out on the kitchen counter for about 15 minutes, so its not tooo cold for your liking. 

Recipe adapted from here (makes 6 individual portions)
IMG_7069
Sponge fingers- around 12 to 15
Cocoa powder- to dust

Mascarpone cheese- 220 gms
Vanilla extract- 1 1/2 tsp
Powdered sugar- 3 to 4 tbsp (as sweet as you prefer)
Double cream- 1 cup

Strong coffee/ espresso powder- 1 tbsp (I used the Java Jampit Estate Arabica coffee)
Boiling water 1/2 cup
Kahlua coffee liqueur- 1 tbsp (optional)
Sugar- 1/2 tbsp
IMG_7054 
Make the coffee, dissolve the sugar and keep aside to cool. 
Once cool, add the coffee liqueur (if using), stir well and keep aside till ready to use.

In a free standing mixer, using the paddle attachment beat the mascarpone cheese with the sugar and vanilla extract till just smooth. Don't over do it.
Change the attachment to a whisk and add in the double cream.
Whisk well till soft, peaks are formed. Don't over do it, or the cream will split and then you are doomed. (has happened tonnes of times)

To assemble, have the individual glasses/ ramekins ready.
Break each sponge finger into two and dip them in the coffee mix. they should not be completely soaked, but still slightly crispy on the inside. 
Line them (rather squish them) into the base of the glass. If you need smaller pieces, just break them off from the remaining fingers and use as required. Make sure the entire base of the glass is covered.
Add a generous dollop of the filling and even it out as much as possible and dust some cocoa powder on top.
Layer again with the sponge fingers dipped in coffee and continue till your glass is full. The top most layer should be the cream.
Dust with some cocoa powder and keep in the refrigerator, covered with cling film, for at least 5 to 6 hours for the flavours to catch on.
IMG_7078
Notes: Use a thin sponge base instead of the sponge finger biscuits
While making the filling, if you don't have a stand mixer, then first mix the mascarpone with the other ingredients using a spatula, then in another bowl whisk the double cream till soft peaks form and then fold it into the mascarpone mix using a spatula.
Use the same measurements for a single dish of Tiramisu that would serve 6.

With thanks to Kopi Coffee for the review samples

Wednesday, 4 April 2012

Sweet and sour baby onions with balsamic vinegar and a review

There is a restaurant chain in UK called Carluccio's which serves authentic Italian fare. I am a big fan of their food and since there is one very close to where I live, I even pop in there just to grab dessert. And Jamie Oliver, who was mentored by chefs Antonio Carluccio and Gennaro Contaldo, is not a new name to any of us. So when I was given an opportunity to review the DVD Two Greedy Italians- Series 1 featuring these two fabulous chefs, I grabbed it. The second series is due to air on BBC2 on April 2nd and is a must, especially if you are interested in Italian food.

This food and travel documentary consists of 2 parts, with each part containing two episodes each, and is a treat in every way. The two greedy Italians take you on a personal journey through Italy, with inputs of their traditional Italian upbringing and of course creating mouth watering dishes using local ingredients.  

You are transformed into a world where rolling hills, sprawling vineyards, beautiful houses, and quaint villages take over. From lunch with a traditional Italian family to cooking pasta, visiting shops selling ham, cured meats and cheese, tasting wines and visiting a local factory making pasta, Antonio and Gennaro keeps you entertained with their wit and humour in Bologna- their first stop. Next they move on to the South of Italy to the Amalfi coast, where Gennaro grew up. Personally this was the most favourite episode for me. Cooking by the sea side, plucking fresh lemons off the trees and biting into them, preparing a linguine dish on a boat using fresh octopus and mussels which Gennaro collected after his diving expedition and the wit and humour the two Italians share among themselves were absolutely fun to watch. Ah! the ricotta and lemon tart they made in this episode still holds fresh in my memory. Its high up there on my to-make list.
IMG_0213 
The second part takes you to Piemonte in Northern Italy, where Carluccio grew up. It is the home of the ever popular risotto rice, parmesan and of course balsamic vinegar. The episode which focuses on Regional Pride covers frog fishing, accepting new influences on Italian cooking and food and of course a glorious apple strudel and pork fillet with ginger and honey which Gennaro whips up. In the last episode they head to Puglia, a very religious region in Italy. It covers different festivals, a bread baking session and a factory where they make mozzarella cheese. If I'm being honest, this was my least favourite of all the episodes. I found it a wee bit dragging and very little emphasis was given to food per se.

But on the whole, the experience was a delight. Cooking in rustic kitchens, out in the open, no fancy gadgets used, just hands, both the chefs playing pranks on each other and of course the food which to me was the highlight. Personally, I would have preferred a lot more recipes to be featured. But I guess the series is more about the Italian lifestyle, how it has evolved over the years with regard to food and so on.

For those interested in the recipe bit, it doesn't end there. Accompanying the series is the book Two Greedy Italians' by Antonio Carluccio & Gennaro Contaldo, published by Quadrille (GBP 20, hardback) which contains over 80 fabulous recipes and even better photography. With a combination of both classic and traditional Italian recipes like the pizza and pasta and contemporary ones that take into consideration the changes in style and influences Italy has undergone in terms of food, the book is a must have for any one interested in Italian food.
261-1 
I tried a couple of recipes from the book and everything turned out great. Below is an antipasti recipe by Carluccio (used with permission) which completely took me by surprise. The husband had been nagging me to make pickled onions and I ended up making something much more glamorous and tastier than that. These sweet and sour baby onions in balsamic vinegar is perfect as a starter at a party or a side dish to any meal. Try and have it the very same day its made and you will love it even more. I have reduced the quantities to suit the two of us and used small red onions instead of the white variety which is not readily available here. 

Also, as Carluccio mentions, the balsamic vinegar plays an important part in this recipe and the kind he talks about- the ones which are, by law, produced only in the province of Modena Emiloa-Romagna- is very expensive and a little goes a long way. Since I only had the basic balsamic vinegar, I am sure the taste would have been compromised a bit, but it was delicious nonetheless. So if you have all the original ingredients, don't think twice about using them in this recipe, you will thank me for it later.

Cipolline in agrodolce balsamico
(Sweet & sour baby onions with balsamic vinegar)
IMG_0207
Small white onions- 250 gms, peeled
Olive oil- 1 tbsp
Caster sugar- 1/2 tbsp
Balsamic vinegar- 2 tbsp
Salt

Boil the onions in salted water for about 20 minutes or till they become soft, but not falling apart. Drain well and keep aside.
Heat the olive oil in a frying pan and add the onions
Fry for about 10 minutes on medium heat, tossing it around carefully.
Add the caster sugar and balsamic vinegar and continue frying for a further five more minutes or so
make sure you stir in between so that all the onions are evenly coated with the vinegar and flavouring.
Take it off the flame and serve hot or cold as antipasti or side dish.

Notes: I used small red onions.
Used a little more of the basic balsamic vinegar to impart more taste
Double the measurements to make a larger quantity
(...and since everyone's doing recipe cards, I though I'll do one too. Feel free to take a print)

Thanks to PPR Publicity for sending me a copy of the DVD to review and Quadrille Publishing for a copy of the cookbook

Tuesday, 18 October 2011

My 'go to' tomato sauce and a chicken tikka pizza

IMG_6272
Till recently I used to buy pizza sauce and marinara sauce for pasta and such and after using half of the bottle, the remaining used to stay in the fridge where it would grow other inedible stuff and finally make its way through to the bin. And then again, when I needed a couple of spoons of tomato sauce for a pizza, I'd go out and buy a bottle which would repeat the same cycle.

That's when a friend mentioned she made her own tomato sauce and it freezes really well. I shrugged off the idea saying I'd never really do it because it sounded like a tough job. What I didn't know was the number of easy peacy recipes on the internet that fetched me same results. So off I went on a fanatic search and came up with this easy to do recipe that suited my taste buds and more importantly, was easy to prepare. I now use this for any kinda dishes like in a lasagna, for spaghetti meatballs and of course as the pizza sauce. If not anything, it works well as a dip for those tortilla chips as well. 
IMG_6224
So yesterday after a rather heavy dinner, the husband suddenly announces that he wants pizza. I had a doubt if I heard him right and asked him what he meant. He said he had a craving for pizza. Yes, craving is the exact word he used. I said if he was hungry, I could make a couple more rotis, but no he wanted pizza and only pizza.

Well too bad, I wasn't going to make pizza at 8 in the night nor was I gonna order pizza because I was too damn full to eat anything more. Fed him some grapes and promised I'd make pizza soon. Well little did I know it would be this soon, but I ended up making it today and even had the will power to take some pics in spite of the lighting being shitty and such.
IMG_6284
I happened to have some sauce tucked away in my freezer and thought it was a good idea to blog it since I intend on making it again. I also had some leftover chicken tikka from a dinner party on Sunday and decided to go for an Indianised version, just for kicks. I'm mighty thrilled with the outcome, as I have evolved from the amoeba shaped pizza to a rather round-like one in about 6 months. I'm getting there people, I'm getting there :)

On a completely different note, a big thanks to my uber creative friend Arun for doing the header for me. He's such a genius, you should check out some of his work here. When he becomes an aspiring film maker, I'm not gonna have this privilege. But till then I'm definitely gonna harass him for random stuff like this. Thanks a bunch A.

Sending the tomato sauce and pizza to the 'Taste for Tomatoes' competition over at Love the Garden. Now I'm just crossing my fingers and waiting to see if I've won :)

Tomato sauce (loosely adapted from Jamie Oliver's recipe)
IMG_6247
Chopped tomatoes- 400 gms (canned)
Garlic- 5 cloves, peeled and finely chopped
Fresh basil leaves- a handful, cleaned and torn
Olive oil- 1 1/2 tbsp
Dried oregano- 1/2 tsp
Dried red chilli- 2, broken in half (optional)
Salt and pepper- to taste
IMG_6229
Into a saucepan add the olive oil and once it becomes hot throw in the chopped garlic.
Swirl it around a bit and once it changes colour a bit, add the tomato followed by all other ingredients.
Stir well and bring to a boil.
Then reduce heat to low and let it simmer away for about 20 minutes, and remember to stir in between.
Once it becomes thick and saucy-like, remove from heat and let it cool for a while.
using an immersion blender, blend to a smoother consistency.
Store in sterilized glass jars and once completely cool, freeze.
When ready to use again, thaw at room temperature, gently heat at a really low temperature and use again.

Notes: I added a wee bit of home made garam masala to the tomato sauce because i was doing a chicken tikka pizza. 
The red chillies add a bit of spice, so omit if you dont want a spicier version.

Chicken tikka pizza (makes 2 8-inch pizzas)
IMG_6279
For the base (recipe halved from here)
Plain flour- 250 gms
Olive oil- 2 tbsp
Salt- 1/2 tsp
Luke warm water- 150 ml
Active dry yeast- 1 tsp
Sugar- 1/4 tsp

For the topping:
Above mentioned tomato sauce- 1 cup 
Chicken tikka pieces- 2 cups (recipe from here, the first part only i.e, the marinade and then grill as per instructions)
Grated Mozzarella cheese- 1/4 cup (optional)
Fresh mozzarella balls- 2 medium, sliced into 1/4 inch thick slices
Cherry tomatoes- 1/2 cup, each of them sliced in half
Spinach leaves- 1/4 cup, pre cooked in the microwave for a couple of seconds
Grated Parmesan cheese- a couple of spoons (optional)
Olive oil- to drizzle
IMG_6267
In a small bowl mix together the yeast and sugar and pour in 50ml lukewarm water. 
Mix well and leave aside for about 10 minutes by which time the yeast would bubble up.
In another large bowl whisk together the flour and salt and rub into it the olive oil, till slightly crumbly.
Once the yeast mix is ready, pour it into the flour mix along with 100ml lukewarm water, and using your hand mix till they all come together.
Lightly flour a work surface and knead till it is no longer sticky, say for about 4 to 5 minutes (yeah that's all it takes, trust me).
Place it back in the bowl, cover with a damp kitchen towel and keep aside to rise for about an hour.
IMG_6287
When you are ready to make the pizza, punch down the dough, knead it a couple of times and roll it out into the desired shape and to about 1/4 to 1/2 inch thickness. I used my silicone mat for this purpose so didn't need any flour. If doing so on your work top, then lightly flour the surface.
Place in a lightly greased pizza pan and then using your fingers stretch it out further.
Generously douse with the tomato sauce, leaving about half an inch from the edges.
Top with grated mozzarella, if using, or else place the chicken tikka slices randomly. Don't crowd it too much though.
Next, arrange the chopped tomatoes followed by fresh mozzarella.
Finally top with the cooked spinach leaves, drizzle some olive oil and place in an oven preheated at 200C.
Bake for about 8 to 10 minutes, by which time the cheese would have melted.
Once you take it out, you can sprinkle some freshly grated Parmesan cheese, drizzle some more olive oil, slice and serve with a glass of wine...BLISS!
IMG_6280
Notes: Add olives and mushrooms if you feel like and as a veg option, paneer tikka can be used. Just replace the chicken in the recipe with paneer.
The pizza is crisp around the edges and soft at the centre, just like we love it.
It is thin crust and not deep pan. For that you will have to keep the base thicker while rolling it out.

Sunday, 25 September 2011

Chilli, ginger and coriander focaccia

IMG_5575-1
Its unbelievable that we are having awesome weather and apparently it continues on to next week. We have been enjoying it thoroughly and as we do every year we also went for the open air movies at the London Scoop. We have one more coming up on Wednesday and that should officially end our summer sojourns :)

I am also super thrilled, I've managed to post another recipe without much of a gap, thanks to a 'no working on weekends' rule Ro has come up with. So while he's spread out on the sofa reading Asterix and watching the F1 highlights, here I am typing out a recipe. Its been ages since we've spent a weekend at home and today also would have been no different if it wasn't for the Greenwich marathon that passes through our place and they've shut down all transport and even the tube station.
IMG_5584
So all day we lazed around, got drunk and the initial plan was to just not do any cooking, but the past few days we've been eating out and so I got down to it and cooked. This focaccia was the outcome and we dunked it in olive oil and munched away with a chicken roast. Discovered this fab website with a lot of baking tips and recipe ideas and I have already bookmarked a few. Do head over and check it out when time permits.

I must admit that the first time I tried out a focaccia recipe, it flopped on me, big time. This time however, I was determined to follow instructions properly and although a couple of ingredient substitutions did leave me confused, I managed to pull it back together. The coriander leaves add a great flavour to the bread and you know the chillies are present, but not in an over powering sort of way.
IMG_5573
Recipe has been adapted from here
Plain flour- 200 gms
Sea salt- 1/2 tsp + enough to sprinkle
Chillies- 3, finely chopped
Coriander leaves- a small bunch, finely chopped
Ginger- 1/2 tbsp, grated
Active dry yeast- 3.5 gms
Water- 112ml (roughly 4oz), warm
Olive oil- 1/2 tbsp
IMG_5582
Slightly warm the water and add the yeast. Whisk to dissolve and leave aside for 6 to 7 minutes to reactivate.
In the meantime whisk together the flour, salt, half of the chillies and coriander leaves and ginger in a mixing bowl.
Once the yeast has frothed, add it to the flour mix and knead using a dough hook attachment for about 5 to 6 minutes or if using your hands, flour the work top and knead well for 10 minutes, till the dough is no longer sticky, but smooth and pliable.
Lightly grease a bowl, place the dough in it, cover with a wet cloth and set aside in a warm place to rise.
After about 2 hours, the dough would have doubled in size, so punch it down, knead for about 2 to 3 minutes and make it into a presentable round shape. Roll it out if you cant really stretch it, but don't thin it a lot.
Place on a baking tray lined with parchment paper and dimple it at intervals with your finger.
Top with the remaining coriander leaves and chillies and keep aside for an hour or so to proof again.
Once the dough has risen again, brush with olive oil generously, sprinkle some sea salt and place in an oven preheated at 190C.
Bake for 17 to 20 minutes or till golden brown.
Take it out, cool on a rack for about 5 minutes and then slice and serve.
IMG_5586
Notes: The ginger was a wee bit over powering for my liking, so id go easy on it or maybe even avoid it altogether next time.
The original recipe called for a mix of very strong and strong bread flour. Didn't have any, so used plain flour instead. I'm sure the outcome would have been much better if I'd used bread flour.
If using instant yeast, then add everything together to the mixing bowl and knead. You can also go directly to the second proofing stage if using instant yeast.
Replace the toppings with garlic, sun dried tomatoes, olives etc. if you want variety.

Friday, 12 March 2010

Square Pizza ... cheated a lot on this one ;)

I had no clue making a pizza was this easy... especially with the pizza base mix from Sainsbury's. Like i mentioned before, Friday's are Pizza days for us and we gorge on Dominos usually. Tried Pizza Hut once and we were thoroughly disappointed with them. We make an order online and Dominos deliver to the dot...literally. Pizza Hut was 45 minutes late and the two times we called to find out what was happening, the Manager had no clue where the delivery guy was and told us he left half an hour from the store...weird? yes i thought so too...we had a major argument with the delivery guy who again had no clue what was going on and it was a whole big mess. We swore never to order from PH ever..i even wrote a stinker to them regarding this and they wrote back saying sorry and we could have a free pizza next time...ya right!..like there ever will be a next time!
So coming back to the post...there were two sachets of the base mix, one of which i used for the calzone and the other i made this pizza. Since pizza was anyway junk food, i went all out and made it as unhealthy as possible...with absolutely no veggies. Next time i shall include bell pepper, mushrooms etc....if there is a next time, that is. Like most of the recipes here, very few have returned to our kitchen.

Sainsbury's/ Asda Pizza base mix- 1 sachet
Pizza Topping sauce- half a bottle. I used this (told ya i cheated).
Chicken sausages- 1/2 cup (diced)
Shredded chicken- 1/2 cup (cook chicken with any spice of your choice or just salt and pepper and once cool, shred them or dice them into small pieces. I used some Mexican seasoning for this)
Grated Parmesan cheese- 1/4 cup
Grated Cheddar cheese- 1/2 cup + more to sprinkle on top

Follow instructions and prepare the dough. Roll out the flour on to the pizza tray and leave it in a warm place to rise. I didn't have a pizza tray, and so had to use the square cookie tray. Anythings fine.

While that's taken care of, prepare your toppings..get the chicken and sausage ready.
Assembling: spread the pizza sauce on to the base..generously, if you want a strong tomato taste, (I went a lil light on this) leaving about an inch gap around the base..just so you get a crispy edge.
Layer with some parmesan and cheddar first. Then add the sausage, chicken and the rest of the cheddar and parmesan.
Cook in a preheated oven (200C) for 20 minutes or until the base is crispy.
Notes: I screwed up on the rolling out bit..again! and so it tore a bit in the centre which i tried to fix and again screwed it up, so the centre didn't come out crisp..although i didn't mind the fact that it was incredibly soft either.
You can put any topping of your choice..including the cheese. Mozzarella is a must actually, but since i realised i didn't have any, only when i started cooking, I went ahead with the mature cheddar and i love love cheddar cheese,so i didn't care much.
The lazy me decided to use store-bought pizza sauce which was good enough. But if you are particular about making your own..there are loads of recipe online. Same goes for the base too.

Sunday, 21 February 2010

Chorizo stuffed Calzone

Friday is pizza day for us...which means Dominos home delivery or pick up a pizza from the super market and jazz it up a bit. Last Friday i thought i should do something different and decided to make a Calzone instead.
I suck at getting the dough consistency..the same reason why i still buy frozen chapati's...and so bought a Pizza base mix where the correct water measure was mentioned and i just had to follow instructions..now that, i can do! So the dough part was taken care of, though I still struggled with the kneading and the flattening due to lack of patience and proper utensils. This is what i did for the filling:

Chorizo- 1 cup (cut into small bit size cubes)
Spring onions- 4 sprigs, whites and greens roughly chopped
Tomato puree- 1/4 cup (or more..i don't really like too much of tomato)
Grated Mozzarella Cheese- 1/2 cup
Pepper powder- to taste
Chilli sauce- 1 tbsp (optional)
Grated Cheddar Cheese- to sprinkle
Butter- 1/2 tsp

Cook the chorizo slices lightly, remove from pan and discard rest of the oil keeping behind just about 1 tsp. Sautee the spring onions in the same oil for about two minutes. Add the tomato puree and cook till you see bubbles. Add the chorizo, pepper pwd and chilli sauce and mix it all together. Take it off the flame.

Assembling:
In a baking tray spread out the pizza dough.
Place the filling on one half of the flattened dough. Top with mozzarella cheese and if you want some of the cheddar as well.
Carefully fold the other half of the pizza over the filling and seal the edges well with a fork.

Cook in a pre-heated oven (200C) for 15 minutes. Take the tray out and brush the melted butter on the calzone and place it back in the oven for another 5 to 6 minutes. Once done, cool on a rack for 5 minutes and then slice into two. Sprinkle the rest of the cheddar and serve hot.
Notes: You can use any filling of your choice...veg or non-veg.
Spring onions can be replaced with red onions or shallots even, and the purée can be replaced with lightly mashed tomato.
The calzone was pretty huge, and it was like a meal on its own. I'd halve the recipe if i need smaller portions

Sunday, 31 January 2010

Under the Tuscan Sun (wishful thinking, that is)

Baguettes and Bruschettas sound so exotic, it makes me want to go to Tuscany, or vice versa rather :)
This is my first time with plain baguettes and i figured a lot of cool stuff can be whipped up in no time. They go well with soups or as a starter or a simple snack as for that matter. Its easy to prepare if you have all the ingredients and most of these, are stuff you'd have in your refrigerator.

Stuffed baguette

French baguette- one, half
Cheddar cheese- 4 tbs
Tomato puree- 1 tsp
Cream cheese- 100gms
Olives- 1/4 cup finely chopped
Pepper powder- to taste
Garlic- 2 pods, finely chopped

Slice off both the ends of the baguette and hollow it out carefully, leaving about half an inch of crust.
Mix the cream cheese and cheddar till nice and soft and add the rest of the ingredients. Check for salt and add if required.
Scoop and fill the baguette with the cheese mix. Wrap with a cling film and refrigerate for upto 2 hours.
Slice and serve with soups or as an appetiser.


I am sending this entry to the No Cook Event hosted by PJ of Seduce your tastebuds.

Notes: Add sun dried tomatoes, meats or any other cheese of your choice and make it more exciting
If you want you can heat it a wee bit just before you serve, but i prefer it cold.

Bruschetta


With left-over baguette, use it as a Bruschetta and be creative with any topping of your choice. Here are a few options:


Pre-heat the grill and grill the bread for one minute, on either side, till they are crispy. Drizzle olive oil and top with mashed tomato and basil, feta cheese with garlic and chives, pancetta, season with freshly ground salt and pepper and drizzle some more olive oil on top and serve. Its brrrriiilliant!

Friday, 29 January 2010

'Brunch' ed Up, eh?

Oh don't you just love the whole idea of a brunch? Well, I do and i love going out to brunch rather than staying at home and making one. Especially after a night out on Saturday, you wake up late on Sunday and head out to a restaurant, have a 3 hour long brunch and if you have friends joining you, even better. So today was brunch day and for a change i decided to do it at home. Boy was it so much more easier and fun to have brunch than to have breakfast at 10 and then get prepared for lunch by the time you are done cleaning up after breakky.
We started off with a rather rich and heavy Frittata, washed it down with a glass of freshly squeezed orange juice followed by buttermilk blueberry pancakes and a cuppa freshly brewed coffee. Yes, you guessed right..we were so full after that to even clean up and now i have a messy kitchen staring back at me. I thought id take a breather, come and blog about it and then get back to cleaning up (which basically means loading the dish washer) ;)

Bacon and Spinach Frittata
Frittata is an Italian omelet mixed with veggies, meats, cheese or rather anything of your choice and served open..and not folded. It is initially cooked on a hob top and finished off under a grill.

Bacon- 3 rashers, cooked and crumbled
Baby Spinach- 1 to 2 cups (depending on your taste. Ro didn't let me put more than a cup)
Garlic pods- 3, chopped fine
Spring onions- 3, chopped fine (both bulb and greens)
Garlic sausages- 3, cooked and chopped (optional)
Eggs- 4
Heavy cream- 30ml
Mature cheddar cheese- less than a 1/4 cup
Pepper powder- as required
Salt- to taste
Baking powder- a pinch (optional)

Clean the spinach leaves, drain and transfer them to a bowl and close with a lid. Cook in the microwave on high for about 2 minutes. Drain off the water and keep aside.
In a large frying pan, cook the bacon and sausages (if using) and preserve the oil.
If there is way too much oil, discard some and in the remaining, sautee the garlic and spring onions till light and fragrant.
Add the spinach, crumbled bacon and sausages. Season with some pepper powder and sautee for a few minutes. Check for salt and only then add, since the bacon and sausages will have some salt content in them.
Beat the eggs, cheddar cheese, cream, salt pepper and baking pwd in a bowl till light and fluffy.
Add this to the frying pan and mix well, without disturbing the ends too much. Try and distribute the filling evenly.
Cook on low fire for about 2 minutes and then cover and cook for a minute or two again. Transfer to a pre-heated grill for another 5 mins max..just to brown the top.
Cut into wedges and serve.


Notes: The garlic sausages were about to expire and so i added that too. The bacon would be good on its own or rather better, because somehow there was a conflict of flavours.
Whole milk can be used instead of heavy cream. I wanted to make sure we don't eat healthy today :)
Add mushrooms, carrots, peas or any veggie of your choice and make it an egg-etariandelight.
If you do not have an oven, you can just carefully turn the egg upside down to brown the top. Be careful though...you shouldn't crack the beautiful round shape. Invert it on to a plate first and then insert that plate back into the frying pan to be double sure. Am i making sense?

Buttermilk Blueberry Pancakes
This is my first time with buttermilk pancakes and i must say it does make a difference to the texture and a slight taste variation. Or am i imagining it, i don't know. I asked Ro and he said he cant remember eating pancakes made by me at all....but clarified that the Tesco one tastes a whole lot different (good different or bad different is a very time consuming argument, so i left it at that)....Thanks for that baby, i am so stupid i didn't know! DUH!

All purpose flour- 1 cup
Sugar- 4 tbsp ( optional)
Baking powder- 3/4 tsp
Baking Soda- 1/4 tsp
Salt- 1/4 tsp
Egg- 1
Buttermilk- 1 cup
Butter- 2 tbsp, melted and cooled slightly
Vanilla extract- 1/4 tsp
Fresh Blueberries- 100 gms

Mix all the dry ingredients (first 5) together and keep aside.
Whisk together the remaining, except the blueberries, and add to the dry ingredients. Stir until it is just blended and then add the blueberries. Give a final stir and keep aside for about 5 to 10 minutes.
Heat a non-stick skillet and pour in one ladle full of batter. After about 3 minutes, bubbles start appearing on top and at that time, flip and cook for another 2 minutes or till golden brown. Repeat till the entire batter is used up. I got about 10 medium size pancakes.
Drizzle some maple syrup, butter or even honey and serve with fresh blueberries on the side. Wanna die sooner? Add some whipped cream :0

Note: Buttermilk can be substituted with whole milk
I tried using an electric grill for the pancakes, but it was surprisingly taking too long and the bubbles were just not there...Hob top skillet is the best.
Use bananas, chocolate chips, strawberries in the place of blueberries, and I'm sure the result will be as 'fruitful' :)

Phew! that was awfully long, i think i'll get Ro to clean up ;)

Sunday, 30 August 2009

Pick-me-up..yes its Tiramisu

I have no idea what tempted me to make Tiramisu. I didn't see anything on Food network, i didn't have it recently in a restaurant and no one even vaguely mentioned it. I have always had bad luck with desserts. Even cakes don't come out well and i depend on ready mixes like Betty Crocker for the same. I, somehow, decided to make Tiramisu one fine day and so went online and did loads of research for some two days. Read blogs, took tips from websites and even watched YouTube videos on how to make it. Outcome, being utterly confused and frustrated at the end of it all. I ultimately decided on a Gordon Ramsay/ James Martin (two renowned chefs in Britain) recipe, but ended up making a whole new one on my own. It turned out beautiful and I'm proud of it.
Most of the ingredients were available in supermarkets or Italian deli's. Anyways, this is my version of the recipe:

Mascarpone Cheese- 250gms
Eggs- 2, yolk and white separated
Ladyfinger/Sponge fingers- about 20
Sugar- 3 tbs (heaps)
Vanilla extract- 1 tsp
Brandy/ Kahlua/Marsala wine- 2 cap fulls
Espresso coffee- 1 cup, really strong
Cocoa pwd- to dust

Make really strong Espresso coffee and set aside to cool.
Beat the egg whites till they form peaks, gradually adding about 1 tbs sugar. This is very important as the egg white should not be flowy.
Beat the egg yolk with the remaining sugar till smooth and add this to the mascarpone cheese with the vanilla extract and beat until smooth. Fold in the egg white into this mixture bit by bit, and smoothening it out, but not mixing/ whisking vigorously. Keep aside.
Pour the brandy into the espresso coffee and give a stir. Dip the sponge fingers one by one in the coffee, but do not soak it, and place in a ceramic dish. Over this, spread the mascarpone mix evenly. Set another layer of the sponge fingers,and then cream. Repeat until you run out of both, but with the cream mix on top.
Dust some cocoa pwd and chill uncovered for a minimum of 5 hrs. The more it chills, the better cos the flavours get more infused into the sponge.

You can actually be a bit creative and do the sponge, cream mix in ramekins or in martini glasses, and decorate with cocoa pwd or maybe even powdered sugar.

Notes: Sponge fingers can be replaced with sponge cake. Recipe here
Espresso coffee can be replaced with instant coffee
Brandy is also optional, if you need an alcohol-free Tiramisu
Whipped cream can add that extra zing to it, but i didn't have any, so omitted that step

Saturday, 18 July 2009

Wonders with leftovers

I have been pushing the last couple of days with ready meals and junk food like burgers, hot dogs and pizzas and Ro hasn't complained till now. Its just plain laziness and also to prove to Ro that he needs me to survive...food-wise at least! I have also run out of almost everything and haven't made an effort to go grocery shopping either. The rains and cold winds have added to this misery and i just don't want to step out of the house. Yes, i go into these nonchalant moods once in a while and no matter what happens, until i feel like doing something, i just wont budge. Awesome right?
It was also the aftermath of a kitchen disaster where i tried to make a caramel something and it all just smoked up. Thank god my smoke alarm didn't go off, and after scrubbing and scratching the hardened caramel off the vessel, i was in no mood to be proactive. So after searching all the cupboards and freezer for an easy dinner option, I came across some pasta, sausages, bacon and asparagus and decided to make something eatable, which ultimately turned out quite tasty.

Wheat pasta (Fusilli)- 200 gms (was all that was left)
Spring Onion- 1 large
Baby tomatoes- 8 to 10 sliced in half
Green chillies- 3, sliced thin
Asparagus heads- 5 to 6, sliced
Pork frankfurters- 3 sliced into coin size pieces
Bacon- 2 rashers
Grated cheddar cheese (mature)- 2 hands full
Maggi seasoning sauce- a few dashes
Tabasco sauce- 1/2 tsp
Salt- to taste

Cook the pasta as per instructions with a pinch of salt. Drain and keep aside.
In a frying pan, fry the bacon rashers. Once cooked, remove and drain on a paper towel and slice into small pieces. In the same frying pan, fry the sausages in the oil oozed out from the bacon (If there is too much oil, pour out some and use the remaining). Remove with a slotted spoon and keep aside.
Now throw in the sliced spring onion, baby tomatoes, green chilli and asparagus and sautee till the asparagus becomes more or less cooked. Add the pasta, bacon and sausage slices, a few dashes of Maggi seasoning, Tabasco and salt and mix well. Do a taste check and if its not spicy enough, you can either put some more Tabasco sauce, chilli pwd or pepper. Towards the end, sprinkle the grated cheddar cheese and give a final stir. The heat from the pasta will make the cheese melt. So it doesn't have to be on fire. Enjoy!

Notes: You can use spinach, green peas, carrots and any other left over veggies for this meal. Ro hates asparagus, but he didn't even realize they were in it:)
If you want to make it a bit more rich, you can add some white sauce. I was lazy, so i didn't.
Instead of spring onions you can use normal onion and for baby tomatoes, the normal ones can be used. I didn't have either of those.
Also, i used both sausages and bacon, but you can choose any one or none at all if you have enough veggies to compliment
Make sure the left over oil from cooking the bacon is used to do the rest of the cooking because it gives that extra flavour to the dish.

Sunday, 5 July 2009

Tuna and Pasta Bake and high on Sangria


Thanks to easy peacy cooking recipes like this, we are still surviving. I think UK has spoilt me in a lot of ways. If its not Indian cooking you are into, then i think being in a place like UK or US helps. The sachets of easy mix powders and gravy's and cut veggies and mixes, add to this luxury.
I am a big fan of the Coleman's brand and they have a various powders in sachets which you can just mix with milk or water and pour over anything from mashed potatoes to beef to chicken to vegetables to pasta. I bought a Tuna and Pasta bake sachet with the intention of using it for a simple bake, but instead decided to try out the recipe at the back of the cover. This is how it goes:

Pasta- 225 gms
Tuna- 200 gms (tinned)
Milk- 425 ml
Carrots- 1/4 cup cut into small bite size pieces
Green peas- 1/4 cup (frozen)
Onions- 1/4 cup (thinly sliced)
Pepper- 1 tsp
Salt- to taste
Cheese- to layer on top (I used Cheddar)
Regular bag of chips
1 sachet Coleman's Tuna and Pasta Bake
Oil- a wee bit

The onions, peas, carrots, pepper is my addition since i did not have sweet corn which the recipe asked for.

Cook the pasta as per instructions (with salt and enough water. Strain and keep aside)
In a heavy bottomed pan heat some oil, saute the onions till transparent and add the carrots, pepper and salt and cook till done. Toss in the tuna along with the green peas and pasta and mix well. If there isn't enough salt or spice you can add as per your requirement at this stage. Keep aside
In a saucepan, tip the contents of the sachet, add a little bit of milk and stir well so no lumps are remaining. Tip in the rest of the milk and bring to a boil, stirring continuously. Reduce heat and simmer for a minute. the sauce will be somewhat thick and creamy.
Pour this mixture on to the pasta/ veggie mix and make sure the cheesy sauce is blended well with the pasta mix. Take it off the stove and pour into a baking dish.
Crush some chips and layer it on top of the pasta, and then layer the cheddar. Bake for 20 minutes in a pre-heated oven at about 175C or heat on high in a microwave oven for 5 minutes or till cheese melts.

Note: The crisps added that zing to the dish and i loved the idea. I think children would love this dish

Its been really hot the last couple of days here in London and so i decided to make Sangria, the perfect summery drink and also because i had some leftover fruits i needed to finish.

Red wine- 1 cup
Rose wine- 2 cups
Orange juice- 1/2 cup
Gin/rum- 60ml or less according to your taste
Apple- 1 sliced into small cubes
Apricot- 3 sliced into small cubes
(Pears, oranges etc. can be added if you want)
Sugar- 3 tbs
Lime juice- 1/2 cup (lemonade if you need a fizzy drink)

Mix all these together in a bowl, pour into tall glasses and drink your heart away:)

Notes: The gin was a bit too strong and it kinda made us a wee bit tipsy after the first glass.
If you keep it overnight, the fruits will be infused with the flavour and will taste better i guess. We didn't have the patience though :)
Sangria is usually a red wine and rum drink, but i didn't have enough of red wine so i mixed it with the rose and it tasted just as good.