Showing posts with label no bake. Show all posts

Tuesday, 26 February 2013

Eggless Tiramisu and Kopi Coffee review

IMG_7087
Life's been crazy busy over the last couple of weeks and I haven't taken a food photograph in a while. I haven't even recharged my camera battery which died on me 2 weeks back, to be precise, right after I took pics of the Tiramisu. I had my two BB team mates over 2 weeks back to sort out our goody bags etc etc for the event and I made an Italian spread. I usually make Tiramisu in a baking dish, but this time decided to do individual portions. I think its more convenient, both to serve and to eat, when its just 3 or 4 that you need to make. 

I have been making Tiramisu for a really really long time, and I think its one of the most easiest dessert recipes ever..that is, if you can get ready made sponge fingers (Savoiardi) and mascarpone cheese easily. I would never attempt it in India where I know I will have to make them both from scratch. Its possible, and there are loads of bloggers who have done the same. Just google it and you will not be disappointed. I had tried a recipe with eggs before and as good as it is, I somehow prefer the one without eggs, since you know the eggs are not cooked and such. I recently attended a bloggers day where we had to make the "authentic" tiramisu and boy we sweated it out whipping egg whites using a whisk. So that recipe used both egg yolk and egg white, and the outcome was really good, with absolutely no taste of the eggs obvious, and it was as creamy and silky as you'd imagine it to be. I shall try that out another time.
IMG_6817
I also decided it was the best way to make use of the Kopi coffee samples that were sent to me, which I must say are simply amazing. The husband and I are hard core coffee drinkers and I for one need a really really good cuppa first thing in the morning. Kopi is an exclusive monthly subscription coffee club wherein each month the experts hand pick the finest single-origin coffee, freshly roast it and sends it over for you to enjoy. You can choose from different types of subscriptions and since the coffee is ground just 14 days before delivery, you can be sure of how fresh it would be. I was sent two different roasts to try. The Kenya Micro-lot Gatomboya AB with festive notes of marzipan, caramel, nutmeg and redcurrant is the kind of the coffee you'd like to wake up to on a Christmas morning. But my favourite however was the Java Jampit Estate Arabica which had very faint chocolate flavours, perfect for those after dinner coffee sessions. I decided to use the Arabica in my Tiramisu and it was a winner. The fact that the coffee packs can be sealed well even after they are opened, impressed me, and each time I opened the pack a strong whiff of the freshly powdered coffee used to hit me. Now that's what a good wake up call should be like :)

Coming back to the recipe...it is so easy to put together and the best part, you can make it a day or two ahead and keep it covered in the refrigerator. Serve it cold or leave it out on the kitchen counter for about 15 minutes, so its not tooo cold for your liking. 

Recipe adapted from here (makes 6 individual portions)
IMG_7069
Sponge fingers- around 12 to 15
Cocoa powder- to dust

Mascarpone cheese- 220 gms
Vanilla extract- 1 1/2 tsp
Powdered sugar- 3 to 4 tbsp (as sweet as you prefer)
Double cream- 1 cup

Strong coffee/ espresso powder- 1 tbsp (I used the Java Jampit Estate Arabica coffee)
Boiling water 1/2 cup
Kahlua coffee liqueur- 1 tbsp (optional)
Sugar- 1/2 tbsp
IMG_7054 
Make the coffee, dissolve the sugar and keep aside to cool. 
Once cool, add the coffee liqueur (if using), stir well and keep aside till ready to use.

In a free standing mixer, using the paddle attachment beat the mascarpone cheese with the sugar and vanilla extract till just smooth. Don't over do it.
Change the attachment to a whisk and add in the double cream.
Whisk well till soft, peaks are formed. Don't over do it, or the cream will split and then you are doomed. (has happened tonnes of times)

To assemble, have the individual glasses/ ramekins ready.
Break each sponge finger into two and dip them in the coffee mix. they should not be completely soaked, but still slightly crispy on the inside. 
Line them (rather squish them) into the base of the glass. If you need smaller pieces, just break them off from the remaining fingers and use as required. Make sure the entire base of the glass is covered.
Add a generous dollop of the filling and even it out as much as possible and dust some cocoa powder on top.
Layer again with the sponge fingers dipped in coffee and continue till your glass is full. The top most layer should be the cream.
Dust with some cocoa powder and keep in the refrigerator, covered with cling film, for at least 5 to 6 hours for the flavours to catch on.
IMG_7078
Notes: Use a thin sponge base instead of the sponge finger biscuits
While making the filling, if you don't have a stand mixer, then first mix the mascarpone with the other ingredients using a spatula, then in another bowl whisk the double cream till soft peaks form and then fold it into the mascarpone mix using a spatula.
Use the same measurements for a single dish of Tiramisu that would serve 6.

With thanks to Kopi Coffee for the review samples

Tuesday, 13 November 2012

No bake biscuit pudding (biscuit cake)

IMG_5434-1
This is my mums signature dish. She makes it at every party and get together and is so popular among everyone. Back in those school/college- going days (I know I sound like a grand mother) whenever there is a party and my mums making a list of things to make, my brother and I would beg her to NOT make this damn biscuit pudding. It used to be so funny...even some of my uncles and relatives used to joke saying, we are not coming to your house if you are serving that biscuit pudding as dessert. Ironic, because, today I'm missing home terribly and thought what better to post than my mums infamous biscuit pudding on this Diwali day, and remember all things comforting and secure...home.

She used to claim its so damn easy to put together and was any day better than a store bought tub of ice cream (which we wouldn't agree of course) and also since it could be cut into slices, it made for a perfect fuss free, plate-free dessert, hence less washing up and easy solution. You might by now understand where I get my lazy genes from..yes mum, thank you very much. But in all honesty, I would completely understand her reasoning. Parties used to go till late in the night and no one wants to sit and wash dishes and clear up stuff till the wee hours of the morning. No dish washer and no live-in house maid to make this job easier. So anything to ease this process was welcome. 
IMG_5440
I called her up the other day to get the recipe and my exact line was 'Mummy I want the recipe for that horrible biscuit pudding you make.' To which she replied, I knew you would one day ask me for the recipe and I shall not give you. I said don't push it since I already had a tonne of biscuit pudding recipes from google searches and if by chance one of those turned out awesome, it would replace her boring recipe. After pulling each others legs for a while, she slyly told me shed just made the recipe that very day cos they had guests over for lunch the next day and so I got the recipe off hand.

So this Diwali, when everyone's making jamuns and Mysore pak and other yummy desserts, go against tradition and made this biscuit pudding instead. Its hassle free and tastes absolutely delish. I have tried another version of the same from Shabs Cuisine and it was great, even though a bit time consuming, and is much more richer and fancier than this version. Take your pick. Either ways, you will love it.

I would also like to dedicate this post to a blog reader of mine U, who sends me the sweetest emails and keeps in touch with me constantly. I thoroughly look forward to her inputs on the recipes I have posted and she once requested for a biscuit pudding recipe. Although I'm terribly late in posting it, I hope she enjoys it and is the recipe she was looking for. 
IMG_5424 
Tea biscuits/ Marie biscuits- 1/2 a pack (as needed)
Coffee/ Espresso powder- 1 1/2 tsp
Water- 1 cup
Butter- 100 gms, at room temperature
Icing sugar- 1 cup
Cocoa powder- 4 tbsp
Milk- approx. 2 tbsp
Vanilla extract- 1/2 tsp

Make a cup of coffee by diluting the coffee/ espresso powder in 1 cup boiling water. Keep aside to cool.
In a large bowl beat together the butter and sugar till light and fluffy. You can do this using a spatula or your hand held beater/ free standing mixer. Its not too difficult if your butter is soft enough.
Sift the cocoa powder into the mix and continue beating till they are all mixed well.
Add the vanilla extract followed by milk and continue beating till everything comes together. Add the milk bit by bit and see if it reaches the required consistency. It shouldn't be too stiff, but easily spreadable consistency, and not too watery. I used around 1 1/2 tbsp.
Dip the biscuits in the coffee and place a layer at the bottom of the pan (refer notes). Its ok if some of them overlap.
Drop a couple of spoons of the chocolate-butter cream mix on top of the biscuits and using a palette knife/ spatula spread it out as evenly as possible and pushing the cream into all the corners and spaces. Again, it need not be smooth and stuff.
Continue with another layer of biscuits followed by cream till all of it is over and the cream is the top most layer. I got 4 layers of each.
Fold over the cling wrap, give a gentle press and refrigerate for at least 4 hours..
When ready to serve, lift the pudding out of the pan, unfold it, turn it onto a plate and decorate (if needed) or immediately slice and place in a serving plate.
IMG_5414 
Notes: There are 2 ways to assemble the pudding..
  • Line a 9 inch loaf pan with cling film, so that the ends fall over the sides and there is enough cling film to fold over the top. This method will let you lift the entire thing off the pan and slice into desired sizes. Less messier, easier and looks pretty.
  • Just layer the entire thing in a square glass/ brownie dish and slice them as required. May be a bit tricky to get the pieces out, but my mum follows this method. She says it works.
The chocolate melts really fast when kept outside for too long, so hand around paper napkins along with the slices. You don't want chocolate stains on your new Fab India cushion cover do you?? :)
You can decorate the top with chopped nuts, chocolate swirls etc. I didn't do it because Ro will dig into it in a matter of seconds and its not worth all that decoration ;)
My mum uses up an entire pack of biscuits, but that could be because she uses a square Pyrex dish for the same. If using up all the biscuits, you may need a wee bit more coffee.

Wednesday, 28 March 2012

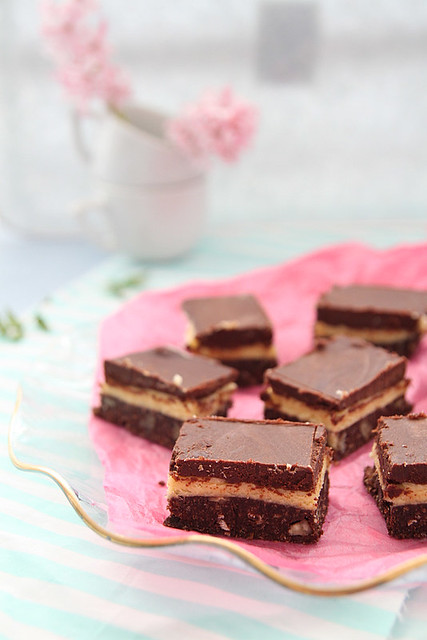
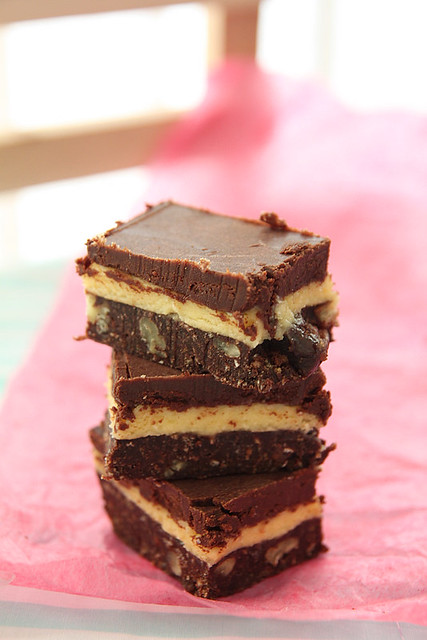
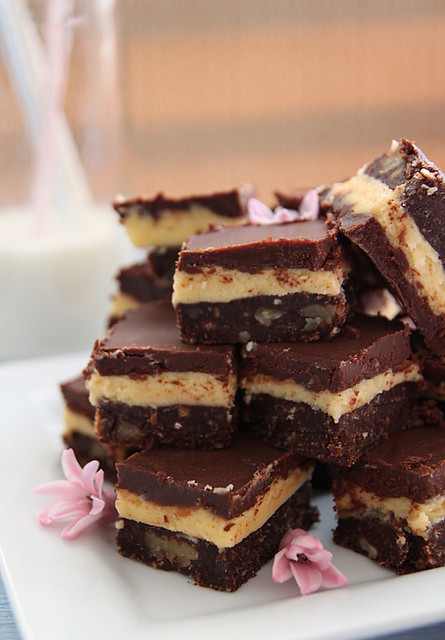
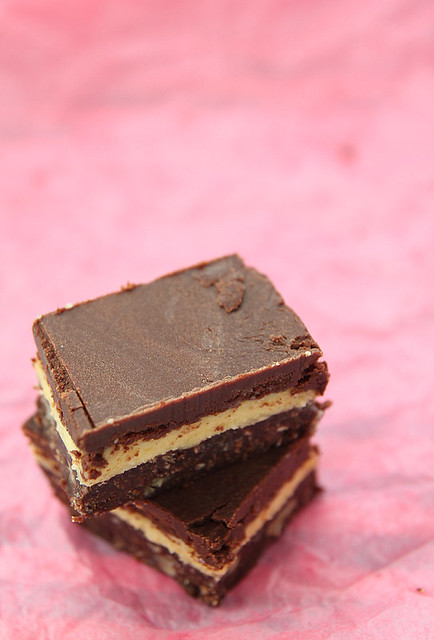
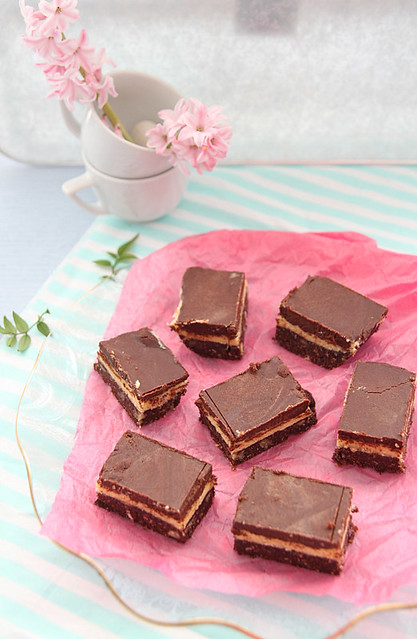
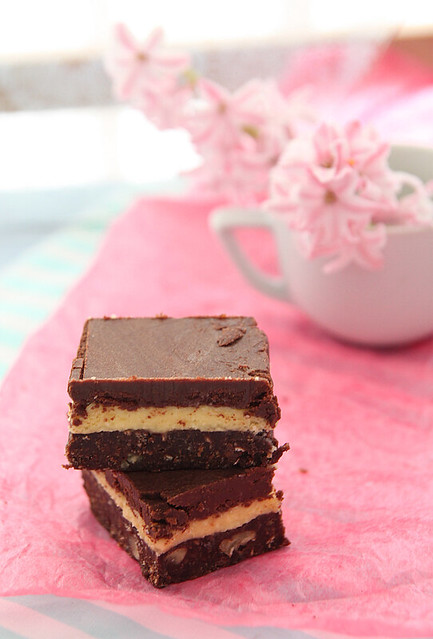
Nanaimo bars

IMG_0068
BBC2 airs a baking competition called 'The Great British Bake Off' and I love it. I have been religiously watching it since it started airing and wait for the cook book to come out after the season, just to gawk at all the pics and maybe try something if its not too complicated. The winner of the first series was food blogger Edd Kimber of The Boy Who Bakes. He, of course, came out with a book full of fabulous bakes and such. I picked it up from the library only to flip through it, but unlike all other cookbooks, this one actually inspired me to make quite a few things...well actually 2 things..which turned out perfectly well.

Nanaimo bars (you can read the history and all about it on Wikipedia) were one of them and although I have seen it cafe's and bakeries, I never bothered trying it for the simple reason it had chocolate in it. It also gave me the feeling of a super rich dessert, high in calories and the various recipes proved that. I didn't want to make a huge batch and end up throwing out most of it or even worse, eating it all up on our own. So when we were asked to a friends place for Sunday lunch, I thought I'll make some and take half of it there. Since its a setting process, I spread the entire procedure over a couple of days and had it ready 2 days before the party. I had sliced one piece to check if it tasted nice, and it did, but not in an 'oh my god why the hell did I wait so long to make this orgasmic dessert' way but more in a 'hmm its a nice thing to munch on' way.
IMG_0095
I left it in the refrigerator, nicely covered and headed to a movie during which time the husband got home and dug into it. Not one piece, but 3 squares he had, all in one go. I did not notice this because Ro does not have the habit of raiding the fridge and cupboards looking for things to eat (unlike me) and I didn't think I should warn him about NOT touching what's in the ceramic tray. Then the day before the party I take the tray out and half of it has disappeared. Greediness got the better of me and I tried one slice. At that point it was certainly an 'oh my god.....orgasmic dessert' moment. I decided to not take it to that friends place and we enjoyed it all to ourselves. Ro is even pleading to make another batch soon. I cant get myself to do so (considering the huge amounts of yumm stuff that went into it) but I shall sometime, or when I have another party I need to take something to :)

On a completely different note, I finally managed to get my recipe index intact. Its still in the work-in-progress state, but its well on its way to completion. Have updated the side bar with my fb, twitter, flicker accounts. So if you want to hear more of my brags and complaints and such please feel free to connect with me there. Phew! who said food blogging was child's play? No one? (I think I did when I initially started the blog) ;)
IMG_9757
Recipe adapted from The Boy Who Bakes (makes around 20 to 25 squares)
Bottom layer
Digestive biscuits- 150 gms (I used McVities, but any rich tea biscuits should do)
Butter- 85 gms
Caster sugar- 38 gms
Cocoa powder- 23 gms
Egg- 1 large
Vanilla extract- 1/2 tsp
Desiccated coconut- 50 gms
Pecans- 37 gms, roughly chopped

Middle layer
Butter- 50 gms
Icing sugar- 170 gms
Custard powder- 1 1/2 tbsp
Double cream- 50 ml

Top layer
Dark chocolate- 113 gms, finely chopped
Double cream- 50 ml
Unsalted butter- 20 gms, softened
IMG_0089
Get a large baking pan (I used a 23 x 13 rectangle casserole dish) ready and line the bottom and up the sides with aluminium foil. Leave some extra hanging over the sides, so its easy to take it out as a whole for convenience of slicing.
Place the biscuits in a plastic bag and use a rolling pin to crush them to resemble bread crumbs. If you have a food processor, then just pulse a couple of times to get the desired consistency. 
Transfer the biscuit crumbs into a mixing bowl and add the desiccated coconut and chopped pecans. Mix well and keep aside.
Melt the butter in a sauce pan over medium heat.
Then remove from heat and whisk in the sugar and cocoa powder, followed by the egg. Beat it into the mixture.
Place the pan back on heat and cook for about a minute, or until the mixture thickens, making sure to whisk constantly.
Remove from heat and stir in vanilla extract.
Pour this into the biscuit mixture and give it a good mix
Tip it into the baking tray, spread it out and press it in as evenly and tightly as possible, so it wont crumble when cut into.
Cover with a cling film and chill for a minimum of 1 hr.

While that's chilling, get the middle layer going.
Beat the butter, using a hand mixer or in a free standing mixer, until light and fluffy.
Gradually beat in the icing sugar until you get a smooth mix.
Add custard powder and cream and beat on low until just combined.
Then increase speed and beat well till you get a light and fluffy mixture.
Spread this evenly on top of the biscuit base.
Cover and chill for another hour or so.
IMG_0062
Finally, for the top layer, make a ganache.
Keep the chopped chocolate ready in a bowl.
Bring the double cream to a boil and pour over the chocolate pieces.
Leave to stand for about 2 minutes and then stir well until you get a smooth mix.
Add the melted butter and stir further to get a silky ganache.
Pour this over the butter cream layer and spread as evenly as possible.
Cover and chill until ready to serve.

To prevent the chocolate layer from cracking, take the baking pan out of the refrigerator about 10 minutes prior to slicing. Then run a clean, sharp knife under hot water, wipe dry and slice. It would be far easier and less messier.
IMG_0079
Notes: I used our Indian desiccated coconut for this. Was a bit wary about how it would turn out, but it worked out just fine. Feel free to use the one meant for baking.
The original recipe called for walnuts, but since I didn't have any, I used pecans. Any kind of nuts should be fine.
I made the base and chilled it for a whole night. I basically took my own sweet time to do the layers which was a very good idea, because patience is not my thing. I probably would have ruined it, if I made it all the same day.
I sliced them up and stored in a container for a week. It was absolutely fine. 
Make sure you slice them into small pieces, because this is super rich and you don't want to over do with a big piece.