Showing posts with label Kerala Cuisine. Show all posts

Monday, 12 November 2018

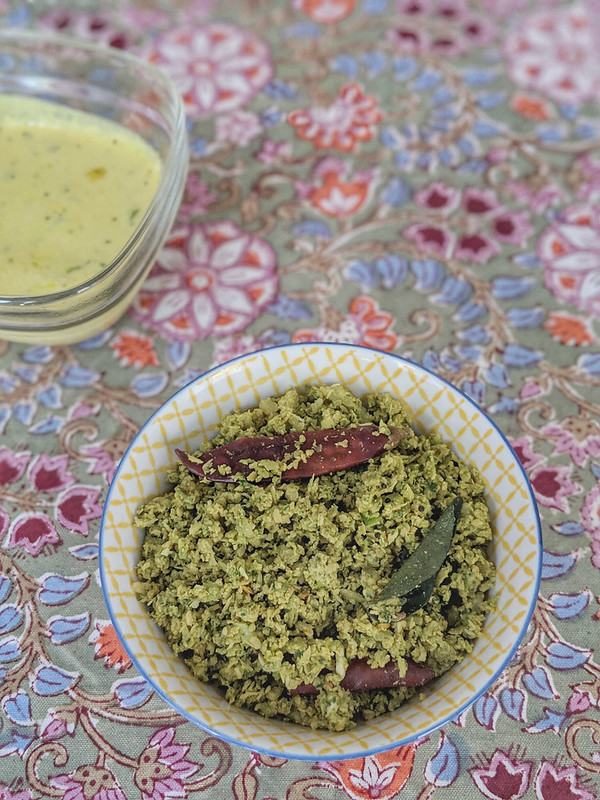
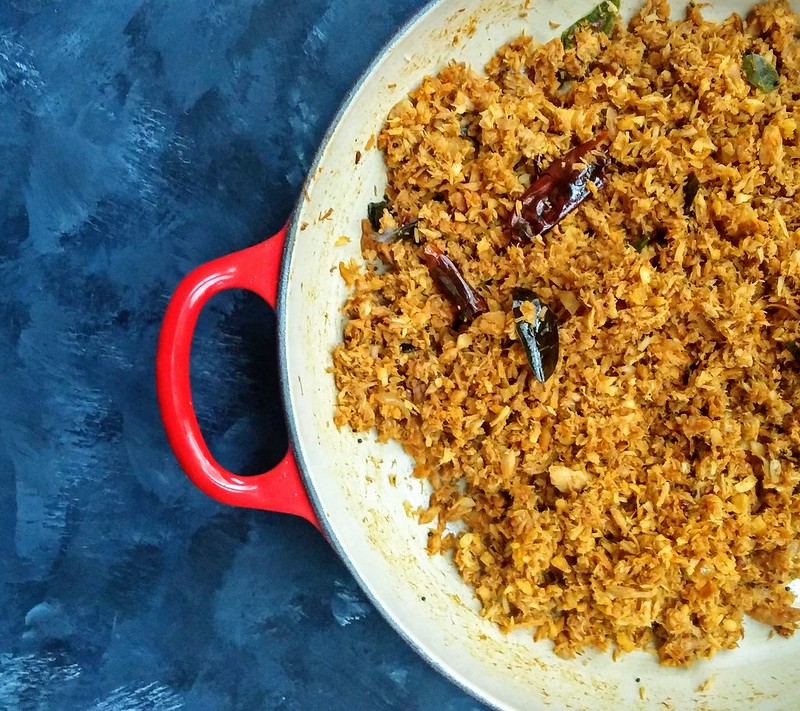
Broccoli-egg thoran

Serves 4 as part of side dish

00100dPORTRAIT_00100_BURST20181112120603038_COVER-02
Minced broccoli- 300gms 

Garlic- 2 pods
Red chilli flakes- 1 tsp

Coconut oil- 2 tbsp + 1/2 tsp
Mustard seeds- 1/2 tsp
Dried red chilli- 2
Curry leaves- 2 sprigs + 4 leaves
Turmeric powder- 1 tsp
Cumin powder- 1/2 tsp
Desiccated coconut- 1/3rd cup
Eggs- 3
Salt- to taste

Into a food processor add broccoli florets and mince to resemble coarse bread crumbs. If you dont have a processor you can either grate the florets using a grater or chop them up really fine using a knife.
Crush together the garlic and chilli flakes using a pestle and mortar to a coarse mix. You can adjust the chilli as per your tolerance level.

Heat coconut oil in a pan and splutter mustard seeds followed by dried red chilli and curry leaves. Saute for a few seconds and tip in the minced broccoli.
Stir well for a couple of minutes and then add the turmeric powder, cumin powder, crushed chilli-garlic and salt and cook covered on medium heat till the raw smell of the garlic disappears.
Open the lid and stir in the desiccated coconut, continue cooking for a few minutes till all the moisture has evaporated and the broccoli is cooked. (the broccoli mince doesnt take too long to cook)
Increase heat, separate the broccoli a bit to make a well in the centre of the pan and add in the eggs and scramble well, scraping the base to remove all the egg thats stuck to the bottom if any.
Mix well with the broccoli, add more salt if needed and finally sprinkle 3-4 curry leaves on top and drizzle the 1 tsp coconut oil on top, mix well and cover with lid. 
Remove from heat and keep aside for about 5 minutes and then serve with rice or chapathi.

Notes: We get ready made broccoli mince called broccoli rice. So i just used that.
You can do the same with cauliflower as well.
If its a small pan you are using then scramble the eggs one after the other instead of adding all three and then scrambling.

Saturday, 7 July 2018

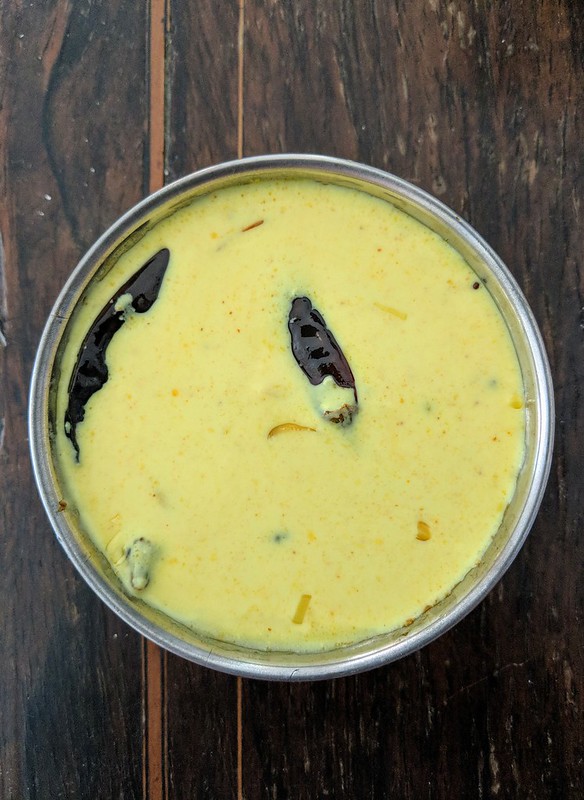
Moru kachiyathu (without coconut)

Recipe adapted from here (serves 3 as part of main meal)
IMG_20180707_154040 
Yoghurt- 1 cup
Water- around 1/2 cup
Salt- to taste

Coconut oil- 1 tbsp
Curry leaves- a generous sprig
Shallots (cheriya ulli)- 3 to 4, peeled and roughly chopped
Garlic- 4 pods, peeled and finely chopped
Ginger- 1 tsp, finely chopped
Green chilly- 1, roughly chopped or slit in half (add more if you want it spicier)
Turmeric powder- 1/2 tsp

To temper
Coconut oil- 1/2 tbsp
Mustard seeds- 1/4 tsp
Dried red chilly- 2
Curry leaves- 1 sprig
Fenugreek seeds- a pinch
Fenugreek powder- a pinch
Cumin powder- a generous pinch
Chilly powder- a generous pinch
IMG_20180707_134145_158
Mix together the yoghurt, salt and water using a whisk till smooth. You can whizz it in a blender as well.
The yoghurt mix shouldn't be too thick, so add more water to thin it out if you feel its still too thick. Keep aside.
In a deep pan, heat the coconut oil.
Add the curry leaves, shallots, garlic, ginger and green chilly. Saute till the onion becomes a light brown and the garlic and ginger no longer smell raw. About 3 to 5 minutes on medium flame.
Add the turmeric powder and cook till the raw smell from the turmeric disappears.
Reduce heat a bit and pour in the yoghurt mix.
Keep stirring continuously till the yoghurt heats up, but don't by any means let it boil, or the yoghurt will split.
Also, make sure the pan is not really hot or else when you pour in the yoghurt it will split immediately.
Lift the spoon in between and if you can see steam lift off the spoon then the yoghurt has warmed through.
Transfer to a serving bowl immediately.

In a small pan, heat the oil. Keep it on medium heat.
Add the mustard seeds and once they crackle add all the other ingredients one after the other. Keep stirring and making sure the spices don't burn, but at the same time the spices shouldn't be raw.
Pour over the yoghurt, mix well and keep covered for about 5 minutes before serving with rice.

Notes: The yoghurt thickens as its sits, loosen with a wee bit of warm water if it really becomes too thick.
If your moru curry doesn't look yellow enough, you can add a bit of turmeric along with the tempering ingredients.
If you feel there isn't enough salt, you can add it in at the very end as well.
Do not warm the curry in a microwave, instead take it out of the refrigerator an hour or so before serving. Make the rice really hot, so it doesn't feel unpleasant to eat the cool curry.
I do have another similar version here

Thursday, 24 August 2017

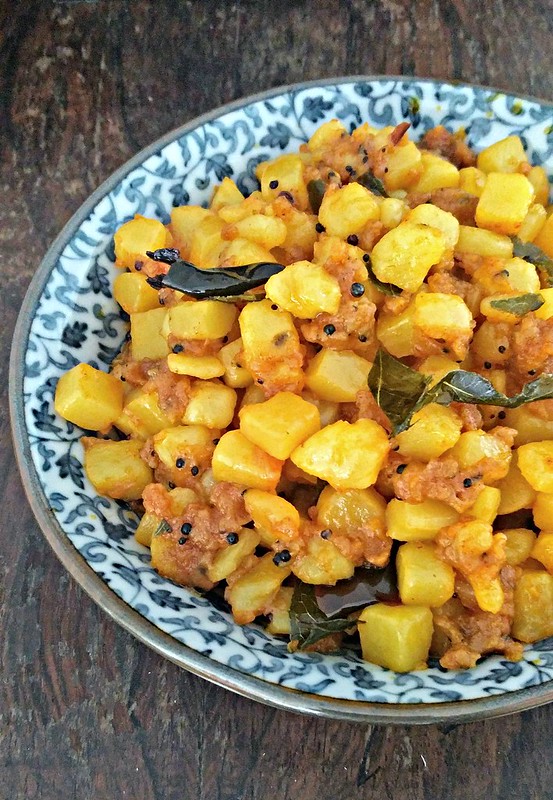
Simple potato fry

IMG_20170823_j163215 
My mum makes this potato fry back home and its so so tasty, i can eat just that and rice and be content. Its a very simple recipe with not a lot of ingredients but you will need patience to make it, as it needs a wee bit of slow roasting. 

Serves 3-4 as part of side dish
Potato- 2 large, peeled and sliced into small cubes
Coconut oil- 2 tbsp
Mustard seeds- 1/2 tsp
Dried red chillies- 3
Curry leaves- 2 sprigs
Kashmiri chilli powder- 1 1/2 tsp
Turmeric powder- 1/2 tsp
Water- 1/4 cup
Salt- to taste

Slice the potatoes into small cubes. The trick here is to try and get them all as uniformly as possible. My mum cubes them much smaller which is even better.
Heat coconut oil in a frying pan and splutter mustard seeds followed by dried red chillis (break them in half) and curry leaves. 
Keeping heat on medium low, stir for a few seconds and then add the potato.
Saute well with the infused oil, preventing the potato from sticking to the pan.
Add the chilli powder, turmeric powder and salt and mix well with the potatoes, making sure they are all coated well with the masala.
Pour in water, give a final stir and close with a lid. 
Cook on medium/low heat, stirring in between carefully without breaking the potatoes.
Once they are partially cooked, open the lid and continue cooking till the water evaporates and the masalas are dry and coats the potato. 
On medium low heat again slow roast it, till the sides of the potatoes slightly crisp up. It takes a while, but don't skip this step as that's what makes it taste so much better. Scrape the base of the pan to get all the masalas off it.
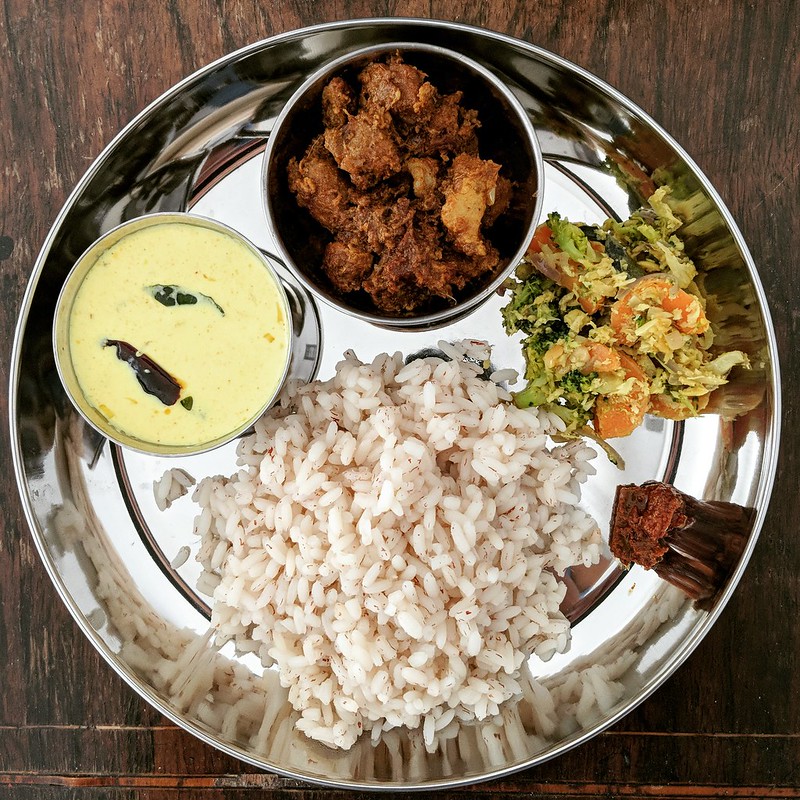
Serve with rice, moru kachiyathu and pappadam.

Notes: Be extremely careful while saunteeing the potatoes as they will easily break and become a mushy mess.
You can add a tsp of coconut oil and curry leaves towards the end for some extra taste, but i avoided it.
Coconut oil imparts that gorgeous taste, so do try with it or a mix of coconut and vegetable oil at least.

Saturday, 25 March 2017

Kerala Kozhi peralan

IMG_3495  
There are loads of ways to do the quintessential Kerala chicken peralan (a semi gravy of sorts), but i find this method the easiest. Sure its not a one pot prep, but a really quick one with the aid of pressure cooker. 

Serves 2 as part of main meal (Recipe loosely adapted from The Suriani Kitchen by Lathika George)
Chicken- 500 gms (Bone in pieces. Here I've used chicken thighs)

To marinate
Chilli powder- 1/2 tsp
Coriander powder- 1/2 tbsp
Turmeric powder- 1/4 tsp
Pepper powder- 1/4 tsp
Ginger garlic paste- 1/2 tsp
Lime juice- 1/2 tsp
Salt- to taste
Curry leaves- a sprig

Oil- 2 tbsp
Curry leaves- a sprig
Onion- 1 medium, finely chopped
Garlic- 4 pods, finely chopped
Tomato- 1 small, finely chopped
Thick coconut milk- 1/4 cup
Garam masala- 1/4 tsp
Pepper powder- 1/4 tsp
e8746935-c7fd-4981-acec-e51a65f5a87e
Marinate the chicken with all the ingredients under the marinate section for about half an hour.
When ready to cook, transfer to a pressure cooker , add a sprig of curry leaves and 1/2 cup water and cook on medium heat for about 15 minutes. 
You basically pre-cook the chicken till done (its also OK if its not completely cooked, as you can finish off the cooking in the next few steps, but it would help cut down on time significantly if the chicken is fully cooked).
Open the cooker lid once the pressure has released and keep aside. There should be about 1/2+ cup of gravy in the cooker. 

In a large frying pan, heat the oil and fry the curry leaves for a couple of seconds.
Into it add the onion and garlic and continue cooking till the onion has wilted and turns golden brown.
Toss in the tomato and cook till the oils start to surface.
Pour in the gravy from the chicken along with the coconut milk and bring to a good boil. If you do think the gravy is too much, then cook to almost 1/2 a cup and then only add the chicken.
Once it becomes thick, like it coats the back of a spoon consistency, add the cooked chicken and mix it all well. 
Cook for a further 5 to 7 minutes, or till the gravy completely coats the chicken pieces. Keep doing this on medium heat without the gravy getting burnt or stuck to the base of the pan. If you feel the chicken hasn't been completely cooked in the pressure cooker, then of course keep cooking till its done at this point.
Sprinkle the garam masala and freshly ground black pepper, give one final stir, and take it off the heat.
Cover and keep till ready to serve.
This chicken preparation is best with steamed rice, thoran and parippu curry.
995b938f-e64b-4872-81f5-6cac6e0047c5
Notes: You can of course do the entire prep in the frying pan without precooking the chicken. Add the chicken after the tomato along cook till done. Then add the coconut milk and cook till the you get the semi gravy consistency. 
This dish doesn't have a lot of gravy and so best had with a gravy accompaniment.
That said, if you did want a little more gravy, then don't dry off almost all of the liquid, but keep enough to use as gravy. You can add more coconut milk also to get a thick gravy.

Wednesday, 22 February 2017

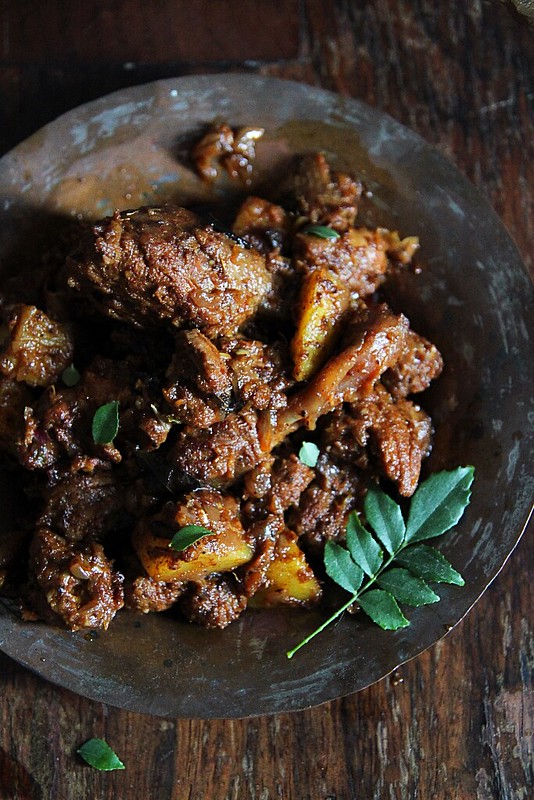
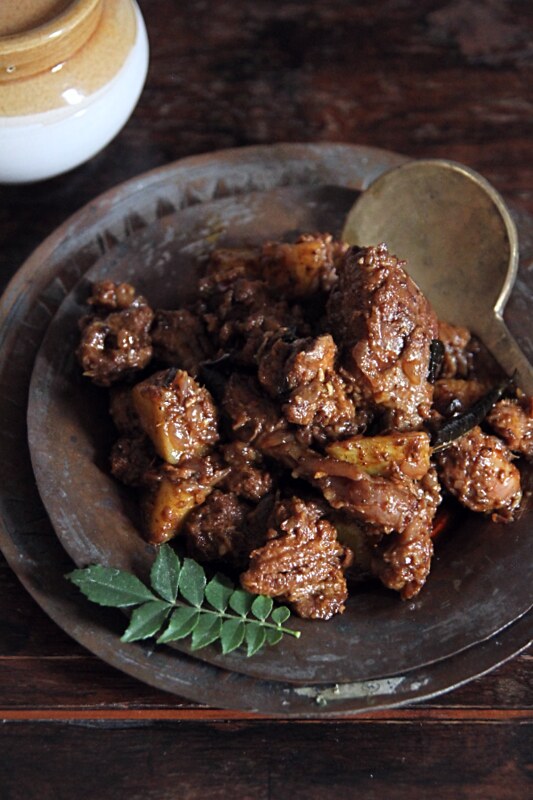
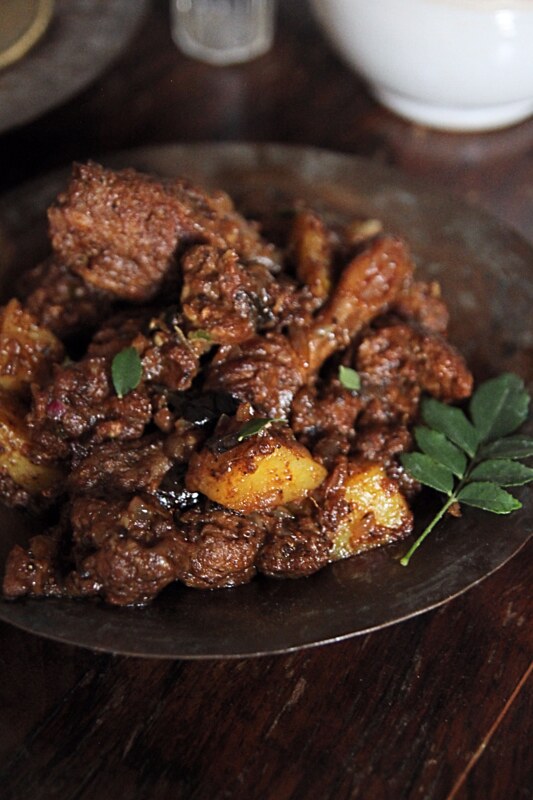
Kerala duck roast

3ac4bc99-41eb-4950-8b50-1e571da58666 
Serves 3 as a side (Recipe loosely adapted from Flavours of the Spice Coast by Mrs. K M Mathew)
Duck legs and thighs- 500 gms (with skin on)

To marinate and pre-cook
Coriander powder- 1/2 tsp
Chilli powder- 1 tsp
Turmeric powder- 1/4 tsp
Ground pepper- 1/2 tsp
Fennel seeds- 1/4 tsp
Cinnamon- 1 inch 
Cloves- 4
Cardamom pods- 2
Vinegar- 1/2 tbsp
Ginger- 1 inch piece, peeled and roughly chopped
Garlic- 4 pods, peeled and roughly chopped
Salt

For the roast masala
Oil- 1 tbsp (coconut oil is ideal)
Shallots/ small onion- 1/2 cup, finely chopped
Curry leaves- 1 sprig + a few to sprinkle
Ginger- 1 inch piece, peeled and grated
Garlic- 4, peeled and grated
Green chilly- 1, slit
Chilly powder- 1/2 tsp
Ground black pepper- 1/2 tsp + 1/4 tsp to sprinkle
Coriander powder- 1/2 tsp
Salt- to taste
Potato- 1 large, par boiled and cut into big chunks
Thick coconut milk- 1/4 cup
080a7656-7757-4568-b815-cfbf74dbf47d
*Please do refer notes before you get started.

Grind together all the ingredients under the 'marinate' section. It wont be smooth and paste like, but its ok to add a wee bit of water and make it into a paste like consistency if you prefer that for marination. 
Marinate the duck with the ground mix and keep aside for about half an hour or till you prepare the masala for the roast.

Peel and par boil the potato chunks and keep aside. I did this in the microwave.

When ready to cook, transfer the marinated duck along with 1 cup of water to a pressure cooker and cook for about 15 to 20 minutes.
Wait for the pressure to release on its own. Open the lid, and if there is more than half cup of liquid, put the cooker back on high heat and boil away some of the liquid. You should have a thick gravy.
Keep aside till ready to use.
788f35b3-8ada-4085-a237-e08d9fc8410a
Heat oil in a heavy bottomed pan and sautee the shallots with curry leaves, ginger, garlic and green chillies.
Cook till the onions turn golden brown.
Throw in the chilly, coriander and pepper powder along with salt, and continue sauteeing for a few minutes till the raw smell of the masala disappears. If you think its sticking to the bottom, then add a teaspoon or two of water and mix well.
Pour in the cooked duck meat along with all the juices, and the par boiled potatoes into this mix and on medium heat roast it all together for about 10 minutes, stirring at intervals. Make sure you dont break the meat or the potatoes.
Add the thick coconut milk and continue to roast on low- medium heat till all the gravy sticks to the meat pieces and the oil starts to slowly separate.
Add the 1/4 tsp ground pepper and some fresh curry leaves, give one final mix, switch off heat and cover and keep for about 15 minutes.
Best served with rice, appam, idiappam or porotta.
66b21319-5eaa-4fbc-8ac9-85f28f73cee2
Notes: I sliced the leg and thigh pieces into smaller portions and used for this prep.
I was a bit wary of the game-y taste that duck meat usually has and so i washed the pieces in a bit of lime juice and yoghurt, drained and then continued with marination. Of course this step is purely optional.
You can of course slow cook the duck in a heavy bottomed pan, but i pressure cooked it for convenience.
If you are in doubt about the pressure cooker timing, then keep releasing pressure and checking the meat by trying a small piece. If they are not chewy and easily fall off bone consistency you are good to go. If not put it back on and cook for 2 more whistles, check again and proceed. Dont under cook it or else it would be chewy. Over cook it and it shreds. It definitely takes more time than chicken but similar to that of mutton, in terms of cooking times.
For some gravy, add 1 cup water along with the coconut milk, but dont bring to a boil. Continue cooking on medium till the oil gets visible. If after cooking the duck there is enough liquid, then you can use that instead of adding the water with the coconut milk.
Its a roast that is medium spiced. Add one or two chillies more for that authentic spice kick this curry deserves.
I used my Le Creuset cast iron dutch pan for this prep and i cant stress how wonderfully it worked.

Sunday, 12 February 2017

Kerala Tuna thoran

Tuna thoran (serves 4 as part of a main meal)
IMG_20170212_153914

A staple in most of the Kerala households, a thoran is nothing but a vegtable of choice cooked with basic ingredients like turmeric and chilli and finished off wwith freshly grated coconut that takes this dish to its delicious level. Mostlly had as a side to rice.
PS: Made in a Le Creuset shallow casserole.

Coconut oil- 2 tbsp
Mustard seeds- 1/2 tsp
Dried red chillies- 2
Curry leaves- a sprig
Shallots- 1/2 cup
Ginger- 1 tsp, grated
Garlic- 1 tsp, grated
Green chilli- 1, slit
Red chilli powder- 1/2 tsp
Turmeric powder- 1/4 tsp
Meat masala- 1 tsp
Ground pepper- 1/2 tsp
Garam masala- 1/4 tsp
Salt- to taste
Canned tuna- around 250 gms (2 cans), drained
Grated coconut- 1/4 cup

Heat oil in you frying pan and add the mustard seeds.
Once they splutter add the red chillies and curry leaves, stir for a second and then throw in the shallots.
As soon as the shallots become slightly brown, add the green chilli, grated ginger and garlic and continue to cook till it no longer tastes raw. 
Add all the masala powders and salt to taste and stir it all together and cook till no longer raw.
Stir in the tuna and cook on medium heat for about 5 to 6 minutes.
If it becomes too dry, mix in a spoon or two of water.
Finally add the grated coconut and cook for a further 3 to 4 minutes, just to get the flavors in.
Turn off the heat, close with a lid and keep aside for 5 minutes.
Serve as a side to rice, roti or even as a sandwich filling (its great with mayo).

Tuesday, 24 November 2015

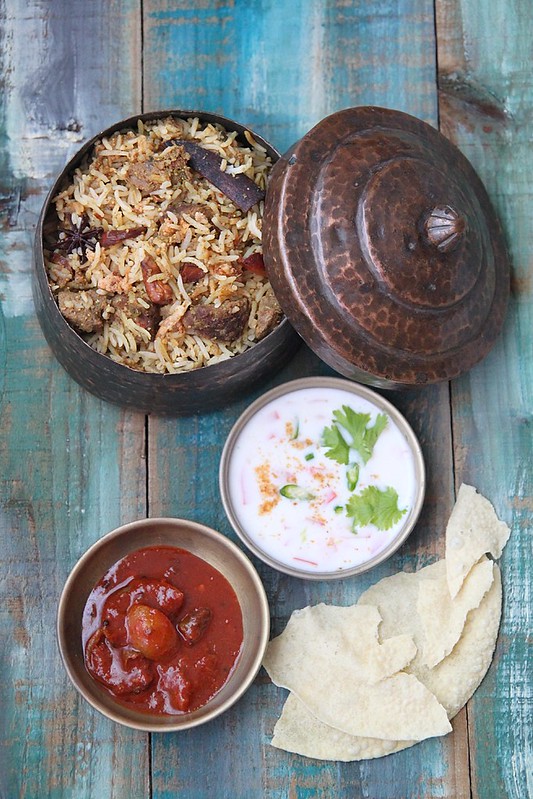
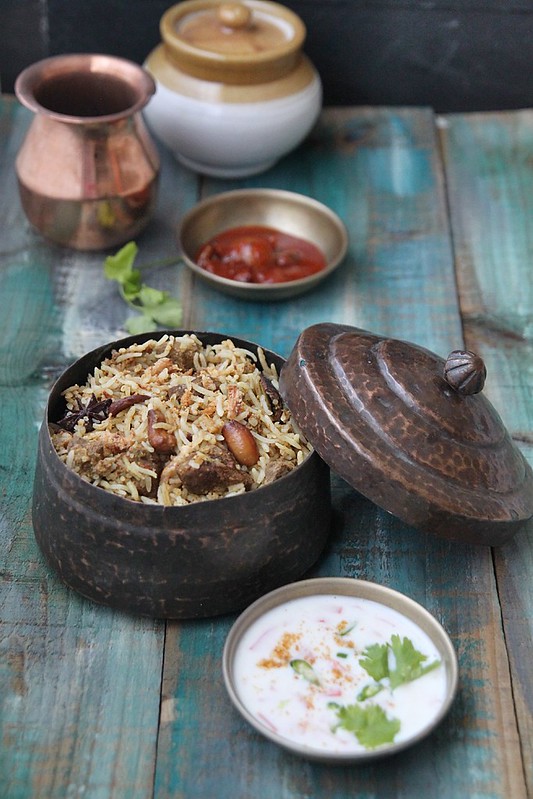
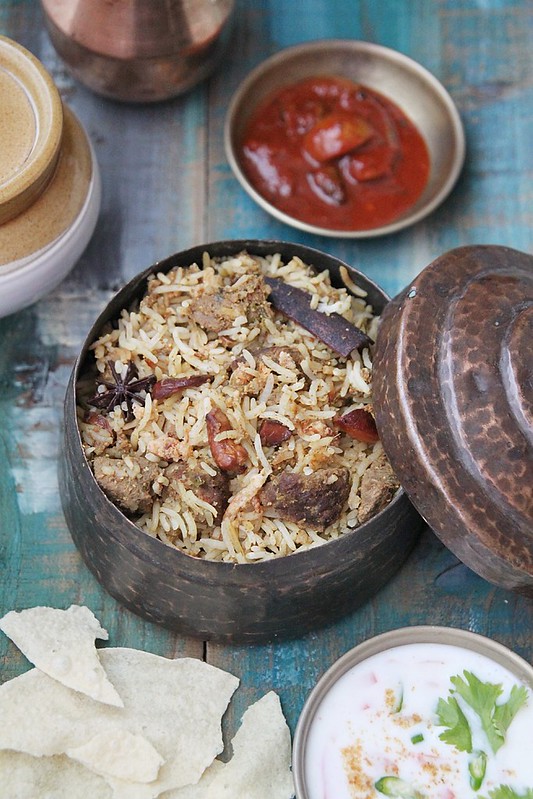
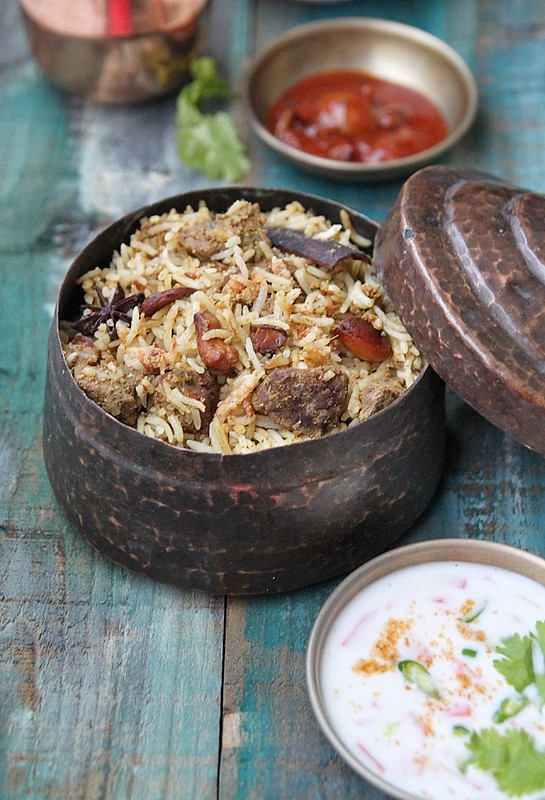
Kerala beef biryani & Christmas traditions

IMG_8836 
Christmas is a month away- A MONTH AWAY- can you believe that?
Its too early to whine about resolutions and how fast this year went by,which i shall keep for my New Year post, so lets talk about food, and Christmas family traditions.

Christmas is a big deal for us back home, something i thoroughly miss after we moved to UK. Although we have tried to do something or the other on Christmas day with friends who are around, its never the same without family. Christmas was spent with cousins and aunts and uncles and started pretty early with a church service at the wee hours of the morning. Droopy eyed we'd still go to church without much fuss because we know we'd get to open presents after. After church we'd all go over to my paternal grandparents house where my grand mother would have prepared a breakfast fit for the kings. But before we sat down to breakfast we'd open all our gifts, which of course was the most favourite part. Breakfast would be elaborate with a Kerala special called appam (hoppers as its commonly known here) served with chicken or mutton stew and there would also be loads of sides like boiled eggs, steamed plantains and this and that. I cant ever remember my grand mother entertaining guests with just two or three dishes, she'd go all out, and every one of them delicious.

We'd have relatives or friends dropping by and they would all be given fruit cake (equivalent of the Christmas pudding) and home made sweet sweet wine. Lunch would follow soon after with a biryani and a side of raita, pappadum, cutlets (croquettes), fish fry etc etc. All home made. It would stretch on for a couple of hours, with non stop banter, Christmas carols in the background, and finally end with dessert which would either be a payasam (which is a sweet milk pudding with vermicelli) or caramel custard or something similar. We'd all be stuffed by then and would be calling dibs on which sofa or bed we'd want to plonk on.
IMG_8804 (1) 
These are all such fond memories of home during Christmas. Its not the same now. Of course the appam and the biryani's are all very much omnipresent, but its no longer a big gathering with cousins and family as we are all spread around the world now. I feel terribly home sick around Christmas time and give Ro quite a hard time about it.

Beef biryani is not something that is made on Christmas day- its usually a chicken or a mutton biryani- but i thought I'd give a twist to tradition with a beef version, which is just as good. The recipe may look long and a bit intimidating for first timers, but its actually not that cumbersome, especially if you manage to make the beef curry a day or two in advance. Do read my notes.

Every family has a Christmas tradition, but if you are looking for something different this time around, then check out the Waitrose Christmas page which has a round up of traditions from around the world accompanied by recipes (Mixing Gorgonzola cheese with Prosecco, now that's a combination i thought never existed!).

Food, in the end, in our own tradition, is something holy. Its not about nutrients and calories. Its about sharing. Its about honesty, its about identity.' Louise Fresco

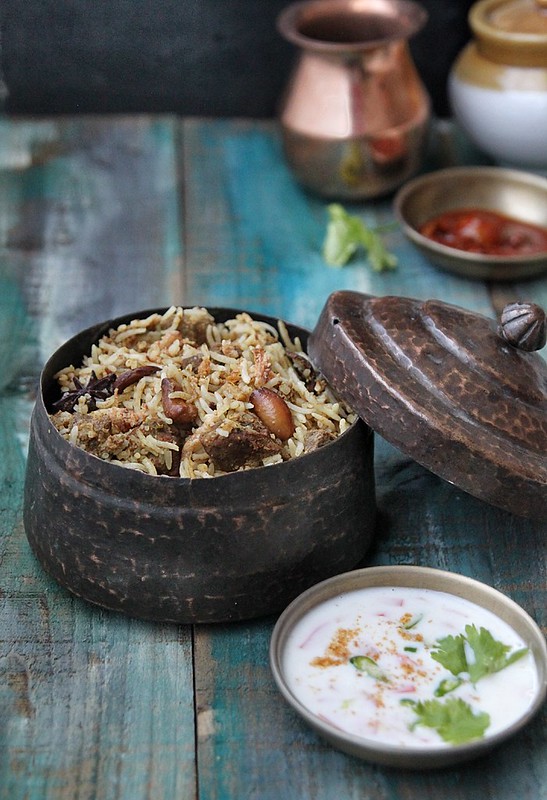
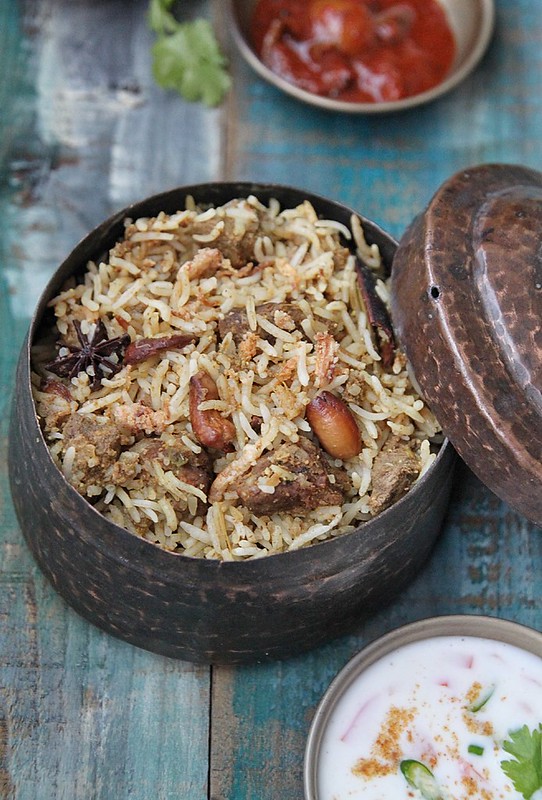
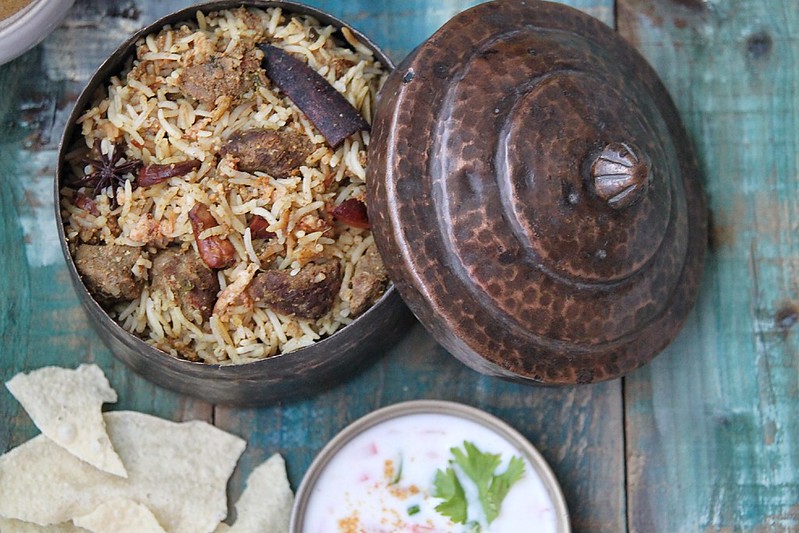
Kerala Beef Biryani (Serves 4 to 5 generously, as part of main) 
IMG_8848 
To marinate
Beef- 1 kg, diced
Turmeric powder- 1/2 tsp
Garam masala- 1 tsp
Pepper powder- 1 tsp
Yoghurt- 4 tbsp
Salt- to taste

For the masala
Oil- 2 tbsp
Onions- 2 large, roughly chopped
Curry leaves- 2 sprigs
Ginger- 2 1/2 tbsp, peeled and roughly chopped
Garlic- 2 1/2 tbsp, peeled and roughly chopped
Green chillies- 3 to 4 (increase or decrease as per tolerance level)
Tomatoes- 2, finely chopped
Garam masala- 1 tsp
Chilli powder- 1 1/2 tsp
Coriander powder- 2 tsp
Fennel powder- 1/2 tsp
Biryani masala powder- 1 tsp (optional)
Mint leaves- 1/4 cup, finely chopped
Coriander leaves- 1/2 cup, finely chopped
Water- 1/2 to 3/4th cup
Khus Khus (white poppy seeds)- 1 tbsp, soaked in water
IMG_8814
For the rice
Ghee- 2 tbsp
Cloves- 5 pods
Cardamom- 5 pods
Cinnamon- 2, 1 inch sticks
Star anise- 1
Bay leaves- 2
Basmati rice- 3 1/2 cups (I used Tilda long grain rice)
Water- 7 to 8 cups
Salt- to taste
Lemon juice- 1/2 tbsp

For garnishing
Ghee- 3 tbsp
Onions- 1/4 cup, julienned
Cashew nuts- 2 tbsp
Coriander leaves- 1/4 cup
IMG_8854
Marinate the beef with all the ingredients under the 'to marinate' section. Keep aside while you prepare the remaining ingredients.
Grind together the ginger, garlic and green chillies.
Soak the khus khus in water for about 15 minutes, and grind to a smooth paste. Keep aside.
Wash and soak the rice in cold water for about 30 minutes.
Also get the garnish ingredients ready by heating the ghee in a pan and frying the onions and cashew nuts, separately till they turn golden brown and crispy. Drain on paper towels and keep aside.

Into a pressure cooker pour the ghee. 
Keeping the heat on medium, add the chopped onions and curry leaves and cook till they turn a light brown in colour. This could take around 10 to 12 minutes.
Add the crushed ginger-garlic-chilli paste and continue cooking till the raw smell disappears.
Add the tomato and cook till they turn mushy and the oil starts to slightly separate.
Stir in all the spice powders- garam masala, chilli powder, coriander powder, fennel powder and biryani masala (if using).
Season with salt, saute for about 2 minutes, and then tip in the marinated beef and all its juices.
Add the mint and coriander leaves, give a good stir and then pour in about 1/2 cup water. 
Bring to a boil, and close the cooker.
Put the weights on once the steam comes and cook the beef on medium heat for about 4 to 5 whistles or till the beef is completely cooked.
Wait for the steam to die on its own and then open the lid.
If you feel the gravy is too loose, then slow cook it till you feel its thick-ish. Alternatively, if you feel there is not enough gravy then add some more water. Remember you need enough water to mix with the rice and make it moist.
Stir in the ground khus khus, check for salt, add more if needed and take the meat off heat.
IMG_8797 
While the beef is cooking get the rice ready.
In a large pot (enough to hold around 8 cups of water) heat the ghee.
Throw in the whole spices and sauté for a couple of seconds, just to get the aromas going, on medium heat. Put a kettle of water to boil at this point.
Add the drained rice and fry for a couple of seconds.
Add about 7 to 8 cups of water to the rice followed by salt and lemon juice. Stir well and wait for it to boil on high heat.
Once the water starts boiling, time it and cook the rice to an almost al dente form, for about 6 to 8 minutes maximum on a rolling boil.
Keep stirring in between, but make sure the rice doesn't break and get over cooked.
Drain immediately into a colander.

To assemble, smear the bottom of a large heavy bottomed pan with ghee. Use left over ghee from frying the cashew and onions.
Spread a layer of rice and then sprinkle half a tsp each of the chopped coriander leaves, fried onions and cashew over the rice
Top with a layer of the beef curry. Spread it out as gently as possible.
Tip in the remaining rice, spread it out and sprinkle the remaining biryani masala powder and coriander leaves. Continue the layers till you run out of both, but with the rice layer right at the top.
Close with a tight lid, making sure no steam escapes, reduce heat to the lowest possible and let it warm up for about 10-15 minutes.
When done, scatter around the remaining fried onions and cashews and serve hot with some raita, pappad and pickle.
IMG_8808 
Notes: The beef curry can be made a day or two in advance, refrigerated and used as required for the biryani. In fact its a better option because the curry would taste absolutely delicious once the masalas have caught on.
The rice i use got cooked to perfection in exactly 5 minutes, so keep a close watch and make sure you don't over cook it. If you can comfortable with the absorption method with the exact quantity of water used, please do that instead
It is a spicy one, so reduce the green chillies to 2 if you are not a spice fan. I used birds eye chilli
If you can get hold of beef on the bone, nothing like it. I shall do so the next time.
Instead of using the biryani masala powder you can also use normal curry powder in its place.
You can do the layering in the oven as well. Arrange it in an oven proof bowl and warm in an oven preheated at 150C for about 20 minutes.
Freeze the remaining biryani in a freezer proof container. To thaw, either transfer it to the top compartment of the fridge and let it thaw over night or take it out and leave on the counter for it to thaw by evening. Tip the contents into an over proof bowl and let it heat in an oven preheated at 200C for about 15 minutes. 
If you don't own a pressure cooker, you can slow cook the beef in a heavy bottomed pan till done. Just keep a check on it at intervals, keep stirring in between and add water as required.

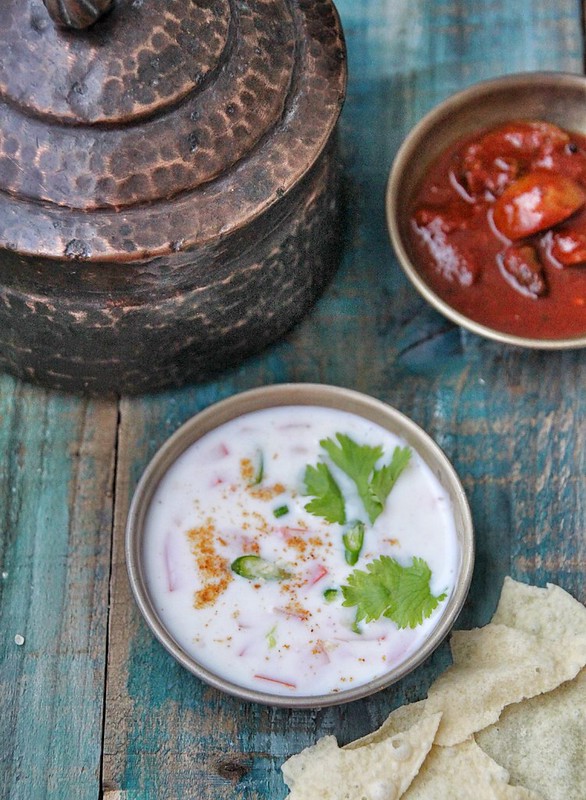
Tomato and shallot raita
IMG_8861 
Yoghurt- 1 cup
Green chilli- 1/2 of one, finely chopped
Chaat masala- 1/2 to 1 tsp + enough to garnish
Salt- to taste
Tomato- 1 small, finely chopped
Shallot- 1 small, finely chopped
Coriander leaves- 1 tsp

Add a few table spoons of water to the yoghurt and whisk to make it a bit loose.
Stir in the salt, chaat masala and green chilli
Add the tomato and shallots, give it a good stir and just before serving garnish with coriander leaves and a generous sprinkle of chaat masala.

With thanks to Waitrose online for sending me a Waitrose gift card which I used to purchase my ingredients. 

Wednesday, 17 June 2015

Curried prawn puffs

IMG_6629
When mallu's talk about puffs, there's always a nostalgic story attached to it- would have had it for tea after school, would be from a favourite bakery in the neighbourhood, was lovingly made by mom etc. I, have none of those memories!

I was not really fond of those bakery snacks except for a few and given a choice I used to prefer cupcakes, cookies and the like, which i think my mum also preferred making, not to mention she was great at it. So our tea time snacks were really innovative cakes, sandwiches, bakes, milkshakes etc etc. On those rare occasions my mum used to get vada or ethakka appam, I used to create such a fuss. Fast forward to about 20 years later and here I am in a foreign country craving the dry egg puffs we used to get at this bakery called Jayaram bakery in Trivandrum.

Karma is a bitch.
IMG_6562
So anyways, I couldn't just hop over to a bakery here and ask for egg puffs which meant i had to make it and make i did, plenty of times. I've since experimented with chicken, beef and prawn puffs and of the 4 the prawn being my favourite is making its way through to the blog after ages. It tastes good, is perfect with tea and freezes well. Sold!

Recipe has been adapted from Shabs, whose prawn filling is one I've tried lots of times and its so versatile and can be used as a filling for anything and everything and also tastes great with rice and rotis. I prefer making them with the tiny prawns as i feel they taste glorious.

Makes 8
IMG_6596
Prawn (the small variety)- 200 gms
Kashmiri chilli powder- 1 1/2 tsp
Turmeric powder- 1/4 tsp
Salt- to taste

Coconut oil- 2 tbsp
Onions- 2, finely chopped
Garlic- 5 cloves
Ginger- 1 tbsp, roughly chopped
Green chilli- 2
Turmeric powder- 1/4 tsp
Fennel powder- 1/2 tsp
Pepper powder- 1/2 tsp
Garam masala- 1/4 tsp
Coriander leaves- 1/4 cup
Grated coconut- 1/4 cup
Salt- to taste

Ready rolled puff pastry- 1 sheet
Egg- 1 small, for egg wash
IMG_6622
Marinate the prawn with the chilli powder, turmeric powder and salt and keep aside while you prepare the rest of the ingredients

Heat oil in a pan and sauté the onions till they become soft and translucent.
Grind together the garlic, ginger and green chilli and add to the onion. Saute for a further 5 minutes on medium heat, or till the raw smell disappears.
Add the salt, turmeric, fennel and pepper powders and saute for a couple more minutes before adding the marinated prawns along with the garam masala, coriander leaves and grated coconut, and mix it all together.
Remember, prawn cooks really fast, so make sure you don't keep it on for too long.
Once the prawns are cooked and the flavours have all been infused, take it off the heat and leave aside to cool.

Pre heat the oven to 200C and line a baking tray with baking paper
Roll out the puff pastry into a rectangle sheet.
Cut into half and divide the pastry into 8.
Take a tbsp of the prawn filling and place into the centre of each cut pastry sheet.
Wet the edges with water lightly and seal the pastry properly.
Place on the baking tray and do an egg wash and bake for about 15 minutes or till the pastry has become golden brown.
Remove from oven and leave aside to cool for a couple of minutes before digging in.
IMG_6641 
Notes: I have made the same using 1/4 cup thick coconut milk instead of the grated coconut and must say the coconut milk won with regard to taste. The grated coconut however lends a bite.
My oven gets really hot so it was done in about 13 minutes and as you can see i ended up browning them a bit too much.
Use shredded chicken for a chicken version.
They freeze really well, do it before the egg wash (clearly!). and then dont even thaw, just do the egg wash and bake. Of course it will need to be in the oven longer.

Thursday, 26 September 2013

Fish Molee

IMG_0629
This post was supposed to go up on Monday, but like everything else in my schedule, this one also got postponed. Life has suddenly become chaotic. From not doing anything at one point, to coming back home tired after a back breaking day of baking is something I'm truly enjoying, (sans the back aches of course), but in the process I've neglected the blog and have just not been able to blog hop as well. Thanks to all you guys who still manage to stop by and put in a few comments, I promise il come visit you all soon.

Its also been ages since I've actually cooked something nice and even worse, styled and photographed. I'm off to Paris this weekend with a couple of friends and hope to come back with loads of pictures and fun stuff. Its going to be a total foodie adventure, and so I'm thoroughly looking forward to it. Once I'm back, I promise I'll whip up something nice for the blog and make a deal of it here. So till then, here's the simplest fish curry I've ever made...Fish Molee/Molly.

Recipe adapted from Flavours of the Spice Coast by Mrs. K M Mathew
IMG_0638
Fish fillets- 250 gms, sliced (I used Tilapia fillets)
Pepper powder- 1/2 tsp
Turmeric powder- 1/4 tsp
Oil- 2 tbsp
Onions- 1 cup, finely chopped
Green chilli- 2, slit
Garlic- 1 tsp, crushed
Ginger- 1 tsp, crushed
Pepper powder- 1/4 tsp
Thin coconut milk- 1 cup
Tomato- 1 small, cut into 4 (i used a couple of baby tomatoes)
Curry leaves- a sprig
Thick coconut milk- 1/4 cup
Salt- to taste
IMG_0643 
Marinate the fish with pepper, turmeric and salt and keep aside for about 10 minutes.
Heat enough in a pan and shallow fry the fish till just cooked, about 1 or 2 minutes. Drain on paper towels and keep aside
Heat oil in a pan and saute onions and green chillies. Cook till the onions have wilted and turns a golden yellow.
Add the ginger and garlic and continue cooking till the raw smell disappears.
Stir in the pepper powder and salt, followed by thin coconut milk and wait for the milk to simmer gently.
At this point add the fried fish and let it cook completely, with the gravy getting thicker and coating the fish.
In goes the tomato and curry leaves. Stir them in and cook till the tomatoes are done.
Finally, add the thick coconut and cook on low heat for a few more minutes and take it off flame.
Serve hot with appam, bread or even rotis.
IMG_0632
Notes: The curry is not really spicy, so i will increase the number of chillies to 3 or maybe even 4
It somehow tastes even more fab the next day :)
Any fish of choice can be used. I have tried it with prawns and its yumm

Friday, 23 August 2013

Beans thoran and Mooru kachiyathu

IMG_8429
I decided that this year was going to be the year I learn how to make all those sadya dishes that I see around all the blogs and draft it here..maybe I'll have them all documented in time for onam and make a feast. That's highly unlikely, but its nice to think I may do it.

A friend of ours was relocating to India (a while back) and we decided to do a session at ours before she left. The husband decided to cook crab and for the two of us in the gang (yes me and this other friend) who didn't eat crab, I made beef fry. I actually suck at making mallu food which is why I rarely make them when I have people over. Even something as simple as a moru kachiyathu I can ruin, leave alone avial and such. But with crab masala as a main dish, I had no choice but to do a mallu centred meal. It was an elaborate two day expedition and the final outcome..was just about average I would say. Not even close to what my mother-in-law in Kottayam makes (on a regular basis).

The reason I'm posting two really simple recipes here is because each time I need to make these, I have to open recipe books and blogs and do searches and stuff. This way, I can just fall back on my blog and not waste time. That said, I still do end up searching for different versions of the same and pinterest-ing for photography inspiration. Do the same preparation with kale, Brussels sprout, asparagus etc. 

Beans thoran (beans sauteed with a spicy coconut mix)
IMG_8413
Grated coconut- 1/2 cup
Cumin seeds- 1/2 tsp
Turmeric powder- 1/4 tsp
Green chilli- 2, slit
Small onions- 2 to 3, roughly chopped
Garlic- 2 cloves, optional
Oil- 2 tbsp
Mustard seeds- 1/2 tsp
Curry leaves- 2 sprigs
Dried red chilli- 2
Green beans- 250 gms, finely chopped
Salt- to taste
Water- 1 tbsp

Into a grinder throw in the grated coconut, cumin seeds, turmeric powder, green chilli, small onions and garlic. Pulse once or twice, just to mix it well and don't grind to a paste. Keep aside.
Heat oil in a heave bottomed pan and splutter mustard seeds.
Throw in curry leaves and dried red chilli and saute till they turn slightly crisp.
Add to it the coconut mix and saute for about 2 to 3 minutes, just to get rid of the rawness.
Finally, add the beans, salt and water, mix tem all together, close with a tight lid and cook on medium-low heat for about 7 to 10 minutes. I like it a bit crunchy, so i don't cook it longer than that. But feel free to do so.
Turn off the heat and leave the pan closed till ready to use.
Serve with rice and mooru kachiyathu.

Moru kachiyathu (spiced buttermilk) Recipe adapted from here
IMG_8440
Mustard seeds- 1/4 tsp
Fenugreek seeds- a pinch
Curry leaves- a sprig
Dried red chilli- 1
Small onions- 2 to 3, roughly chopped
Ginger- 1 tsp, peeled and grated
Green chilli- 1, slit
Turmeric powder- 1/4 tsp
Salt- to taste
Oil- 1 tbsp

Whisk together the buttermilk with salt. Keep aside.
Heat oil in a kadai and splutter mustard seeds followed by fenugreek seeds.
Add all the remaining ingredients except buttermilk and sauté till the onions turn light brown.
Pour in the buttermilk, and on medium heat keep stirring till you see steam coming through the spatula. If you are not careful, the mix can curdle.
Serve hot.

Notes: If using yoghurt, dilute it with water to make a loose mix.

Monday, 27 May 2013

Netholi fry (Fried anchovies)

IMG_8338
I've been a bit busy (good busy) with work catching on and a cousin visiting from India. Its been quiet around here and I haven't really cooked that much or taken pics in a while. Its a long weekend here and for some strange reason, the weather has been great. We've been out enjoying the sun before the next set of rains and temperature drops happen. 
I made nethili fry a couple of weeks back with the intention of serving it as a starter for a party we threw at home. Since it was my first time with the fish, I decided to try it out a day before, just to see if it would turn out ok. It didn't. It went all soggy on me and I decided to not serve it at the party. Instead I just bought crisps :)

I have this thing against deep frying and after some helpful inputs from Ria, I decided to give it a shot again. I didn't deep fry it, instead shallow fried it. It does make a terrible mess (or maybe that's just me) and takes a tad longer than deep frying, but you do get crispy anchovies..the way its supposed to be. If cooked well, they are great to snack on and perfect with some cold beer. 

Recipe adapted from here and here (serves 2)
IMG_8359
Nethili- 250 gms, cleaned- remove head, tail and all the unnecessary inside parts
Lemon juice- 1 tsp
Salt- 1/4 tsp
Oil- to fry

Marinade
Kashmiri chilli powder- 2 tsp
Turmeric powder- 1/4 tsp
Fennel powder- a lil less than 1/4 tsp
Pepper powder- 1/4 tsp
Coriander powder- 1 tsp (optional)
Ginger paste- 1/2 tsp
Garlic paste- 1 tsp
Yoghurt- 1/2 tbsp (optional)
Curry leaves- a sprig
Salt- to taste
Marinate the fish with lemon juice and salt for about 5 minutes. This really gets rid of the fishy smell. Rinse well and keep aside.
Mix together all the ingredients for the marinade. If it is too dry, feel free to add a spoon or so of water to get a smooth paste. 
Do a taste test and add more salt or spice if required.
Add the fish to the marinade and mix well to coat the pieces well. Keep aside for about 15 minutes.
Heat the oil in a kadai or frying pan (enough to cover the base of the pan properly). It should be really hot, otherwise you will end up with soggy ones. 
Add the fish (in batches if required) and fry on both sides, till brown and crispy. Keep the heat on medium all through.
Remove the fish and the crispy curry leaves with a slotted spoon and drain on paper towels.
Squeeze a lemon over and serve warm.

Notes: The recipe can be easily doubled.

Saturday, 27 April 2013

Prawn pollichathu (cooked with spices in banana leaf)- A guest post for Manju's Eating Delights

IMG_8460 
Manju of Manju's Eating Delights and I don't go a long way back, but it feels like I've known her forever. I only recently started following her blog posts and I must say I'm hooked. We are facebook friends and needless to say, you invariably end up being a part of each others food journey, and even life. She's a pro at cake decorating (seriously, check out this Carousel Cake she made for a birthday) and is a friendly and cheerful person. I hope that some day I get to meet her in person and maybe even taste a dish or two made by her. While she's busy setting up her new home, I'm taking over her page today to share a lil something I made. 
IMG_8462
I am not too much of a seafood fan, or should I say, I WAS not a seafood fan, because these days I do indulge in a seafood of choice once in a while, which is mostly fish that is masala-fied so much it hardly tastes like fish. I know its sacrilegious to even say that, but sadly that's what works. Prawns are a different story altogether. I have never had an aversion to it, well, my husband would roll his eyes at this. But I can usually handle any prawn prep, except when its just boiled, like in a prawn cocktail. Ok fine, you can say I'm a fussy eater and a pseudo foodie :)
IMG_8480 
Coming to the prawn pollichathu recipe, its an absolutely delicious prep and a crowd pleaser. Don't be put off by the crazy list of ingredients, its really not that difficult at all. Banana leaves impart that special taste to the whole prep, but I understand that its not readily available everywhere. I myself usually just use aluminium foil in its place, but this time I wanted to give banana leaves a try and had to go all the way to the Indian store to get myself a batch. I cleaned and froze a couple of them in a zip lock bag for future use.

Hope you enjoy this mallu dish, and thanks to manju for having me over at her space. Check out the recipe here

Wednesday, 27 March 2013

Padavalanga mooru curry (Snake gourd and yoghurt curry)

IMG_7854
We love yoghurt. Period.
We almost always have a stash in the fridge and can easily go through a pot in two days. That said, I have never tried making yoghurt at home and have to depend on the store bought ones (which is not bad at all)

So when YoghurtDirect sent me the Easiyo yoghurt maker to review, I was excited. I'd never tried making yoghurt  at home and this was going to be fun. The yoghurt maker promises fresh yoghurt with three easy steps and makes use of the finest quality New Zealand milk powder, available in a range of plain and flavoured varieties (of course with varying or lower fat contents as well). The instructions were really easy to follow and on a cold night I set about making my first yoghurt.
25
From the two sachets I ordered, I tried the Full Fat Greek Yoghurt and kept the Sweet Forest Fruits sachet for another day. Followed the manual to the dot, kept it to set overnight and by next morn I had a kilo of perfectly set Greek yoghurt. The yoghurt turned out exceptionally thick and creamy and the slight sourness reminded me of the curds you get back in India, perfect for those south Indian curries. 

Its a no mess, no fuss system and I would think, much more economical than buying store bought yoghurt. The fact that the sachets can only be picked up online is a bit of an issue for me- the non planner that I am, I would invariably end up forgetting to order them and will have to head over to the nearest store to buy yoghurt when in need. If the online store is not an issue, I think Easiyo is a really good addition to your kitchen. 

We enjoyed half of the yoghurt on its own, and the other half, I used for a "mooru" curry (yoghurt based curry) which turned out really nice. 

Recipe adapted from here
IMG_7894
Yoghurt- 1 1/2 cups (beaten well)
Water- as required
Salt- to taste

Snake gourd (padavalanga)- 1 cup, peeled cleaned and diced
Turmeric powder- 1/4 tsp
Chilli powder- 1/2 tsp
Water- 1/2 cup

To grind
Dessicated coconut- 1/2 cup
Green chilli- 1, roughly chopped
Cumin seeds- 1/2 tsp

Tadka
Oil- 1 tbsp
Mustard seeds- 1/4 tsp
Fenugreek seeds- 1/4 tsp
Curry leaves- a large sprig
Dry red chillies- 2 to 3
IMG_7847
Beat the yoghurt with enough water and salt to make it lump free. It shouldn't be too thin. Keep aside.
In a saucepan mix together the diced snake gourd, turmeric powder, chilli powder and water and cook covered over medium heat till the vegetable is done. A fork should easily break through the flesh. 
While that's taken care of, grind the coconut, green chilli and cumin seeds in a coffee grinder to a coarse paste. Add a tsp or two of water if required.
Once the snake gourd is done, reduce heat to low and add the ground coconut mix.
Stir it all together and cook for a further 5 minutes.
Take the pan off heat and keep aside to cool for a couple of minutes (around 7 to 10 mins).
Add the beaten yoghurt and stir well to combine. 
Do a taste test and add more salt if required.
Do a tadka by heating oil and adding all the ingredients to it once the mustard starts to crackle.
Pour over the curry, give a good mix and serve warm with some rice, pappad, fish fry and pickle :)

Notes: The snake gourd can be replaced with the Indian cucumber or ash gourd.
Of course you can omit the coconut mix and instead just add some chopped onions and ginger to the tadka and pour over the curry for a different, but just as good, version.

With thanks to YoghurtDirect for sending me the Easiyo yoghurt maker to review.

Friday, 1 March 2013

Kerala kappa masala (Tapioca masala)

IMG_7011
In my mind I keep thinking I have loads of time and think of taking part in all these cook outs and blog events and such. But then in reality, I am either busy with something or the other or lazy. Being a hard core mallu, I am ashamed at the low number of mallu recipes from down south. Even though I don't make mallu food that often, it is definitely a favourite of ours and I really wished I knew how to make those authentic dishes.

That's when Kerala Kitchen, this group I'm part of on Facebook, decided to do a cook out together. I decided it was the best time to learn some new dishes, and feed my mallu-food-deprived blog some fab dishes from the mother land. But as usual, I waited till the n-th minute to post it. But better late than never right? So here I am with a very popular dish from Kerala- tapioca. Since I couldn't get hold of fresh tapioca, I had to make do with the frozen one. Its not that bad, but if you get fresh ones, that's the best.
IMG_7027
The husband loves it to no end, but not in the mashed sort of way, just boiled and served with some spicy onion-chilli chutney. I on the other hand, am not that big a fan of it, but if I do have it, I prefer the mashed one with coconut and such, served with some spicy curry. This prep. is new to me, and since it is very close to the one I prefer, i loved it. I paired it with a fish curry and dinner was sorted. Thanks Nags for the simple, but tasty recipe. 

Recipe adapted from Edible Garden (serves 2)
Tapioca- 500 gms
Garlic- 5 to 6 cloves
Dry red chillies- 2
Mustard seeds- 1/2 tsp
Curry leaves- a sprig
Turmeric powder- 1/4 tsp
Oil- 1 tbsp
Salt- to taste
IMG_7014 
Cook the tapioca till tender. A fork should easily cut through. I pressure cook it with some water for about 10 to 12 minutes. Lightly break/ mash the pieces. (Not too smooth like mashed potato though)
In the mean time, coarsely grind the garlic and red chillies in a spice grinder or with a pestle and mortar.
Heat the oil in a kadai and splutter mustard seeds and curry leaves.
Add the ground mix along with turmeric and cook for a couple of minutes, for the raw taste to disappear.
Tip in the cooked tapioca and enough salt, stir it all together and cook for a couple more minutes, just to heat through the tapioca.
Take it off the heat and serve with your favourite curry or chutney

Monday, 25 June 2012

Malabar chicken biryani

IMG_2689
I am not sure if I have mentioned this before, but I love biryani, in any form that is. Even if its a horrible one, I can pretty much enjoy it with gusto which actually doesn't make me the best judge of a biryani, but surely I can say the difference between a good one and a bad :)

I have been wanting to make a Thalassery/ Malabar biryani for a long time now, and last weekend I was finally able to do so. Thanks to experts from the region, like Shab, a quick text to her and she gave me detailed instructions as to how to go about it. I am very pleased with the way the biryani turned out and like I mentioned before, I am a sucker for any kind of biryani and this was no different. If you insist I still give you a verdict, I'd say I prefer biryani's with some more masala and such, unlike this one which uses very little of the masala's. I understand that in the authentic Thalassery biryani, the only masala used is the special garam masala mix and nothing else, which is also the reason behind the biryani colour I suppose (did I just comment on the biryani colour?????). Also a special type of rice called the Jeerakashaala is used for the authentic Thalassery biryani, something I couldn't get my hands on, but basmati rice worked just fine.

The chicken masala was so good on its own, if it wasnt for my enthusiasm to make the biryani, I would have just said, ok its rice and chicken curry for lunch. I would have to give the chicken curry a go some other time, because it seemed  like a perfect curry for chapathis and such. Now before going on to the recipe, I am not claiming it to be the authentic way (before the blog police heads here and leaves nasty comments)- although authentic is a very strong word and different people have different definitions of it. The biryani was spectacular and thats what matters. Both of us enjoyed it to the last bit.

Taking pics of awesome smelling food, especially when you are hungry, is quite torturous and so I haven't really done justice to how great it actually is, so pardon the pics.

Recipe adapted from here and here
IMG_2703
For the chicken masala
Chicken- 500 gms (cleaned and cut into medium size pieces)
Ginger- 2 inch piece, peeled and roughly chopped
Garlic- 10 pods, peeled
Green chillies- 3
Lemon juice- 1/2 tbsp
Fennel powder- 2 tsp
Onions- 2 medium ones, chopped fine
Tomato- 1, chopped
Pepper powder- 1/2 tsp
Chilli powder- 1 tsp
Turmeric powder- 1/2 tsp
Coriander powder- 1 tbsp
Cumin powder- 1 tsp
Garam masala- 3/4 tsp
Coriander leaves- 1/4 cup, chopped fine
Mint leaves- 3 tbsp, chopped fine
Cashew nuts- 5 to 6
Coconut milk- 100ml
Oil- 3 tbsp
Salt- to taste

For the rice
Basmati rice- 2 cups, washed and drained
Cinnamon- 1 inch piece
Cardamom- 2 pods
Cloves- 2
Nutmeg- a pinch
Bay leaf- 1
Ghee- 1 tbsp, heaped
Water- 4 cups
Salt- to taste

For assembling
Biryani masala powder- 1 tsp 
Cashew nuts- about 6 to 7
Onion- 1/4 cup, julienned
Oil- enough to fry
Coriander leaves- 2 tbsp
IMG_2686 
Grind together coarsely the ginger, garlic and green chillies.
Marinate the chicken pieces with a quarter of the ground mix, lime juice, fennel powder and salt. Keep aside while you prepare the remaining ingredients. You can also marinate it in the refrigerator over night.
Soak the cashew nuts for the chicken masala in the coconut milk and keep aside.
Heat enough oil in a pan and fry the onions and cashew nuts (from the assembling bit) till they turn golden brown and crispy. Drain on paper towels and keep aside.

In a heavy bottomed pan, heat the 3 tbsp of oil. 
Add the chopped onions and the remaining ground mix and cook till they turn a light brown in colour. this could take about 10 to 15 minutes on medium heat.
Add the tomato and cook till they turn mushy and the oil starts to separate.
In goes the marinated chicken pieces and pepper powder. 
Stir in all together, close with a tight fitting lid and let the chicken cook on medium heat. 
Once the chicken is half cooked, add the chilli, turmeric, coriander and cumin powders. Stir well and continue till the chicken is fully cooked.
If there is too much water, leave the pot open and boil it off.
Grind the cashew nuts with coconut milk and add to the chicken once it is fully cooked, making sure the curry doesn't boil, but gently simmers henceforth. You should have a thick gravy by now. 
Also do the salt test and add more if required.
Finally mix in the chopped mint and coriander leaves and let the chicken simmer for about 5 more minutes. 
Then take it off the flame, sprinkle the remaining garam masala on top, close with the lid and keep aside to infuse flavours.
Before layering, give a good stir.

Get the rice ready, once the curry is taken care of.
In a large pan heat the ghee.
Throw in the whole spices and sauté for a couple of seconds, just to get the aromas going, on medium heat. Put a kettle of water to boil at this point.
Add the drained rice and fry for a couple of seconds.
Once the water has boiled, measure 4 cups and add to the rice.

Season with enough salt and close with a tight fitting lid.
Reduce heat to low and let the rice cook for about 10 to 12 minutes or till you can no longer see any water remaining and the rice is cooked but not mushy in consistency.
Remove pan from fire, open the lid and gently fluff the rice using a fork, making sure you don't break up the rice.
Transfer to a separate bowl immediately.
IMG_2694-1 
Assembling:
Smear the bottom of a pan with oil or ghee and place a layer of rice.
Sprinkle half a tsp of the biryani masala, half of the chopped coriander leaves, fried onions and cashew over the rice and top with the chicken curry. Spread it out as gently as possible.
Tip in the remaining rice, spread it out and sprinkle the remaining biryani masala powder and coriander leaves.
Close with a tight lid, making sure no steam escapes, reduce heat to the lowest possible and let it warm up for about 10-15 minutes.
When done, scatter around the remaining fried onions and cashews and serve hot with some raita, pappad and pickle.
IMG_2706 
Notes: Instead of using the biryani masala powder while doing the layer, you can also use garam masala in its place.
You can do the layering in the oven as well. Arrange it in an oven proof bowl and warm in an oven preheated at 150C for about 20 minutes.
You can make the chicken masala a day or two ahead in which case, the flavours would have infused better.
The chicken masala can be made in a pressure cooker to reduce cooking time. Although Shab advices against it.
Try the exact same recipe with mutton, if you prefer that.
Freeze the remaining biryani in a freezer proof container. To thaw, either transfer it to the top compartment of the fridge and let it thaw over night or take it out and leave on the counter for it to thaw by evening. Tip the contents into an over proof bowl and let it heat in an oven preheated at 200C for about 15 minutes.