Showing posts with label Beef. Show all posts

Tuesday, 11 February 2020

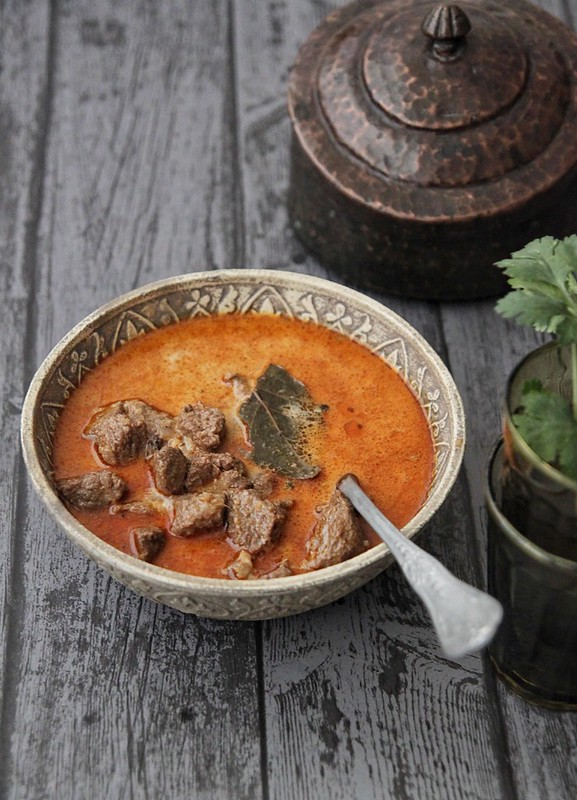
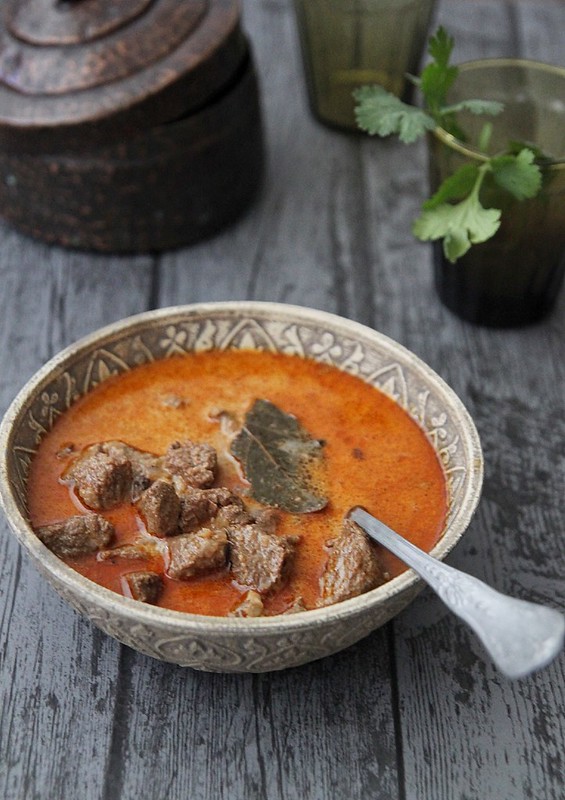
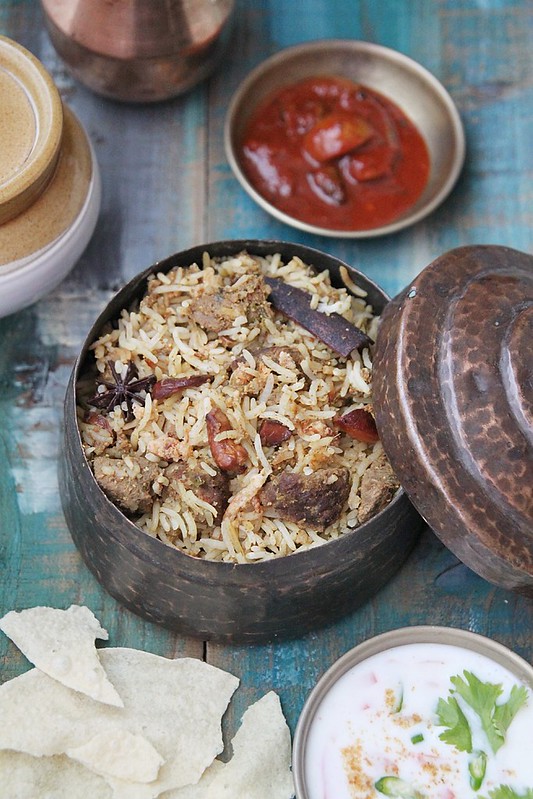
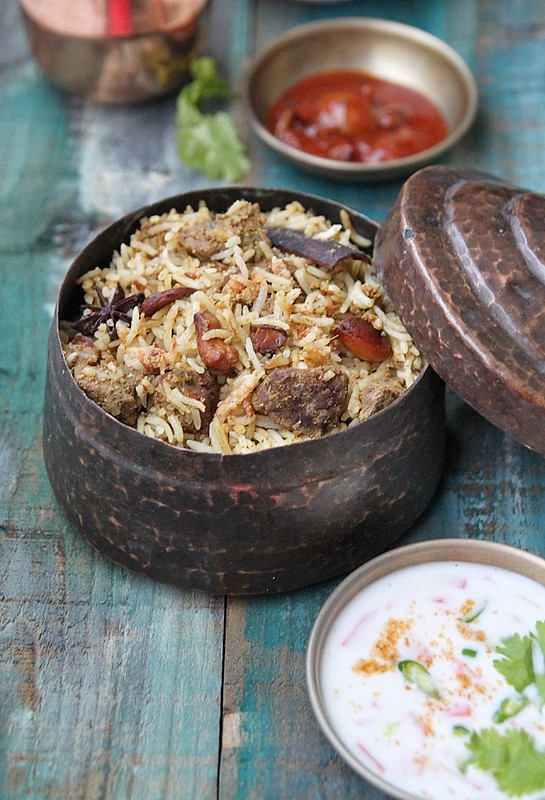
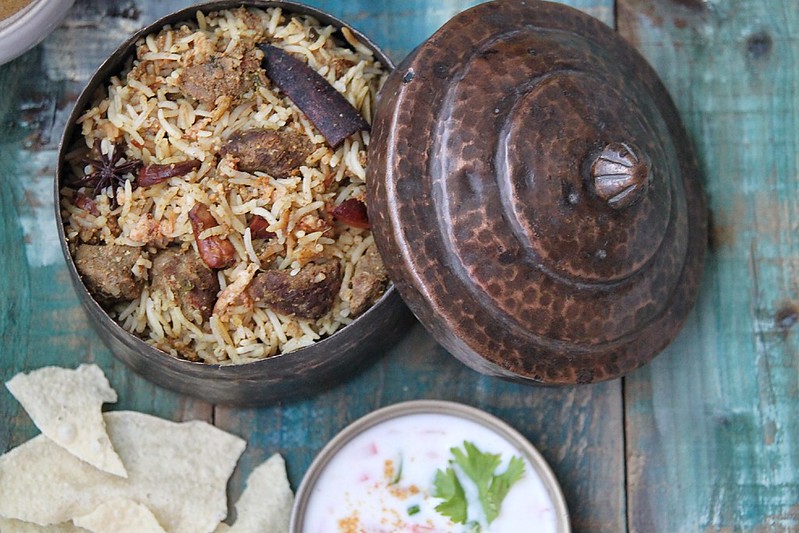
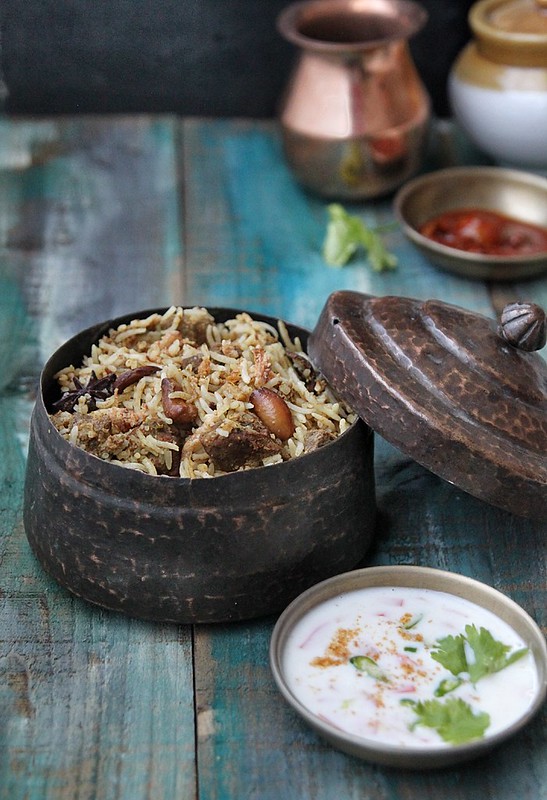
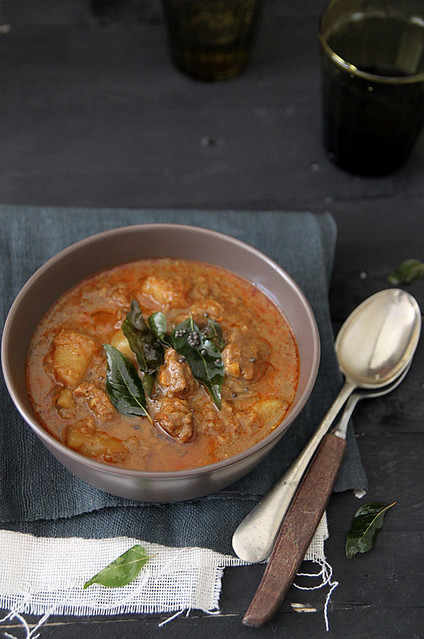
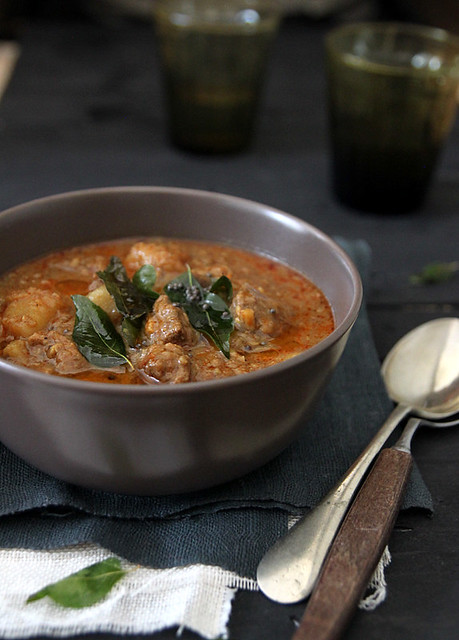
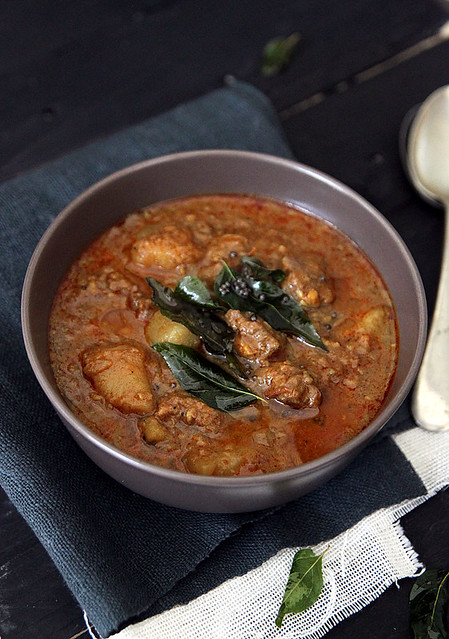
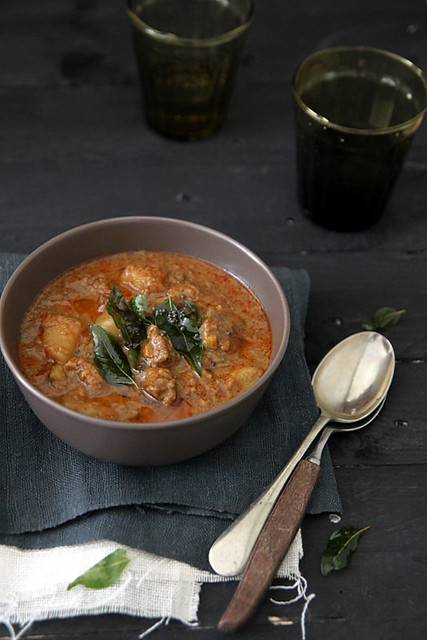
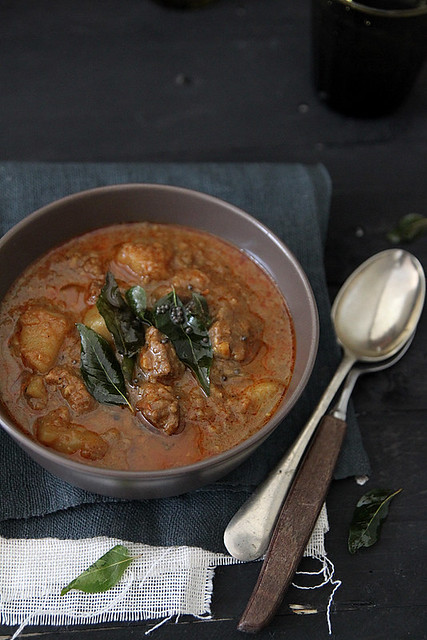
Meat pattichu varuthathu

Adapted from Mrs K. M Mathew's book Flavours of the Spice Coast
 Beef- 1 kg*, cut into medium size pieces

To roast and grind
Fennel seeds- 1 1/2 tsp
Cinnamon stick- 2 inch piece
Cloves- 6
Peppercorn- 2 tsp
Kashmiri chilly powder- 2 tsp
Turmeric powder- 1 tsp
Coriander powder- 3 1/2 tsp

Ginger garlic paste- 2 tsp
Vinegar- 2 tsp
Salt- to taste

Coconut oil- 1 tbsp
Mustard seeds- 1 tsp
Curry leaves- 2 sprigs
Shallots- 10 to 12, roughly chopped
Ginger- 2 tbsp, sliced
Garlic- 5 cloves, sliced

Dry roast all the ingredients in the roast section for about 3 to 4 minutes on medium heat. Keep stirring continuously or else you will end up burning the spices.
Once slightly cool, grind them finely.
Remove 1 tsp of this powder and to the rest add the ginger garlic paste, vinegar and salt.
Marinate the meat with this mix, and keep aside for an hour or so. 
Transfer the meat to a pressure cooker and cook with about half cup water till done. 
(I close the lid and cook on high till steam comes after which i put on the weight and wait for the first whistle. Once the first whistle is out, i reduce heat to medium and cook for about 15 minutes. For the beef we get here, this method works well).

Open the pressure cooker, and if there is a lot of liquid, evaporate most of it on high heat, leaving about a quarter cup of liquid with the meat.
Heat coconut oil in a large wok and add mustard seeds.
Once they splutter, add curry leaves, shallots, sliced ginger and garlic and cook till slightly brown and the raw smell from the ginger and garlic disappears.
Add the reserved tea spoon of masala powder to the onions and saute for a few minutes.
Finally, tip in the beef along with the gravy and fry on medium heat till dark and semi dry. I dont like my beef too dry, but with some wet masala smothering it.
The masalas will start leaving the sides of the pan, and there will be some oil visible around the pan. At this point, you can add some more fresh curry leaves, give a final mix and take it off the flame.
Serve hot with Kerala porotta or rice and moru kachiyahu.
Notes: The preparation is just moderately spicy, you can increase the pepper and red chilly powder to suit your taste
*The beef i used here is a roasting joint which has a nice layer of fat. Please do yourself a favour and use beef with a bit of fat, for this recipe. Trust me, it makes a difference.
I also added a few beef short ribs just to see what its like. I personally think it didnt make too much of a difference, however if it was a curry i was making, it would have amped up the taste. 
You can do the entire prep in a normal pot, but cooking time is longer and also make sure you add at least 2 to 3 cups of water to the beef while cooking, so it doesnt dry out.
You can try the same with mutton as well, and it tastes great.

Tuesday, 27 February 2018

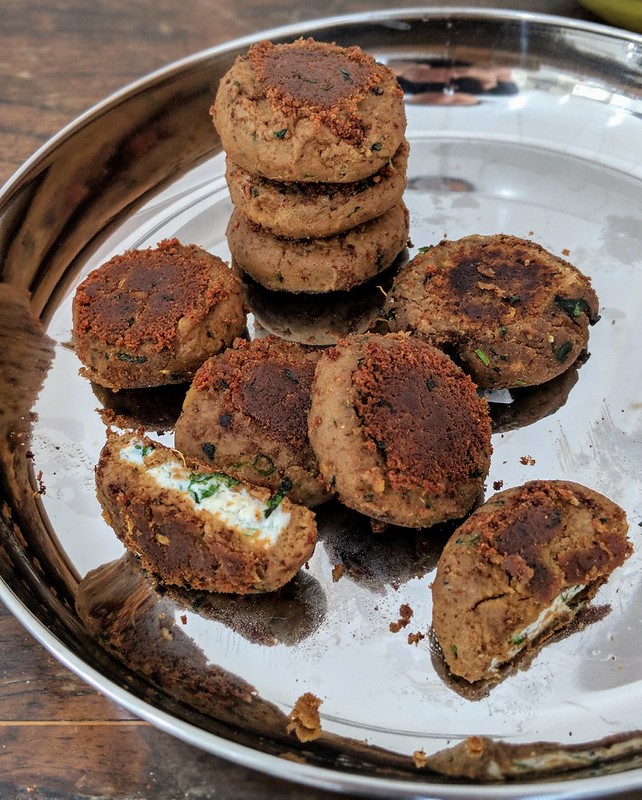
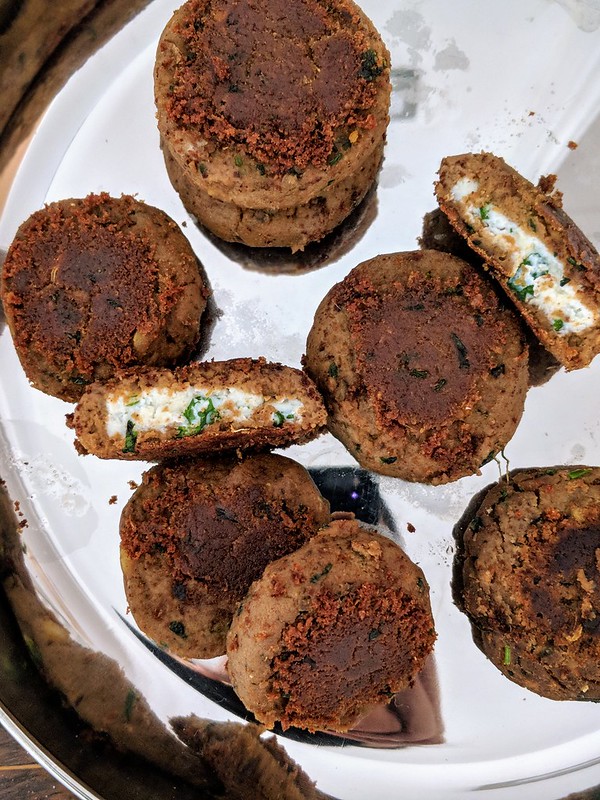
Shikampuri kebab (cheese stuffed kebab)

Recipe adapted from Vah Chef (makes around 20)

00100dPORTRAIT_00100_BURST20180227130338255_COVER (1)
Meat- 500 gms (I used minced beef, you can use beef cubes, minced lamb, lamb cubes, or even chicken)
Chana dal- 1/2 cup, washed till water runs clear
Ground pepper- 1/2 tsp
Cinnamon- 2, 1 inch pieces
Cardamom- 3 pods
Cloves- 2
Dried red chilly- 3
Salt- to taste

Mint leaves- 1 tbsp, finely chopped
Coriander leaves- 2 tbsp, finely chopped
Fried onions- 2 tbsp
Cumin powder- 1/2 tsp
Garam masala powder- 1 tsp
Red chilly powder- 1 tsp
Lime juice- 1 tbsp

For the filling
Ricotta cheese- 250 gms (Traditionally, hung curd is used)
Green chillies- 2, finely chopped (add more if you want it spicy)
Coriander leaves- 1 tbsp, finely chopped
Onions- 2 tbsp, finely chopped
Salt- to taste

Oil- to shallow fry
00100dPORTRAIT_00100_BURST20180227130215945_COVER (1)
Cook together the meat, chana dal, ground pepper, whole spices and red chilly in a pressure cooker with little or no water. I used about 1/4 cup water.
Once you open the cooker, if there is lot of stock, cook on high flame till most of the water has evaporated. 
Keep aside to cool completely and then blend to a paste. Do not add any water.

Transfer this mix to a mixing bowl and add the mint, coriander, fried onions, cumin, garam masala, red chilli powder and lime juice. 
Using your hands, mix the masala into the meat paste, as evenly as possible. 
If you feel that the mix is slightly moist, keep in the refrigerator so its easier to shape.

While the meat is cooking you can also get the filling ready.
Mix together all the ingredients for the filling in a bowl. Keep refrigerated till ready to use.
I used ricotta because it was a more convenient option. But even then there was quite a bit of water content in the cheese, so i still hung it in a cloth and tried to get as much water out. 

Assembling
At this stage if you fee that the meat mix is too dry, as in, its cracking while you are tying to make balls, then sprinkle some water and knead well. Add water bit by bit, or else the kebab will fall apart while frying,
Make lime size balls out of the meat mix, you should get around 20 of them.
Flatten it out , make a well and stuff about 1/2 tsp of cheese filling. Bring edges together and seal.
Gently flatten the kebab using your palm, and shape into a round
This takes a wee bit of practise. If the filling is too much then it oozes out, so start with a small quantity and once you get the hang of it, add more filling.
Heat a tawa and drizzle the oil. Not too much oil, just enough to shallow fry.
Fry the kebabs on medium heat till both the sides turn crisp and brown.
Serve with mint chutney.

Notes:
If you are using minced meat, you can cook it in a frying pan as well.
Ive also tried it with Mascarpone cheese and it works fine.
Make sure your filling isnt loose, as it will ooze out of the kebab while frying. remove as much water content possible.


Thursday, 7 April 2016

Beef rogan josh in a Staub Cocotte

IMG_9610 
Ever since we moved into our new house we've been talking of banishing our non stick Teflon pans and going all cast iron or stainless steel. We have been eliminating them bit by bit and the transition has been a bit of a challenge but i think its working and I'm slowly getting used to it.

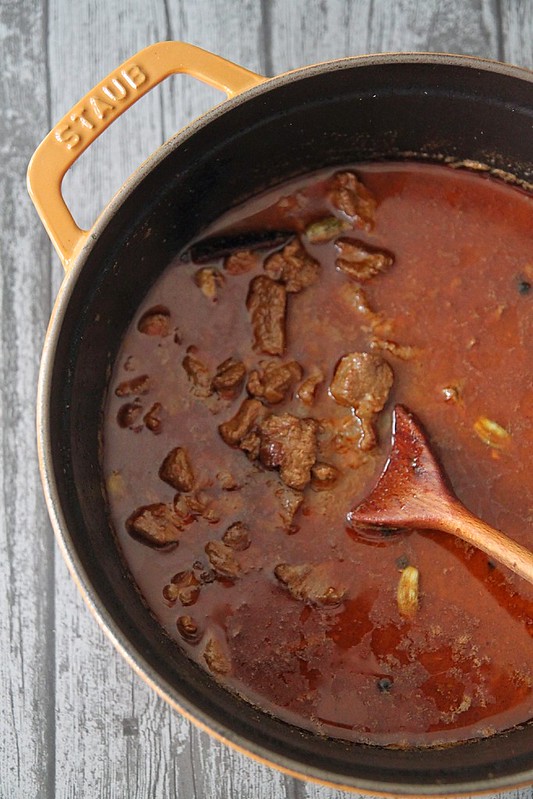
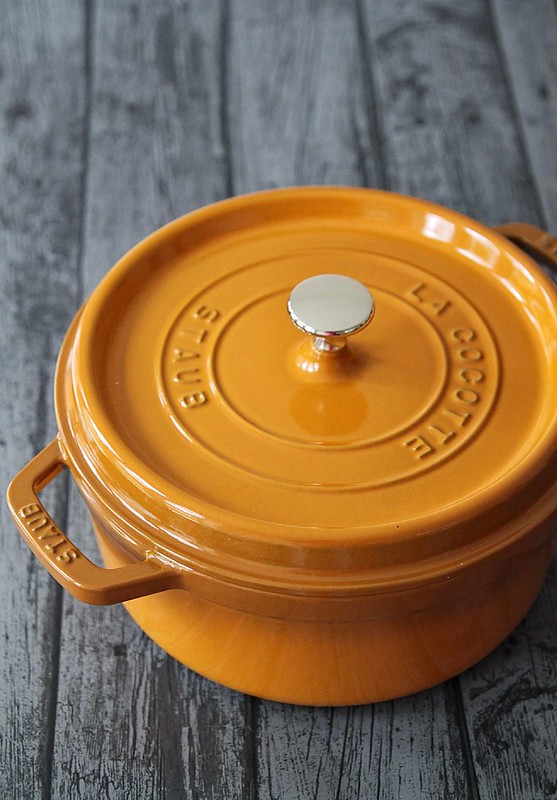
My first cast iron cooking experience was with this gorgeous Staub 24cm Cocotte, the lovely people over at Zwilling UK sent over. I have been thoroughly enjoying my time with it, or rather getting used to cooking with it and I'm very happy to have it as part of my new kitchen. If like me you do like a bit of colour, then look no further because Staub Cocottes come in a range of colours from cinnamon to basil to cherry red to graphite grey. etc Those who know me, also know my obsession with the colour yellow so no surprises there when i opted for the mustard colour Cocotte. It arrived promptly on time and i got cooking with it the very same day. 
IMG_9563 (1)
One thing i had to get used to was the weight of the cast iron pot. Having dealt with light weight thin stainless steel pots and such, the weight of the cast iron pot was a bit of a shock in the beginning, but i soon got the hang of it especially once i realised how the weight works to your favour while cooking. It also retains heat really well which also helps with cooking food evenly. I also noticed that all the dishes i made in the Staub cocotte was done at a much lower temperature than i usually do. For example, if i was cooking previously on the heat mark 7 on my ceramic hob, with the Staub i was doing it on heat mark 4, sometimes even reducing it down to 3 because of the heat retention and things like onions and garlic getting burnt. I agree it does take a while to get used and I'm still experimenting with what heat settings work well for what. The point is, energy consumption has reduced drastically, and my husband who was sceptical about this whole cast iron cooking is now absolutely impressed and sold on the idea.

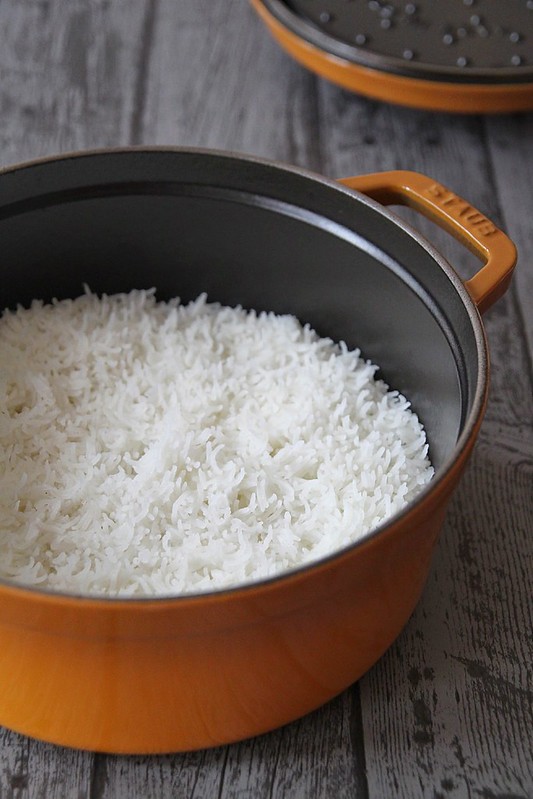
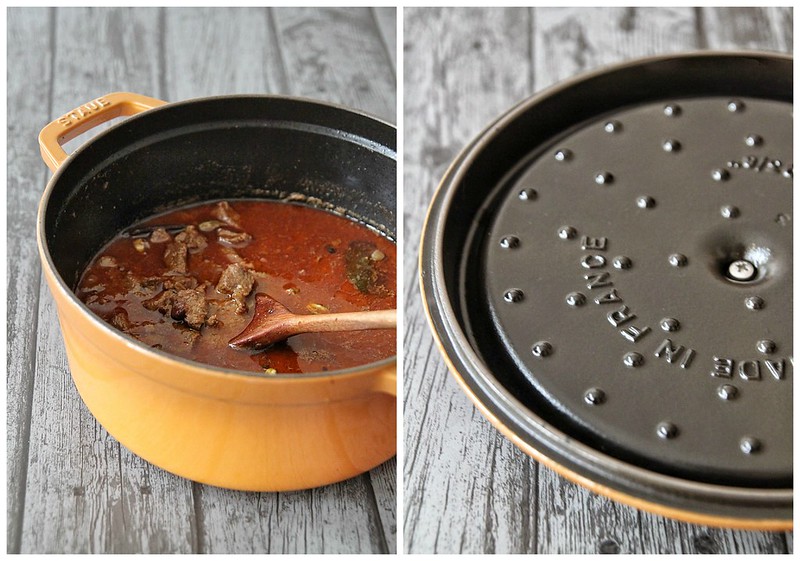
Another excellent feature about the Staub Cocotte is the heavy lid with small spikes on them which act as a natural baster. The water drops back into the pot keeping your meat moist and this to me is a great plus point. When i usually slow cook meat, i have to keep adding water every now and then to keep the meat moist and also to prevent the food from burning or sticking to the base because the water would evaporate quite quickly. This i think is my most favourite feature from Staub, the really heavy lid and the special drip structure makes sure no moisture escapes and whatever gets collected gets poured back into the pot. I loved how my rogan josh didn't need any refilling through the entire cooking process and also how my rice was cooked perfectly well without moisture escaping, and without going through all that drama of covering the lid with a cloth or paper towel.
PicMonkeynn Collage
When i made the rice, i was pretty sure it would stick to the bottom, but was pleasantly surprised it didn't. The enamel coating even though not completely non stick works to a great extent when it comes to cooking and cleaning, and even if it does stick a bit to the base, a bit of a soak easily removes it all. I have to try a biryani in the pot to see how the whole 'dum' aspect works, but before that i need to familiarise myself with the cast iron pot a bit more.

The only negative thing, well i cant quite call it negative really, is that the entire pot and lid becomes really hot while cooking. If you hold on to your pot while stirring and mixing, this becomes a bit uncomfortable. I managed to burn my hand twice, even after using a cloth but, this again is something i need to get used to, and nothing a pot holder cant solve. It however, doesn't affect the performance of the pot at all. Then there is of course the price which, lets be honest, is steep. When i was thinking of investing in a cast iron pan, i did a lot of research on various products in the market. and Staub definitely stood out. It is one of the best out there so think of it as an investment that would last you forever, and put it on your birthday gift list.

Coming to the recipe, I made a mutton rogan josh last year and it differs from this one quite a bit. I would like to think that is definitely the more authentic recipe and this one by Madhur Jaffrey is a bit more Anglicised, if i may call it that. But it works, its absolutely flavourful and we've been making it for years now. 

Recipe adapted from here (serves 4 as part of main)
IMG_9598
Ginger- 5cm piece, peeled
Garlic- 8 to 9 cloves, peeled
Oil- 4 tbsp
Beef- 700 gms (cut into 2 cm cubes)
Cinnamon sticks- 2 cm
Cardamom- 6 pods
Cloves- 6 pods
Bay leaf- 1
Whole peppercorns- 10
Onions- 200 gms, peeled and finely chopped
Coriander powder- 1 heaped tsp
Cumin powder- 1 1/2 tsp
Kashmiri chilli powder- 2 tsp
Spicy chilli powder- 1 tsp (adjust according to heat)
Salt- to taste
Yoghurt- 6 tbsp
Warm water- 400ml
Garam masala- 1/2 tsp
IMG_9553
Grind together the ginger and garlic with 2 tbsp water to make a fine paste.
Heat 2 tbsp oil in a deep thick bottomed pot and on medium-high heat sear the beef cubes in batches till they are all brown. Transfer to a plate.
Reduce heat to medium, add the remaining oil into the pot and throw in all the whole spices- cinnamon, cardamom, cloves, bay leaf and peppercorns - and saute till they are fragrant for about 10 seconds, take care not to burn them.
Follow with onions and saute them for about 5 to 10 minutes or till they turn brown.
Tip in the ginger garlic paste and continue to fry till the raw smell goes
Add all the spice powders one after the other along with salt, and cook for about 5 seconds, just to remove the raw smell. If you think the mix is sticking to the pan and has a chance of burning, add in a tbsp or two of water with the spices and cook till you can no longer smell the raw masala.
In goes the fried meat along with all the juices. Mix well so all the masala gets coated on the meat.
Add the yoghurt one spoon at a time, and stirring it into the meat mix after each addition.
Pour in 400 ml warm water and bring to a boil, scraping the sides of the pot.
Cover with a heavy lid, reduce heat to the lowest and cook for about an hour or until the meat is tender. 
Keep checking in between to see if the water has reduced, and if the meat is sticking to the bottom add some more water, stir well and continue cooking closed.
Open the lid, check if the meat is cooked, add more salt if required, and if you can see a thin layer of oil on top, that's sign of a good rogan josh i believe. 
If you do think there is too much liquid, increase heat and let the curry boil away some of the liquid.
Just before serving stir in the garam masala and serve hot with some steamed rice.
IMG_9574
Notes: Instead of cooking this on the hob top, you can finish off the curry in the oven at 180C for about 1-1.30 hrs. Just make sure you stir it every 10 minutes or so and check for liquid levels. My Staub Cocotte would do a perfect job for this as you wouldn't need to transfer it into another oven proof dish but can directly move this from the hob to oven.
You can make the same dish with mutton/goat/lamb as well. Cooking times may slightly vary though.
Over the years I've made my own changes to it. I add a generous dash of cream just after i put the garam masala, making this quite irresistible.

With thanks to Zwilling UK for the Staub Cocotte that was sent to me. All opinions are my own and no monetary compensation was offered in return for a positive review.

Tuesday, 24 November 2015

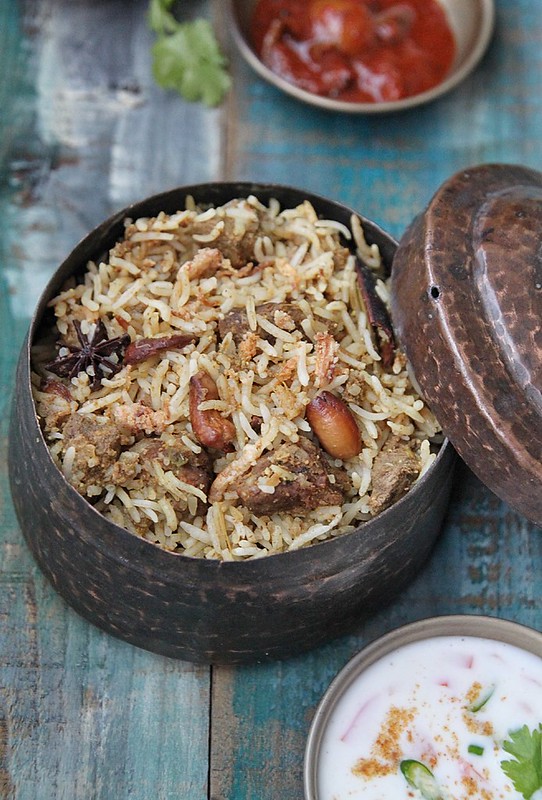
Kerala beef biryani & Christmas traditions

IMG_8836 
Christmas is a month away- A MONTH AWAY- can you believe that?
Its too early to whine about resolutions and how fast this year went by,which i shall keep for my New Year post, so lets talk about food, and Christmas family traditions.

Christmas is a big deal for us back home, something i thoroughly miss after we moved to UK. Although we have tried to do something or the other on Christmas day with friends who are around, its never the same without family. Christmas was spent with cousins and aunts and uncles and started pretty early with a church service at the wee hours of the morning. Droopy eyed we'd still go to church without much fuss because we know we'd get to open presents after. After church we'd all go over to my paternal grandparents house where my grand mother would have prepared a breakfast fit for the kings. But before we sat down to breakfast we'd open all our gifts, which of course was the most favourite part. Breakfast would be elaborate with a Kerala special called appam (hoppers as its commonly known here) served with chicken or mutton stew and there would also be loads of sides like boiled eggs, steamed plantains and this and that. I cant ever remember my grand mother entertaining guests with just two or three dishes, she'd go all out, and every one of them delicious.

We'd have relatives or friends dropping by and they would all be given fruit cake (equivalent of the Christmas pudding) and home made sweet sweet wine. Lunch would follow soon after with a biryani and a side of raita, pappadum, cutlets (croquettes), fish fry etc etc. All home made. It would stretch on for a couple of hours, with non stop banter, Christmas carols in the background, and finally end with dessert which would either be a payasam (which is a sweet milk pudding with vermicelli) or caramel custard or something similar. We'd all be stuffed by then and would be calling dibs on which sofa or bed we'd want to plonk on.
IMG_8804 (1) 
These are all such fond memories of home during Christmas. Its not the same now. Of course the appam and the biryani's are all very much omnipresent, but its no longer a big gathering with cousins and family as we are all spread around the world now. I feel terribly home sick around Christmas time and give Ro quite a hard time about it.

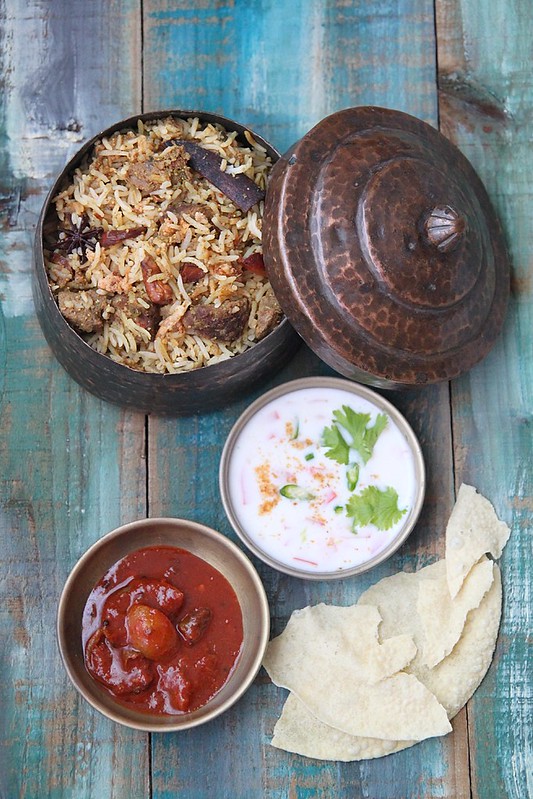
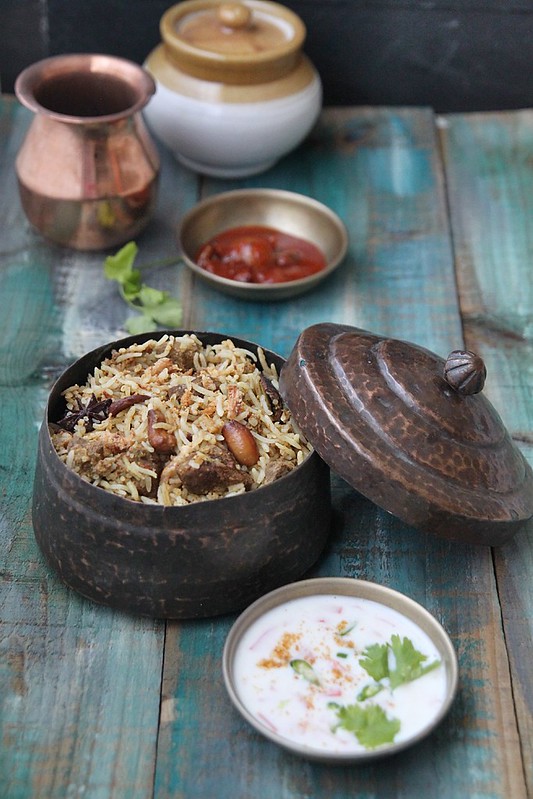
Beef biryani is not something that is made on Christmas day- its usually a chicken or a mutton biryani- but i thought I'd give a twist to tradition with a beef version, which is just as good. The recipe may look long and a bit intimidating for first timers, but its actually not that cumbersome, especially if you manage to make the beef curry a day or two in advance. Do read my notes.

Every family has a Christmas tradition, but if you are looking for something different this time around, then check out the Waitrose Christmas page which has a round up of traditions from around the world accompanied by recipes (Mixing Gorgonzola cheese with Prosecco, now that's a combination i thought never existed!).

Food, in the end, in our own tradition, is something holy. Its not about nutrients and calories. Its about sharing. Its about honesty, its about identity.' Louise Fresco

Kerala Beef Biryani (Serves 4 to 5 generously, as part of main) 
IMG_8848 
To marinate
Beef- 1 kg, diced
Turmeric powder- 1/2 tsp
Garam masala- 1 tsp
Pepper powder- 1 tsp
Yoghurt- 4 tbsp
Salt- to taste

For the masala
Oil- 2 tbsp
Onions- 2 large, roughly chopped
Curry leaves- 2 sprigs
Ginger- 2 1/2 tbsp, peeled and roughly chopped
Garlic- 2 1/2 tbsp, peeled and roughly chopped
Green chillies- 3 to 4 (increase or decrease as per tolerance level)
Tomatoes- 2, finely chopped
Garam masala- 1 tsp
Chilli powder- 1 1/2 tsp
Coriander powder- 2 tsp
Fennel powder- 1/2 tsp
Biryani masala powder- 1 tsp (optional)
Mint leaves- 1/4 cup, finely chopped
Coriander leaves- 1/2 cup, finely chopped
Water- 1/2 to 3/4th cup
Khus Khus (white poppy seeds)- 1 tbsp, soaked in water
IMG_8814
For the rice
Ghee- 2 tbsp
Cloves- 5 pods
Cardamom- 5 pods
Cinnamon- 2, 1 inch sticks
Star anise- 1
Bay leaves- 2
Basmati rice- 3 1/2 cups (I used Tilda long grain rice)
Water- 7 to 8 cups
Salt- to taste
Lemon juice- 1/2 tbsp

For garnishing
Ghee- 3 tbsp
Onions- 1/4 cup, julienned
Cashew nuts- 2 tbsp
Coriander leaves- 1/4 cup
IMG_8854
Marinate the beef with all the ingredients under the 'to marinate' section. Keep aside while you prepare the remaining ingredients.
Grind together the ginger, garlic and green chillies.
Soak the khus khus in water for about 15 minutes, and grind to a smooth paste. Keep aside.
Wash and soak the rice in cold water for about 30 minutes.
Also get the garnish ingredients ready by heating the ghee in a pan and frying the onions and cashew nuts, separately till they turn golden brown and crispy. Drain on paper towels and keep aside.

Into a pressure cooker pour the ghee. 
Keeping the heat on medium, add the chopped onions and curry leaves and cook till they turn a light brown in colour. This could take around 10 to 12 minutes.
Add the crushed ginger-garlic-chilli paste and continue cooking till the raw smell disappears.
Add the tomato and cook till they turn mushy and the oil starts to slightly separate.
Stir in all the spice powders- garam masala, chilli powder, coriander powder, fennel powder and biryani masala (if using).
Season with salt, saute for about 2 minutes, and then tip in the marinated beef and all its juices.
Add the mint and coriander leaves, give a good stir and then pour in about 1/2 cup water. 
Bring to a boil, and close the cooker.
Put the weights on once the steam comes and cook the beef on medium heat for about 4 to 5 whistles or till the beef is completely cooked.
Wait for the steam to die on its own and then open the lid.
If you feel the gravy is too loose, then slow cook it till you feel its thick-ish. Alternatively, if you feel there is not enough gravy then add some more water. Remember you need enough water to mix with the rice and make it moist.
Stir in the ground khus khus, check for salt, add more if needed and take the meat off heat.
IMG_8797 
While the beef is cooking get the rice ready.
In a large pot (enough to hold around 8 cups of water) heat the ghee.
Throw in the whole spices and sauté for a couple of seconds, just to get the aromas going, on medium heat. Put a kettle of water to boil at this point.
Add the drained rice and fry for a couple of seconds.
Add about 7 to 8 cups of water to the rice followed by salt and lemon juice. Stir well and wait for it to boil on high heat.
Once the water starts boiling, time it and cook the rice to an almost al dente form, for about 6 to 8 minutes maximum on a rolling boil.
Keep stirring in between, but make sure the rice doesn't break and get over cooked.
Drain immediately into a colander.

To assemble, smear the bottom of a large heavy bottomed pan with ghee. Use left over ghee from frying the cashew and onions.
Spread a layer of rice and then sprinkle half a tsp each of the chopped coriander leaves, fried onions and cashew over the rice
Top with a layer of the beef curry. Spread it out as gently as possible.
Tip in the remaining rice, spread it out and sprinkle the remaining biryani masala powder and coriander leaves. Continue the layers till you run out of both, but with the rice layer right at the top.
Close with a tight lid, making sure no steam escapes, reduce heat to the lowest possible and let it warm up for about 10-15 minutes.
When done, scatter around the remaining fried onions and cashews and serve hot with some raita, pappad and pickle.
IMG_8808 
Notes: The beef curry can be made a day or two in advance, refrigerated and used as required for the biryani. In fact its a better option because the curry would taste absolutely delicious once the masalas have caught on.
The rice i use got cooked to perfection in exactly 5 minutes, so keep a close watch and make sure you don't over cook it. If you can comfortable with the absorption method with the exact quantity of water used, please do that instead
It is a spicy one, so reduce the green chillies to 2 if you are not a spice fan. I used birds eye chilli
If you can get hold of beef on the bone, nothing like it. I shall do so the next time.
Instead of using the biryani masala powder you can also use normal curry powder in its place.
You can do the layering in the oven as well. Arrange it in an oven proof bowl and warm in an oven preheated at 150C for about 20 minutes.
Freeze the remaining biryani in a freezer proof container. To thaw, either transfer it to the top compartment of the fridge and let it thaw over night or take it out and leave on the counter for it to thaw by evening. Tip the contents into an over proof bowl and let it heat in an oven preheated at 200C for about 15 minutes. 
If you don't own a pressure cooker, you can slow cook the beef in a heavy bottomed pan till done. Just keep a check on it at intervals, keep stirring in between and add water as required.

Tomato and shallot raita
IMG_8861 
Yoghurt- 1 cup
Green chilli- 1/2 of one, finely chopped
Chaat masala- 1/2 to 1 tsp + enough to garnish
Salt- to taste
Tomato- 1 small, finely chopped
Shallot- 1 small, finely chopped
Coriander leaves- 1 tsp

Add a few table spoons of water to the yoghurt and whisk to make it a bit loose.
Stir in the salt, chaat masala and green chilli
Add the tomato and shallots, give it a good stir and just before serving garnish with coriander leaves and a generous sprinkle of chaat masala.

With thanks to Waitrose online for sending me a Waitrose gift card which I used to purchase my ingredients. 

Monday, 7 September 2015

Beef 360, the Science of Steak

IMG_7460 (1)
Both of us love a good steak and we are in the process of learning how to cook the perfect steak. So i was pretty much looking forward to the Beef 360, the science of steak event hosted by Simply Beef and Lamb, the home of Red Tractor and Quality Standard beef and lamb. On a warm day when the Tube strike was creating havoc in the city, I took off to Le Meridien in Piccadilly Circus to spend an evening learning all about beef.

The evening started off with an introduction to what makes quality beef, and how high standards are followed to ensure a good quality of meat is delivered every time, by putting it through rigorous procedures. Dr Phil Hadley, who is an expert in the field, took us through an intense session explaining what ingredients make different steaks from around the country unique- precisely- how feed, age and breed type make for quality beef.
IMG_7459
We blind tasted a wide variety of beef- from grass fed to grain fed, ones aged for different periods of time and so much more, that at the end of it all we were in a beef coma, not one that we complained about though. We then sat down to a fabulous meal put together by the talented Denise and also got to catch up with fellow foodies. We then packed away gorgeous chunks of beef to work on back home and also got tips on how to make a perfect steak by expert Hugh Judd

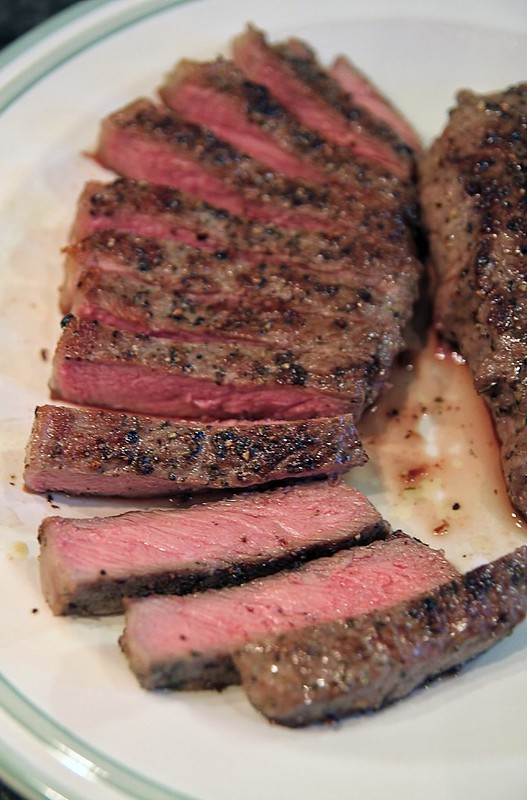
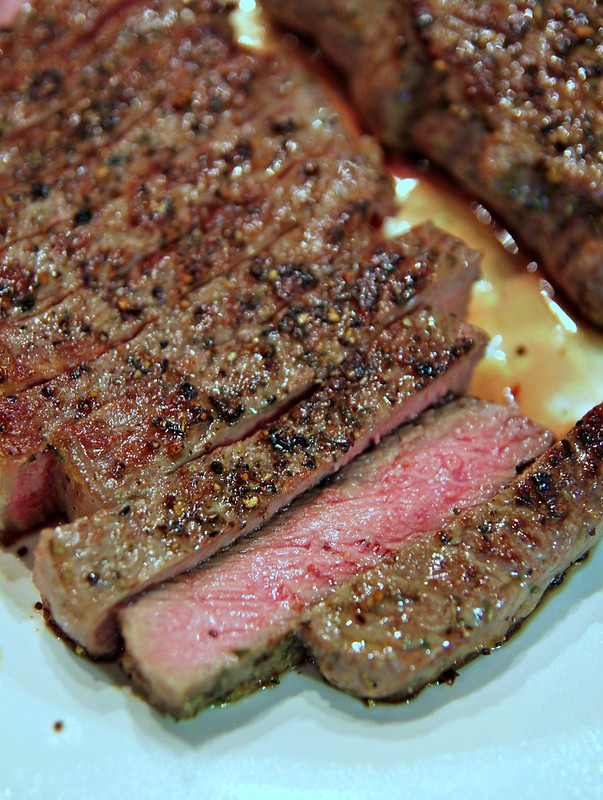
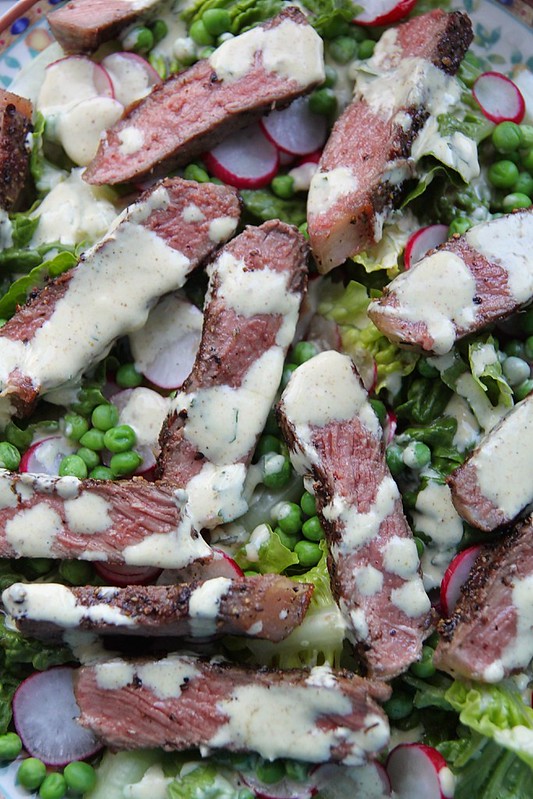
I froze the beef soon after and put it to good use a couple of weeks later by making the Coronation Steak, radish and pea salad that was served on the day, and was one of my favourites. Ro cooked the steak to perfection, i think this is the first time he's got it spot on, and it tasted delicious. Medium rare, just the way we like it. The salad recipe is pretty straightforward. Cook the steak as per your preference (rare, medium, well done), cover and leave side till you get the other things going.. Toss together the rest of the salad ingredients like lettuce, radish and defrosted peas and arrange on a large plate (or a bowl). The dressing is the best bit and I'll give you the exact recipe as provided by The Meat Elite.

Coronation steak salad (dressing) adapted from Simply Beef and Lamb
IMG_7470
Curry powder- 2 tsp
Mayonnaise- 3 tbsp
Cold water- 2 tbsp
Coriander leaves- 2 tbsp

Place all these ingredients in a bowl and mix together till well combined.
Slice the steak into strips and arrange on the plate, along with any of the juices.
Spoon the delicious dressing over the beef and serve with crusty bread.
And that's exactly what we had, and also some gorgeous red wine.
IMG_7719
There was still some leftover steak and I made a quick Philly Cheese Steak for lunch the next day. I followed this recipe to the T and its a keeper. I agree it does take a bit of time, because everything needs to be made separately. But trust me, it tasted so darn good. 

The session that evening did open my eyes to a lot of aspects and I'm now aware of the Quality Standard Mark Scheme that provides the highest level of independently-inspected quality assurance for meat in the UK. It cares for the environment, animal welfare and food safety which i believe makes a difference.

With thanks to The Meat Elite for inviting me to the event. 

Sunday, 2 March 2014

Beef Moussaka

My boss is a brilliant cook- you know- the types that can whip up something with whatever is in the pantry and make a fabulous meal out of it. She refuses to let me take lunch to work which means I get to enjoy her fabulous cooking. I have learnt so many new methods of cooking, easy to make dishes and new ingredient names, and always come back home and try them out much to Ro's amusement. He's secretly thanking her, I'm sure :) 

Last week I was whining to her about how planning daily meals were such a feat and she gave me this idea to cook with aubergines. Both Ro and I were not aubergine fans till a while back when we went to an aunts place for lunch and she served baingan bhartha with biryani. We loved it so much that we got the recipe from her and tried it at home. As expected, it wasn't even close to what we had in mind and so gave up. After that, I may have tried working with aubergines about 5 or 6 times and 3 of those (successful ones) have appeared on the blog (actually one of it is what my friend Rashida made and sent over, so not counted). Aubergine parmigiana was another successful one and we loved it, but pictures were rubbish and hence couldn't blog it. 

So anyways, Dora gave me this really easy recipe to cook with aubergines and I got all worked up at how easy it was. But of course on the 1 hour train ride back home from work my mind decided to go on overdrive and research aubergine recipes. Moussaka was up there on search results and yes, it had to be made that evening. I went straight to the grocery store to pick up ingredients (of course got carried away and bought a whole lot of other rubbish as well) and came back home all ready to cook. Its a bloody long process- this thing called Moussaka. When I read the recipe, I had no idea how tedious it was and many times during the process I wanted to just cut it short and make something else out of it. The fact that I could make a blog post out of this was at the back of my mind and I think that's what made me determined enough to continue with the actual process. (Some good has come out of owning a blog i guess??)
At the end of it all, I must admit, it was thoroughly worth it, like really really worth it. Both Ro and I enjoyed it and I made a note to experiment with aubergine again. I served it with a fabulous salad I learnt from an aunt this time i was in India (will try and blog it some other time) and a gorgeous bottle of red.

Word of caution: Attempt ONLY when you have time.

Recipe adapted from here (serves 3 generously)
Olive oil- 2 tbsp
Onion- 1 large, finely chopped
Garlic- 4 cloves, peeled and finely chopped
Minced beef- 450 gms
Cinnamon powder- 1/4 tsp
Oregano- 1/2 tbsp, dried
Allspice- 1/4 tsp
Bay leaf- 1
Thyme leaves- 1/2 tsp, dried
Tinned, chopped tomatoes- 1, 400 gm tin
Dry white wine- 90ml
Aubergines- 3 medium, cut into 1 cm slices
Pepper- to taste
Salt- to taste

Bechamel sauce (topping)
Butter- 45 gms, unsalted
Plain flour- 45 gms
Milk- 450ml
Parmesan cheese- 45 gms
Gruyère cheese- 50 gms, grated
Egg yolks- 2

Place the sliced aubergines in a large bowl, sprinkle with salt and leave aside for about 30 minutes. This will draw out any bitter juices.
Heat the oil in a frying pan and cook the onions for about 10 minutes on medium heat. The onions should turn soft, but not brown.
Add garlic and sauté for a couple more minutes.
Into this add the mince meat and break it up, while mixing it into the sauteed onions.
Stir in the cinnamon, oregano, allspice, thyme and bay leaves followed by chopped tomatoes. Stir it all together till well combined.
De-glaze the pan with white wine, season with enough salt and pepper and cover and cook for another 15 minutes or so on medium heat, till the meat is cooked and the mix is thick.
Once the sauce is ready, cover and keep aside

While the meat is being cooked, you can deal with the aubergines.
Preheat oven to 200C
Rinse the aubergines in a colander and pat dry with a kitchen towel.
Toss with some olive oil and line on 2 baking trays, trying not to overlap.
Bake for 20 to 25 minutes, or till the slices turn a light brown.
To make the bechamel sauce, melt the butter in a saucepan and stir in the flour.
Take off heat and slowly whisk in the milk.
Return pan to heat and continue stirring till the sauce thickens.
Simmer for a further 5 minutes on low heat and then remove from heat.
Stir in around 30 gms of parmesan and gruyere cheese, season with salt and pepper and keep aside to cool lightly.
Once cool, whisk in the egg yolks till no trace is visible.

Once all the preparation is done, you can assemble the moussaka.
Into a large baking casserole/ dish generously spread a third of the mince.
Cover with aubergine slices, overlapping each other.
Repeat the layers, ending with a final layer of the mince.
Finally pour over the bechamel sauce, sprinkle both the remaining cheese and bake for 40 to 50 minutes or till it bubbling and golden on top.
Take the casserole out of the oven, leave aside to settle for about 5 minutes before slicing and serving.

Notes: Yes, its a frikkin long recipe and procedure. Atleast 2 hours including prep and cooking
Bechamel sauce can be made a day or 2 ahead and refrigerated in an air tight container
Try and serve it with a refreshing salad or some bread, to cut through the grease and cream.
Traditionally Moussaka is made with lamb mince but I'm not a big lamb fan, hence used minced beef. Feel free to replace the beef with lamb mince. 

Tuesday, 19 June 2012

Slow cooked beef and potato stew

IMG_2468
I have been hearing so much about slow cooked roasts and casseroles and have been pretty intrigued by it. I mean I'm not one for slow activities which involve a lot of patience and concentration, but I just had to try it out once, after all the ooh's and aah's about how great they tasted and how tender the meat was. Whenever I cook something with beef or pork, I end up using the good ol pressure cooker and although it reduces the cooking time drastically and does the job of cooking the meat, I somehow feel all the curries I make in the pressure cooker tastes the same, no matter what different combinations of masala I use.

So the other day when I picked up some stewing beef, I decided to go ahead and try this whole slow cooking method, not in the oven, but on the hob top..just to see if it was fabulously different and worth wasting all that energy (literally too). I don't have a slow cooker/ crock pot and so I could only experiment with slow cooking using a heavy bottomed cooking pot. The procedure took almost 2 hours and I was thoroughly pleased with the outcome. Unlike a slow cooker, I couldn't just leave it on to do the job, but had to keep checking it on and off- liquid levels, stir to prevent scorching and so on.

I personally thought it tasted much much better than the curry made in the pressure cooker. For one, the masalas had nicely caught on to the beef cubes and the potato was cooked to perfection. Since the stew turned out so well, I decided it was a waste to serve it with frozen chapathi's. So I immediately turned to my trusted appam mix and whipped up some batter and set it aside to ferment. I know I would be a disgrace to the food blogger community by saying this, but I love love love ready mixes of any sort:). 
IMG_2481 
This appam mix for example, its a brand called Double Horse, and it works wonders. Just mix the powder with with water, coconut milk or milk or a mix of all of these and keep it aside for an hour or so in a warm place and you have nice soft appams ready in no time. I have a flat glass top hob and so cant use the traditional appam chatti, so I make do with the frying pan and dish out the flat appams (I cant for the love of me remember what its called). Its always worked for me and I don't understand why you would waste time and energy making your own batter when the ready made ones work just well. Its either that or its because Ro and I cant really make out the difference between appams made using home made batter and the store bought one. We savour it whatsoever. Same with dosa batter and vada mixes. They work like a charm for us :)

Anyhoo, I lovingly served it for dinner, quite looking forward to the fact that Ro would most certainly notice the difference and sing praises only to be slightly let down. He didn't utter a word even after a few mouthfuls and I finally lost it and asked how the stew was. 'It nice, its the same stew you always make right?' was his reply. I then had to explain to him that it is a slow cooked stew..2 hours I spent slaving over it and it HAS to taste different from the usual. He still didn't get it. His reply was 'you just wasted 2 hours of electricity on a stew that would have taken just 15 minutes to prepare in a pressure cooker???? You talk about energy conservation all the time, what about this then??' I just rolled my eyes and let it pass. I still believe the stew did taste fabulously different from my usual pressure cooker stews. Please, if anyone tries it out, do let me know what you think, so I don't feel horrible about all that energy I could have conserved.

Also, somewhere along the way my blog turned 3, well on may 29th to be precise, and since I don't keep track of stuff like this, it wasn't a big deal. It was only recently when someone asked me how old my blog was, that I realized I should go and check and yes, it had turned 3 :) So I'm gonna consider my first ever slow cooked recipe as a milestone achievement and make a big deal out of it on this 3rd anniv. Hope you enjoy the stew.

Recipe modified from here
IMG_2478
Stewing beef- 500 gms, cut into bite size cubes (try and get beef with some fat on, makes a lot of difference)
Potatoes- 2, cut into medium sized cubes (optional)
Oil- 2 tbsp (i used coconut oil, but any oil would do)
Shallots- 250 gms
Ginger- 3 inch piece, peeled and roughly chopped
Garlic- 10 cloves, peeled (or use 1 1/2 tbsp ginger garlic paste)
Green chillies- 2
Tomato- 1, chopped
Curry leaves- 2 sprigs
Turmeric powder- 1/2 tsp
Chilly powder- 1/2 tbsp (adjust according to taste)
Kashmiri chilli powder- 1/2 tbsp
Coriander powder- 1 tbsp
Pepper powder- 1 1/2 tsp
Garam masala- 1 tsp
Meat masala- 1 tsp (any meat masala of choice)


Salt- to taste
Thick coconut milk- 1/2 cup

To temper


Coconut oil- 2 tbsp
Mustard seeds- 1/2 tsp
dried red chilli- 1, broken in half
Shallots- 3 small, roughly chopped
IMG_2463 
Crush/ grind together coarsely the shallots, ginger, garlic and green chillies.
Heat oil in a heavy bottomed pot and throw in the crushed mix.
Saute on medium heat till they turn a light brown in colour. This should take about 10 to 15 minutes. Make sure this mix is really cooked well and turns brown or else the curry would be sweet.
Add the chopped tomatoes and saute for a couple more minutes, till they turn mushy and the oil starts to separate.
In goes all the masala powders- turmeric, chilly powders, coriander, pepper and garam masala.
Saute till the raw smell disappears and the oil becomes visible. Add a dash of water if its sticking to the bottom of the pan.
Add the beef along with the potato (if using), half of the curry leaves and enough salt. Mix it all in, making sure the masala coats the beef and potato well.
Add about 1 cup water, give a final stir and close with a lid.
Cook for about 1.30 to 2 hours on low-medium heat, stirring in between (carefully, as you don't want to mash the potatoes), checking liquid levels and adding water as and when required. However, don't over do it. 
Once the meat is completely cooked add the coconut milk and check for salt.
Keep on medium flame for about 10 more minutes and take the stew off the flame. 
Heat the coconut oil in a kadai and splutter mustard seeds.
Add the curry leaves, dried red chilli and shallots and saute till the shallots turn a deep golden brown (not too dark and crispy)
Pour this over the cooked stew and give a final stir.
Serve with chapathi's, appam, bread or even idiappam.
IMG_2466 
Notes: You can use any cut of meat. The one advantage of slow cooking is that it makes the meat quite tender whatsoever.
If you cant find shallots, 2 medium sized onions would do.
You can omit the coconut milk and just do with water. The coconut milk however gives it a very distinct taste. I also sometimes add some thinned out coconut milk along with water.
The tadka can be done in the beginning as well, before you add the crushed mix.
Try this with mutton or lamb and it would be just as good.
The curry is slightly on the spicier side, so avoid the chilly powder if you are not up to it.
I have also tried adding whole garam masala right at the beginning with the oil, and i think i like that better.
If at all you did want to make this in the pressure cooker, do all the steps as above in a pressure cooker, add water and close with the lid.
Cook for about 18 minutes or 5 to 6 whistles (you'd know how long the beef you get usually cooks).
Open, check if meat is done and pour in the coconut milk.
Bring to a boil and then take it off flame. Continue with the remaining steps.

Wednesday, 23 March 2011

Sunday brunch for two

I love the whole idea of a brunch. I've said that loads of times and here I am saying it again. There is something romantic about the whole brunch bit, even better when you are not making it and you just sit there with a cocktail and make idle conversation with friends. I keep thinking about making Sunday a brunch day, but I wake up at quite an ungodly hour and by that time Ro would have already had his breakfast and then brunch idea keeps getting pushed on to lunch. But I still like to refer to it as brunch, you know..because I can :)

Last Sunday wasn't any different. Had a late night out on Saturday and by the time I woke up it was close to 10 and of course Ro had made himself a nice lavish breakfast with eggs and the works and I was just getting into cooking mode when the husband decides he wants lunch NOW (this is probably at around 11.30- 12, and after a heavy breakfast). I was so damn pissed that I decided to ignore him and make my so-called brunch, whatsoever.
By the time I was done it was about 1.30 (perfect lunch time, if you'd ask me) and Ro obviously wanted to eat what I made and did so with a long face. And then we had to argue about random stuff (so not what I had in mind) and I stormed out of the room leaving everything in the kitchen as it is and vessels unwashed. If Ro hadn't even bothered to clean up, I would have probably stormed out of the house itself, but that drama didn't happen and by evening Ro pretended all was good with the world and I even bribed him into making me a hot cuppa ginger-lime tea (oh its awesome if you haven't tried it btw) and then caught a movie (The Lincoln lawyer which was interesting to say the least). Dinner out and cocktails were a great end to an otherwise normal Sunday and I decided 'all's well with the world, after-all' :)

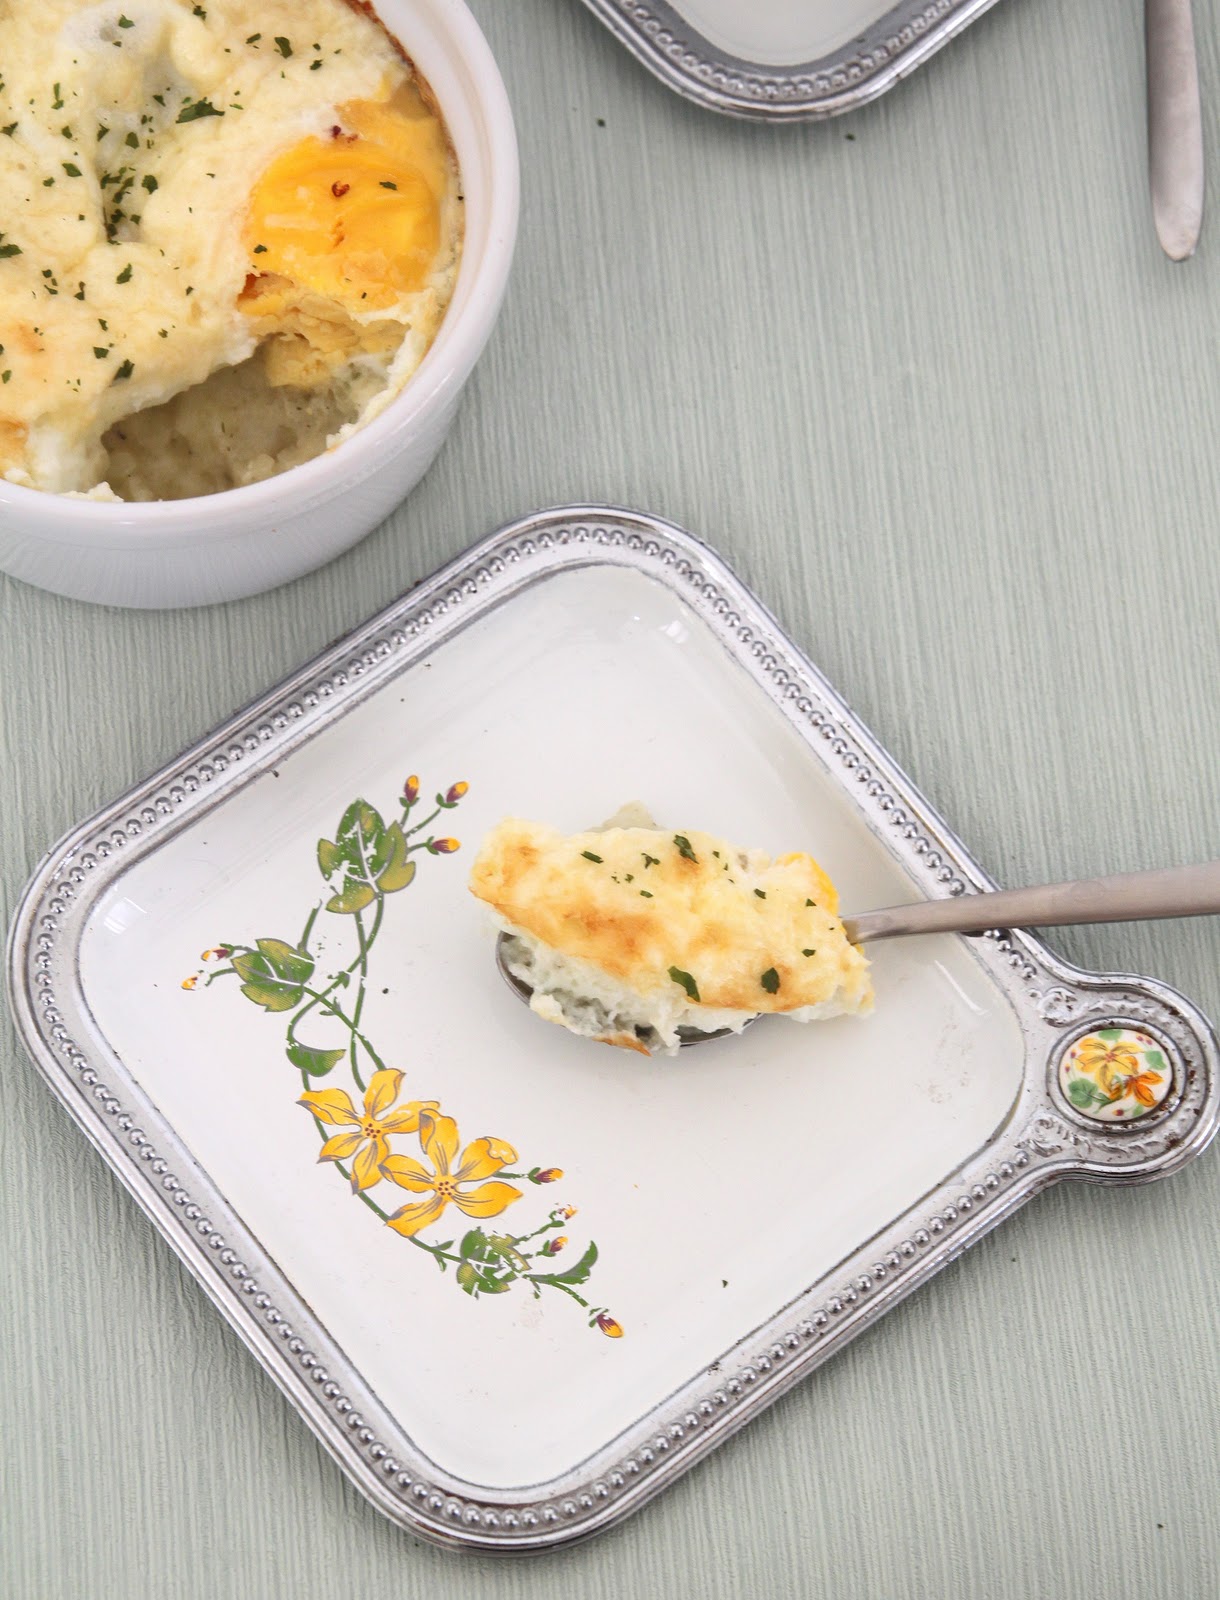
Individual oven-coddled eggs with mashed potato and herbs (Baked eggs and potato)
I found this recipe while I was browsing and the bon appetit online version appeals a lot to me, the pictures at least and its very rarely I actually read through a recipe (typical me) unless I'm looking for something in particular. This recipe by Dorie Greenspan caught my eye since i WAS looking for a baked egg brunch idea and have no regrets. It tasted so darn good that I cant wait to throw a brunch party and flaunt it. Go ahead say it 'I'm so vain' ;)
Anyhoo, the herbs in this dish just added that awesome flavour and I cant imagine why I never really used Rosemary and Thyme in my cooking. But like I have mentioned before, its an acquired taste, and if you don't like it...then you just don't!
Also, I was wondering how incredibly cute these eggs would have looked in the amazing Le Creuset cookware. Cant wait to get my hands on some of those.
Milk- 1/4 cup
Bay leaf- 1
Potatoes- 7 oz (I used about 5 to 6 baby potatoes)
Shallots- 2 medium, thinly sliced
Butter- 1tbsp
Rosemary- 1/2 tsp, minced
Thyme- 1/2 tsp, minced
Eggs- 3
Whipping cream- 3 tbsp
Freshly grated Parmesan cheese- 3 tbsp or as per your taste
Salt & pepper- to taste
Chives or parsley- to sprinkle (optional)
Bring the milk to a boil, add the bay leaf and let it seep for about 15 minutes.
While that's taken care of, cook the potatoes in boiling water till mashable consistency..say about 15 to 20 minutes. 
Drain, remove skin and mash with a potato masher or fork.
Add the shallots, butter, rosemary, thyme and milk (discard the bay leaf), season with enough salt and pepper and mix well till you get a smooth consistency.
Butter 3 ramekins and divide the potato mix equally.
Crack one egg each carefully over the mashed potato in each ramekin.
Spoon 1 tbsp cream on top of each egg and also sprinkle enough (approx. 1 tbsp) Parmesan cheese.
Preheat the oven to 176C and place the ramekins in a baking tray. Fill the tray with enough hot water making sure they come half way up the ramekin.
Bake for about 20 minutes or until the egg whites are set but the yolk is still soft.
Take it out of the oven, sprinkle some parsley or chives and serve on its own or as a side to any main meal.
Notes: I halved the recipe. Double it if you need to please more guests :)
You can also make the whole thing in a baking dish rather than doing it individually in ramekins.
I baked it for a bit longer (30 minutes) cos I was a little scared of the uncooked yolk (salmonella and all that crazy stuff you know!). Also I hate runny yolk. But I think 30 was a tad too much and it became a bit too hard, so lesser time hence forth.
You also don't need to particularly bake it in a water bath. Tried both ways, not much difference.

The best ever beef chops with gravy
My mom-in-law, who is such an awesome cook, introduced me to these beef chops on my visit home last December. I stood by her side trying to grasp all that she was showing me but you know me, how spaced out I am, that I start thinking about what to wear for the dinner party that evening. So after the first few steps, it all went over my head. I told mamma that I will call her up for the recipe and method since I was pretty sure I wouldn't remember half of what she showed me. I went back to my place and bragged about this dish to my mom and one day while we were sitting around chatting, my mom asked me for this recipe and I had no clue. No problemo, I called up my mother-in-law and she gave me the details. Made it and it was such a big hit. Came back to England and obviously I had forgotten the recipe AGAIN! Lucky for me, my sister-in-law and family had just relocated to UK and time differences were not an issue. Called her up and got the details on how to make it. Made it and it was brilliant (although Ro would beg to differ). Made it again last weekend and it was even better. So before I forget here's the recipe for my mom in laws kick ass beef chops with gravy.
Thin cut beef steak or frying steak- 500 gms
Onion- 2 small, finely chopped
Ginger- 1 inch piece, thinly sliced
Garlic- 3 pods, thinly sliced (optional)
Soy sauce- 2 tbsp (or less if you don't want a strong taste)
Tomato ketchup- 1 tbsp
Freshly ground pepper powder- to taste
Salt- to taste (check if required at all)
Oil- 2 tsp

Potatoes- 3 large, cut into wedges or circles (you can also use baby potatoes)
Boil the potatoes till about 3/4th done. It shouldn't be over cooked. Keep aside.
Cut the beef steak into smaller slices and thin it out using a mallet or if you don't have that, just use a knife as a mallet and lightly chop it on either side..through the entire length of the steak (I know I'm not making much sense here, but I promise I'll post a pic the next time I do it)
In a bowl mix together the rest of the ingredients checking for enough salt and adding as required.
Place a pressure cooker on medium high heat and layer the beef steak slices at the bottom. Don't over crowd it and make sure they don't overlap.
Place a generous layer of the onion mix on top of the beef followed by the remaining beef and onion mix, till you are done, making sure you end with the onion mix.
Add a 1/4 cup water (if you want more gravy), close the lid, wait for the steam, place the weight and cook for about 4 to 5 whistles or about 10 to 12 minutes. You would know how long the beef you get cooks, so do accordingly.
Once the steam releases, open the lid and separate the beef chops from the gravy and the onion. Leave the gravy on medium heat to simmer for a while to get a thicker consistency. If there is not much gravy, you can add a wee bit water here.
Heat a frying pan and pour the oil. Swirl it around to coat the pan and once hot, char/fry the beef chops in batches. Just to get the beef a bit brown, you can skip this step if you are lazy. Remove and place in a serving dish.
Do the same with the pre-cooked potato wedges as well. Fry till the colour changes to a light brown. Place them on top of the beef chops and pour the gravy over it. Try and cover most of the chops and potatoes.
Serve hot with chapathi or garlic bread or like I did with the baked eggs.
Notes: My mom in law places the potatoes as well inside the pressure cooker so that also gets cooked simultaneously. I don't trust myself with that method because I always end up over cooking it.
Since I already had my carb in take with mashed potatoes, I avoided the potato wedges with the beef chops and hence its not in the picture.

Thursday, 4 November 2010

Sweet and spicy Asian dipping sauce with Tibetan Momos

I was first introduced to Momos by my college mates in Chennai. I had three Tibetan friends in my class and they used to rant and rave about these, and invariably all of us ended up liking it so much we started harassing them to throw Momo parties. Even for our culturals there used to be Momo stalls and needless to say we absolutely loved gorging on those with the sauce topping it all.

I have no idea what came over me yesterday, but I had to make some Momos and I put in a message on one of these friends' FB page asking him for the recipe. He had not replied and my lack of patience didn't let me back out. So I harassed my best friend on gtalk asking for the recipe because she had made it once long back after seeing it in some mag. She gave me a-lil-bit-of-that a lil-bit-of-this recipe and I soooo knew I was gonna screw up and that's when I realized, why not head to the Chinese store and just buy the wrapper (which is where I usually screw up) and use the remaining mince meat which I'd frozen, as the filling. Oh how clever am I? Yes, clever indeed and ran to the Chinese store only to realize there were at least 4 varieties of dumpling wrappers and another 4 varieties of wonton wrappers. After a failed attempt at trying to understand what the store keeper was trying to explain, I called Ro, who was working from home, to check it up online and let me know. He just confused me even more (no surprises there). Anyway, picked the one I thought was apt and ran back home.

The focus here, however, is the kick-ass sauce I whipped up surprising me altogether. I usually don't experiment when it comes to food and follow a recipe religiously, but this time, I just threw in a few things and came up with this dipping sauce which I'm sure teams well with almost any Asian appetizer and maybe Indian ones like samosas and I'd even serve them as a dip for normal chips.
Filling:
I used this recipe for the mincemeat filling. I know its not authentic but by now you'd already know be familiar with my lack of patience and so had to make do with this. But my mom-in-laws spring roll filling is a good enough one I'd assume and so please do follow that for a more authentic recipe. 

Wrapping and cooking:
Now wrapping it up...I just blindly followed this video and it is actually as simple as that. But where I think I screwed up was the steaming bit which I either kept for too long or too short and it was a wee bit rubbery. If you guys have some knowledge about it please clear it for me. Is 20 minutes too short or too long a time to steam the dumplings??? 

Dipping sauce:
(The quantity is for a very small bowl of sauce, so adapt it to how much ever you'd like)
Tomato- 1/2 of one medium sized tomato, thinly sliced
Onion- 1 shallot, thinly sliced
Dried red chillies- 3 to 4 (or even more if you want it really spicy)
Chopped coriander leaves- 1 tbsp
Tomato ketchup- 1/2 tbsp (if you want it sweeter, add a wee bit more but not too much)
Cumin powder- a pinch (optional)
Soy sauce- a dash (Its optional , but if adding add very little)
Salt- to taste
Oil- 1/2 to 1 tbsp (yes I know its a lot for such small quantities, but it just worked for me. Reduce if you are not comfortable)
EVOO- a dash (optional)

In a saucepan, heat the oil and throw in the onions and red chillies. Sauté till they turn light brown.
Add the tomatoes, cumin powder, soy sauce and salt to this and on medium heat cook till the oil separates.
Add the tomato ketchup and coriander leaves and mix well for about a minute or so.
Take it off the fire and leave aside to cool a bit.
Now using either an immersion blender (oh how I love you immersion blender) or a pestle and mortar, grind/crush this till it becomes more or less mushy....not too paste like. Pulse it two or three times if using a blender.
Pour into a sauce bowl, add a dash of olive oil, mix well and serve with just about anything.
Notes: Adding garlic to this makes it even tastier, but I just didn't have time. Next time for sure.
Its like a tomato chutney, but with a sweetness attached to it.
I think I've found the perfect and easiest sauce for all my fried stuff.

Since the first batch didn't turn out well, I fried a few just to see if it would be any different. Well compared to the steamed ones, the fried ones were better but that is simply not an option for me cos I detest fried stuff. This is how it looked like:
Sending the sauce over to the Food Palette Red Event over at Torviewtoronto

Tuesday, 26 October 2010

Minced meat- 2 ways

This is a pretty lame post and and even lamer pic...no patience for food styling and all. So apologies in advance.
Remember I mentioned my cousins were visiting..well we ended up partying it hard over the weekend and was lethargic whole of Monday. Needless to say, we had a blast, but in the process these are the things I learned:
1. Red wine gives me a hang over
2. Gin and tonic is my new found love which brings me to the next point
3. NEVER mix your drinks
4. Next time think a hundred times before deciding to order an entire case of wine off the Internet.
5. Thank the inventor of the dish washer again and again.

So after all that I spent whole of yesterday in bed watching silly mallu movies and making do with left over food for dinner. Had to get off my ass today because of some important deadlines I had to meet but I'm still pretty pathetic with regard to stamina. I have to rest and be ready for Thursday when they will be back from Ireland :)
I had only mince meat and that too quite a bit of it and so decided to go berserk with it since it was raining and windy and incredibly cold to go out and do grocery shopping.

Basic kheema recipe
So with half kg minced meat I made a kheema sorta thing and used that for my empanadas. I was kinda bored with my basic mince meat recipe and so tried out this recipe by PreeOccupied which came out really well. Its a keeper I'd say!

Pizza dough Empanadas
I made use of my leftover pizza dough to make these simple empanadas and they taste pretty darn good.

Pizza base mix- 1, 100 gm packet kneaded according to instructions. Alternatively, follow this recipe.
Cheddar cheese- 1.4 cup (optional)
Butter melted- 1/2 tbsp
Flour- to dust the working surface

Pre heat the oven to 220C
Once the dough has puffed up the first time, knock it back and make about 6 to 7 lemon size balls out of it.
Dust the working surface with enough flour and roll each of it into a circle or oval shape.
Fill with enough mince meat (about 1 tbsp for each circle) and cheddar cheese (if using) and cover carefully. With the tip of your finger, seal it and use a fork to create impressions around the edges if you want to.
Place them on a baking tray lined with a baking sheet because oil might ooze out and make a mess. You don't want to end up scrubbing the tray.
Using a basting brush, generously butter the empanadas for that brown colour. You can also do the same with egg if you please. I was lazy.
Bake for 20 to 25 minutes and serve hot with sour cream:)

Minced beef Kebabs (seekh kebab)
With the remaining 200 grams I decided to make seekh kebabs. Something I was very doubtful about, but turned out incredibly yum and it was so darn easy to make.

Minced lean beef- 200
Onion- 1 small, roughly chopped
Green chillies- 3, thinly sliced
Coriander leaves- 1/4 cup, washed and roughly chopped
Kashmiri chilli powder- 1/2 tsp
Cumin powder- 1/2 tsp
Turmeric powder- 1/4 tsp
Garam masala- 1/2 tsp
Garlic paste- 1/2 tbsp
Egg- 1 small
Gram flour- 1 tbsp
Salt- to taste
Wooden skewers- 8 or more

Soak the wooden skewers in water for at least 20 minutes
Mix together all the ingredients in a bowl till well combined. If it happens to a be a bit loose, add some more gram flour.
Take small portions in your hand and press it on to the skewers, binding well. If its too heavy then it might fall off (yup I learned from my mistake).
Place them in a baking tray lined with baking paper and bake in an over preheated at 220 C for 20 minutes, turning them occasionally.
You get absolutely delicious and juicy beef kebabs. Serve them with cucumber raita or just a salad.
Notes: Use bread crumbs instead of gram flour
You can make them into patties as well and use the same for burgers.