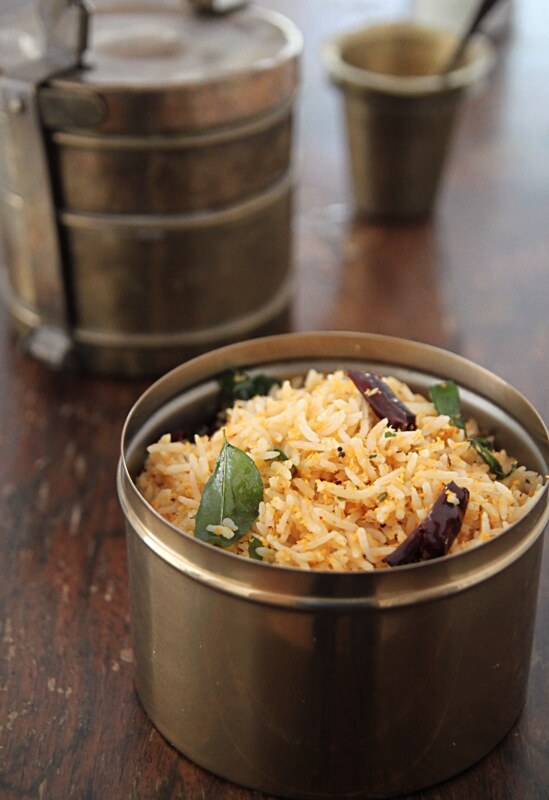
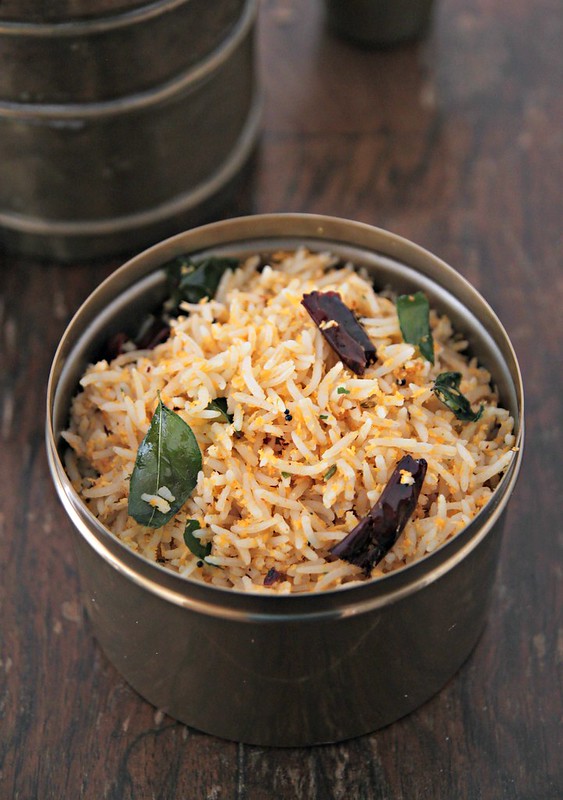
Showing posts with label Rice. Show all posts

Saturday, 31 July 2021

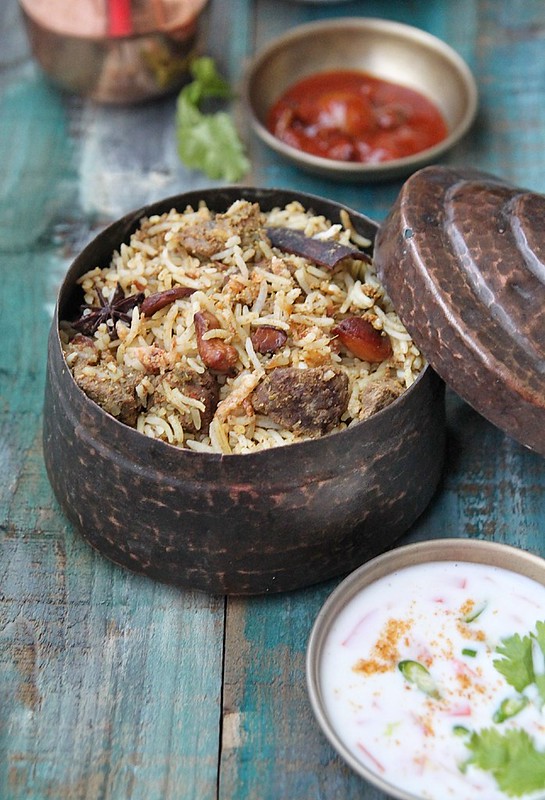
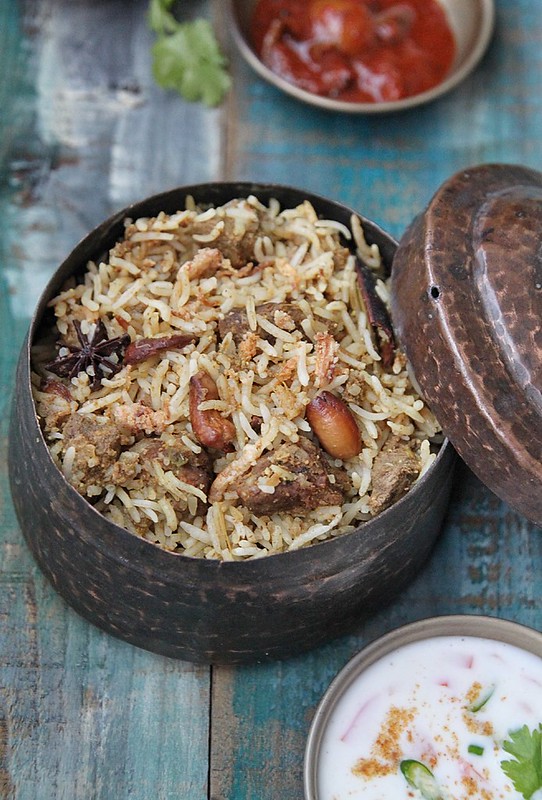
Absolutely flavourful rice

Basmati rice- 2 cups
Coconut oil- 1 tbsp
Cardamom- 4 pods
Cinnamon- 2, 1 inch sticks
Cloves- 4
Cumin seeds- 1 tsp
Garlic- 1 heaped tbsp, finely chopped
Coconut milk- 2 1/4 cups
Chicken stock- 2 cups*
Salt- to taste
Fried onions- to garnish

Wash and soak the basmati rice for about 20 minutes.
Heat coconut oil in a heavy bottom pan and throw in the whole spices.
Once they sizzle and becomes fragrant add the garlic and saute on medium heat till they become a bit brown.
Drain the rice and add to the mix, sauteing well and making sure it doesnt stick to the bottom.
Increase heat to high and pour in the coconut milk and chicken stock.
Give a good mix, check salt and add if required.
Once it comes to a boil, reduce heat to low and close the pan with a well fitting lid.
Cook for about 12 minutes or till the rice is well done.
Keep closed for about 10 minutes after which fluff the rice, garnish with friend onions and serve warm.

Notes:*I used 2 Knorr chicken stock cubes diluted in 2 cups of hot water.
You know how long your rice would take to cook, so cook accordingly.
Add a lemongrass along with the stock and it gives a different flavour.
The rice is incredibly flavourful and so simple to make.

Friday, 1 May 2020

Mushroom-butter rice

Serves 2 as part of main meal

Butter- 1 heaped tbsp
Garlic- 1/2 tbsp, finely chopped
Onions- 1/4 cup, finely chopped
Mushrooms- 1 cup, roughly chopped
Chicken soup cube- 1/2 tsp, crumbled
Cooked basmati rice- 2 1/2 to 3 cups (preferably a day old, and straight from the refrigerator)
Salt- to taste
Pepper- to taste
Spring onion greens- 2 tbsp (optional)

Melt the butter in a wok and add garlic and onions.
Saute till the onions turn translucent. You dont need to get it to turn golden brown.
Add the mushroom and fry on medium heat till they are cooked. If there is water, wait for it to dry up.
Mix the crumbled soup cube into the mushroom and wait for it to melt in the heat.
Tip in the cooked rice and mix well, carefully, without breaking the rice.
Season with enough pepper and salt (after a taste test, as the soup cube is salty), and half of the spring onion greens and mix gently. 
Let it sit for about 2 to 3 minutes on medium heat, just to warm up the rice.
Transfer into serving dish and garnish with the remaining spring greens

Tuesday, 6 June 2017

South Indian garlic and coconut rice

298fcbad-aab5-4959-96d7-2506e60ebac1
Serves 4 as part of main meal (recipe adapted from here)
Oil- 1tsp
Curry leaves- 6 to 8 leaves
Garlic- 15 medium size pods, peeled and roughly chopped
Dried red chilli- 1 large (add more if you want it spicy)
Fennel seeds- 1/4 tsp
Grated coconut- 1 cup
Kashmiri chilli powder- 1 tsp

Ghee- 1/2 tbsp
Oil- 1 tsp
Mustard seeds- 1 tsp
Curry leaves- 1 sprig
Urad dal- 1 tsp
Dried red chilli- 2

Cooked rice- 6 cups (could be basmati, or any leftover rice)
IMG_3715
Heat the oil in a wok and keeping heat to medium low, add the curry leaves, garlic, dried red chilli, fennel seeds, grated coconut and chilli powder.
Roast till the coconut changes in colour a bit and all the spices are aromatic, for about 5 minutes or so. Keep stirring continuously or they will burn. 
Once cool, grind to a coarse mix.

Heat the ghee in the same wok and splutter mustard seeds.
Add curry leaves, urad dal and the dried red chilli to temper.
Add the ground mix and saute for a couple of minutes, just to warm it up.
Add cooked rice into the wok and mix it into the tempered ingredients and ground mix slowly, without breaking the rice.
Keep on heat just enough to warm the rice.
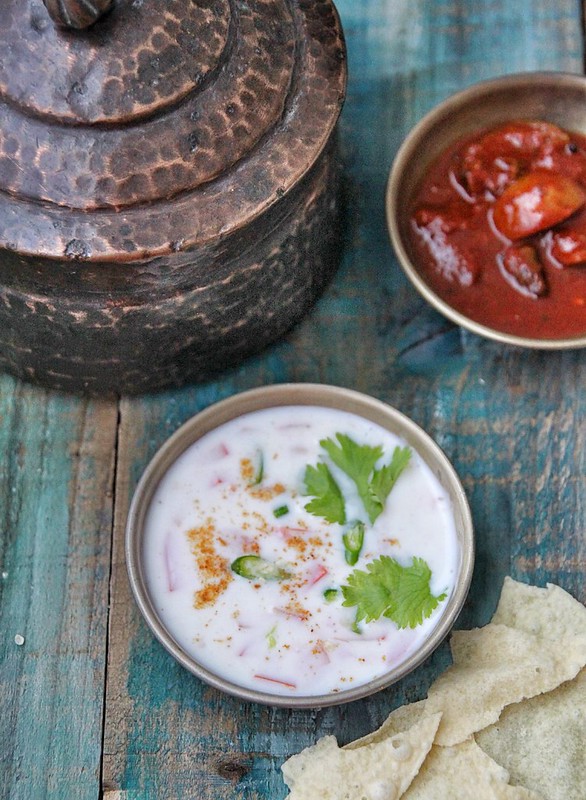
Serve with cold raita and pickle and papad.

Notes: Its a dish that is very strong on the garlic flavour. Reduce it if you want to mellow it down a bit.
Cold cooked rice, or rice that has stayed a couple of days in the fridge is best in this recipe.
You can ease the process by adding the ground mix with the rice in a bowl and then pouring the tempered ingredients on top of the rice and giving a good mix.

Monday, 6 June 2016

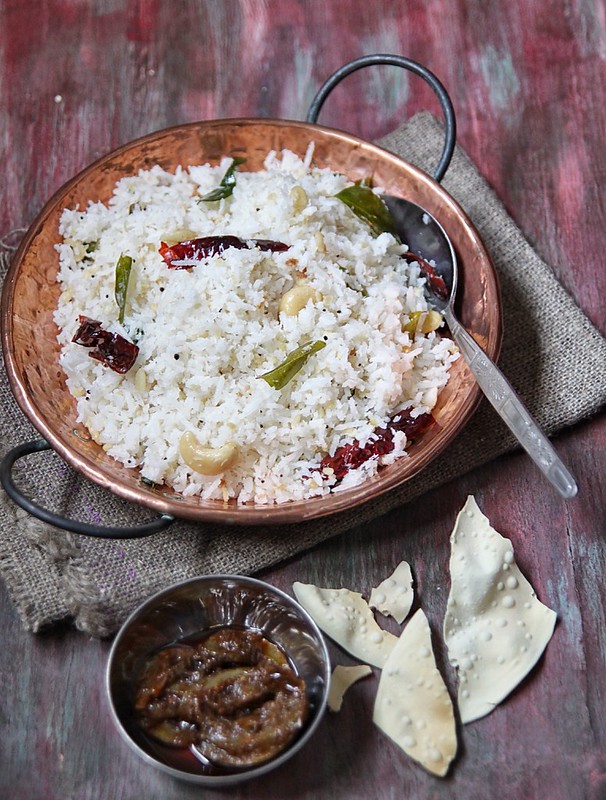
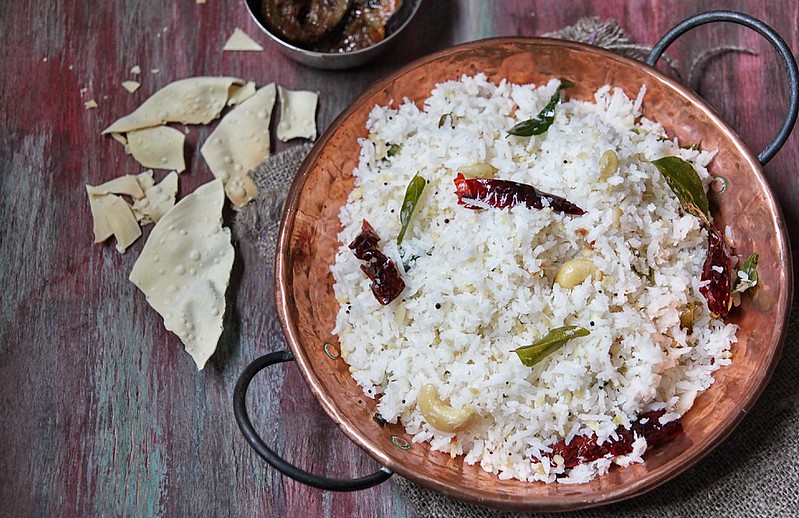
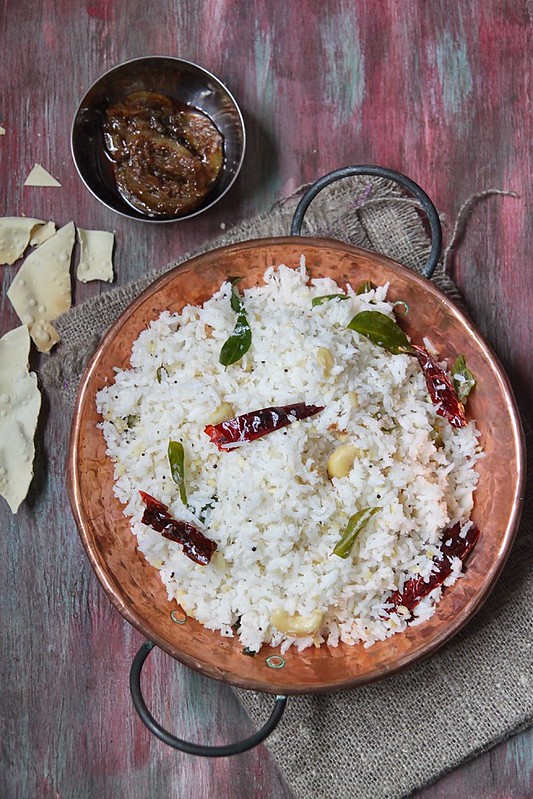
South Indian coconut rice

IMG_8008
On days I make rice, I make a bit extra and use it for variety rice, which is what we refer to rice that has been flavoured with various ingredients- lemon, tamarind, curd, tomato, coriander- to name a few. These are perfect when made with rice that is a day or two old and cold out of the refrigerator. Its also a one pot meal which pairs well with just a pickle, poppadom and maybe some yoghurt if needed,

This coconut rice recipe is an absolute favourite and it makes its way into my kitchen at least twice a month. Its perfect for summer (or whatever they call this ridiculous weather we've been having), light, not too spicy but with brilliant flavours and if you are feeling a bit indulgent you can of course pair it with a chicken curry and serve at a party.

Serves 2 as part of main meal
IMG_7992

Cooked basmati rice- 2 1/2 cups
Ghee- 1 tsp
Vegetable oil- 1/2 tbsp
Mustard seeds- 1/2 tsp
Dried red chillies- 3, crushed or torn
Curry leaves- a sprig
Cashew nuts- 2 tbsp
Asafoetida- a generous pinch
Urad dal- 2 tbsp
Grated coconut- 1/2 cup
Salt- to taste
IMG_7995
In a large wok, heat together the ghee and vegetable oil.
Add the mustard seeds and once they begin to pop, add the dried red chillies and curry leaves. Stir until they become almost crisp.
Add the urad dal, cashew nuts and asafoetida and continue stirring, making sure the dal and cashew nuts get ricely roasted and turn a light golden brown in colour. Make sure they do not burn, as this may change the flavour to a slightly smoky one.
Add the dessicated coconut and keep stirring on medium heat till the wetness from the coconut disappears and it becomes fragrant and lightly toasted- it should turn a reddish brown. This should take 7 to 8 minutes. keep a close eye as coconut can burn pretty quickly.
Add the rice, breaking it down carefully.
Add salt, mix them all together and take off the heat.
Transfer to a serving plate and serve hot with pickle and poppadoms.

Tuesday, 24 November 2015

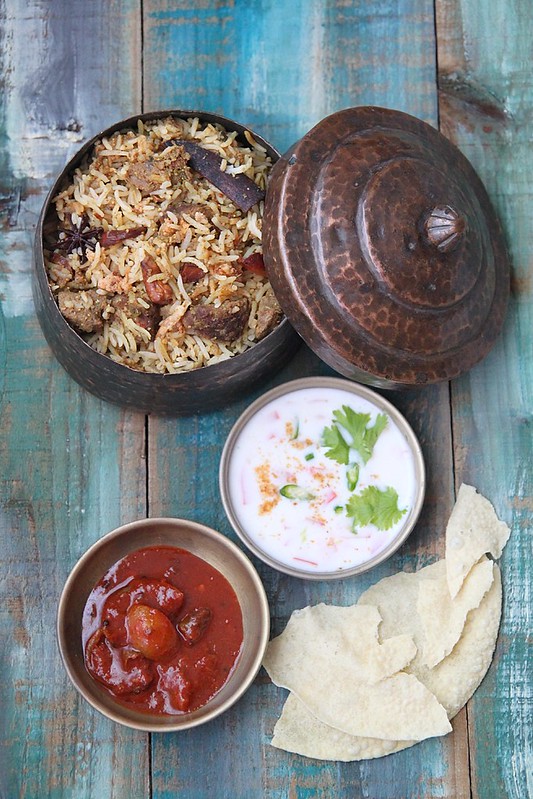
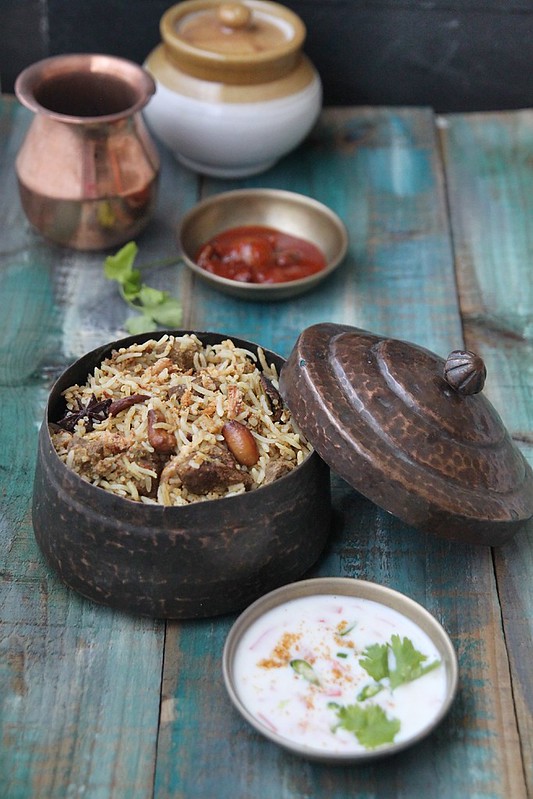
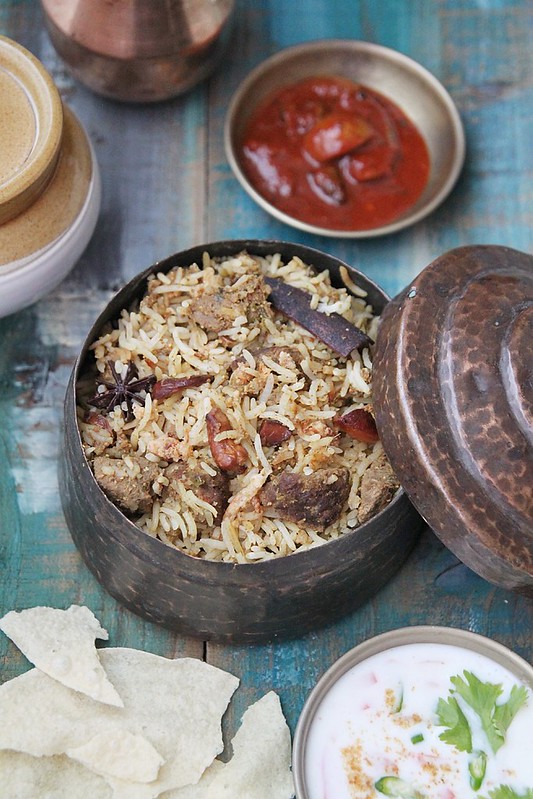
Kerala beef biryani & Christmas traditions

IMG_8836 
Christmas is a month away- A MONTH AWAY- can you believe that?
Its too early to whine about resolutions and how fast this year went by,which i shall keep for my New Year post, so lets talk about food, and Christmas family traditions.

Christmas is a big deal for us back home, something i thoroughly miss after we moved to UK. Although we have tried to do something or the other on Christmas day with friends who are around, its never the same without family. Christmas was spent with cousins and aunts and uncles and started pretty early with a church service at the wee hours of the morning. Droopy eyed we'd still go to church without much fuss because we know we'd get to open presents after. After church we'd all go over to my paternal grandparents house where my grand mother would have prepared a breakfast fit for the kings. But before we sat down to breakfast we'd open all our gifts, which of course was the most favourite part. Breakfast would be elaborate with a Kerala special called appam (hoppers as its commonly known here) served with chicken or mutton stew and there would also be loads of sides like boiled eggs, steamed plantains and this and that. I cant ever remember my grand mother entertaining guests with just two or three dishes, she'd go all out, and every one of them delicious.

We'd have relatives or friends dropping by and they would all be given fruit cake (equivalent of the Christmas pudding) and home made sweet sweet wine. Lunch would follow soon after with a biryani and a side of raita, pappadum, cutlets (croquettes), fish fry etc etc. All home made. It would stretch on for a couple of hours, with non stop banter, Christmas carols in the background, and finally end with dessert which would either be a payasam (which is a sweet milk pudding with vermicelli) or caramel custard or something similar. We'd all be stuffed by then and would be calling dibs on which sofa or bed we'd want to plonk on.
IMG_8804 (1) 
These are all such fond memories of home during Christmas. Its not the same now. Of course the appam and the biryani's are all very much omnipresent, but its no longer a big gathering with cousins and family as we are all spread around the world now. I feel terribly home sick around Christmas time and give Ro quite a hard time about it.

Beef biryani is not something that is made on Christmas day- its usually a chicken or a mutton biryani- but i thought I'd give a twist to tradition with a beef version, which is just as good. The recipe may look long and a bit intimidating for first timers, but its actually not that cumbersome, especially if you manage to make the beef curry a day or two in advance. Do read my notes.

Every family has a Christmas tradition, but if you are looking for something different this time around, then check out the Waitrose Christmas page which has a round up of traditions from around the world accompanied by recipes (Mixing Gorgonzola cheese with Prosecco, now that's a combination i thought never existed!).

Food, in the end, in our own tradition, is something holy. Its not about nutrients and calories. Its about sharing. Its about honesty, its about identity.' Louise Fresco

Kerala Beef Biryani (Serves 4 to 5 generously, as part of main) 
IMG_8848 
To marinate
Beef- 1 kg, diced
Turmeric powder- 1/2 tsp
Garam masala- 1 tsp
Pepper powder- 1 tsp
Yoghurt- 4 tbsp
Salt- to taste

For the masala
Oil- 2 tbsp
Onions- 2 large, roughly chopped
Curry leaves- 2 sprigs
Ginger- 2 1/2 tbsp, peeled and roughly chopped
Garlic- 2 1/2 tbsp, peeled and roughly chopped
Green chillies- 3 to 4 (increase or decrease as per tolerance level)
Tomatoes- 2, finely chopped
Garam masala- 1 tsp
Chilli powder- 1 1/2 tsp
Coriander powder- 2 tsp
Fennel powder- 1/2 tsp
Biryani masala powder- 1 tsp (optional)
Mint leaves- 1/4 cup, finely chopped
Coriander leaves- 1/2 cup, finely chopped
Water- 1/2 to 3/4th cup
Khus Khus (white poppy seeds)- 1 tbsp, soaked in water
IMG_8814
For the rice
Ghee- 2 tbsp
Cloves- 5 pods
Cardamom- 5 pods
Cinnamon- 2, 1 inch sticks
Star anise- 1
Bay leaves- 2
Basmati rice- 3 1/2 cups (I used Tilda long grain rice)
Water- 7 to 8 cups
Salt- to taste
Lemon juice- 1/2 tbsp

For garnishing
Ghee- 3 tbsp
Onions- 1/4 cup, julienned
Cashew nuts- 2 tbsp
Coriander leaves- 1/4 cup
IMG_8854
Marinate the beef with all the ingredients under the 'to marinate' section. Keep aside while you prepare the remaining ingredients.
Grind together the ginger, garlic and green chillies.
Soak the khus khus in water for about 15 minutes, and grind to a smooth paste. Keep aside.
Wash and soak the rice in cold water for about 30 minutes.
Also get the garnish ingredients ready by heating the ghee in a pan and frying the onions and cashew nuts, separately till they turn golden brown and crispy. Drain on paper towels and keep aside.

Into a pressure cooker pour the ghee. 
Keeping the heat on medium, add the chopped onions and curry leaves and cook till they turn a light brown in colour. This could take around 10 to 12 minutes.
Add the crushed ginger-garlic-chilli paste and continue cooking till the raw smell disappears.
Add the tomato and cook till they turn mushy and the oil starts to slightly separate.
Stir in all the spice powders- garam masala, chilli powder, coriander powder, fennel powder and biryani masala (if using).
Season with salt, saute for about 2 minutes, and then tip in the marinated beef and all its juices.
Add the mint and coriander leaves, give a good stir and then pour in about 1/2 cup water. 
Bring to a boil, and close the cooker.
Put the weights on once the steam comes and cook the beef on medium heat for about 4 to 5 whistles or till the beef is completely cooked.
Wait for the steam to die on its own and then open the lid.
If you feel the gravy is too loose, then slow cook it till you feel its thick-ish. Alternatively, if you feel there is not enough gravy then add some more water. Remember you need enough water to mix with the rice and make it moist.
Stir in the ground khus khus, check for salt, add more if needed and take the meat off heat.
IMG_8797 
While the beef is cooking get the rice ready.
In a large pot (enough to hold around 8 cups of water) heat the ghee.
Throw in the whole spices and sauté for a couple of seconds, just to get the aromas going, on medium heat. Put a kettle of water to boil at this point.
Add the drained rice and fry for a couple of seconds.
Add about 7 to 8 cups of water to the rice followed by salt and lemon juice. Stir well and wait for it to boil on high heat.
Once the water starts boiling, time it and cook the rice to an almost al dente form, for about 6 to 8 minutes maximum on a rolling boil.
Keep stirring in between, but make sure the rice doesn't break and get over cooked.
Drain immediately into a colander.

To assemble, smear the bottom of a large heavy bottomed pan with ghee. Use left over ghee from frying the cashew and onions.
Spread a layer of rice and then sprinkle half a tsp each of the chopped coriander leaves, fried onions and cashew over the rice
Top with a layer of the beef curry. Spread it out as gently as possible.
Tip in the remaining rice, spread it out and sprinkle the remaining biryani masala powder and coriander leaves. Continue the layers till you run out of both, but with the rice layer right at the top.
Close with a tight lid, making sure no steam escapes, reduce heat to the lowest possible and let it warm up for about 10-15 minutes.
When done, scatter around the remaining fried onions and cashews and serve hot with some raita, pappad and pickle.
IMG_8808 
Notes: The beef curry can be made a day or two in advance, refrigerated and used as required for the biryani. In fact its a better option because the curry would taste absolutely delicious once the masalas have caught on.
The rice i use got cooked to perfection in exactly 5 minutes, so keep a close watch and make sure you don't over cook it. If you can comfortable with the absorption method with the exact quantity of water used, please do that instead
It is a spicy one, so reduce the green chillies to 2 if you are not a spice fan. I used birds eye chilli
If you can get hold of beef on the bone, nothing like it. I shall do so the next time.
Instead of using the biryani masala powder you can also use normal curry powder in its place.
You can do the layering in the oven as well. Arrange it in an oven proof bowl and warm in an oven preheated at 150C for about 20 minutes.
Freeze the remaining biryani in a freezer proof container. To thaw, either transfer it to the top compartment of the fridge and let it thaw over night or take it out and leave on the counter for it to thaw by evening. Tip the contents into an over proof bowl and let it heat in an oven preheated at 200C for about 15 minutes. 
If you don't own a pressure cooker, you can slow cook the beef in a heavy bottomed pan till done. Just keep a check on it at intervals, keep stirring in between and add water as required.

Tomato and shallot raita
IMG_8861 
Yoghurt- 1 cup
Green chilli- 1/2 of one, finely chopped
Chaat masala- 1/2 to 1 tsp + enough to garnish
Salt- to taste
Tomato- 1 small, finely chopped
Shallot- 1 small, finely chopped
Coriander leaves- 1 tsp

Add a few table spoons of water to the yoghurt and whisk to make it a bit loose.
Stir in the salt, chaat masala and green chilli
Add the tomato and shallots, give it a good stir and just before serving garnish with coriander leaves and a generous sprinkle of chaat masala.

With thanks to Waitrose online for sending me a Waitrose gift card which I used to purchase my ingredients. 

Thursday, 27 August 2015

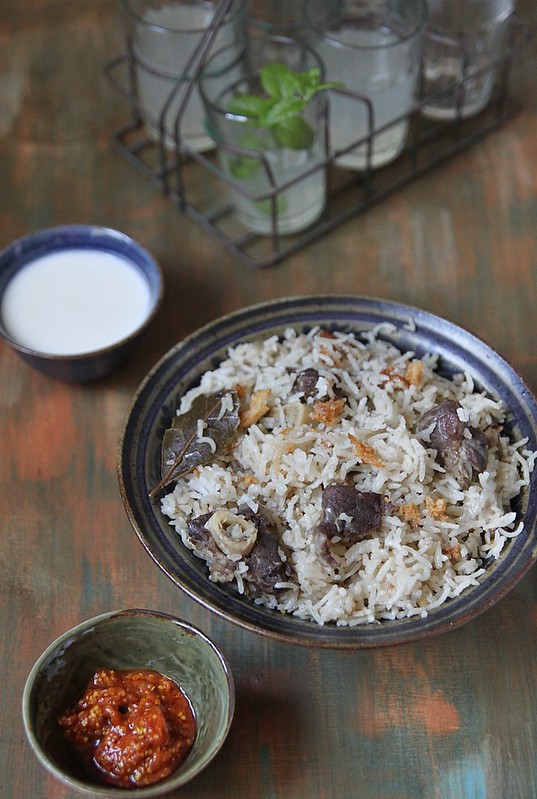
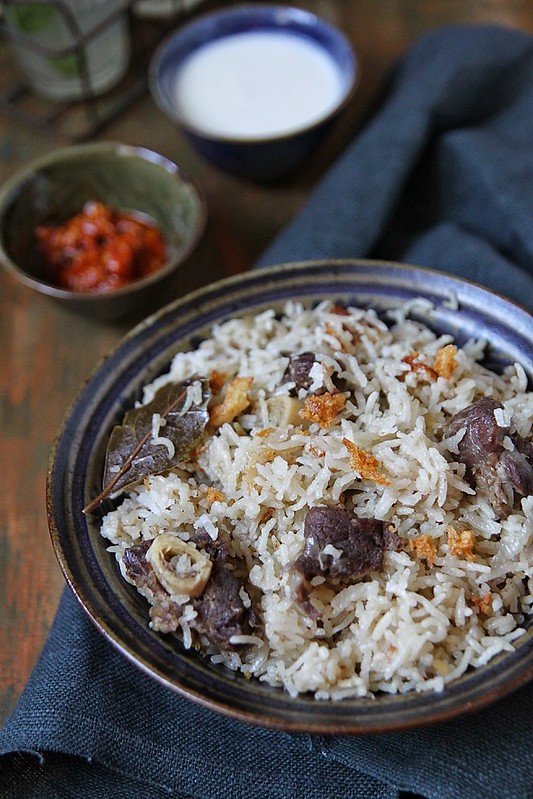
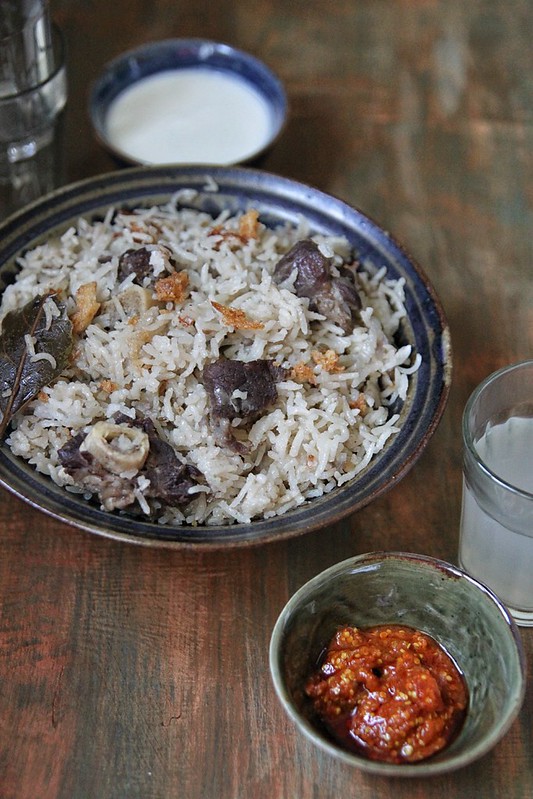
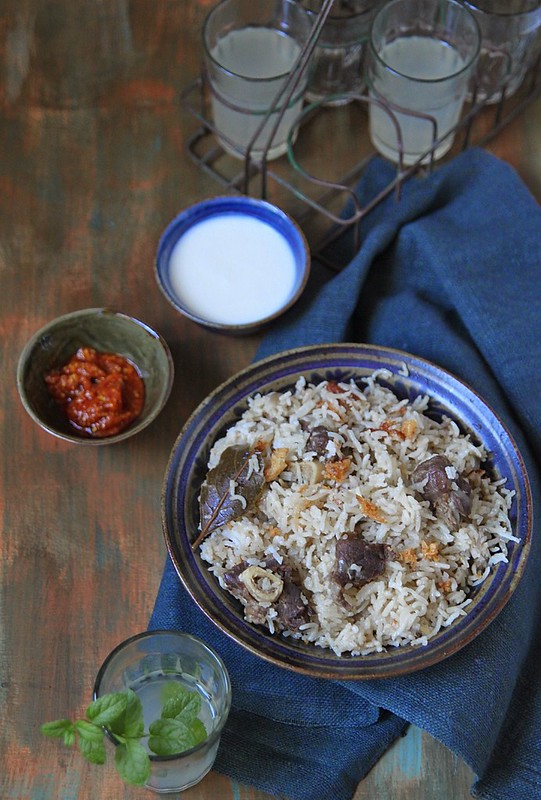
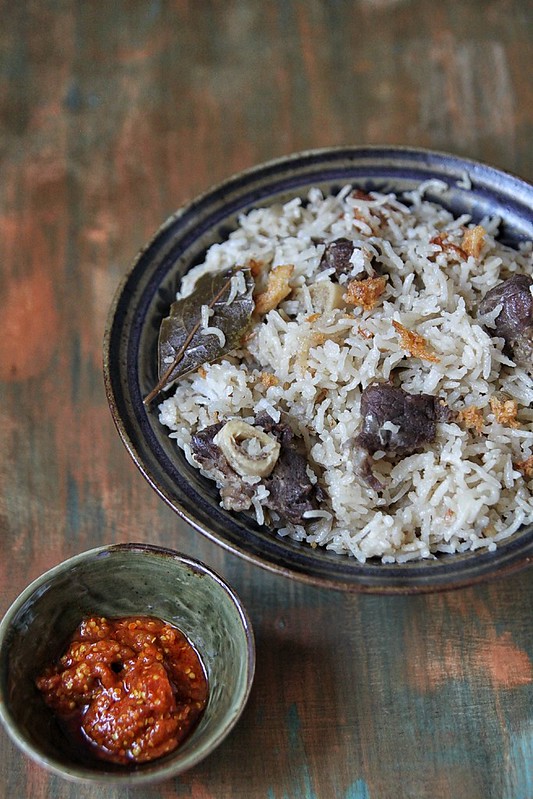
Mutton Yakhni pulao

IMG_7657 
It's been a busy summer, not in a relaxing, I'm-not-doing-anything sort of summer, but a working summer with Chaiparty gaining full on momentum. We did our 4th themed supper club last Sunday and must say we have slowly gotten the hang of cooking and hosting without too much wastage, mismanagement, and goof ups. Of course there is still loads more to learn, but we are really thrilled at how we have pulled through so far. Do check out our Facebook Chaiparty page for pictures and updates.

We also went off to Spain for a week and stayed in the quaintest, rural-est of places and I loved it. Of course the insect bites and the unbearable heat meant half of the time was spent in the pool or at the beach, but it was a good break and we had a blast.
IMG_7652
Cooking wise, not a lot of experimenting has been happening, but I'm still cooking! This yakhni pulao was the after effect of a week long no-cooking scenario and after being sick of eating out, i decided to get into the kitchen and cook, and no less a rich pulao. I have tried this with beef and thought it was somehow much more flavourful then. It wasn't bad this time, very flavourful and such, but i remember the beef being a favourite at that time. Its a recipe that is supposed to be slow cooked, but me being me, decided to cook the mutton in a pressure cooker and then continue with the rest of the process. That cant have been the reason why the beef prep was better, because i did that the same way- in the pressure cooker.

Anyways, this is definitely one of those indulgent pulao's, but one definitely worth trying.

Recipe adapted from here (serves 4)
IMG_7675
Mutton- 500 gms
Yoghurt- 1 tbsp
Cardamom- 5
Cloves- 5
Cumin seeds- 1/2 tsp
Coriander seeds- 1/2 tsp
Cinnamon- 2 ,1 inch sticks
Bay leaf- 1
Black peppercorns- 1 tsp
Onion- 1, roughly chopped
Ginger- 1 tbsp, crushed
Garlic- 6 cloves, crushed
Salt- to taste

Ghee- 1 tbsp
Onions- 1 medium, thinly sliced
Basmati rice- 2 cups, washed and soaked in water for about half an hour
Water- as needed to make 
IMG_7636
Into a pressure cooker add the mutton and all the ingredients listed up to salt and marinate for about an hour or so. 
Add 3 1/2 cups of water to the marinated meat and pressure cook for about 20 minutes, or till the meat is completely cooked. 
Remove the mutton pieces from the mix using a slotted spoon. It doesn't matter if the onions have disintegrated and the garlic and ginger sticks to it. Don't bother removing them, it only adds to the flavour.
Drain the stock using a sieve and discard the spices. You should have around 3 cups of stock. Add quarter cup water to the stock to make it 3 3/4 and keep aside.

Pour the ghee into a heavy bottomed pan and add the onions.
Fry on medium heat till they turn brown, around 15 to 20 minutes. They don't need to be crisp, just caramelised.
Into that add the meat (along with the onions, ginger garlic and whatever is clinging to it) and the drained rice and saute for a minute or so. Don't over do this, or else the rice would break.
Reduce heat to low and add the stock to the rice and meat and give a good stir. Check for salt and add more if needed.
Close the pan with a tight fitting lid, covering all sides with a wet cloth if you think steam would escape.
Cook for around 15 to 20 minutes, resisting the urge to open the lid.
Once the time is up, turn off the heat and leave the rice to rest for about 10 minutes without taking off the lid.
Fluff the rice, garnish wtith some fried onions and serve with raita and poppadom.
IMG_7663
Notes: You know your rice cooking times, usually its around 15 minutes for me, but 20 is safe.
My ratio of rice to meat was not that right, I'd probably use 1 1/2 cups of rice next time.
Of course if you want to do it the right way, slow cook the meat till tender, in a heavy bottomed pan. Keep checking in between to see that water levels are not too low and that the meat is not getting over cooked.
If you don't want the onions disintegrating, keep it whole with and x slit at the base. Same with the spices if you dont want to keep biting into them tie them all together in a muslin cloth and use

Thursday, 22 January 2015

Chicken zafrani pulao

IMG_5292 (1) 
I am not one to adhere to new year resolutions and so i stopped taking them. But last year i decided I wanted to go organic and am pretty proud of the fact that we did manage to do that with whatever options we had. The grocery bills did go through the roof, and there are still some arguments about the pros and cons of going organic, but i think its been a good decision and we are still sticking to it. This year my decision is to eliminate plastic from my life. Replacing all my storage containers and the like tops the list.

This year also started off with me deciding to get my priorities right. (Ro will roll on the floor laughing if he hears this). First on the list was to take up a new hobby. I am still working on it and I have so much negative energy in me right now, i should channel it all in the right direction. I turn a year older in the next couple of weeks and suddenly out of nowhere I've started to panic. It kind of happens every year but this time my fears are different. I'm getting older (and not in a wise , I'm rocking the 30's sort of way), I'm wondering if I'm taking the right decisions, whether I'd regret those decisions and most of all if Ro would resent me later for those decisions. Anyways, rant over, lets talk about something that cheers everyone up.. Food!
IMG_5296
Tilda has been my go to brand for basmati rice. I had some excellent biryani at a restaurant called Kadiri's in North London and we got talking and they gave me a couple of sachets of their excellent biryani rice to sample. And no surprises there, it was of course this special extra long rice called golden Sella from Tilda. I made a batch of biryani with that rice and omg it was the best ever. The rice is so so fragrant, super long, and what we realised is it absorbs the flavour much much more strongly than any other rice we've used. After my sachets were used up i scouted around for that exact variety but couldn't find it anywhere. Tilda does have the Grand Biryani rice in a similar pack but its not the same. 

I was not willing to let go of the rice like that so I sent Tilda a tweet and after a couple of emails they were able to find the rice and they were kind enough to send me a bag to cook with. I have been so stingy with it, and have only managed to make this zafrani pulao and a small batch of plain rice to show you how long they are. I am on a quest to collect recipes and make the best biryani's and blog it and also to find some of the best biryanis in London. This zafrani (saffron) pulao with chicken added to it, is a close substitute for biryani and much easier. A lot of cream and milk is used and like i said, the rice does a great job by absorbing all the fab flavours. Its a very flavourful one pot meal.

Recipe adapted from here (serves 4 generously)
IMG_5295
Basmati rice- 2 cups, washed and soaked in water for half an hour
Water- 1 cup (approx.)
Lemon juice- 1 tbsp (optional)

Eggs- 3 to 4, hard boiled and sliced in half (I used 6 quails eggs, cos i had them lying around , yes i know, I have a thing for quails eggs)

To marinate
Chicken- 1kg, with bone and cut into medium size pieces
Yoghurt- 2tbsp
Ginger-garlic paste- 2tbsp
Salt- to taste

Single cream- 1 cup
Milk- 1 cup
Saffron strands- 8 to 9 
Coriander leaves- 1/4 cup, roughly chopped + enough to garnish
Mint leaves- 1/4 cup, roughly chopped

Ghee- 3 tbsp
Cinnamon- 2, 1 inch sticks
Peppercorn- 1 tbsp
Cloves- 5
Bay leaf- 1
Star anise- 1
Cardamom- 5 pods
Mace- 1 blade
Onions- 2 large, finely chopped
Chilli powder
Garam masala- 1 1/2 tsp
Salt- to taste- 2 tsp
IMG_5287
Marinate the chicken with all the ingredients mentioned.
Warm the milk in a bowl and soak the saffron strands in it for a while.
Into it add the cream, coriander and mint leaves, give a good mix and keep ready.

Melt the ghee in a big chefs pan  on medium heat, and throw in all the spices.
Once the aroma sets in, throw in the onions and sauté till they turn golden brown.
Add the garam masala and chilli powder and mix it all in.
Pour in the saffron infused mix followed by the marinated chicken and give it a good stir. make sure everything is nicely mixed.
Cook the chicken till about 3/4th done, or if you are doubtful like me, cook it all the way through, stirring in between.
Add the rice, boiling water and lemon juice, and enough salt (if needed). Stir it in well.
Once it boils, reduce heat to the lowest, cover the pan with a tight fitting lid and cook till the rice is done. This would take around 15 to 18 minutes.
IMG_5299
Once the rice is cooked, take it off heat and leave aside for another 10 minutes or so, after which you can scoop it on to a serving plate, garnish with coriander leaves and eggs.
Serve with raita.

Notes: Zafrani pulao is traditionally not made with chicken, so omit the meat for a meatless version.
The recipe did not specify what cream was to be used and i ended up using double cream which was a bad idea. So use single cream like I've mentioned in the recipe.
Use 2 cups of milk for a lighter version
The left over pulao freezes really well for a couple of weeks. I thaw it at room temperature and then steam it for best results.

I was not asked by Tilda to do this project, but thanks to Tilda for providing me the rice for this #biryaniquest

Tuesday, 19 November 2013

Minced pork and egg fried rice and Cooking with Kikkoman Masterclass

IMG_1968
I know...been almost a month since I posted here. I'm not going to give excuses blaming work, weather, this, that etc etc. Instead, I'm going to jump right into it and talk about the 'Cooking with Kikkoman masterclass'  I attended a month back at the fabulous Matsuri St James restaurant. Kikkoman is a leading brand of soy sauce and I regularly use it for all my Asian cooking. We networked over cocktails at the foyer before being escorted into the restaurant and seated around a Teppan table. Bing-yu Lee, Manager for Kikkoman UK gave a talk on Kikkoman- how it is made, how its different from the usual ones and we even did a blind tasting between two different types of soy sauces.
20131015_183731
Michelin Starred Chef, Simon Hulstone then took over and demonstrated how to use Kikkoman in a mean broccoli and scallop dish which we all got to taste. After a sushi making demo and a theatrical teppan-yaki meal cooked in front of our eyes we went on to enjoy our meal, full on, paired perfectly with wine.
20131015_185133
In our goody bag was a Kikkoman cook book and this fried rice is adapted from that. There are so many easy recipes and even though i made this rice a week after the event, it didn't make it to the blog because I wasn't happy with the pictures. I thought id make it again and take better pictures, but nope, that never happened and so you are gonna have to just believe me when I say the fried rice tasted simply good. Its really really simple to make and you should give it a go.

I went a bit crazy with the stir frying and that's why it looks like tiny grain. Its just that the rice broke while I got carried away. So be careful when you do the final mixing.

Recipe adapted from the Kikkoman cook book (serves 2)
IMG_1958 
Basmati rice- 1 cup
Water- to cook the rice
Oil- 1 tbsp
Minced pork - 300gms
Ginger- 1 1/2 tbsp, peeled and grated
Garlic- 2 tbsp, peeled and finely chopped
Spring onion- 1/4 cup, finely chopped (reserve a few greens for garnish)
Green chilli- 1, finely chopped
Salt and pepper- to season
Kikkoman soy sauce- 2 tbsp
Eggs- 2
Coriander leaves- 1 tbsp, finely chopped (optional)
IMG_1969
Cook the rice al dente. Drain and keep aside. Make the rice a day ahead and store in the refrigerator. This would make it drier- perfect for fried rice
Heat the oil in a non stick wok and add the minced pork. Stir fry on high heat till the meat changes colour.
Throw in the ginger, garlic, spring onion and green chilli and fry till the pork is cooked through.
Season with salt and pepper and 1 1/2 tbsp of Kikkoman soy sauce. Mix well and cook till the meat turns a bit brown.
Add the rice and stir fry on high heat continuously.
Whisk together the egg and remaining 1/2 tbsp soy sauce in a bowl.
Move aside a bit of the rice from the wok and add the egg. Scramble a bit, turn off the heat and leave covered for about a minute or two for the eggs to set.
Just before serving, garnish with the remaining spring onion greens and coriander leaves.

Notes: The original recipe called for chicken breasts. If using chicken (around 2 medium), dice them into cubes and do as above.

With thanks to Kikkoman for inviting me to the event and the goody bag.

Friday, 2 August 2013

Caribbean Jerk marinated poussin- a post in association with Schwartz

IMG_0177
I know.. 3 posts in a week. Pat on the back for me right?
Well, truth be told.. loads of pending posts and me being a bit of a perfectionist when it comes to my blog (OH MY GOD did I just say I was a perfectionist???), I end up taking a looot more time on a post with editing and re-editing and sometimes even re-cooking (is that a word?) and re-shooting. In spite of all this Ro finds grammatical and spelling mistakes in my posts. Seriously..he cant just say the picture is nice, or that dish was so yum , you should make it again or generally something nice about me.. but no, he says my grammar is rubbish and i need to pay someone (Jane, you in particular actually) to edit my post. Of course if i could pay someone to do my job, then I would have done that in the beginning itself wouldn't I? Anyway, who needs compliments from the husband when I have all you lovelies sending me all the encouragement and push needed to carry on blogging. Big hugs :)

Coming to the recipe. I first tried jerk chicken at the Nottinghill Carnival and liked it. Not loved it , but liked. That was around 4 years ago and then it was recently at Manjiri's place that I tried it again. She was enthusiastic enough to make the spice from scratch, but I was just plain lazy and picked up the Schwartz Jamaican Jerk spice blend off the shelves to give it a go. One word..loved it! Makes life so much more easier and it tastes absolutely fine. The recipe I followed was from the Schwartz website and it was a really simple one at that. I jazzed it up a bit and served it with rice and beans (again Caribbean in Nature), but its not really necessary. You can find other chicken recipes from Schwartz here

Caribbean Jerk marinated poussin (Recipe adapted from here)
IMG_0180 
1 small poussin/ chicken- 500 gms
Schwartz Jerk spice blend- 1 1/2 tbsp
Soy sauce- 1 tbsp
Vinegar- 1/2 tsp (optional)
Vegetable oil- 1 1/2 tbsp
Onion- 1 small, roughly chopped
Garlic- 5 pods
Lemon- 1 half

Mix together the spice blend, soy sauce, vinegar and vegetable oil in a bowl.
Check for salt and add if necessary.
Place the chicken and garlic pods in roasting tray and pour over the marinade.
Rub it into all parts of the chicken. Try and get it under the skin if possible.
Keep aside for about 30 minutes. I skipped this part and baked it immediately.
Squeeze the lemon over the chicken and add it into the tray.
Pre-heat over to 200C and bake the chicken for 30 minutes.
Take the chicken out once the 30 minutes is up and baste with the juices from the tray.
Scatter the onion around and on top of the chicken and bake for another 20 to 30 minutes more. If you want, you can turn the chicken up side down. I didn't.
During the last 10 minutes or so, you can change to grill mode and broil it to get a charred effect.
Check if the chicken is done by poking the fleshiest part with a knife or skewer and if juiced run clear you are good to go.

Notes: Feel free to use cut chicken- legs, thighs anything.
The garlic gets roasted nicely and emits some great flavour, but not a must. Same with onions and lemon.
Its not a spicy dish (as opposed to the actual) one, so add some chilli powder if you want it hot.
Here is the recipe for the jerk chicken spice from scratch.

Rice with beans (Recipe adapted from here)
IMG_0151 
Vegetable oil- 1 tbsp
Onion- 1, finely chopped
Green chilli- 1, slit
Garlic- 2 cloves, peeled and finely chopped
Rice- 1 cup, washed and drained
Kidney beans- 200 gms, drained
Coconut milk- 1/2 cup
Chicken stock- 1 1/2 cups
Thyme- 1/2 tsp
Kidney beans- 200 gms, drained
Salt- to taste

Heat oil in a chefs pan and fry the onions till they soften and turn a bit brown.
Add the chilli and garlic and saute for a minute or two.
Throw in the rice and stir it slowly, making sure it is well coated with oil.
Pour in the coconut milk followed by chicken stock, and also stir in the kidney beans.
Bring to a gently boil on high heat. You can check for salt at this point and add if required.
Then reduce heat to low, put on the lid and let it cook for about 10 to 12 minutes or till all the liquid has been absorbed.
Open the lid and sprinkle thyme.
Keep closed for another 5 minutes after which you can fluff with a fork and serve immediately.
IMG_0154
Notes: The coconut milk I used was from powdered coconut and I may have diluted it too much, the taste of coconut was not obvious at all. Do use a good can of coconut milk for this recipe.
Replace kidney beans with gungo peas or black eyed peas.

This is a post in association with Schwartz

Thursday, 24 January 2013

Coconut milk pulao

IMG_6378 
We had some friends staying over last weekend and it was a hell of a lot of fun. On Monday, after a day out shopping, we got back home exhausted. With the plan of ordering food from outside, we sat down and relaxed with a cup of tea for more gossip sessions. At around 5pm this sudden enthusiasm to cook came over me (and let me warn you, that's not something that happens often, or let me say ever). So I got up and said I was gonna make dinner.

This friend of mine said she would help and we got around to chopping and peeling. Pulao and a beef curry was on the cards and we started prepping. Half way through, the conversation went on to Thai and jasmine rice and coconut milk and my friend said she makes a pulao with coconut milk. She was explaining the procedure and it sounded too good to pass. Turned the whole thing around and decided to make that pilaf instead. 

It was so easy to make and absolutely delish. The whole credit for this dish goes to her and it would be one of those rice preps that will make its way through to my table more often. As I have said before, making rice in the microwave is a revelation to me and again its proved satisfactory. The recipe is quite versatile and you can add whatever veggies you please- it was my first time using potato in a pilaf but it was worth it, its a pretty nice addition. It serves 4 generously and I paired it with a side of beef and spinach curry, pickle and raita.
IMG_6394 
Rice- 1 1/2 cups (washed and soaked for at least 15 minutes)
Water- 3 cups
Ghee- 1 tbsp
Onion- 1 small, finely chopped
Green chilli- 1, finely chopped
Garlic paste- 1 tsp
Carrots- 1/2 cup, finely chopped
Beans- 1/2 cup, finely chopped
Potato- 1/4 cup, cut into small cubes
Turmeric powder- 1/2 tsp
Thick coconut milk- 1/3rd cup 
Salt- to taste
Lemon juice- 1/2 tbsp
Coriander leaves- to garnish (optional)
IMG_6377 
Melt the ghee in a frying pan and add sauté the onions and chilli till glossy, about 3 to 4 minutes. No need to brown it.
Add the garlic paste and sauté till the raw smell disappears.
In goes the diced carrots, beans and potato. Add salt and turmeric powder, stir well, close the pan with a lid and let it cook for about 5 to 6 minutes on medium heat. Make sure it doesn't char.
Open the lid and add the coconut milk, making sure the veggies are all coated well. Continue cooking with the lid open for a few more minutes, till the veggies are cooked.
Drain the rice and add it to the coconut milk mix. Stir continuously for about 2 to 3 minutes, coating the rice with the mix.
Meanwhile, boil 3 cups of water in the kettle.
Transfer the rice mix to a microwave safe bowl, add the boiling water, lemon juice and more salt and place in the microwave, uncovered.
Cook on high (mine was a 750 wts) for 20 minutes.
Once time is up, take the bowl out to see if all the water has been absorbed. If not, put it back into the microwave and cook for another 3 minutes or so.
Leave the bowl covered for about 10 minutes (this is completely optional) and then fluff well using a fork. The grains would all be separate if cooked perfectly.
Garnish with coriander leaves and serve warm
IMG_6387
Notes: Do different versions with frozen peas, corn kernels, mushrooms and so on to make it more interesting.
The coconut milk taste is very distinct, think it out with water if you are not a big fan and reduce the water used accordingly. For example if using 1/2 cup think coconut milk, then use only 2 3/4 cups of boiling water. 
You can also stir in the coconut milk along with the boiling water and add to the rice so the rice gets cooked in the coconut milk. Shall try that method next time and update with results.

Tuesday, 18 December 2012

Turkey and chickpea pilaf

IMG_5920-1
There are some things in life you need to do once. Roasting a turkey is definitely one of them :)
And that's exactly what we did. 

I have never cooked a whole chicken (poussin exempted), leave alone a 5kg turkey. So when Asda asked if I would like to review a Turkey from their Butchers selection, I was a bit sceptical, but the husband was 100 percent confident he could handle it and so I said yes, why not! I decided to give him full responsibility of handling and cooking the turkey and I must say he did a really good job.
141-1
We did some research and decided to do a turkey roast- Indian style and boy are we glad we did so. Most of the turkey roasts I've had are bland, but doing an Indian prep took care of that. The marinade was a basic chilli powder, lime juice, salt, pepper, ginger-garlic paste one and Ro made sure he got the marinade under the skin all throughout the turkey. He also put some onions, lemon wedges, bay leaves, garlic pods and carrots into the cavity for the flavours to catch on. He then nicely doused olive oil over the bird and rubbed it in, followed by seasoning generously with salt and pepper. The cooking method we followed was from here and we managed to get a golden, crispy roast turkey, but the last 10 minutes of cooking on high heat somehow burnt it a wee bit, but no complaints there as we loved the flavours.

We were only a few of us for lunch when we did the roast turkey and so had tonnes left over. After packing off some to friends and relatives, the remaining batch was divided into two. One went into the freezer for future use, and I made this turkey and chickpea pilaf with the remaining. This is a very quick lunch preparation if you have all the ingredients at home and can actually be a one pot meal if you are not obsessed with precooking the onions before hand. Either ways, we loved it. I am hooked on to cooking rice in the microwave now and cant think of doing it any other way. Try this easy peacy pilaf with your left over Chritstmas turkey, and you wont be disappointed..seriously!!!

Recipe adapted from here
IMG_5923
> Olive oil- 2 tbsp
Onion- 1 small, finely chopped
Garlic- 1 tbsp, finely chopped
Ginger- 1 tbsp, finely chopped
Green chilli- 1, slit
Curry paste- 1 heaped tbsp (I used Sharwoods korma paste)
Chickpeas- 150gms (from a 400gm can. Drain and use 150 gms)
Turkey- 150 gms, shredded
Basmati rice- 1 cup, washed and soaked in cold water for 15 minutes
Stock*- 2 1/4 cups (I used chicken stock, feel free to use vegetable stock as well) 
Lime juice- from half a line
Coriander leaves- to garnish
Salt- to taste
IMG_5908
Heat the oil in a large frying pan and saute the onions till they turn light brown.
Add the garlic, ginger and green chilli and continue frying for 2 to 3 minutes till their raw smell disappears.
Add the curry paste and cook for a further 1 minute.
In goes the chickpeas and shredded turkey. Saute till all the masala gets coated well.
Drain the rice and add to the pan, fry for 2 to 3 minutes, stirring continuously. 
Add salt (remember, the stock will have enough salt, so add accordingly), give a final stir and transfer the mix into a microwave safe bowl.
Pour in the stock and lemon juice, give a stir and place in the microwave.
Cook on high (700W) for 15 minutes.
Once done, check if all the water has been absorbed and then cover and leave aside for 10 minutes.
Fluff well using a fork and garnish with coriander leaves just before serving.
Make a meal of it with a side of yoghurt, pickle and poppadoms.
IMG_5938
Notes: Replace the turkey with shredded chicken
I use a stock cube. I dilute it in the required amount of boiling water and use that.
If you don't have curry paste, then use a meat masala or curry powder in its place.

With thanks to Asda for the turkey and gift voucher.

Monday, 19 November 2012

Keralan prawn biryani

IMG_5119
As I have said numerous time before, I am a sucker for biryani, good or bad. I can thoroughly enjoy it without an issue. That said, I completely suck at making biryani the proper way and so cant flaunt it when I have guests over. I do experiment with different types of biryani when its just us at home and sometimes it comes out ok, but most of the time, not good.

When the lovely people over at Flora asked me if I wanted to try making the Keralan Prawn Biryani recipe from their new cookbook called 'Let's Get Cooking,' I jumped at it. With around 30 odd recipes contributed by mums (and dads), the cookbook was put together by Jean-Christophe Novelli and has an array of easy recipes you can whip up in no time. You can view all the recipes in the cookbook here. It was also my first time using Flora Cuisine, and I must say I'm pretty impressed with it. Its a much healthier cooking oil which can be used in place of any oil or butter and used for baking, frying, greasing, sauteing and what not. I have been regularly using it for my cooking now and I love it.
IMG_5103
Coming to the recipe. One look at it and you will instantly realise its an easy peacy one, with no complications of a biryani. That said, its not the traditional biryani. So scoot if its what you are looking for. The rice here is cooked in a microwave, the prawn masala made separately and then both mixed together and served. Not the authentic biryani flavour you would get with this, but would suffice for one of those days you don't want to slog it out in the kitchen, but want something fancy and tasty. I had never cooked rice in a microwave and was wary about doing so, especially because it involved a huge quantity of ingredients and you definitely don't want to waste it by screwing it up. So I did a couple of Google searches, asked the contributor of the recipe (who btw has her own food blog) and some other friends and they all assured me it would turn out well as they regularly did it. 

I was still too chicken to do it and so tried it out with a small quantity of plain rice the previous day. All I have to say is, I'm hooked. I'm kicking myself for not discovering microwave cooking earlier. Its so easy and convenient and the best part, individual grains of rice which are perfectly cooked and fluffy. I now make different types of pulao and stuff in the microwave, which I shall blog about later. So anyways, the whole thing doesn't take any time to put together especially if you make the prawn masala a day or two ahead. Which is what I did and all I had to do was make the rice, garnish and assemble it on THE day. Taste-wise, I thought it was more like a prawn pulao than a biryani, but who cares, it tasted good nonetheless. 

Recipe adapted from Flora's Let's Get Cooking
IMG_5086
To marinate
Tiger prawns- 500 gms, peeled and cleaned
Chilli powder- 1 tsp
Turmeric powder- 1/2 tsp
Salt- to taste

For the masala
Flora Cuisine- 2 tbsp
Onion- 1 large, thinly sliced
Ginger paste- 2 tbsp
Garlic paste- 2 tbsp
Green chillies- 2, slit
Coriander powder- 2 tsp
Mint leaves- 1/4 cup, cleaned and roughly chopped
Coriander leaves- 1/3rd cup, cleaned and roughly chopped
Garam masala- 1 1/2 tsp
Salt- to taste
Water- 1/2 to 3/4th cup
Lemon juice- 1 tbsp

For the rice
Basmati rice- 2 cups, cleaned and soaked in water for around 15 to 20 minutes and then drained.
Flora Cuisine- 1 tbsp
Onion- 1 large, thinly sliced
Boiling water- 4 1/4 cups
Salt- to taste

Garnish (optional)
Cashewnuts- 3 tbsp
Onion- 1 half, julienned
Raisins- 1 tbsp
IMG_5095 
Marinate the cleaned prawns with all the ingredients under the marinate section and keep aside for about 15 to 20 minutes. This is purely optional. Skip the step if time constrained.
Once the marinating time is over, you can start with the masala.
Place a large pan over medium heat and add the Flora Cuisine. Once hot, saute the onions till they turn soft and a light brown in colour.
Add the ginger, garlic pastes and green chilli and continue sauteing till the raw smell disappears, around 2 to 3 minutes.
Throw in the coriander powder, chopped mint and coriander leaves', garam masala and salt and mix it all in, stirring for about a minute or so.
Add the marinated prawns, water and lemon juice and simmer on medium heat till the prawns are cooked through and the masala is in semi-gravy form. Keep aside.
This can be made the previous day or 2 days in advance and refrigerated.
IMG_5102 
Add the boiling water into a large (big enough to comfortably hold the rice once it expands) microwave safe bowl and add the drained rice.
Season with enough salt, give a stir and cook without a lid in the microwave for about 10 minutes.
Simultaneously, heat 1 tbsp of the Flora Cuisine in a frying pan and sauté the onions for the rice till soft and light brown. 
After 10 minutes, remove the rice from the microwave (carefully, bowl might be hot) and add the sauteed onions to it. Give a thorough mix and continue cooking for about 12 minutes.
Once the time is up, check to see if all the water has been absorbed and if not, microwave for a further 2 to 3 minutes.
Take the bowl out, cover with a lid and leave aside for 10 minutes. You will then notice that the rice is perfectly cooked, and no water remains.

To assemble, fluff the rice gently using a fork and mix it with with the prawn masala. Make sure you don't over do the mixing and break the rice.
If using garnish, then heat 2 tbsp of Flora cuisine in a frying pan and fry the cashew nuts, onions and raisins separately till lightly crisp, drain on paper towels and when ready to serve garnish with the same.
Serve with pappad, pickle and raita.
IMG_5104 
Notes: The original recipe calls for frying the marinated prawns for around 4 minutes on each side and adding that to the masala. I omitted this step because I used pre-cooked prawns and doing so would have made it tough when cooked again in the masala. If using fresh prawns, then this step is highly recommended.
Quantities have been altered a bit to suit our taste.
I cooked the rice on full power (700Watts) for 22 minutes. Times vary according to your microwave power.
You can of course layer the biryani the traditional way and cook in the oven or on the hob top to get the 'dum' effect. But the whole point of this biryani is the simplicity and so I followed the above mentioned procedure
I froze the remaining biryani in an air tight container. Just take it out and let it thaw at room temperature before using and finally warm in a microwave before serving.

With thanks to Flora Cuisine for sending me all the ingredients to make this tasty Prawn Biryani.

Monday, 23 April 2012

Afghani murg (chicken) malai kebabs with cumin flavoured rice

IMG_0376
After a week of glorious weather (where everyone thought summer arrived early, even the weather man jumped up in glee) its back to winter like drab this part of the world. Its been filled with rainy days the past 2 weeks and although the trees are in full bloom and the birds are chirping and there is peace in the world, the temperatures are 10C and 12C and the fierce winds make it feel like 5 or 6. Since weather reports form a major chunk of my life these days, I had to update you on it :)

In all honesty, I love rains. The heavy, you cant see whats in front of you, making loads of noise kinda rains, like the monsoons in Kerala. The story is different here because, you wont even know its raining unless you look outside. It comes and goes like a thief and quite unpredictably, like a woman. Like for example, yesterday I woke up to bright sunshine and brilliant 14C temperatures, windows were left open and beer bottles were opened. I went about making lunch thinking I would be able to take some pics finally (oh ya its always that way and not the other way round). 

By the time lunch was done, it was overcast and gloomy, threatening to rain. It finally did, around 4pm and I thought, perfect, let me grab a cup of tea and cosy up with a cookbook. Made tea in 5 mins, settled down on the couch with a throw and the rains had disappeared and the sun was out. So I jumped up immediately, frantically arranged my props, prepped up the food and yes, you guessed it right, it started raining. I was so pissed off, I didn't even have the energy to put back all the stuff I had painstakingly arranged (strewn all over the floor would be more precise). I hoped it would be sunny again and it did become bright for a couple of minutes, but by then I was so engrossed in the book, I couldn't care less. It's sad really, because it was a recipe I would have definitely loved to put up here. This morning isn't any better and the weather forecast says, its raining all week. So I guess the recipe is not meant to be displayed as yet..Sigh!
IMG_0385 
That brings me to this kebab recipe, which I did make on a rainy Sunday and was just the perfect thing to eat on a cold dreary day. The difference, however, was that in spite of the horrid lighting I still managed to take pics (of course they are not really the best, but I still made it work). A friend and I were chatting about food a couple of weeks back and she said she tried these kebabs and they were great. I asked her for the recipe but she said she couldn't find it. So Google came to my rescue and I found a recipe which had all the yummy ingredients and immediately knew it would be a success. So I went about sourcing the stuff and made it the very next day.

The outcome was this really cheesy, juicy and absolutely delicious kebab. The recipe is more or less similar to the Reshmi kebab, but I would say this one is waay better and so so good, it puts other kebabs to shame, really, it does! I don't usually brag about the food i make unless its extremely good. and this definitely is high up there on the food pedestal. I cant wait to make it again (once my oven gets  fixed). I must admit however, that the cardamom taste in this recipe is prominent and this, in spite of reducing it drastically from the original recipe. But I guess that's really one of the specialities of the dish. Do reduce it even more or omit it completely, if you cant stand it.

Recipe adapted from here
IMG_0336-1 
Boneless chicken- 500 gms (I used chicken thighs)
Ginger paste- 1 tsp
Garlic paste- 1 tsp
Rice vinegar- 1 tbsp
Cashew nuts- 3 tbsp
Milk- 3 tbsp
Cheddar cheese- 2 tbsp, finely grated
Cardamom powder- a little less than 1/4 tsp or to taste (powder the seeds alone from about 5-6 pods)
Freshly ground black pepper- 1 1/2 tsp
Garam masala- 1 tsp
Egg- 1, lightly beaten
Double cream- 2 tbsp
Salt- to taste
IMG_0377 
Cut up the boneless chicken pieces into bite size pieces (not too small) and marinate it with ginger, garlic pastes, vinegar and salt and keep aside while you get the remaining preps going.
Soak the cashew nuts in milk for about 15 minutes and then blend to a smooth paste.
Transfer the mix into a bigger bowl and add to it the grated cheese, cardamom powder, black pepper, and garam masala.
Whisk the egg and cream together separately till just combined, and add it to the cashew-cheese mix.
Mix till you get a smooth paste.
Pour this mixture onto the marinated chicken and mix well, making sure all the pieces are well coated with the paste
Cover with a cling film and marinate it for a minimum of 1hr. I kept it in the refrigerator over night.
About an hour or so before cooking, soak around 6 to 8 bamboo skewers in water. 
Also bring the marinated meat to room temperature.
When ready to cook, preheat the oven in the grill mode.
Thread the chicken on to the skewers, about 4 to 5 pieces per skewer (of course depending on the size of the pieces) and place on a baking tray lined with aluminium foil.
Place under the grill and cook for about 6 to 7 minutes on one side.
Take the tray out, turn the chicken pieces over, baste with remaining marinade if required, and place it back under the grill for a further 6-7 minutes or till the meat is tender and cooked through.
Test this by inserting a fork into the centre and separating the flesh. If it falls off easily, you are good to go.
Keep aside for about 5 minutes before digging in.
Serve with a green chutney as appetiser or with flavoured rice and raita as part of mains.
IMG_0358 
Notes: Feel free to use chicken breasts instead of thighs. I find breasts absolutely tasteless- contextually speaking of course ;)- so never bother using it in any cooking.
Use apple cider vinegar or any vinegar of choice (except for maybe balsamic and red wine vinegar).
Cheese variety also can be varied I guess, but make sure you grate it fine because only then will they stick to the meat.
Replace double cream with yoghurt or crème fraiche.
If you don't want to grill the meat, then bake in an oven preheated at 176C for about 30 minutes, flipping sides and basting occasionally.

Cumin flavoured rice
IMG_0396 
Basmati rice- 1 cup
Oil- 1 tsp
Cumin seeds- 1 tsp
Whole black pepper- 1 tsp, lightly crushed
Green peas- 1/4 cup (optional)
Lime juice- a dash (optional)
Salt- to taste
Water- 2 cups
IMG_0386 
Wash and drain the rice. Keep aside.
Heat the oil in a wide, deep pan and add the cumin seeds.
Once they start to splutter, add the black pepper, garam masala and green peas.
Stir for a couple of seconds after which you add the drained rice.
Stir fry on medium heat till the rice becomes slightly translucent.
Meanwhile, boil 2 cups of water in a kettle and pour into the rice.
Add enough salt and a dash of lemon juice (this prevents the rice from sticking to each other).
Give on final stir, cover the pan with a tight lid, reduce heat to low and cook for about 15-20 minutes or till the rice is well done.
Remove from heat, fluff the rice using a fork and serve immediately.
IMG_0393 
Notes: Use ghee instead of oil for a richer flavour.
You can of course do a pulao version by sautéing onions etc etc,.
Garnish with coriander leaves for that extra kick.