Friday 31 May 2013

Challah bread

IMG_8884
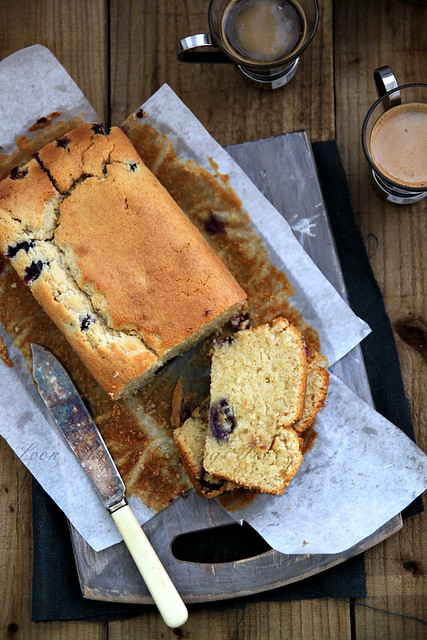
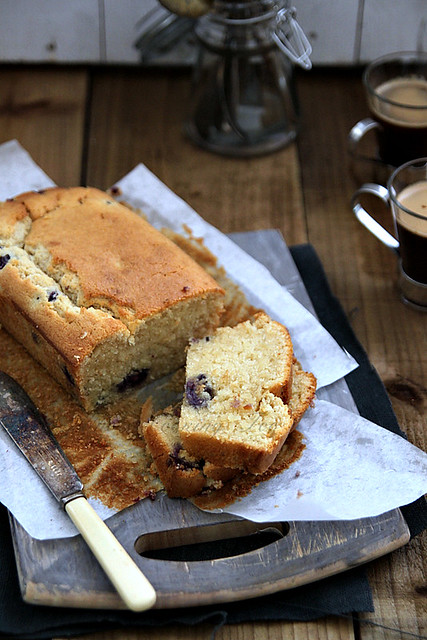
I don't have too many bread recipes on my blog. Its not because I don't bake bread, its because the process takes waaay too long in this cold weather. I have to start in the morning for it to rise (twice) and have it ready for dinner. Which makes it impossible to take pictures. This time however, I was lucky, since I had a bread bin to keep my bread in and not worry about it going stale since the next sunny day was 2 days later. You think I'm crazy? Join the club. I know a whole lot of people who think I'm crazy because I check the weather every hour to plan my photo shoot. Lucky for me, most of my readers are food bloggers and you'd know exactly what I'm talking about!

Garden Trading is this beautiful online store which provides functional everyday products for the home and garden. First look at their website and I was hooked. I wanted everything they displayed and they fit my style so so well. I'm a sucker for anything rustic with the whole country-house, farm house feel and Garden Trading has everything that fits the theme.. I was sent the Bread Bin in Flint to review and since we were on the look out for a bread bin, the timing couldn't be better. 

IMG_8940
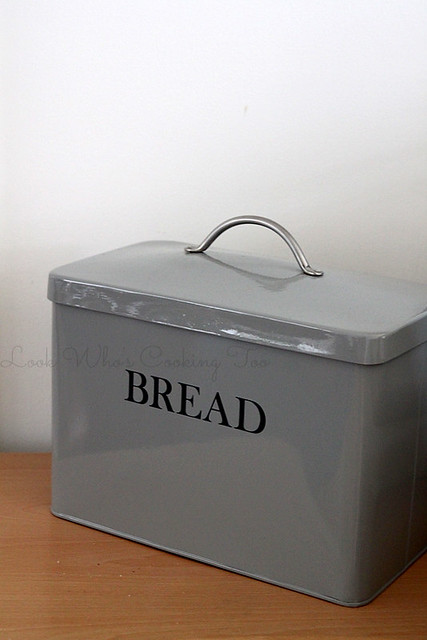
The colour, a soft grey, blends well with my decor, the design stylish with a chrome handle lid, and the interior the same soft grey colour. The only (small) issue I had was the size, which for my tiny kitchen was a tad too big. I have very little counter space and so putting the bin there wasn't an option. It was too big to go on top of my microwave either. That said, the bin can easily hold two big loaves of bread and we've even chucked in some packs of chocolate and stuff as well. We made it work somehow and I, for one, love having the bread bin in my kitchen now.

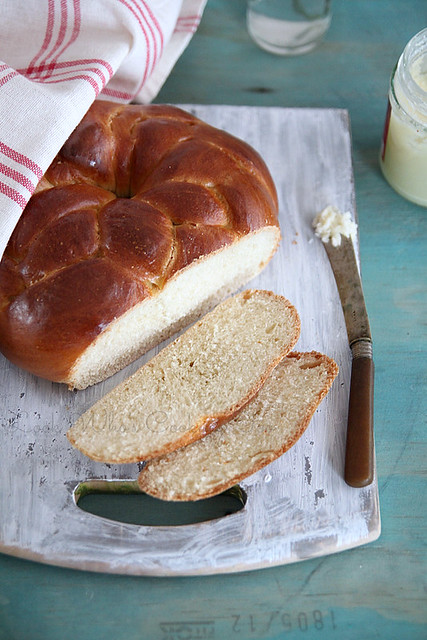
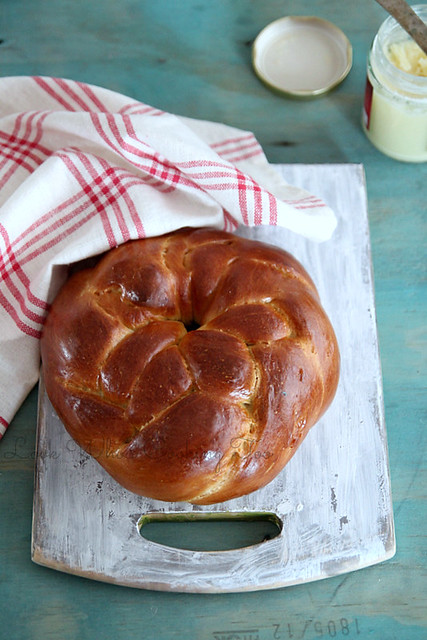
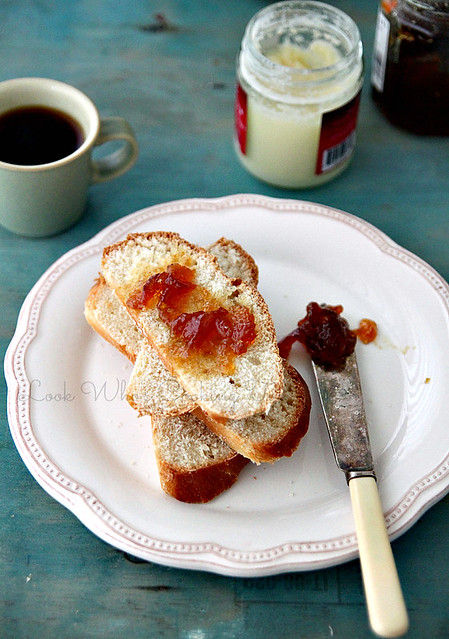
The Challah bread (pronounced "hallah") was put in the bread bin for about 2 days and then I made some delicious French toast with it. I've wanted to make this gorgeous looking bread for so long but kept putting it off because I thought the braid was complicated. And it was!! After watching numerous YouTube videos I still didn't get it right. Tried it thrice and then on the 4th I just made a normal 3 braid challah, shaped it in a circle and called it a day. The bread is soft, slightly sweet and perfect with a spread of brandy butter. Or if you want to be more experimental, make a French toast or bread pudding with this gorgeous looking bread.

Recipe halved from here (makes one small loaf)
IMG_8883 
Plain flour- 2 to 2 1/4 cups 
Granulated sugar- 
Salt- 1 tsp
Instant yeast- 1 tsp
Egg- 1 large
Egg yolk- 1 small (take off about 1 tsp from this and keep aside to do an egg wash)
Water- 1/2 cup (lukewarm)
Vegetable oil- 1 oz

Into the bowl of a free standing mixer (or mixing bowl if using your hand) add the flour, sugar, salt and instant yeast. Stir to combine.
Make a well in the centre and add the egg, egg yolk and vegetable oil. Mix using a wooden spoon till the mix becomes wet.
Add the warm water, and using the same wooden spoon mix them all together...roughly.
Attach the dough hook and knead on medium speed for about 5 to 6 minutes, or till the dough is soft and smooth and is no longer sticky. My dough was really sticky, so I ended up adding at least 2 tbsp of flour. If you are using your hands to knead, then flour a work top and knead for about 10 minutes till you achieve the desired consistency.
Lightly oil the same bowl and place the (lightly greased) dough ball in it. Cover with a cling film and leave it in aside to rise. I preheated my oven at 100C for about 6 to 7 minutes and placed the bowl inside with the light on. It took the dough about 3 1/2 hours to double in size.
IMG_8910
Punch the dough down and separate the dough into 3 equal sizes. 
Roll each of them out into a long rope about 1 inch thick and around 8 to 10 inches long. They might shrink as you try to roll them. In that case, just leave them aside to rest for 5 minutes and try it again.
Join the ends of all the three ropes and secure tightly by pressing then together.
Then spread the three ropes and try and braid them like how you do your hair. If you mess up, don't worry, start over. (I had to.. thrice!).
Once you reach the end, carefully tuck them under the braid and shape them into a round, joining both the ends.
Place it carefully on to a baking tray lined with baking paper, cover with the same cling film, and leave it to rise in a warm place for another hour or two. I did the same oven method.

When ready to bake, pre heat the oven to 175C.
Mix the egg yolk with some egg white and 1/2 tbsp water and brush over the risen challah, generously and making sure you don't miss the cracks and sides of the loaf.
Bake for about 25 to 30 minutes, rotating the pan half way through for even cooking.
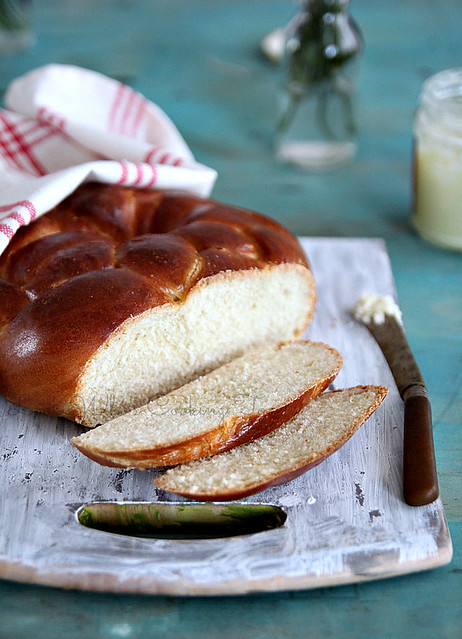
The loaf is done when it turns a golden brown colour.
take it out of the oven and leave to cool on a rack for about 10 minutes, after which you can slice, spread some butter or jam and have it warm.
IMG_8892
Notes: The recipe can easily be doubled.
The dough is slightly sticky, so I had to use a generous amount of flour on the work surface while rolling out the rope.
The bread stayed absolutely fine for a week in the bread bin. I wrapped it in some aluminium foil and placed it in.

With thanks to Garden Trading for sending me a bread bin to review.

Monday 27 May 2013

Netholi fry (Fried anchovies)

IMG_8338
I've been a bit busy (good busy) with work catching on and a cousin visiting from India. Its been quiet around here and I haven't really cooked that much or taken pics in a while. Its a long weekend here and for some strange reason, the weather has been great. We've been out enjoying the sun before the next set of rains and temperature drops happen. 
I made nethili fry a couple of weeks back with the intention of serving it as a starter for a party we threw at home. Since it was my first time with the fish, I decided to try it out a day before, just to see if it would turn out ok. It didn't. It went all soggy on me and I decided to not serve it at the party. Instead I just bought crisps :)

I have this thing against deep frying and after some helpful inputs from Ria, I decided to give it a shot again. I didn't deep fry it, instead shallow fried it. It does make a terrible mess (or maybe that's just me) and takes a tad longer than deep frying, but you do get crispy anchovies..the way its supposed to be. If cooked well, they are great to snack on and perfect with some cold beer. 

Recipe adapted from here and here (serves 2)
IMG_8359
Nethili- 250 gms, cleaned- remove head, tail and all the unnecessary inside parts
Lemon juice- 1 tsp
Salt- 1/4 tsp
Oil- to fry

Marinade
Kashmiri chilli powder- 2 tsp
Turmeric powder- 1/4 tsp
Fennel powder- a lil less than 1/4 tsp
Pepper powder- 1/4 tsp
Coriander powder- 1 tsp (optional)
Ginger paste- 1/2 tsp
Garlic paste- 1 tsp
Yoghurt- 1/2 tbsp (optional)
Curry leaves- a sprig
Salt- to taste
Marinate the fish with lemon juice and salt for about 5 minutes. This really gets rid of the fishy smell. Rinse well and keep aside.
Mix together all the ingredients for the marinade. If it is too dry, feel free to add a spoon or so of water to get a smooth paste. 
Do a taste test and add more salt or spice if required.
Add the fish to the marinade and mix well to coat the pieces well. Keep aside for about 15 minutes.
Heat the oil in a kadai or frying pan (enough to cover the base of the pan properly). It should be really hot, otherwise you will end up with soggy ones. 
Add the fish (in batches if required) and fry on both sides, till brown and crispy. Keep the heat on medium all through.
Remove the fish and the crispy curry leaves with a slotted spoon and drain on paper towels.
Squeeze a lemon over and serve warm.

Notes: The recipe can be easily doubled.

Wednesday 22 May 2013

Review: Thorntons Chocolates

My brother and I used to look forward to relatives visiting from abroad just for the chocolates. Those fancy ones with nuts and fruits and all that jazz were so totally popular among us kids, the fights we've had over them are endless. So the moment someone gifted us chocolates, my mum used segregate them and make sure we both got equal share. I used to happily finish off my share and then beg and plead with my brother to give me some of his. After a bit of convincing, he would actually part with some of his stash and I'd do a victory dance. When the situation was reversed, I'd be this really mean sister and refuse to give him some from my share and stand solid on the fact that mum segregated them so we wouldn't have to share. Go on, say it...I'm horrible. :) :)

Anyways, coming to today's review...Thorntons was the first brand of chocolates I was introduced to in the UK. Our first year here was a year of exploring everything British, and chocolates topped the list (for a while at least). My husband is such a Thorntons fan he says there is nothing better than Thorntons ice cream. Its a bit of an exaggeration, but I'll let it pass.
I was sent one of the boxed chocolates by Thorntons- the Continental Milk, White & Dark Collection- to review and that was our after dinner treat for about 2 weeks. Its their finest chocolate range and a good gift idea for anyone who loves chocolate. More so if you don't know what the persons preference is, since this box contains an equal mix of milk, white and dark chocolates, with fruity flavours, with nutty centres, mousses, pralines and so on. We are more of the dark chocolate lovers, so we thought the white and milk ones would go to waste, but I absolutely liked them and there was none left. The ones I didn't really enjoy much were the fruity chocs, but that's just me. I have an issue pairing fruits with chocolates and so the husband took it upon himself to eat it all. The boxes come beautifully packed and you would think twice before throwing it away (and maybe even the ribbon. Yes I have a hoarding problem). They are also packaged well and the chocolates were all intact when it arrived at my doorstep.

If you ever get stuck with a gift idea for a friend, don't forget to check out Thorntons' great gift ideas. They really do have a few options to choose from. Word of advice: Dont gift this box to someone who plans on going on a diet. You may get an earful for the sin they are about to commit. Instead, check out the Thorntons website and get inspired.

With thanks to Thorntons for sending me the samples.

Sunday 19 May 2013

Curried coconut shrimp and Merrydown cider review

IMG_8589
I love cider, more than beer. I started off with the really sweet ones and now my preference is the medium or the dry ones which are perfect to glug on a hot summer afternoon. A couple of weeks back, we had some great weather and as luck would have it Merrydown Cider sent me their cider to review. It was my first time with Merrydown and my first cider this season and so was really excited. Yes, I do have seasonal drinks, in case you ask ;)

They also sent me a Great Summer Celebrations recipe booklet featuring some great ideas using cider as a key ingredient, which you can download. Since summer is just around the corner (or I'm hoping its just around the corner), I thought the cider would be a great addition to the BBQ parties and brunches. I paired it with this simple coconut shrimp starter and it was perfect. I always think fried food and cold drinks go hand in hand. My initial plan was to make a cider-batter for the shrimp, but the dry cider bottle broke in transit and so had to just do a pairing instead. I promise I'll update the post once I get hold of their dry cider, which I'm pretty sure would be my favourite out of the two. Not that the medium cider was any bad, but it was a teeny tiny bit on the sweeter side and since I've evolved from  the really sweet drinks (be it wine, cocktails or cider), the dry version would have hit the spot (or so I think). 

Anyways, coconut shrimp has made its way through to my blog before and this time I did a curried version which is not too bad, but I preferred my first version better. The marinade options are endless and if you do get your hands on some dry beer or cider, then the batter would be even better. I served the shrimp with a mayo-ketchup sauce (recipe here), but feel free to serve with just ketchup or any other hot sauce.

Serves 2 to 3 as starter
IMG_8549
Shrimp- 250 gms, cleaned and deveined
Curry powder- 1 tsp
Salt- to taste

Plain flour- around 1/4 cup
Baking soda- 1/4 tsp (optional)
Pepper- 1/4 tsp
Salt- to taste
Egg- 1, small
Water- 1 to 2 tbsp
Dessicated coconut- 1/2 to 1 cup
Oil- to fry
IMG_8595
Marinate the shrimp with curry powder and salt and keep aside for about 15 minutes.
In a bowl whisk together the flour, baking soda, pepper and salt.
Add the egg and enough water to make a smooth batter. It shouldn't be too loose.
Tip in the marinated prawns into the batter and mix well to coat the prawns evenly.
Get the dessicated coconut ready in a plate
Heat oil in a deep saucepan. Check that the oil is done by dropping some batter into it. If it floats to the top immediately then you are good to go.
When ready to fry, take each shrimp out of the batter, drip off any excess and roll in the dessicated coconut a couple of times to coat as evenly as possible.
Drop into the oil. 
Repeat with remaining shrimp. 
Once the prawns turn golden brown on one side (in about 2 minutes), turn them over and cook for another 2 minutes or so.
Remove the shrimp with a slotted spoon and drain on paper towels.
You may need to fry them in a couple of batches, depending on the size of the pan.

With thanks to Merrydown Cider for sending me the samples.

Wednesday 15 May 2013

Pin it Forward UK and the 1-minute chocolate chip cookie (in a mug)

I'm assuming most of you know about Pinterest already? For those of you who don't, its this amazing platform for collecting and organising the things you love, or are interested in by "pinning" them. I first came across Pinterest on one of my random blog stats check where I saw a lot of traffic form the site. Suspicious and a bit worried really, I checked out the site and couldn't make head or tail of it at one look. Spent a couple of hours reading up and doing some research and I was hooked. Got myself an account and was soon spending hours on the site pinning the things I love. 
Now its become such a part of my research that I have this tendency to search for anything on Pinterest first, rather than Google. I mostly pin recipes, both from my blog and otherwise, and fabulous food photography from where I derive a lot of my inspiration from. Other than these boards, I totally love the DIY, fashion & beauty and home décor information and inspiration I find from all the fabulous pinners. The advantage here is that these pins are linked back to the original source and so you don't need to worry about stuff being copied. 

Pinterest has officially launched in UK and they had this fabulous party to celebrate that. We all got to meet fellow pinners and it was a fun night with loads of food and drinks. If you are already on Pinterest then do follow me here or if you aren't hooked on as yet, then register on Pinterest here. Just a warning, its frikking addictive, but you'd love, love, love it :)

I would also like to introduce two amazing fellow pinners and food bloggers, Michelle of Greedy Gourmet who has an amazing array of recipes, reviews and giveaways on her blog, not to mention her beautiful food photography, and Emma of Poires au Chocolat who completely got me hooked on her beautiful cakes and treats.
IMG_8810
The recipe below is one I got from Pinterest. Its been pinned some 3000 odd times (yes, there is every reason to trust this recipe) and its as easy as it can get to make a cookie. When the whole mug cake recipe was a rage in the blog world, I didn't fall prey to it because, truth be told, I hate microwave cakes.  This happened out of desperation, on a day I was sugar starved and HAD to have a cookie, yes just one would have made me happy. As usual Pinterest came to my rescue and I had a chewy chocolate chip cookie in under a minute. In fact, if it wasnt for the egg yolk, I would have had the batter on its own :)

You will most certainly have all these ingredients in your pantry at any given time and so there is no excuse to not make it. So immediately after reading this, please do yourself a favour and check if it works, if not for the cookie craving (which usually for me is after mid night) :)

1-minute chocolate chip cookie (in a mug). Recipe adapted from here
IMG_8824
Butter- 1 tbsp
Granulated white sugar- 1 tbsp
Dark brown sugar- 1 tbsp, firmly packed
Vanilla extract- 3 splashes
Salt- a pinch
Egg yolk- 1
Plain flour- 3 tbsp
Chocolate chips- 2 tbsp ( I used dark choc. chips)

Melt butter in the microwave, preferably in the same cup you are planning to make the cookie in (to make it mess free and simpler). The butter should not boil, it should be just melted.
Add the white and brown sugars, vanilla and salt and mix well to combine, using a spoon.
In goes the egg yolk. Mix it in properly till no traces of the yolk is seen.
Mix in the flour properly and then fold the chocolate chips.
Cook on high in the microwave for 40 seconds, or a maximum of 50 seconds.
Serve warm (maybe even with a dollop of ice cream).
IMG_8816
Note: If you over cook it, the cookie starts drying and is awful (yes it has happened). So reduce cooking time if that happens to you
Like most cookies, this once will continue to cook as it cools.
Feel free to double it, in case your partner longingly looks at you gobbling it all up :)
I used a small espresso cup which was about 3/4th full. The dough rises a bit so make sure you dont fill it to the brim.
Feel free to use a ramekin, coffee cup or any small dish.

I was invited to be part of the Pin it Forward campaign by Pinterest, but was not compensated in any way for the same. All thoughts on Pinterest are my own.

Thursday 9 May 2013

Blueberry cream cheese butter cake

IMG_8754-1
Its been ages since I updated the blog, and even longer since I posted a cake recipe. I have half written posts in my drafts and loads of reviews to be done, but somehow my days have become really busy..ever since I started working part time. I love my job and its opened up a completely new world of baking and cooking and such for me. More on that later.

I am not going to ramble today, yes, time constrained, so I'll go straight to the recipe. Like I said before, I hadn't baked a cake in a looong time and so on a day I felt the need to eat something seriously unhealthy, cake was what came to my mind. My usual Google searches led me to this fab recipe, tried by 3 of my fav bloggers and so I knew it was going to be a winner. 
IMG_8715
Loads of butter, loads of sugar and loads of cream cheese is what nice things are made of. So by no means think that this is a low calorie cake...which I think is bull shit any way. There is nothing called low calorie cake. If you want to eat cake then go all out and eat the real thing is my motto! Which is also probably why I need to go on a crazy diet :O

I usually don't like to bake with butter, more so because the whole creaming it with sugar etc etc is messy and time consuming, as opposed to oil which is soo cool, you just pour it into the batter (and also I can be a teeny tiny happy its a bit better than butter). But once in a while I don't mind going all out and, although I cringed at the amount of ingredients needed, that's exactly what I did with this cake! The outcome was delicious. I mean really, really delicious. Its so moist, like melt-in-your-mouth moist, and the blueberries break down the sweetness at intervals. It so versatile, you can definitely make this cake plain or add any other flavouring like orange or lemon and it would be great. TRUST ME!

Recipe adapted from here (makes an 8 inch loaf cake + an 8 inch square cake)
IMG_8738
Caster sugar- 1 cup
Butter- 250 gms, softened
Vanilla extract- 1 tsp
Eggs- 3, medium at room temperature
Cream cheese- 250 gms
Milk- 1/3rd cup
Self-raising flour- 2 1/4 cups
Blueberries- 150 gms, fresh or frozen (I used fresh)
IMG_8748
I didn't have self raising flour so I made my own by sifting together 3 1/2 tsp of baking powder with 2 1/4 cups of plain flour. The ideal measurement is 2 tsp baking powder to 1 cup plain flour.
Pre heat the oven to 160C and line an 8 inch loaf pan and 8 inch square brownie  pan with baking paper
Beat together the sugar butter and vanilla extract in a free standing mixer, using the paddle attachment, till soft and fluffy. You can use your hand beater as well.
Add the eggs, one at a time, beating well after each addition.
Change to the whisk attachment and add the cream cheese and milk. Whisk till the mix turns lump free and you get a smooth batter.
Add the flour and whisk just until mixed.
Using a spatula, fold in the blueberries.
Pour the batter into the lined pans till about 1/4th full and bake for about 50 minutes or till a skewer inserted into the centre comes out clean. My brownie pan took only 40 minutes to bake.
Once done, cool completely on a wire rack and before eating either dust with some icing sugar or have it plain.
IMG_8733
Notes: Original recipe called for 1 1/2 cups of sugar. Even for an ardent sugar lover I thought that was a bit too much, so i reduced it to 1 cup. It was pleasantly sweet.
I changed to whisk attachment half way through because i noticed that the cream cheese was still in lumps and not smoothening out with the paddle attachment. The whisk worked like a charm.
The cake keeps well in the refrigerator for about a week. I cling wrapped it properly and refrigerated it. It also freezes well.
Replace the blueberries with any berry of choice.