Showing posts with label product review. Show all posts

Thursday, 7 April 2016

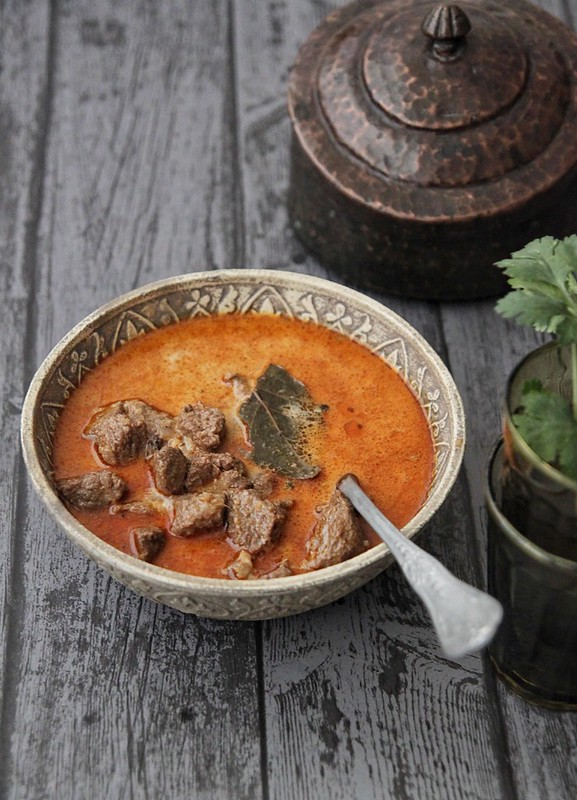
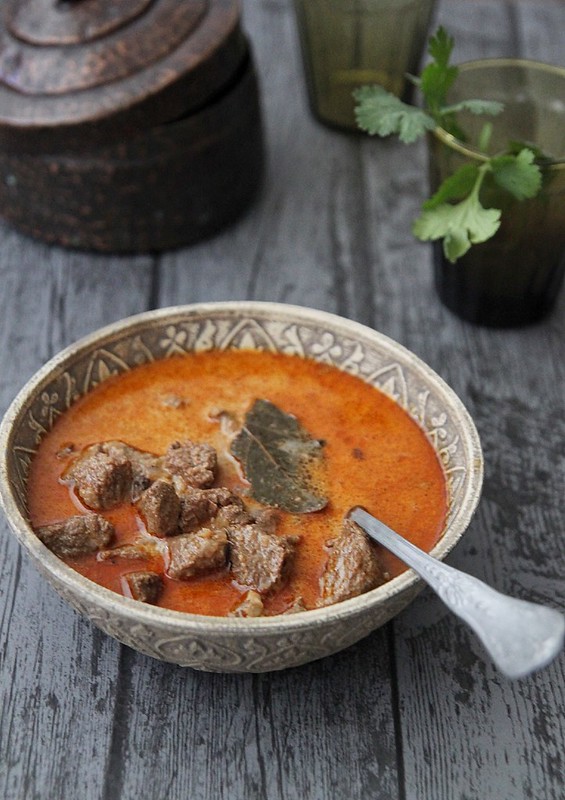
Beef rogan josh in a Staub Cocotte

IMG_9610 
Ever since we moved into our new house we've been talking of banishing our non stick Teflon pans and going all cast iron or stainless steel. We have been eliminating them bit by bit and the transition has been a bit of a challenge but i think its working and I'm slowly getting used to it.

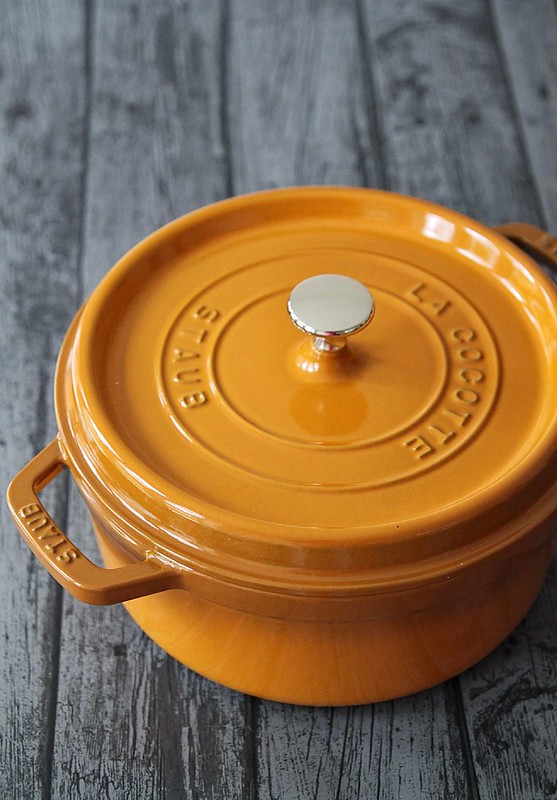
My first cast iron cooking experience was with this gorgeous Staub 24cm Cocotte, the lovely people over at Zwilling UK sent over. I have been thoroughly enjoying my time with it, or rather getting used to cooking with it and I'm very happy to have it as part of my new kitchen. If like me you do like a bit of colour, then look no further because Staub Cocottes come in a range of colours from cinnamon to basil to cherry red to graphite grey. etc Those who know me, also know my obsession with the colour yellow so no surprises there when i opted for the mustard colour Cocotte. It arrived promptly on time and i got cooking with it the very same day. 
IMG_9563 (1)
One thing i had to get used to was the weight of the cast iron pot. Having dealt with light weight thin stainless steel pots and such, the weight of the cast iron pot was a bit of a shock in the beginning, but i soon got the hang of it especially once i realised how the weight works to your favour while cooking. It also retains heat really well which also helps with cooking food evenly. I also noticed that all the dishes i made in the Staub cocotte was done at a much lower temperature than i usually do. For example, if i was cooking previously on the heat mark 7 on my ceramic hob, with the Staub i was doing it on heat mark 4, sometimes even reducing it down to 3 because of the heat retention and things like onions and garlic getting burnt. I agree it does take a while to get used and I'm still experimenting with what heat settings work well for what. The point is, energy consumption has reduced drastically, and my husband who was sceptical about this whole cast iron cooking is now absolutely impressed and sold on the idea.

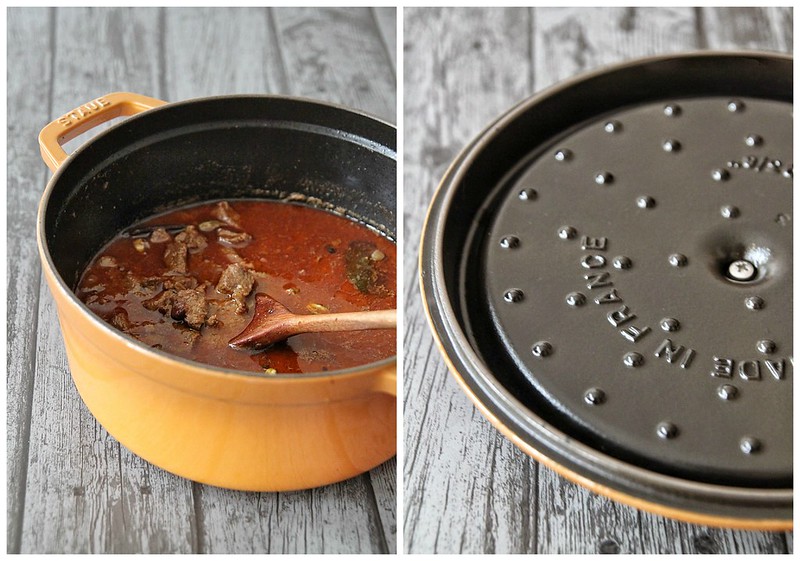
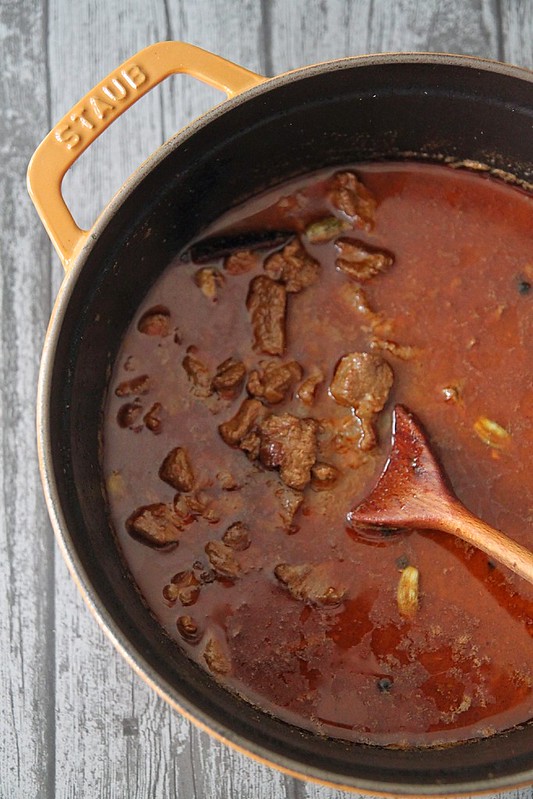
Another excellent feature about the Staub Cocotte is the heavy lid with small spikes on them which act as a natural baster. The water drops back into the pot keeping your meat moist and this to me is a great plus point. When i usually slow cook meat, i have to keep adding water every now and then to keep the meat moist and also to prevent the food from burning or sticking to the base because the water would evaporate quite quickly. This i think is my most favourite feature from Staub, the really heavy lid and the special drip structure makes sure no moisture escapes and whatever gets collected gets poured back into the pot. I loved how my rogan josh didn't need any refilling through the entire cooking process and also how my rice was cooked perfectly well without moisture escaping, and without going through all that drama of covering the lid with a cloth or paper towel.
PicMonkeynn Collage
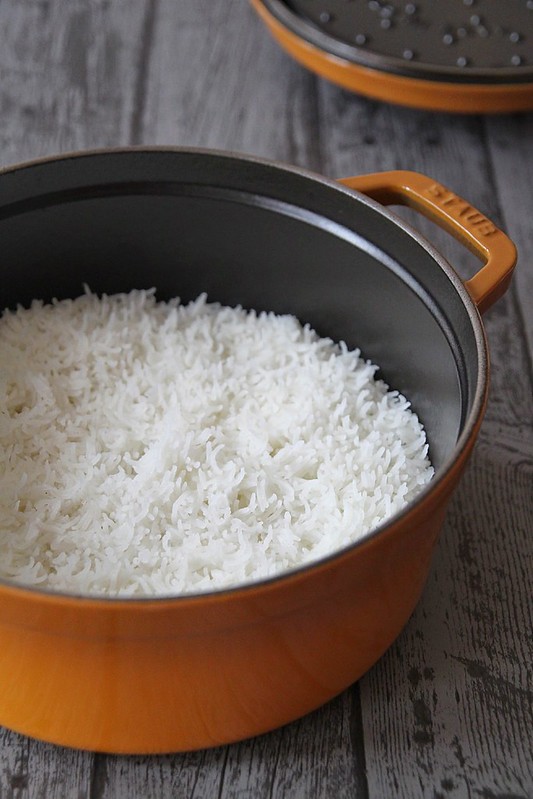
When i made the rice, i was pretty sure it would stick to the bottom, but was pleasantly surprised it didn't. The enamel coating even though not completely non stick works to a great extent when it comes to cooking and cleaning, and even if it does stick a bit to the base, a bit of a soak easily removes it all. I have to try a biryani in the pot to see how the whole 'dum' aspect works, but before that i need to familiarise myself with the cast iron pot a bit more.

The only negative thing, well i cant quite call it negative really, is that the entire pot and lid becomes really hot while cooking. If you hold on to your pot while stirring and mixing, this becomes a bit uncomfortable. I managed to burn my hand twice, even after using a cloth but, this again is something i need to get used to, and nothing a pot holder cant solve. It however, doesn't affect the performance of the pot at all. Then there is of course the price which, lets be honest, is steep. When i was thinking of investing in a cast iron pan, i did a lot of research on various products in the market. and Staub definitely stood out. It is one of the best out there so think of it as an investment that would last you forever, and put it on your birthday gift list.

Coming to the recipe, I made a mutton rogan josh last year and it differs from this one quite a bit. I would like to think that is definitely the more authentic recipe and this one by Madhur Jaffrey is a bit more Anglicised, if i may call it that. But it works, its absolutely flavourful and we've been making it for years now. 

Recipe adapted from here (serves 4 as part of main)
IMG_9598
Ginger- 5cm piece, peeled
Garlic- 8 to 9 cloves, peeled
Oil- 4 tbsp
Beef- 700 gms (cut into 2 cm cubes)
Cinnamon sticks- 2 cm
Cardamom- 6 pods
Cloves- 6 pods
Bay leaf- 1
Whole peppercorns- 10
Onions- 200 gms, peeled and finely chopped
Coriander powder- 1 heaped tsp
Cumin powder- 1 1/2 tsp
Kashmiri chilli powder- 2 tsp
Spicy chilli powder- 1 tsp (adjust according to heat)
Salt- to taste
Yoghurt- 6 tbsp
Warm water- 400ml
Garam masala- 1/2 tsp
IMG_9553
Grind together the ginger and garlic with 2 tbsp water to make a fine paste.
Heat 2 tbsp oil in a deep thick bottomed pot and on medium-high heat sear the beef cubes in batches till they are all brown. Transfer to a plate.
Reduce heat to medium, add the remaining oil into the pot and throw in all the whole spices- cinnamon, cardamom, cloves, bay leaf and peppercorns - and saute till they are fragrant for about 10 seconds, take care not to burn them.
Follow with onions and saute them for about 5 to 10 minutes or till they turn brown.
Tip in the ginger garlic paste and continue to fry till the raw smell goes
Add all the spice powders one after the other along with salt, and cook for about 5 seconds, just to remove the raw smell. If you think the mix is sticking to the pan and has a chance of burning, add in a tbsp or two of water with the spices and cook till you can no longer smell the raw masala.
In goes the fried meat along with all the juices. Mix well so all the masala gets coated on the meat.
Add the yoghurt one spoon at a time, and stirring it into the meat mix after each addition.
Pour in 400 ml warm water and bring to a boil, scraping the sides of the pot.
Cover with a heavy lid, reduce heat to the lowest and cook for about an hour or until the meat is tender. 
Keep checking in between to see if the water has reduced, and if the meat is sticking to the bottom add some more water, stir well and continue cooking closed.
Open the lid, check if the meat is cooked, add more salt if required, and if you can see a thin layer of oil on top, that's sign of a good rogan josh i believe. 
If you do think there is too much liquid, increase heat and let the curry boil away some of the liquid.
Just before serving stir in the garam masala and serve hot with some steamed rice.
IMG_9574
Notes: Instead of cooking this on the hob top, you can finish off the curry in the oven at 180C for about 1-1.30 hrs. Just make sure you stir it every 10 minutes or so and check for liquid levels. My Staub Cocotte would do a perfect job for this as you wouldn't need to transfer it into another oven proof dish but can directly move this from the hob to oven.
You can make the same dish with mutton/goat/lamb as well. Cooking times may slightly vary though.
Over the years I've made my own changes to it. I add a generous dash of cream just after i put the garam masala, making this quite irresistible.

With thanks to Zwilling UK for the Staub Cocotte that was sent to me. All opinions are my own and no monetary compensation was offered in return for a positive review.
Sunday, 27 July 2014

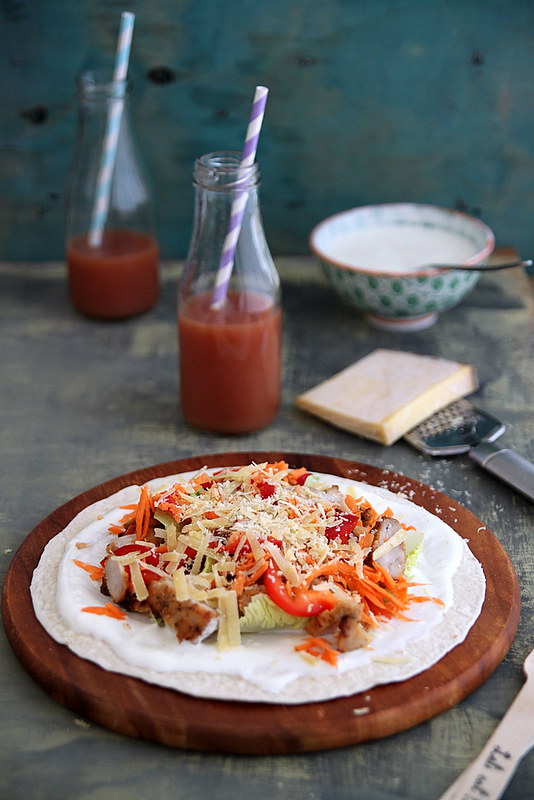
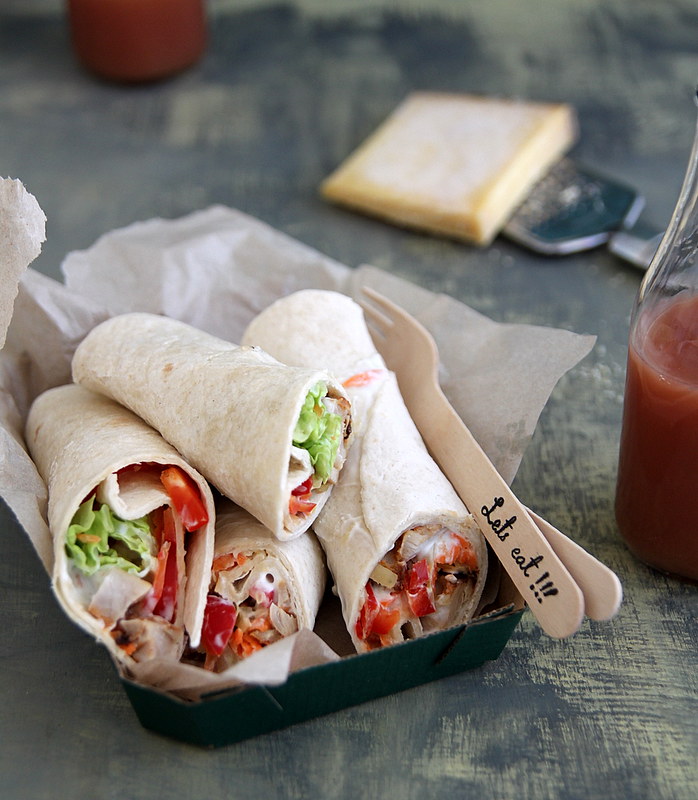
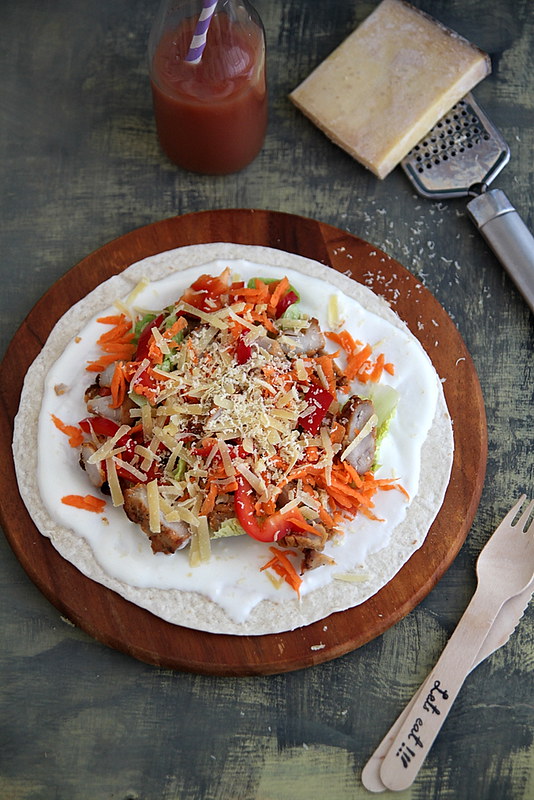
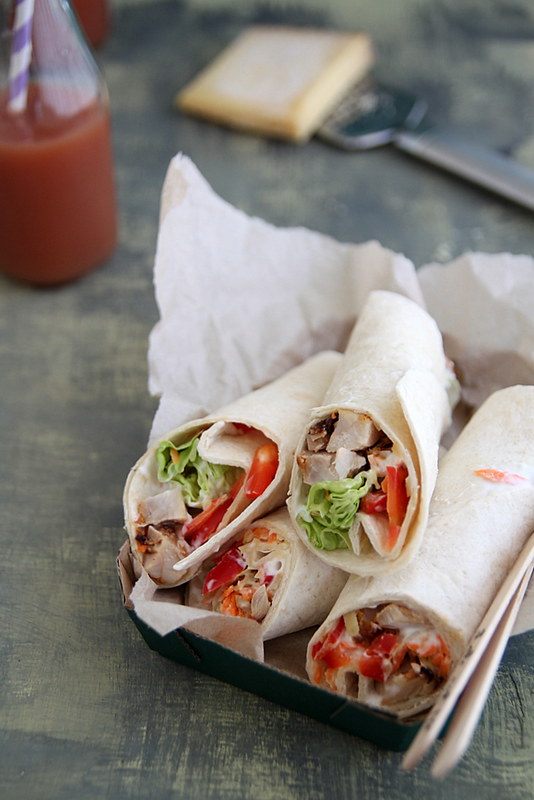
Grilled chicken and Comte cheese wraps

IMG_3828
Work has been crazy hectic for me with late nights and early morning runs to the kitchen, churning out hundreds of macarons and delivering to Selfridges where we have a stand at the moment as part of the 'Meet the Makers' campaign that runs till the end of August. If you do want to pick up some printed macarons, do drop by :)

Anyways, coming to the recipe. I have trouble sorting out the lunch scene in between all the chaotic baking. I almost always never eat lunch on time and its around 4 or so in the evening that i manage to grab a bite and by then I'm famished. On days i wake up early enough, i manage to make something for lunch, and by make i mean pack the leftovers from last night or make a sandwich. This wrap happened on one of those days I was sick of eating rubbish sandwiches from the nearby supermarket. I had grilled the chicken a day before and so it was really easy to put together. I chucked it into the microwave for a couple of minutes and it tasted so so so much better than the store bought ones.
IMG_3852
Comte cheese has turned out to be a favourite of ours and i keep adding them to almost all of our pasta and sandwich dishes. I was sent a 24 month aged Comte and I've been very stingy with it. I used it in this sandwich and its been nicely wrapped and put in the freezer for future use. The nutty flavour of Comte is perfect in this wrap and i love it even more a bit melted. This recipe was passed on from Comte as part of the Bastille Day Celebrations and its a fabulous one to take to picnics and such as Comte is a hard cheese and doesn't melt that quickly in this hot weather, which btw has gotten to me so much, i actually want the cold to come back. Its so muggy and stuffy during the night, and the days are even worse. I know, I know, i complain when it cold, i complain when its hot as well :)

Serves 4
IMG_3844
Tortilla wraps- 4
Boneless chicken thighs- 2, around 250 gms
Paprika- 1 tsp (optional)
Salt and pepper- to taste
Oil- 1 tbsp

Yoghurt- 3 tbsp
Mayonnaise- 1 tbsp
Lemon juice- a splash
Carrots- 150 gms, grated
Red pepper- 1, small
Lettuce- 1 small head
Comte cheese- 100 gms, grated
IMG_3845
Wash, pat dry the chicken and cut into bite size cubes.
Season with enough salt and pepper and the paprika. Keep aside for half an hour.
When ready to cook, preheat oven grill and line a baking tray with aluminium foil.
Arrange the chicken pieces on the tray and grill in the oven for about 15 to 20 minutes, flipping each of them after about 10 to 12 minutes.
Once cooked, keep it wrapped in the foil itself.

Make the sauce by whisking together the yoghurt, mayonnaise and lemon juice. Season with salt and pepper.
Grate the carrots, dice the red pepper into long strips and tear the lettuce into big slices. 

Lightly heat a tortilla, either in the microwave or in a frying pan. Place on a serving plate.
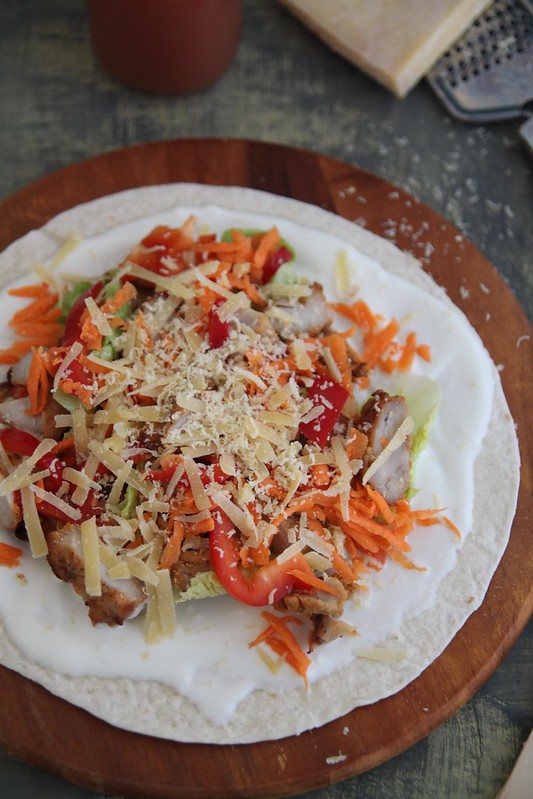
Generously spread the yoghurt sauce on to the tortilla leaving about an inch from the edges.
Place the lettuce, peppers, carrots and chicken slices on the wrap and top with freshly grated Comte cheese.
Roll the wrap tightly and gently heat in the microwave for a couple of minutes, just to get the cheese melting. Of course, this step is purely optional, but i like it this way.
Cut the wrap diagonally and serve warm.
Do the same with all other remaining tortillas.
IMG_3829
Notes: Feel free to use chicken breasts instead and you can even pan fry it in about 2 tbsp of oil.
Original recipe called for corn as well, but i didn't have any at home so omitted it

With thanks to Comte cheese for the samples.

Tuesday, 3 June 2014

Cooking with Lactofree- Broccoli & Cauliflower cheese bake

IMG_3534
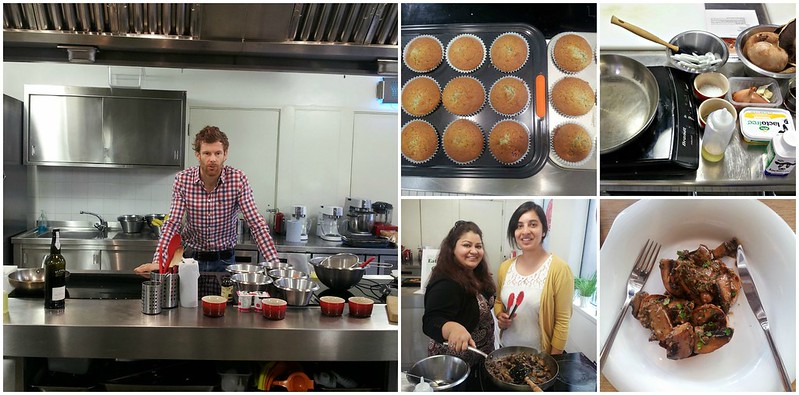
Around 2 weeks back I was invited to an exclusive Lactofree masterclass with Michelin starred chef, Tom Aikens. I had a crazy night the day before and waking up for a breakfast masterclass was a bit of a feat, and for a second (just a second) I wished I didn't have to go, but just snuggle in bed. I'm glad that thought didn't last long because I really did have a fab time. I reached just before the session started and so missed out on the lavish breakfast spread a la Lactofree. So with a cup of coffee in hand i joined the crew in the kitchen. Tom Aikens is quite a charming and patient chef. He talked about using Lactofree products in cooking and baking and how you get the delicious taste of real dairy, but without the lactose and since its made from cow's milk, you still get all its nutritional benefits too.

First up was Lacto(se)free raspberry, poppy seed and white chocolate muffins which Tom prepared right in front of us, and we even got to take home a few for tea. He then took us through a cooking demo of mushroom ragout on toast which we were then asked to recreate at our cooking stations. We went about creating our brunch dish with much enthusiasm and devoured into it with all the other bloggers. It was also the first time i cooked with and tasted sorrel leaves and chervil and it did make a whole lot of difference to the final dish. I'm sure i can use spinach and some other herb instead.
PicMonkey Collage
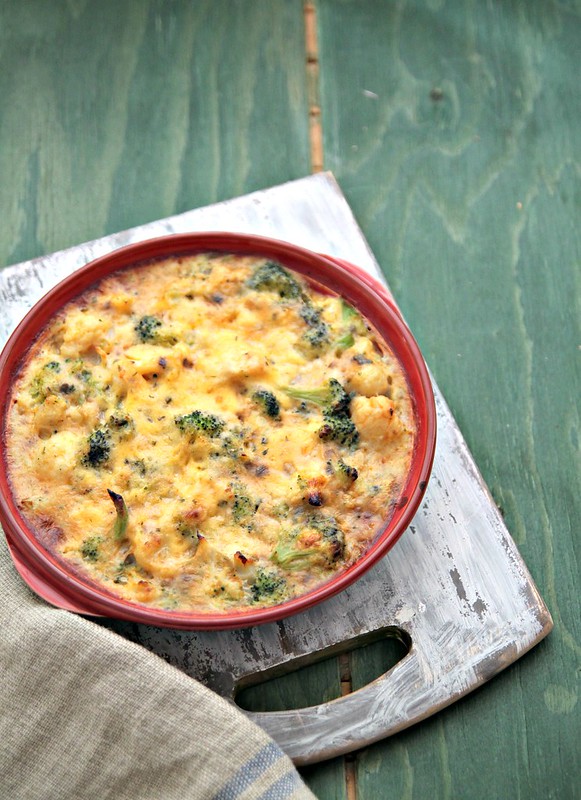
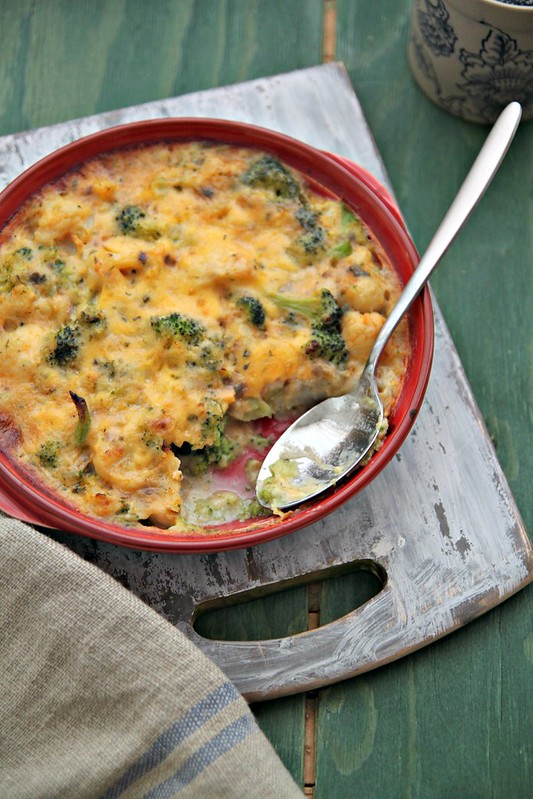
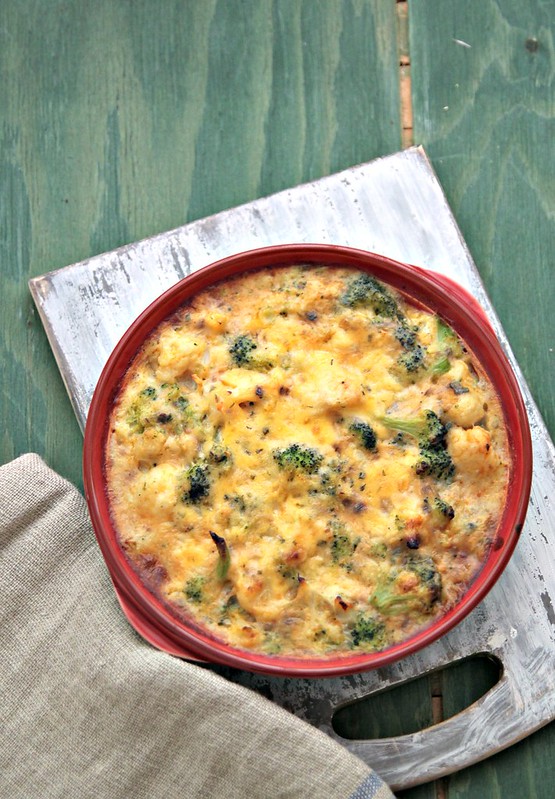
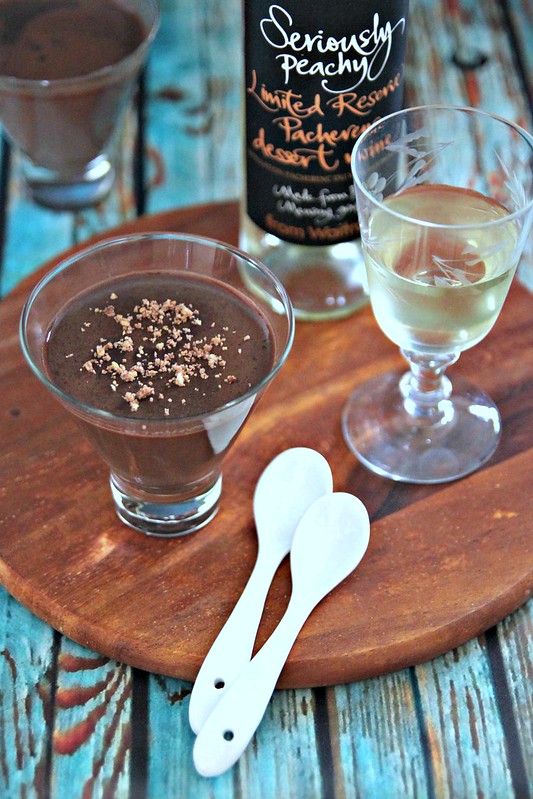
From the Lactofree samples in the goody bag, I ended up making a broc and cauliflower cheese bake and a chocolate-coffee panna cotta. My husband is lactose intolerant (self proclaimed) and he was happy he could have his coffee and tea with milk for a few days :)

Recipe adapted from here (serves 4 to 5)
IMG_3551 
Broccoli- cauliflower cheese bake
Broccoli florets- 3 cups
Cauliflower florets- 3 cups
Butter- 2 tbsp (I used Lactofree spreadable butter)
Plain flour- 1/4 cup
Spicy brown mustard- 1/2 tsp (optional)
Ground nutmeg- a generous pinch
Paprika- 1/2 tsp
Pepper- to taste
Salt- to taste
Milk- 2 cups (I used Lactofree semi-skimmed milk)
Cheese- 1 cup (I used Lactofree cheese) + enough to sprinkle on top
IMG_3528
Boil the broccoli and cauliflower in enough water for about 3 to 5 minutes. Make sure you dont cook it completely. It should still be crispy.
Drain in a colander and transfer to a large baking dish (9x 13 inch is what i used)
In a saucepan, melt the butter and stir in the flour to make a roux and add in the mustard, nutmeg, paprika, pepper and salt and continue to whisk till smooth.
Gradually add the milk and bring to a boil, while continuously whisking and making sure it doesnt stick to the bottom of the pan.
Once the milk mix had thickened a bit, stir in the cheese until it has melted.
Pour the mix over the vegetables and bake in an oven preheated at 200C for about 30 minutes.
Take the baking dish out of the oven, change the setting to broiler/grill, sprinkle some cheese on top and place under the broiler for another 7 to 8  minutes or until the cheese has melted.
Serve with garlic bread
IMG_3611
Here is the panna cotta recipe i used. I used Lactofree cream and milk for this recipe.

Notes: I have tried this with a Mexican cheese blend and it was fabulous
Of course, you can add other vegetables like carrots, spinach, leek etc.
The paprika gives it a punch, but feel free to omit if you dont want it spicy.

With thanks to Lactofree for inviting me to the event and for the samples, and Tom Aikens for the fabulous masterclass.

Tuesday, 24 December 2013

Season's Greetings & Christmas Specials

How are last minute preparations for Christmas coming along? Are you frantically baking and cooking or relaxing with your feet up while your parents put together the Christmas feast? Either ways, I'm sure you are all looking forward to Christmas celebs tomorrow.

The husband has pushed off to India and I had to stay back because of a hectic work schedule and Id be joining him only in Jan. I was all ready to have frozen pizza and get drunk on wine on 25th, when a friend invited me over to hers for Christmas. Since the entire transport system comes to a standstill on 25th I am heading to hers tonight, attend a midnight Christmas service at the church and ring in Christmas with friends tomorrow. I would have loved to be with family, but hey, I'm not complaining. Atleast I'm not having frozen pizza and watching Downton Abbey reruns in my Pj's.

Anyways, here's wishing all you guys a very Merry Christmas. Have a glass or two of wine on me and enjoy your day to the max. Leaving you with some fun Christmassy stuff ...

Oddka
I love my cocktails and am forever trying to recreate new ones at home, which means scouting the drinks aisle at the supermarket is a treat. I came across this vodka drink called ODDKA and was thoroughly amazed at the flavours on offer. Fresh cut grass.. seriously.. now that's a flavour I'm completely intrigued by. Other flavours include Electricity, Salty caramel popcorn, Twisted melon and Peach Bellini. As luck would have it, I was asked if I'd like to try some Christmas cocktails using ODDKA and how on earth could I say no? Since I'm home alone, I've not really made any cocktails as yet but if I have a girls night out around New Years, I'd definitely be trying out a few cocktails from the list ODDKA has put together. If you do want to try something different this Christmas, then head on over to the ODDKA website and give some of their cocktails a go. Your local Asda or Sainsburys should stock a few flavours of ODDKA.

Castello Cheese
I received this really adorable Christmas stocking, with my name on it and all, filled with Castello Cheese. I had big plans to make Ronnie Murray's Baked leek tart with Castello Jersey Blue and I even bought all the ingredients, but with crazy work schedules I had to put the cooking on hold. I shall definitely give it a go one of these days I'm home. The Castello range includes Creamy Blue, Creamy White, Traditional Danish Blue, Extra creamy Danish Blue, Pineapple Halo i (I made a macaron filling with the Pineapple cheese), and the latest addition just in time for Christmas is the Tickler Cheddar, with a sweet, strong and tangy taste. If you are doing a cheese platter for the parties, don't forget to include this one, its a winner. Pair it with a Rioja Gran Reserva 2001 or a an Italian Barolo wine.

Christmas food and drink matching
Pairing the right drink with the food you serve is really an art. I try hard to actually do this and mostly, because of lack of knowledge, I just do a theme and follow with drinks from the same cuisine. When you do a large spread like for Christmas, this becomes a bit of an issue, especially when you have invited people with different tastes. To make matters easy for people like me, Waitrose has teamed up with wine lover Philip Schofield and wine connoisseur Olly Smith to develop a food and wine matching guide to get the combinations right. The infographic gives you a basic knowledge of pairings which would help you manage your Christmas meal pretty easily. I am sooo going to keep this for future references. There are also some great videos here for some festive inspiration

Parmigiano Reggiano Christmas Cook-off
Parmigiano Reggiano (PR) is one cheese I regularly use in cooking- in soufflés, bakes, dips and just to grate atop pasta. I was recently invited to a Parmigiano Reggiano Christmas Cookalong organised by the Consorzio del Formaggio and lead by top chef Valentina Harris. We started off the evening tasting some amazing starters like dates filled with PR and wrapped in Parma Ham, PR lollipops with sesame seeds and chilli (an absolute favourite) and a 30 month matured PR with balsamic vinegar. We were then split into two teams and set about creating our meal for the night- Venetian duck stuffed with a PR mix, Fennel topped PR and Rosotto PR. It was my first time cooking with duck, and although not really a favourite, I quite enjoyed the whole cooking experience. Highlight of the evening, however, was cracking open a 45kg PR wheel which we all got to taste, after which we all sat down to a fabulous meal. After an evening of like minded food enthusiasts and after gaining such indepth knowledge about PR, I cant wait to cook with the cheese. For more information and recipes check out the website

With thanks to all the brands for inviting me to their events and for review samples.

Thursday, 24 October 2013

Jamie Oliver 20 minute meals app review and his recipe for chilli corn chowder

IMG_1625
I love Jamie Oliver! Like seriously. I think he's one of those chefs who you develop a liking towards right from the start- so down to earth and simply a sweetheart. I used to watch his 30 minute meals on telly and have even given some of the recipes a shot (obviously I take more than 30 minutes). They are absolutely easy to follow and his photographs (courtesy David Loftus) are to die for. I love how he presents his final dishes on his shows, and the props he uses, sigh!

I was asked to review an app on the Google Nexus 7 tablet available at Argos here- a gadget we have both been religiously using for all our browsing and other nonsensical stuff like watch videos, chat, etc etc. I still am not too sure why people need tablets at all, because it really cant do anything your smart phone cant (techies and gadget freaks, kindly excuse). Of course size matters but I think I would have survived without one. However, now that we have it in our life, its being put to regular use. I even carry it around to our Bloggers Buzz meetings looking all important, and it does make life a wee bit more easier. If you do want to pick up a tablet (among other cool things) then Argos is the place to go to.

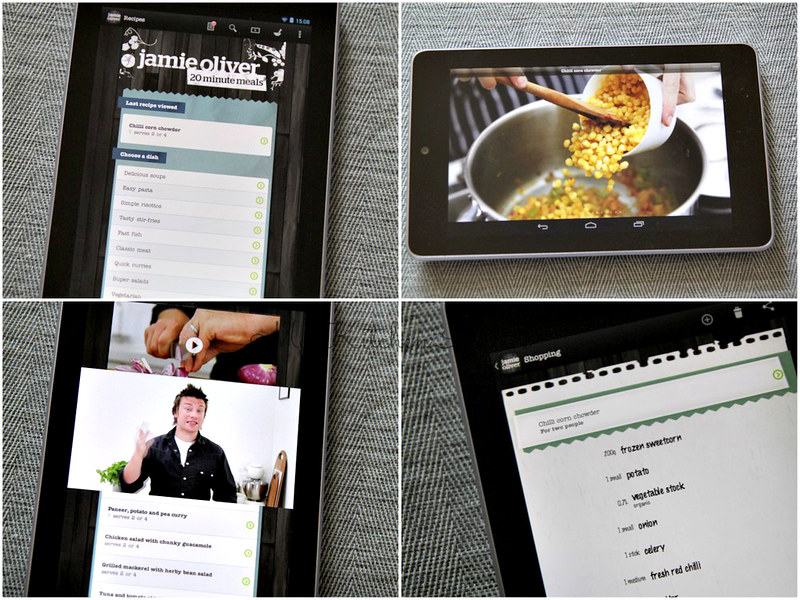
Coming to the app. I did break my head about which app to pick up and after some research I decided to go with good ol Jamie (first name basis and all after 2 paragraphs). The tablet is a good thing to have on your kitchen counter but what kept bugging me was the fact that I had to keep switching it on each time the screen turned off when not in use (I don't even know if that's the right term to use, but you get the point right?). My tablet doesn't have a stand, so I had to keep cleaning my hands properly to pick it up and do the same. These may be irrelevant to most of you, but to me it kind of makes a difference and is a bit of a hindrance. I am trying to use the tablet more for my recipes while cooking instead of dragging my ginormous laptop on to a small kitchen counter, so ask me about it a few months from now and maybe I would have a different opinion.
221

Pro's
  • The step by step pictures are fabulous, not to mention beautiful photography. It guides you through the entire cooking process.
  • There are basic videos of Jamie showing is how to chop an onion, basic knife care, cooking the perfect steak and so on..something we all may know, but its kind of informative.
  • The shopping list is pretty cool, in fact its my favourite feature. You can send it directly from the app to your email, making life a whole lot easier. Yes, I just had to send it to Ro.
  • Navigating through the app is easy. Nothing techy about it.
Cons
  • GBP 4.99 for an app is pretty steep. You do get 60 recipes for it, but still I find it a little on the expensive side. 
  • It keeps crashing!!! Apparently that's been an issue with the app for a while. This definitely needs to be fixed as it gets annoying after a while.
The app is a good one, but not a great one. I mean it wont be something id miss if it was taken off and I think id find most of his recipes in his book or show. But if you are a big Jamie fan and need to hear his voice once in a while, then just buy the app..really, his videos and the way he cooks is just pure entertainment :) 

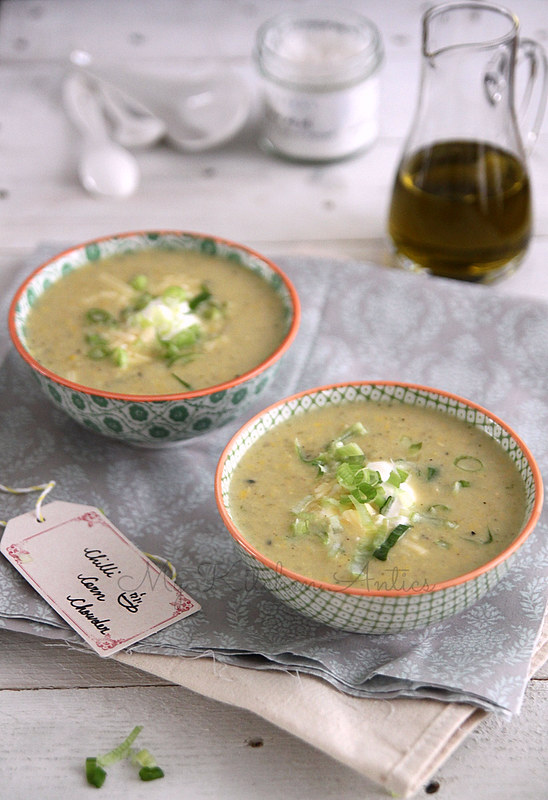
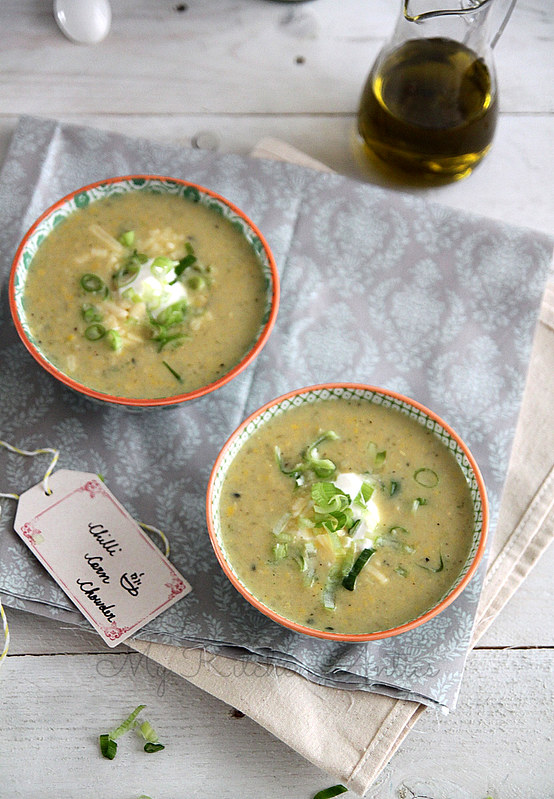
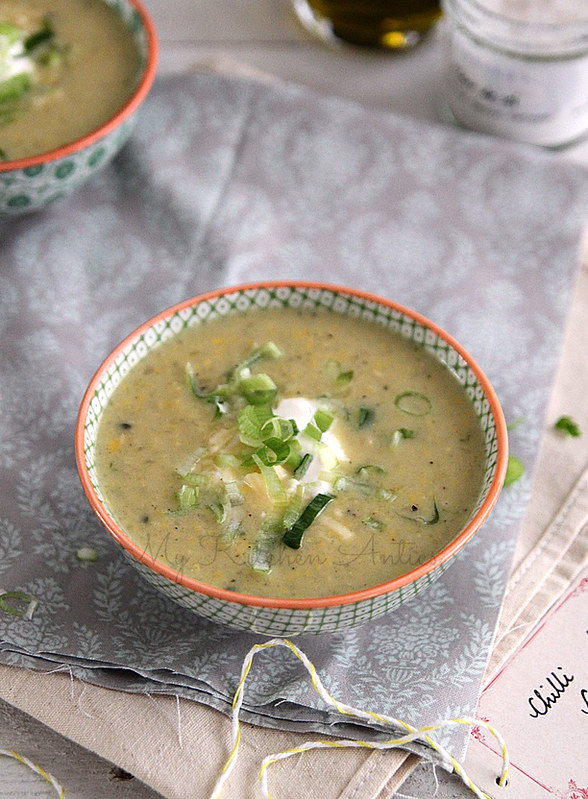
That said, his chilli corn chowder from the app was excellent. It was my first time with corn chowder (soup to be precise) and was completely surprised at how nice it tasted. Of course i couldn't complete it in 20 minutes (what with me checking fb and whatsapp and a million other 'apps' in between) but it was a winner. Ro gets to taste it today and he can give his verdict. Serve it with some garlic bread and its perfect for an autumn night in,

Chilli corn chowder (Adapted from Jamie's 20 minute meals Android app. Serves 2)
22
Vegetable stock- 700ml
Onion- 1 small, roughly chopped
Celery- 1 stick, diced
Chilli- 2, slit (de-seed if you cant handle the heat)
Butter- 1 tbsp
Olive oil- a dash
Thyme- 1 small stalk
Potato- 1 small
Frozen sweetcorn- 200 gms (approx. 1 1/2 cups)
Double cream- 2 tbsp (optional)
Spring onions- 2 small, finely chopped
Cheddar cheese- 25 gms, grated
Sour cream- 75ml
Salt and pepper-  to taste
IMG_1623
Fill a saucepan with the vegetable stock and bring to a gentle simmer over medium heat.
While that's simmering away, slice the onion, celery and chilli.
Heat a large deep pan on medium heat and melt the butter along with a generous dash of olive oil.
Add to it the chopped vegetables with a splash of water, stir well and cover and cook on medium-low heat for about 10 minutes or until the vegetables start to soften.
Pick the thyme leaves and add to the pot of simmering stock. Let it continue to simmer for a few more minutes.
Peel and roughly grate the potato and add to the vegetable stock.
By now the vegetables would have wilted enough. Open the lid and throw in the sweetcorn. Stir it in and cook for about 2 to 3 minutes.
Carefully pour in the vegetable stock along with potato and bring everything to a boil.
Reduce heat, pour in the double cream and let it simmer for about 5 minutes after which you can take the pan off heat.
In the meat time, slice the spring onions and grate the cheddar.
Once the chowder has cooled down a bit, pulse with an immersion blender, but still retaining the texture. Don't make it too smooth.
Taste and season with enough salt and pepper and cover the pot with a lid and keep aside.
When ready to serve, spoon ladles full of the chowder into slightly warmed bowls, top with a spoon on sour cream, sprinkle over the cheddar followed by a generous sprinkling of spring onions.
(Add some chopped chillies if you are brave)
IMG_1634 
Notes: The original recipe called for just one chilli, half of which needed to be added with the vegetables and half used as garnish. Adamant that it wouldn't be spicy, I added two whole chillies to the chowder and skipped the garnish. It was SPICY and apparently, one chilli would have been enough. 
The cream is completely optional, but i had some left over cream that desperately needed to be used and so chucked it in. Worked for me.

The post is in conjunction with Argos

Friday, 13 September 2013

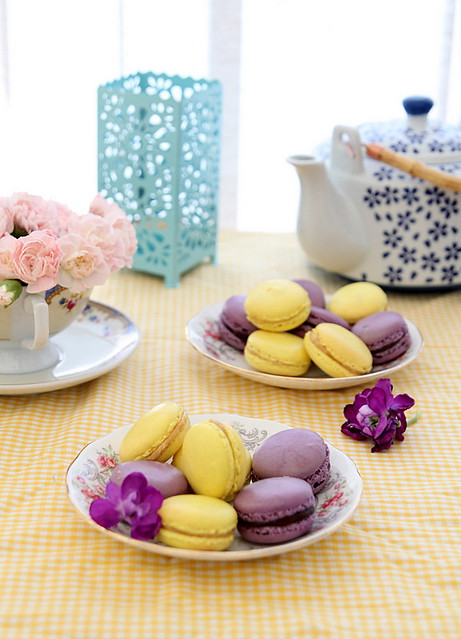
Macarons {3 ways}

IMG_0827-3
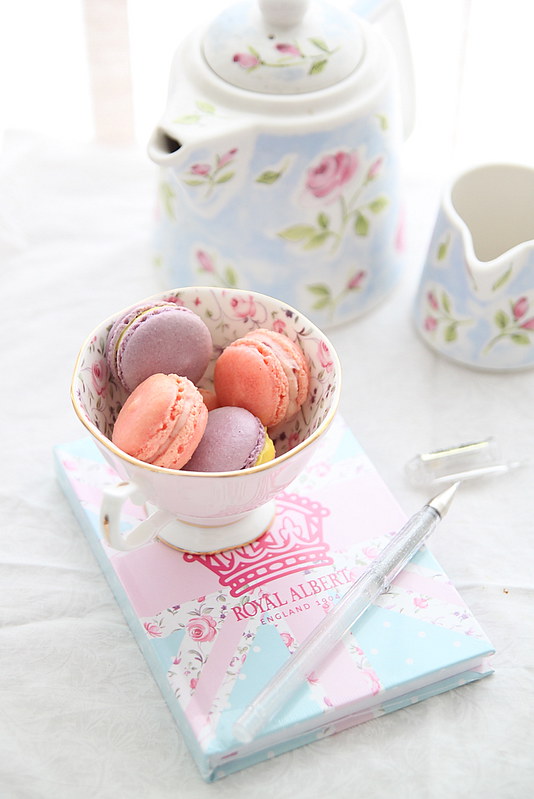
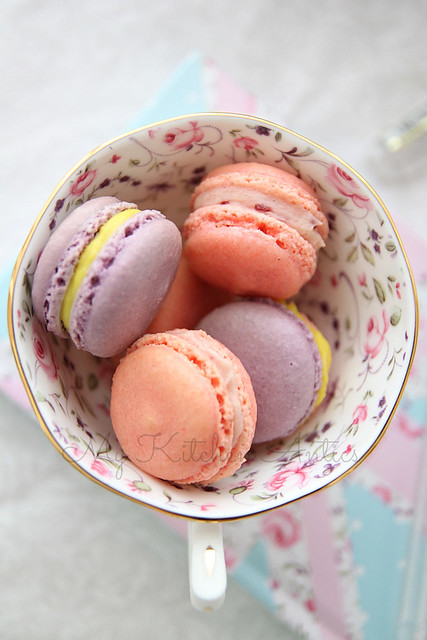
Last week, a couple of us food bloggers went to the Royal Albert Afternoon Tea Tour in association with Breast Cancer Care. It was an afternoon of fun, eating and oohing and aahing the gorgeous, gorgeous vintage style tea sets that were used to serve the cupcakes and tea in. Just a few days before, we were oohing and aahing their collection at one of the department stores and Id seen this one particular cup and saucer set with tiny flowers inside, and I even remember exclaiming to a fellow foodie that some pretty and dainty macarons would just look gorgeous in them.

Little did I know that two days later I'd actually get the exact same cup and saucer from Royal Albert in my goody bag at the tea party. I HAD to make macarons and I even had a clear idea what colour and how Id style and photograph it. I am very pleased with how they have turned out and even had a small afternoon tea party at my place. The tea tour will be heading to different locations around London, so please do drop by, enjoy some tea and cakes and support the great cause.
Thursday 12th and Friday 13th- Bloomsbury Square
Saturday 28th and Sunday 29th- Parsons Green

I always follow the basic macaron recipe from Ottolenghi (Recipe here) which fetches me around 22 to 24 medium sizes macarons. For a full, detailed post on macaron making, follow this link. The fillings are for 12 macarons. I always halve the batter and add two colours. I get around 12 macarons in each colour.

Pineapple cheesecake filling
IMG_0840
The filling for the purple one was Pineapple cheesecake a really pleasant one made with the Castello Pineapple Halo, a soft cheese coated in pineapple and almonds. Castello has this fabulous range of cheese which go great with white wine. My favourite however is the pineapple flavoured one which works great as cheesecake (trust me on this, I tasted it at the Castello event and loved it). So inspired by that I made the cheesecake filling for the macarons. It was a hit. (I added some yellow colour to emphasise the pineapple bit)

Castello pineapple halo cheese- 1/3 rd cup, at room temperature
Double cream- 1/4 cup
Honey- 2 tbsp

Whisk the double cream till soft peaks form.
Fold in the soft cheese slowly, till well mixed and no traces are seen.
Add the honey (or icing sugar) and mix well.
Refrigerate till ready to use.

Raspberry jam buttercream filling 
IMG_0817-1 
The pink macarons made specially for Breast Cancer Care were filled with raspberry jam filling. This is a really easy one and quite versatile because you can use any jam and make it into a filling.

Butter- 4 tbsp, at room temperature
Raspberry jam- 2 tbsp
Vanilla extract- a drop (optional)
Icing sugar- 2 tbsp (add more if you like it sweeter)

Whisk the butter and icing sugar together in a bowl, till light and fluffy
Add the jam and vanilla and continue whisking till they all come together.
Refrigerate till ready to use.

Cardamom cream cheese filling
IMG_0517-1 
I love cream/ soft cheese fillings and frosting and my macaron fillings are almost always cream cheese based. I used the Lactofree soft white cheese for this and was pleasantly surprised at how nice it tasted. Lactofree products are perfect for those who are lactose intolerant and doesn't have to give up dairy altogether. I had the privilege of tasting some of their products and you wouldn't even be able to make out the difference. Check out the website for more details.

A couple of us were invited to Preeti's place for an Indian themed lunch and while breaking my head on what to take for her, Suchi came up with the idea of the tricoloured Indian flag theme. The party was just two days after Indian Independence Day and it was the perfect theme. It looked gorgeous when put together and I filled it with cardamom to give it an Indian touch. Personally, I find cardamom to be an over powering spice, and I prefer it in the mildest possible dose, so this was not really my favourite. I did get good reviews about it though.

Cream cheese- 1/2 cup
Icing sugar- 3 tbsp
Vanilla extract- a generous splash
Cardamom powder- 1/2 to 3/4 tsp (powder the cardamom seeds to make enough)

Whisk the cream cheese and sugar gently using a wire whisk. Make sure it doesnt become too loose.
Fold in the vanilla extract and cardamom and continue mixing till they all come together.
Do a taste test and add more cardamom if required.

With thanks to all the brands for inviting me to the events and for the samples.

Sunday, 1 September 2013

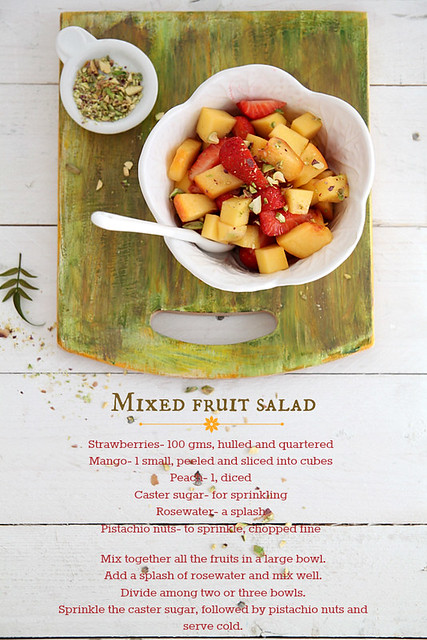
Mixed fruit salad with rose water and pistachio

IMG_0734
Its over guys, its over. Summer is on its way out and I can already feel the slight chill in the air post 5pm. Although it was a pretty decent summer, I feel it ended too soon and I am not willing to let go as yet. I think the coming week is the last of 20C weather we'd get to enjoy. Sigh!

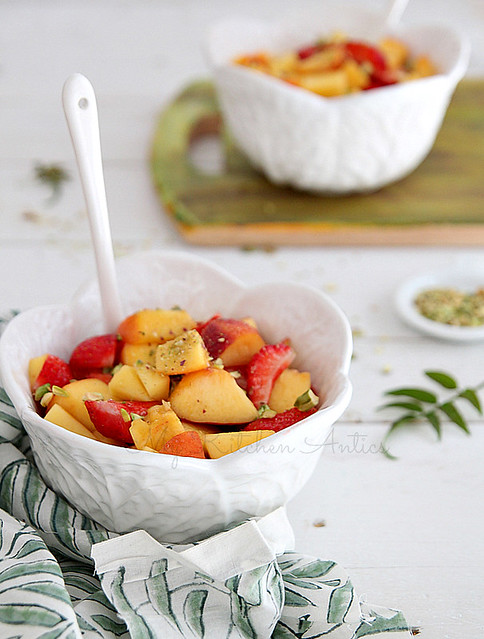
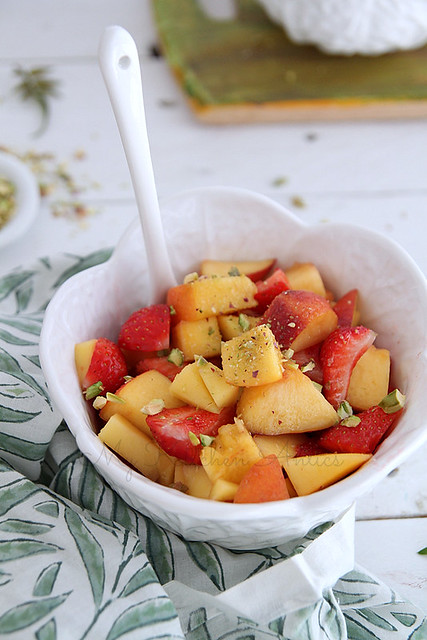
So on a warm-ish Saturday I made this mixed fruit salad to enjoy the best of British bounty. The strawberries were sent across by Sweet Eve Strawberries - one of the best I've actually tried. They are British born and bred and deliciously sweet and full of flavour. I am not very lucky when it comes to strawberries as the ones from the stores are never really sweet. But the Sweet Eve strawbs were a welcome change- almost all of them were really sweet and I kind of finished half of it at one go. With the rest I whipped up a nice smoothie and this summer salad which was a hit. The pistachio nuts add that extra crunch and the next time I do this, I'll try it with other fruits and a generous sprinkling of almonds or so.

Rosewater is one extract I've never really tasted or experimented with and was pleasantly surprised by the Nielsen Massey rose water which did lend a very Moroccan flavour to this salad. That said, it can be a very over powering flavour and not a favourite of many (the husband included). A very small quantity goes a long way and so watch how much you put in. I had guests over last weekend and I made some poached peaches with rose water and served it with vanilla ice cream and pistachio nuts. it was divine! 

Recipe adapted from here
IMG_0731
Strawberries- 100 gms
Mango- 1 ripe, peeled and sliced into cubes
Peach- 1 ripe, diced
Rosewater- a splash (optional)
Caster sugar- for sprinkling
Pistachio nuts- enough to sprinkle, chopped fine

Mix together the fruits in a large bowl.
Add a splash of rosewater and toss well.
Divide the mix between two or 3 bowls
Sprinkle the caster sugar followed by pistachio nuts and serve cold.
IMG_0742
Notes: Add any fruit of choice, except maybe bananas
If not for rosewater a splash of Marsala wine or Sherry would be good

With thanks to Sweet Eve Strawberries and Nielsen Massey for the samples.

Friday, 16 August 2013

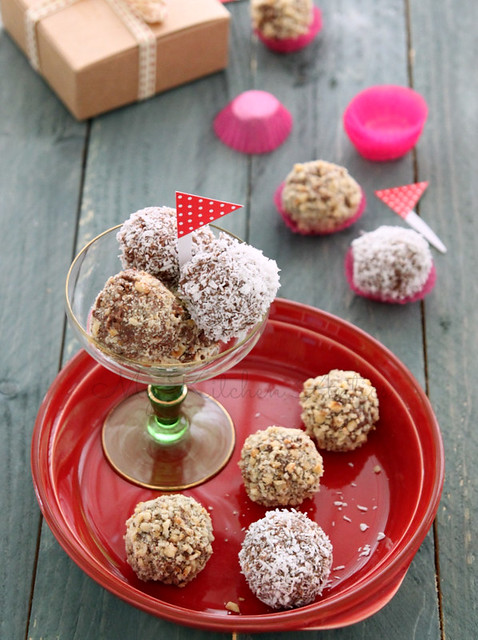
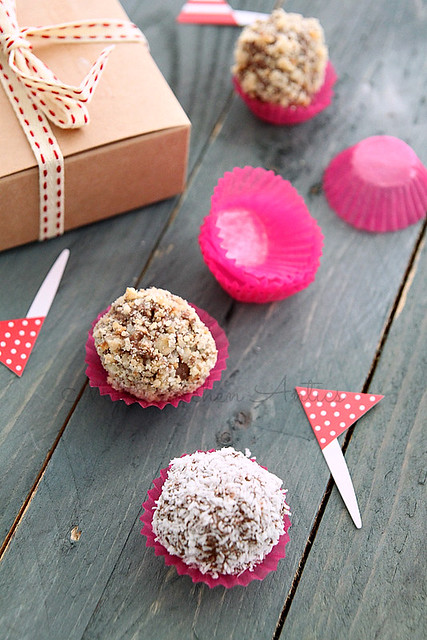
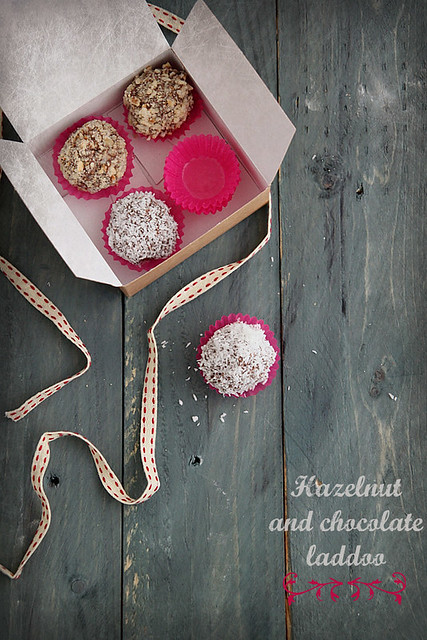
Chocolate and hazelnut laddoo (truffles)

IMG_0389
First of all a huuuuge thanks to all those who left comments on the ad post. I am a wee bit embarrassed and at the same time overwhelmed at the outcome. Its weird watching myself on telly and I hope I get used to it soon :)

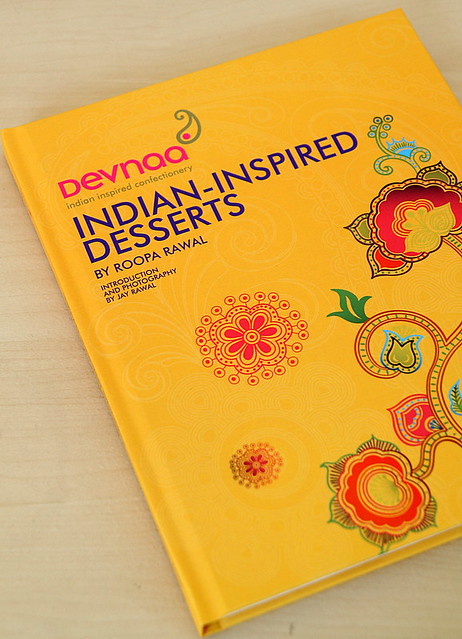
Those who attended Bloggers' Buzz beginning of this year might remember Devnaa who sponsored a box of sweets for the goody bag? Or let me put it this way, those of you who attended BB will not forget Devnaa and that amazing box of Indian-inspired sweets in the goody bag. I remember a lot of you writing back and saying that was the best part of the goody bag- the well packaged, colourful box with delicate chocolates. Started by brother-sister duo Roopa and Jay Rawal, the journey of Devnaa began at their kitchen table with praises flowing in about Roopa's home made sweets. They decided to take this interest further by starting Devnaa, a collection of sweets and desserts combining authentic Indian recipes and artisan chocolate techniques. 

Now, I am not a big fan of Indian sweets and desserts, with maybe gulab jamun and gajjar ka halwa being an exception. So in all honesty I was not too excited about the box of chocolates. But of course I had to give it a try and must say I wasn't too disappointed. I mean i did have a few favourites like the saffron and pistachio caramel and the cinnamon praline, and my not so favourite were the ones with ginger. Ginger or not, I think the whole concept of Devnaa is quite interesting.
IMG_0477
They also sent me their cookbook and ingredients for two recipes. I have bookmarked a whole bunch of recipes from the book, but like a million other recipes I have bookmarked, God alone knows when they will actually make an appearance on the blog. The recipes are pretty descriptive, but being a big fan of food photography, I would have liked some better pictures. I mean desserts are so pretty to photograph and I would have loved to see some cool styling and stuff. 

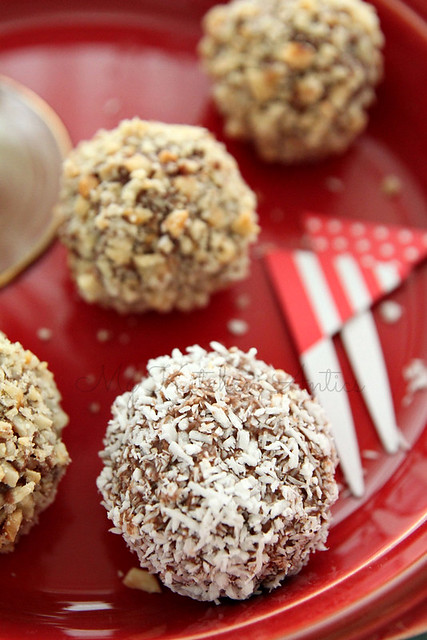
These chocolate and hazelnut laddoos did not disappoint, but i would def try them with dark chocolate next time. Gave it to some friends at a party and they loved it. They are really easy to make a do a good job of being pretty, presentable and tasty. Do some cool packaging, and they would double up as return gifts for guests. 

IMG_0397 
Condensed milk- 200 gms
Cocoa powder- 1 tbsp
Milk- 2 tbsp
Milk powder- 100gms
Milk chocolate- 100 gms
Chocolate-hazelnut spread- 1 tbsp (say like Nutella or equivalent)
Hazelnuts- 60 gms, slightly roasted and crushed or chopped finely
Dessicated coconut- 20 to 25 gms (optional)
IMG_0383 
Mix together the condensed milk, cocoa powder and milk in a saucepan and heat gently. (It would make it a lot more easier if you sift the cocoa powder into the condensed milk, because it was a bit of a trouble for me with small bits of cocoa powder dotting the mix. I had to use my spatula to break them down and still couldn't manage to do it all. So my mix was speckled with cocoa).
Keeping the heat on low-medium, add the milk powder and stir until the mixture starts forming a smooth dough that comes away easily from the sides of the pan. This may take about 4 to 5 minutes. Make sure you don't leave it unattended and that you keep stirring till you get the desired consistency.
Take the mix off heat and leave aside to cool in the refrigerator. The recipe called for just leaving it aside to cool, but still warm and pliable. I did as mentioned, but the dough was just too loose to work with. So I chucked it into the refrigerator for about 15 minutes, and waited for it to become completely cold (like with truffles) and then it was easier to handle.
Scoop out 1 tbsp of the dough at a time and roll into a smooth ball. Mine were slightly bigger in size so I got a total of 12. Leave on a tray lined with baking paper.
Meanwhile, melt the chocolate in a microwave.
Stir in the chocolate-hazelnut spread and make sure that the mix is not too hot, but warm and runny. If it hardens up when you are ready to dip, then just give a burst or two in the microwave and stir again to mix well.
Arrange the chopped/crushed hazelnuts on a plate.
Dip the rolled dough balls into the melted chocolate, trying to coat them evenly on all sides, followed by generously rolling them in the chopped hazelnuts.
Carefully place them back on the same lined baking tray. Continue with all the dough balls and chuck the tray back into the refrigerator till the chocolate hardens, say about 30 minutes.
Serve them at room temperature.
IMG_0429
Notes: I generously rolled the dough balls in hazelnuts, so I didn't have enough to roll the entire batch. So i used dessicated coconut and did the same rolling process.
Feel free to use chocolate of any type for the dipping...dark, white, flavoured etc.

With thanks to Devnaa for sending me the book and the ingredients to make two recipes from the book.

Thursday, 8 August 2013

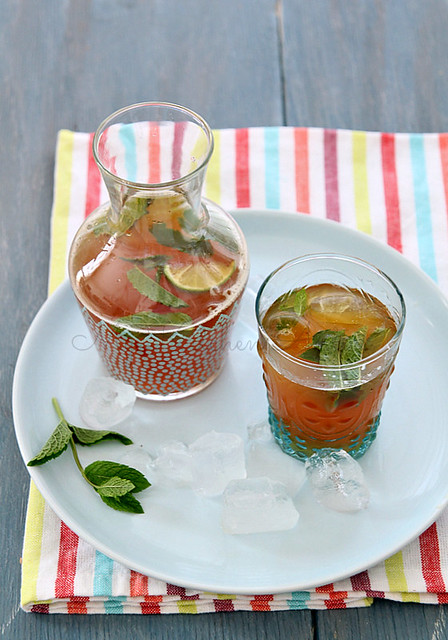
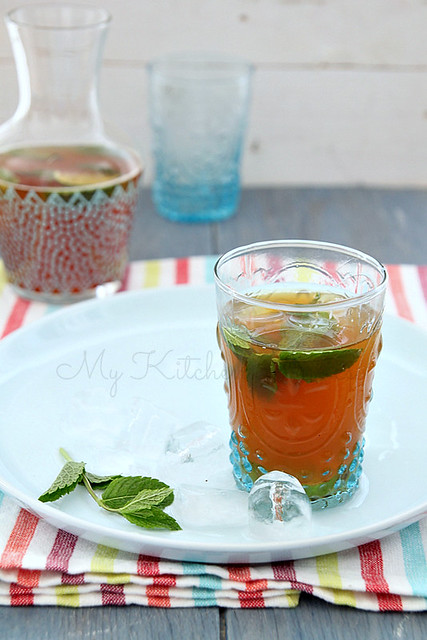
Sponsored review: Twinings Moroccan mint tea mojito

IMG_9801 
Both Ro and I enjoy a good cuppa tea every once in a while. Mostly weekends, we try making all these different types of tea and enjoy it with some biscuits and such. I particularly love experimenting with it..like making a macaron flavour with it, different flavours of iced tea's with it, the occasional masala chai and our favourite the mint tea.

I received a couple of boxes of Twinings tea to review and after enjoying some with our biscuits and cakes, I decided to try something new. I had never made a cocktail with tea, and my love for everything cocktail made me try this Moroccan inspired mojito. Its such a cool recipe..i mean it combines my favourite mint tea with rum and really, what's not to like about that?
IMG_9862 
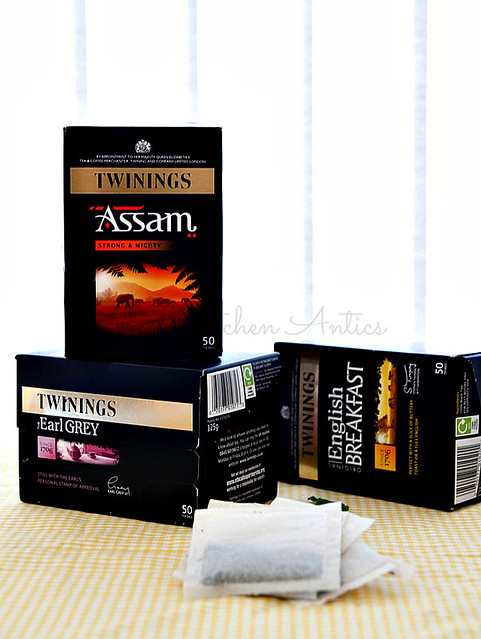
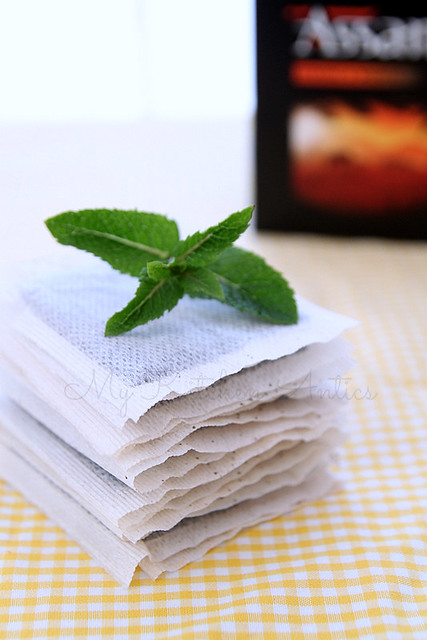
I also absolutely love the whole Afternoon Tea idea. I find it incredibly romantic, to dress up and go to a fancy hotel for some tea. I have been wanting to throw a tea party at mine for a long time, but haven't had the time to do it. But I did whip up some macarons for an afternoon tea-ish session with friends beginning of summer. I served them with Twinings Earl Grey (my favourite), English Breakfast and Assam tea- all great tea's. The English breakfast makes a mean mint tea as well. But be careful to not let it steep too much, or else your mint tea is gonna taste bitter. I have wasted waaay too much tea with that mistake.

Recipe adapted from here (Makes 2 to 3 glasses)
IMG_0294-1 
Twinings English Breakfast- 2 bags
Boiling water- 1 1/2 cups
Cardamom pods- 20, crushed
Sugar- 3 tbsp (adjust accordingly)
Mint leaves- 10 to 15
Lemon juice- 3 tbsp
White rum- 3 oz
Ice
IMG_0323 
Into a measuring cup put in the tea bags and bruised cardamom pods.
Pour enough boiling water to make 1 1/2 cups of liquid in total.
Seep for about 2 to 3 minutes, remove the tea bags, but not the cardamom and store in the refrigerator till ready to use.
Meanwhile, muddle the mint and sugar together in a cocktail shaker and keep aside.
When ready to serve, add the tea mix to the cocktail shaker, followed by lemon juice, rum and some ice cubes.
Shake away and then pour into individual glasses, top with a sprig of mint, a lime wedge and some ice and you are good to go.

IMG_9853 
Notes: The drink was not sweet at all, so the second batch i made, I used sugar syrup (1/4 cup) instead of sugar and added it to the tea mix when it was still warm. The mint leaves were muddled on its own.
Add more rum if you want it super boozy :)

With thanks to Twinings for the samples

Tuesday, 30 July 2013

Food and wine pairing {Loire blogger competition}

First of all, a huge thanks to all of you who wrote in congratulating me on the ad appearance. I am overwhelmed and loving my lil blog family even more. I will definitely post the ad on the blog and make sure none of you miss it :)
IMG_9906
I was sent two bottles of Loire wines- the Muscadet and Rose d'Anjou- for a blogger challenge wherein I had to match the wines with food of choice. I only recently started this whole pairing business and even though I'm not an expert, I kind of have a few favourites I'd like to pair with the food we have. Now that summer is in full swing, the white and rose wines were gladly accepted and we put them to good use.

Before we go into my food selection, here is a bit about Loire Valley wines. The region, mostly central France, is situated along the Loire river and is home to some great wines. There are 65 appellations that include all types of wine- red, white, rose, sparkling, still, dry, sweet and so on. As opposed to other wine growing regions in France, the wines here are thoroughly affected by the Loire river and are lucky enough to benefit from the minerals matured by the clay minerals in the river. This results in wine that is truly distinct with a lot of intensity and variety.
IMG_0261-1
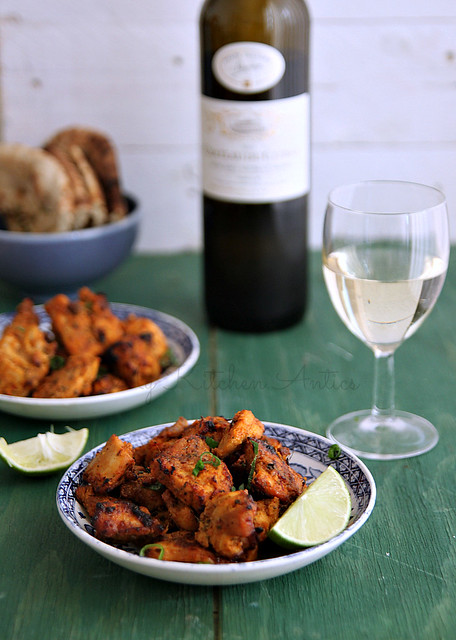
I love a good white once in a while. From preferring the really sweet ones to the dryer ones, I think my taste in wines have kinda improved with time. The cool thing about Muscadet wine is that it is left to age all winter to bring out as much flavour from them as possible and it sure didn't disappoint us. The wine is very light in colour and I was sure it was gonna be dry, but then one sip you take and its one of the sweeter wines...something I wasn't too thrilled about, but then I decided to pair it with some spicy chicken malai tikka kebab and I thought we had a winner. You smell the wine and its like summer in a glass. Crisp and delicious with some fruity flavours (I definitely got citrus, but I cant really pin point the other flavours present). The husband thought it was more floral and agreed that the spring-like tones of the white wine was definitely brought out by the strong masala's used in the chicken. Contrary to usual pairings of the Muscadet with seafood, I picked chicken tikka because it is something we regularly have at home and to find wine that would match food that you are so used to is the winner for me.
tart2
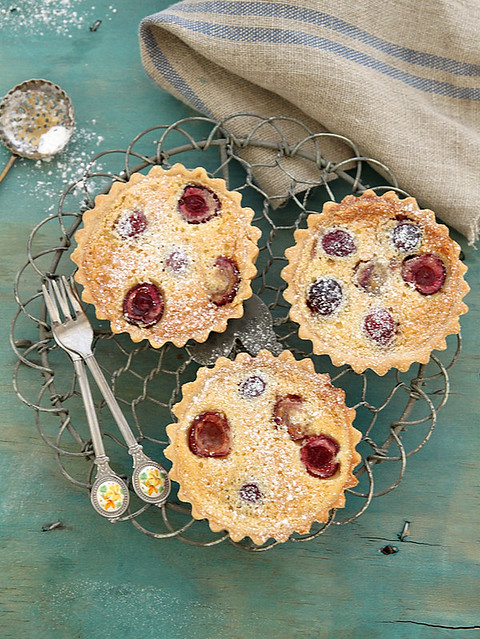
The Rose d'Anjou with its pretty pink colour was too good to resist and so that's the bottle we devoured first. I preferred the medium sweet flavours of rose with the spicy chicken malai tikka. It completely broke down the oiliness of the tikka and replaced it with sweet fragrant taste of berries. After a few sips we realised it would have been great with dessert as well. So after glugging down half a bottle we kept the remaining to test with dessert. I made some cherry clafoutis tarts and decided to serve with the wine. It wasn't too bad, especially because the tarts were not cloyingly sweet and so didn't over power the subtle sweetness from the Rose d'Anjou. More than anything, I'm a sucker for rose wines as its the first type of wine I got familiarised with. Sweet memories (no pun intended) ;)

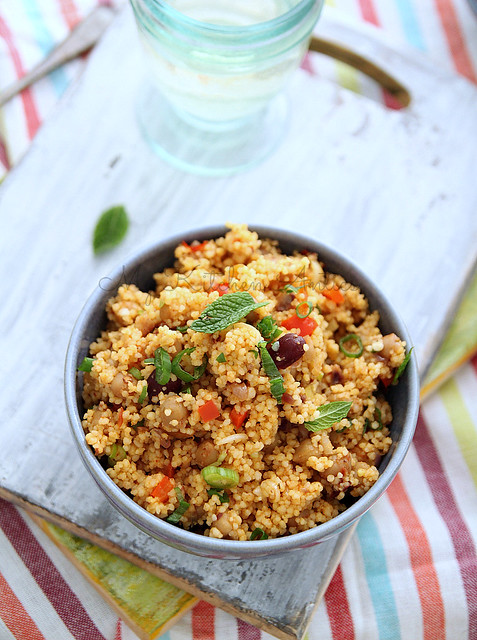
Both the wines were thoroughly enjoyed and they are perfect for the summer days, especially for those barbecue parties where you have a lot of grilled meat and vegetables. More than anything, its a pleasure to know that fabulous wines like these are not exorbitantly priced, and at 8.99 (Muscadet) and 7.99 (Rose d"anjou) a bottle, they make a bloody good deal. I served the light meal of chicken malai kebabs with cous cous salad (thanks to Nupur for the fabulous recipe) and washed it down with the wine. The white would be a good after meal aperitif as well, the husband says as an after thought. But I'm absolutely happy with the pairings I figured out :)
IMG_0221
Recipe for the chicken malai tikka kebabs were adapted from Soma's eCurry- a recipe I've tried so many times and has never failed me. I followed it to the dot, except for the red food colouring which I didn't add. The cherry clafoutis tart recipe can be found here. I made it for the Great British Chefs website to celebrate National cherry week :)

With thanks to Loir wines for the sample bottles.

Wednesday, 3 July 2013

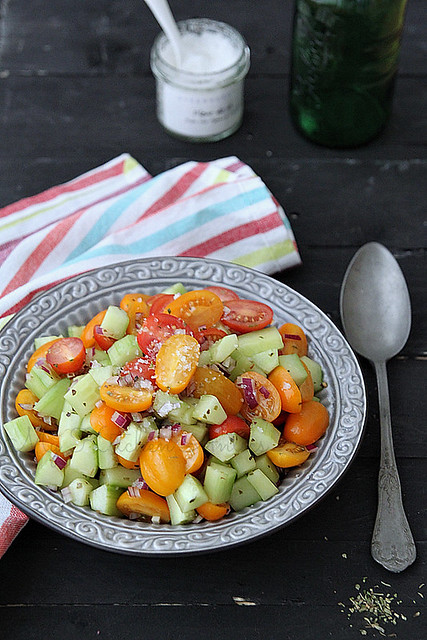
Tomato and cucumber salad with Fleur de Sel

IMG_9673
Its only after I starter food blogging did I come across so many different types of ingredients and methods. Fleur de Sel, meaning flower of salt, was one such ingredient that made me wonder what it tasted like. The numerous recipes that called for Fleur de Sel, like salted caramel and chocolate tarts, I had no choice but to use normal sea salt since I just couldn't get my hands on Fleur de Sel.

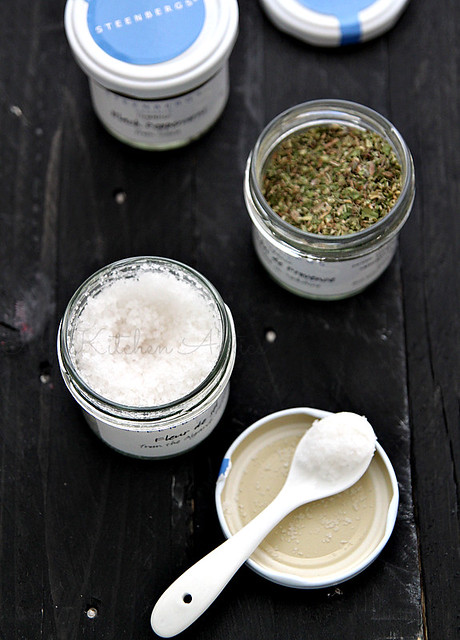
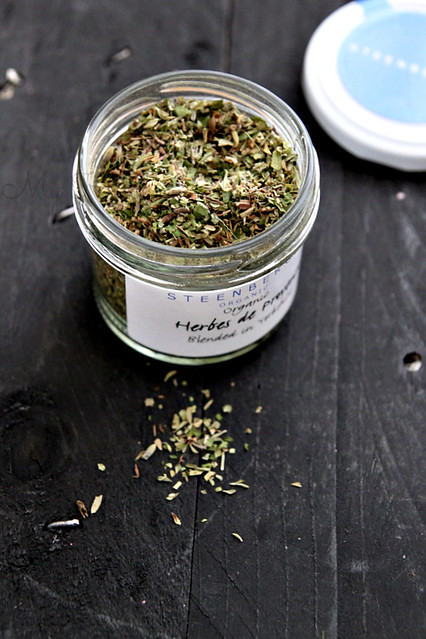
Eco Market is an online marketplace where you can buy natural products directly from the sellers that make them. I think its a really cool concept and so didn't think twice when they asked if I wanted to review any of their spices, herbs, and seasoning. I had spotted Fleur de Sel on the list and thats exactly what I wanted. It came as part of the French stack from Steenbergs, a set of 3 organic French culinary essentials - Fleur de Sel, Herbes de Provence and black pepper. Neatly packed in small glass containers, these would definitely make a great gift for those with a culinary side. 
IMG_9622
It was my first time with fds and I didn't know what to expect. I opened the bottle to find really moist salt flakes, and worried if it was supposed to be otherwise, I immediately wrote to Sophie, owner of Steenbergs. This was her reply: 
'No that is exactly how it’s meant to be. The salt is sun dried in traditional salt pans in the Algarve so it always retains some moisture, as opposed to factory dried which removes it all. The salt is part of the slow movement group and has nothing added or taken away.'

She also added, 'The Fleur de sel means it is the cream of the crop, the flakier salt that goes to the top of the pan. Not for grinding.'
IMG_9657
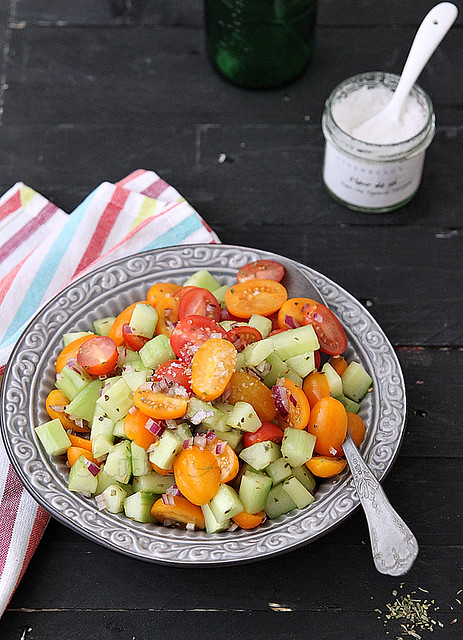
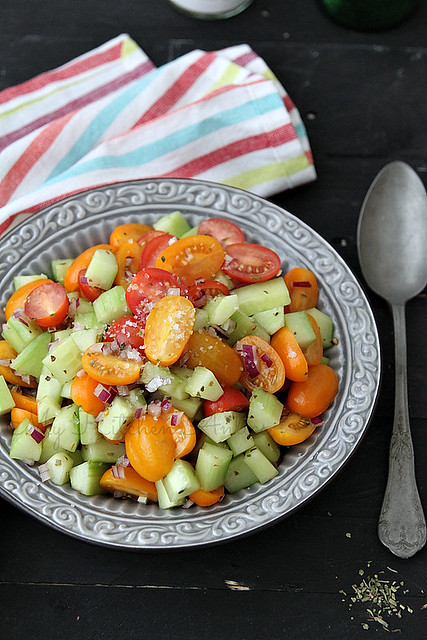
That was so helpful and off I went to make something with the gorgeous looking salt. It had to be a salad, simple and summery with a generous sprinkling of fds. This tomato and cucumber salad thoroughly did justice to the authentic taste of the salt with the saltiness cutting through the acidic tomatoes and cool cucumber. The pepper container hasn't been open as yet, but I did use the Herbes de Provence for my roasted potatoes and they were delish. 

If you have tasted fds, then its very difficult to actually go back to using normal sea salt. That said, they don't come cheap. Although I would like to sprinkle it on every possible salad, fruit and chocolate, the fact that it is expensive and not readily available in my local grocery store makes me stop and think twice. But hey, that's what Eco Market is for right? :)

Over to the recipe. There is no precise measurement for the salad, you kind of eye ball it and add/ reduce stuff. 
IMG_9644 
Mixed baby plum tomatoes- 400 gms, sliced in half
Salad cucumber- 1 large, peeled and diced (around 1 cup)
Red onion- 1/4 cup, finely chopped
Oregano- 1 tsp
Olive oil- a generous splash
Lime juice- 2 to 3 splashes
Fleur de Sel- 1/2 to 3/4th tsp (adjust as per taste)

In a salad bowl, mix together the first 6 ingredients, one after the other.
Toss them well so that the oil and lime juice and oregano gets mixed well with the vegetables.
Just before serving, sprinkle the Fleur de Sel on top of the salad and serve generous portions.
We had it with some grilled fish and garlic bread.
IMG_9655
PS: A special thanks to Finla for the gorgeous bowl in the picture. Its been treasured :)

With thanks to Eco Market and Steenbergs for sending me the sample stack to review.