Showing posts with label Review. Show all posts

Thursday, 7 April 2016

Beef rogan josh in a Staub Cocotte

IMG_9610 
Ever since we moved into our new house we've been talking of banishing our non stick Teflon pans and going all cast iron or stainless steel. We have been eliminating them bit by bit and the transition has been a bit of a challenge but i think its working and I'm slowly getting used to it.

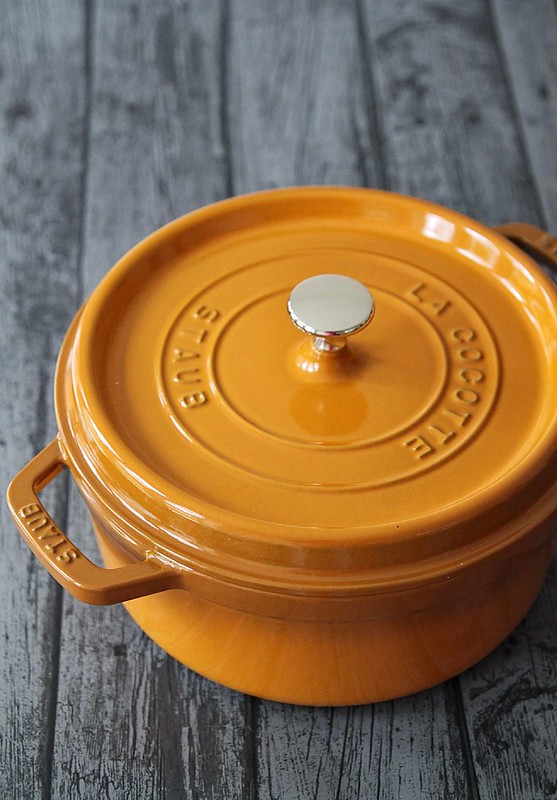
My first cast iron cooking experience was with this gorgeous Staub 24cm Cocotte, the lovely people over at Zwilling UK sent over. I have been thoroughly enjoying my time with it, or rather getting used to cooking with it and I'm very happy to have it as part of my new kitchen. If like me you do like a bit of colour, then look no further because Staub Cocottes come in a range of colours from cinnamon to basil to cherry red to graphite grey. etc Those who know me, also know my obsession with the colour yellow so no surprises there when i opted for the mustard colour Cocotte. It arrived promptly on time and i got cooking with it the very same day. 
IMG_9563 (1)
One thing i had to get used to was the weight of the cast iron pot. Having dealt with light weight thin stainless steel pots and such, the weight of the cast iron pot was a bit of a shock in the beginning, but i soon got the hang of it especially once i realised how the weight works to your favour while cooking. It also retains heat really well which also helps with cooking food evenly. I also noticed that all the dishes i made in the Staub cocotte was done at a much lower temperature than i usually do. For example, if i was cooking previously on the heat mark 7 on my ceramic hob, with the Staub i was doing it on heat mark 4, sometimes even reducing it down to 3 because of the heat retention and things like onions and garlic getting burnt. I agree it does take a while to get used and I'm still experimenting with what heat settings work well for what. The point is, energy consumption has reduced drastically, and my husband who was sceptical about this whole cast iron cooking is now absolutely impressed and sold on the idea.

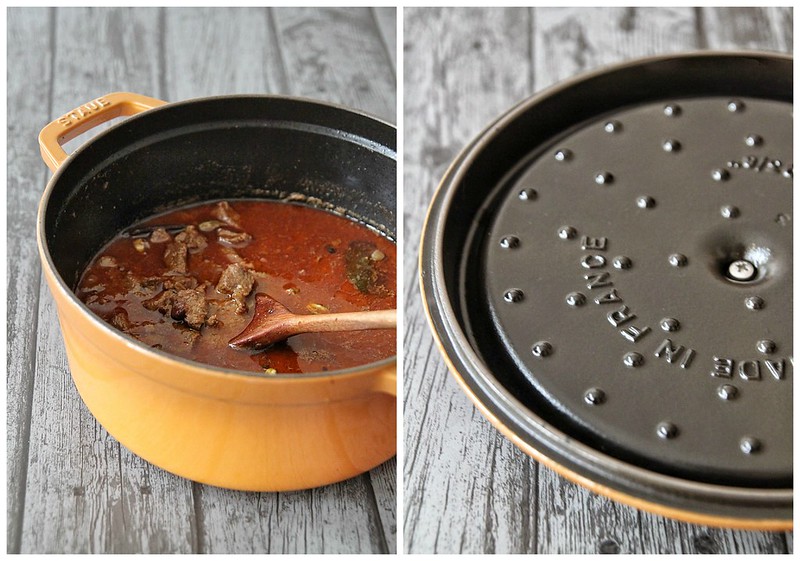
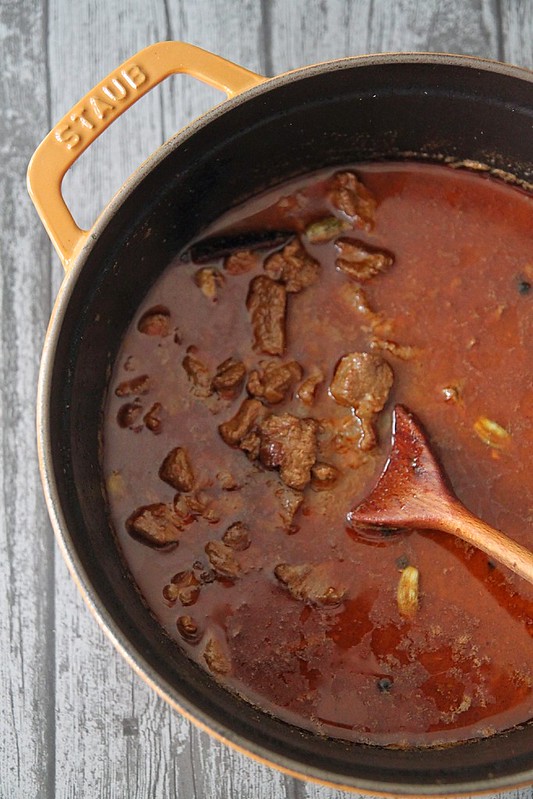
Another excellent feature about the Staub Cocotte is the heavy lid with small spikes on them which act as a natural baster. The water drops back into the pot keeping your meat moist and this to me is a great plus point. When i usually slow cook meat, i have to keep adding water every now and then to keep the meat moist and also to prevent the food from burning or sticking to the base because the water would evaporate quite quickly. This i think is my most favourite feature from Staub, the really heavy lid and the special drip structure makes sure no moisture escapes and whatever gets collected gets poured back into the pot. I loved how my rogan josh didn't need any refilling through the entire cooking process and also how my rice was cooked perfectly well without moisture escaping, and without going through all that drama of covering the lid with a cloth or paper towel.
PicMonkeynn Collage
When i made the rice, i was pretty sure it would stick to the bottom, but was pleasantly surprised it didn't. The enamel coating even though not completely non stick works to a great extent when it comes to cooking and cleaning, and even if it does stick a bit to the base, a bit of a soak easily removes it all. I have to try a biryani in the pot to see how the whole 'dum' aspect works, but before that i need to familiarise myself with the cast iron pot a bit more.

The only negative thing, well i cant quite call it negative really, is that the entire pot and lid becomes really hot while cooking. If you hold on to your pot while stirring and mixing, this becomes a bit uncomfortable. I managed to burn my hand twice, even after using a cloth but, this again is something i need to get used to, and nothing a pot holder cant solve. It however, doesn't affect the performance of the pot at all. Then there is of course the price which, lets be honest, is steep. When i was thinking of investing in a cast iron pan, i did a lot of research on various products in the market. and Staub definitely stood out. It is one of the best out there so think of it as an investment that would last you forever, and put it on your birthday gift list.

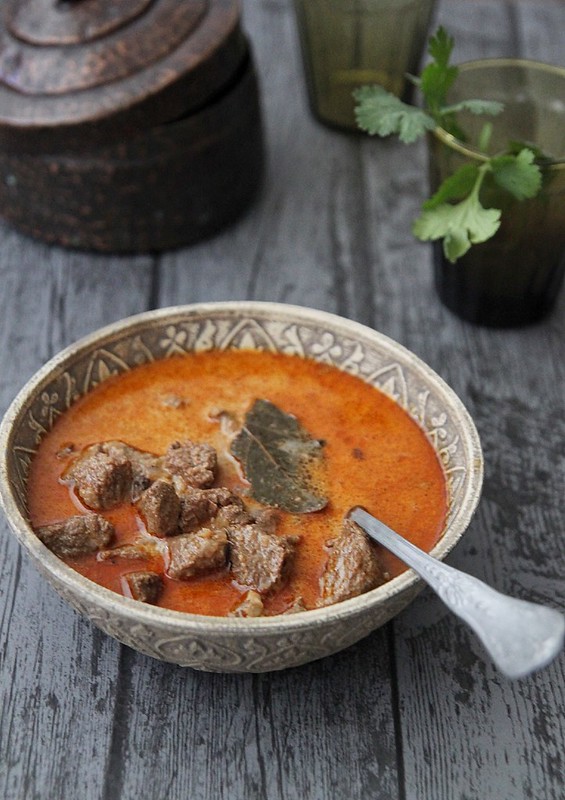
Coming to the recipe, I made a mutton rogan josh last year and it differs from this one quite a bit. I would like to think that is definitely the more authentic recipe and this one by Madhur Jaffrey is a bit more Anglicised, if i may call it that. But it works, its absolutely flavourful and we've been making it for years now. 

Recipe adapted from here (serves 4 as part of main)
IMG_9598
Ginger- 5cm piece, peeled
Garlic- 8 to 9 cloves, peeled
Oil- 4 tbsp
Beef- 700 gms (cut into 2 cm cubes)
Cinnamon sticks- 2 cm
Cardamom- 6 pods
Cloves- 6 pods
Bay leaf- 1
Whole peppercorns- 10
Onions- 200 gms, peeled and finely chopped
Coriander powder- 1 heaped tsp
Cumin powder- 1 1/2 tsp
Kashmiri chilli powder- 2 tsp
Spicy chilli powder- 1 tsp (adjust according to heat)
Salt- to taste
Yoghurt- 6 tbsp
Warm water- 400ml
Garam masala- 1/2 tsp

IMG_9553
Grind together the ginger and garlic with 2 tbsp water to make a fine paste.
Heat 2 tbsp oil in a deep thick bottomed pot and on medium-high heat sear the beef cubes in batches till they are all brown. Transfer to a plate.
Reduce heat to medium, add the remaining oil into the pot and throw in all the whole spices- cinnamon, cardamom, cloves, bay leaf and peppercorns - and saute till they are fragrant for about 10 seconds, take care not to burn them.
Follow with onions and saute them for about 5 to 10 minutes or till they turn brown.
Tip in the ginger garlic paste and continue to fry till the raw smell goes
Add all the spice powders one after the other along with salt, and cook for about 5 seconds, just to remove the raw smell. If you think the mix is sticking to the pan and has a chance of burning, add in a tbsp or two of water with the spices and cook till you can no longer smell the raw masala.
In goes the fried meat along with all the juices. Mix well so all the masala gets coated on the meat.
Add the yoghurt one spoon at a time, and stirring it into the meat mix after each addition.
Pour in 400 ml warm water and bring to a boil, scraping the sides of the pot.
Cover with a heavy lid, reduce heat to the lowest and cook for about an hour or until the meat is tender. 
Keep checking in between to see if the water has reduced, and if the meat is sticking to the bottom add some more water, stir well and continue cooking closed.
Open the lid, check if the meat is cooked, add more salt if required, and if you can see a thin layer of oil on top, that's sign of a good rogan josh i believe. 
If you do think there is too much liquid, increase heat and let the curry boil away some of the liquid.
Just before serving stir in the garam masala and serve hot with some steamed rice.
IMG_9574
Notes: Instead of cooking this on the hob top, you can finish off the curry in the oven at 180C for about 1-1.30 hrs. Just make sure you stir it every 10 minutes or so and check for liquid levels. My Staub Cocotte would do a perfect job for this as you wouldn't need to transfer it into another oven proof dish but can directly move this from the hob to oven.
You can make the same dish with mutton/goat/lamb as well. Cooking times may slightly vary though.
Over the years I've made my own changes to it. I add a generous dash of cream just after i put the garam masala, making this quite irresistible.

With thanks to Zwilling UK for the Staub Cocotte that was sent to me. All opinions are my own and no monetary compensation was offered in return for a positive review.

Wednesday, 15 January 2014

The Magnetic Touch- Innovative products from Magnet Kitchens, 2014


We all have our dream kitchen. You know....the types that have been pinned innumerable times on Pinterest, seen in magazines and gawked at in stores. I have in my mind every single detail about 'the' kitchen that I would own one day. Since most us do tend to spend a lot of time in the kitchen.. err.. me being food blogger and all, I think it does matter how that little space of yours looks like. I would love a cozy lil kitchen with an aga and old copper pans and such, but in all honesty what i need is a nice modern kitchen- built in, with a small breakfast bar.


I walked into the Magnet Kitchen store in Wigmore street and I could very confidently say I found my dream kitchen (s). From dramatic ones with stylish islands and contemporary hob tops, to the perfect bachelor pad kitchenette, Magnet Kitchens have it all. I couldn't help but wish I was actually in there to pick out a new kitchen design for our home. Sadly, that will have to wait for a few more years and in the mean time I'd just have to take in Magnets new kitchen range which I must say are really impressive. 
Intergra Astral Grey- a smooth, uncluttered design which is both trendy and neutral enough to be paired with all sorts of different colours
Integra Fantasy Oak- a brown hued wonder which just makes you feel like you are in a summer cabin. The textured horizontal lines add to the refreshing design.
Leighton Grey for that country kitchen feel with matt grey finish and solid wood worktops.
Astral Grey with its smart glossy grey surfaces make it look very bachelor-pad-like I feel. Nevertheless, a beautifully put together colour combination can make it look simply fabulous.

What I'd like to however talk about are the new product innovations that Magnet has introduced. Their desire to keep designs fresh and more appealing inspires them to come up with new ideas regularly- ideas that you wont see anywhere else. The Coffee Unit, Illusion Sink and Sound Bar are 3 innovations that have been recently introduced, and I must say, they are a class apart. I was lucky enough to check out some of these products and here is my take on them.

Illusion sink


The illusion sink is perhaps the coolest kitchen feature I've ever seen. As the name suggests, its a sink you can see one minute, but not the next. When you install a sink in your kitchen, you'd like it to be fairly big right? But when the sink is not in use, the space is completely wasted. In such situations, the illusion sink comes in handy. When not in use, simply push down the tap and slide over a cover to create extra worktop space. The cover comes in the exact same colour as your work top (of course you can select your own too) and does look pretty neat when the cover is pulled over.

Sound bar

The slim and stylish sound bar system makes working in the kitchen a bit more fun. Making your favourite seafood paella while jiving to some Spanish salsa music is something we all would like to do in the kitchen...that too without having to worry about the wine spilling over your ipod or laptop. The sound bar blends seamlessly into the wall cabinets and if you link it to any device with Bluetooth capability you wont even know its there..well, until you hear it.
"Magnet provides a flexible full circle service that includes a smart design service, a 15 year cabinet guarantee, free home survey and the unique Smart Care service. The Sound Bar System is a system that can not only be incorporated into Astral Grey kitchen, it can also be fitted with many other Magnet kitchens."

To find out more about Magnet’s range of kitchens or to locate your nearest store, visit www.magnet.co.uk”

Disclosure: Compensation was provided by Magnet via Glam Media. The opinions expressed herein are those of the author and are not indicative of the opinions or positions of Magnet

Tuesday, 24 December 2013

Season's Greetings & Christmas Specials

How are last minute preparations for Christmas coming along? Are you frantically baking and cooking or relaxing with your feet up while your parents put together the Christmas feast? Either ways, I'm sure you are all looking forward to Christmas celebs tomorrow.

The husband has pushed off to India and I had to stay back because of a hectic work schedule and Id be joining him only in Jan. I was all ready to have frozen pizza and get drunk on wine on 25th, when a friend invited me over to hers for Christmas. Since the entire transport system comes to a standstill on 25th I am heading to hers tonight, attend a midnight Christmas service at the church and ring in Christmas with friends tomorrow. I would have loved to be with family, but hey, I'm not complaining. Atleast I'm not having frozen pizza and watching Downton Abbey reruns in my Pj's.

Anyways, here's wishing all you guys a very Merry Christmas. Have a glass or two of wine on me and enjoy your day to the max. Leaving you with some fun Christmassy stuff ...

Oddka
I love my cocktails and am forever trying to recreate new ones at home, which means scouting the drinks aisle at the supermarket is a treat. I came across this vodka drink called ODDKA and was thoroughly amazed at the flavours on offer. Fresh cut grass.. seriously.. now that's a flavour I'm completely intrigued by. Other flavours include Electricity, Salty caramel popcorn, Twisted melon and Peach Bellini. As luck would have it, I was asked if I'd like to try some Christmas cocktails using ODDKA and how on earth could I say no? Since I'm home alone, I've not really made any cocktails as yet but if I have a girls night out around New Years, I'd definitely be trying out a few cocktails from the list ODDKA has put together. If you do want to try something different this Christmas, then head on over to the ODDKA website and give some of their cocktails a go. Your local Asda or Sainsburys should stock a few flavours of ODDKA.

Castello Cheese
I received this really adorable Christmas stocking, with my name on it and all, filled with Castello Cheese. I had big plans to make Ronnie Murray's Baked leek tart with Castello Jersey Blue and I even bought all the ingredients, but with crazy work schedules I had to put the cooking on hold. I shall definitely give it a go one of these days I'm home. The Castello range includes Creamy Blue, Creamy White, Traditional Danish Blue, Extra creamy Danish Blue, Pineapple Halo i (I made a macaron filling with the Pineapple cheese), and the latest addition just in time for Christmas is the Tickler Cheddar, with a sweet, strong and tangy taste. If you are doing a cheese platter for the parties, don't forget to include this one, its a winner. Pair it with a Rioja Gran Reserva 2001 or a an Italian Barolo wine.

Christmas food and drink matching
Pairing the right drink with the food you serve is really an art. I try hard to actually do this and mostly, because of lack of knowledge, I just do a theme and follow with drinks from the same cuisine. When you do a large spread like for Christmas, this becomes a bit of an issue, especially when you have invited people with different tastes. To make matters easy for people like me, Waitrose has teamed up with wine lover Philip Schofield and wine connoisseur Olly Smith to develop a food and wine matching guide to get the combinations right. The infographic gives you a basic knowledge of pairings which would help you manage your Christmas meal pretty easily. I am sooo going to keep this for future references. There are also some great videos here for some festive inspiration

Parmigiano Reggiano Christmas Cook-off
Parmigiano Reggiano (PR) is one cheese I regularly use in cooking- in soufflés, bakes, dips and just to grate atop pasta. I was recently invited to a Parmigiano Reggiano Christmas Cookalong organised by the Consorzio del Formaggio and lead by top chef Valentina Harris. We started off the evening tasting some amazing starters like dates filled with PR and wrapped in Parma Ham, PR lollipops with sesame seeds and chilli (an absolute favourite) and a 30 month matured PR with balsamic vinegar. We were then split into two teams and set about creating our meal for the night- Venetian duck stuffed with a PR mix, Fennel topped PR and Rosotto PR. It was my first time cooking with duck, and although not really a favourite, I quite enjoyed the whole cooking experience. Highlight of the evening, however, was cracking open a 45kg PR wheel which we all got to taste, after which we all sat down to a fabulous meal. After an evening of like minded food enthusiasts and after gaining such indepth knowledge about PR, I cant wait to cook with the cheese. For more information and recipes check out the website

With thanks to all the brands for inviting me to their events and for review samples.

Sunday, 1 September 2013

Mixed fruit salad with rose water and pistachio

IMG_0734
Its over guys, its over. Summer is on its way out and I can already feel the slight chill in the air post 5pm. Although it was a pretty decent summer, I feel it ended too soon and I am not willing to let go as yet. I think the coming week is the last of 20C weather we'd get to enjoy. Sigh!

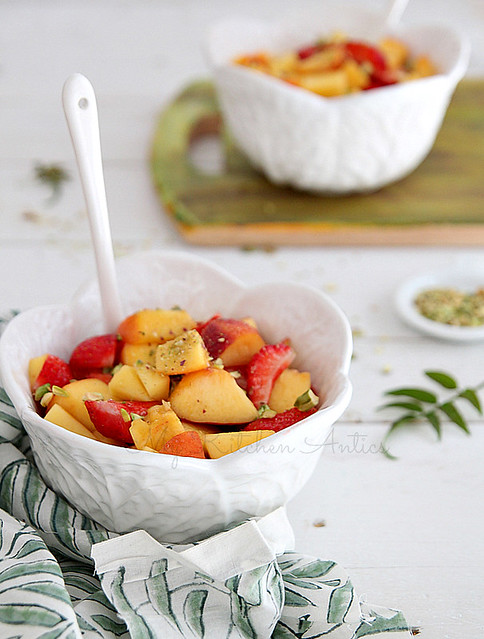
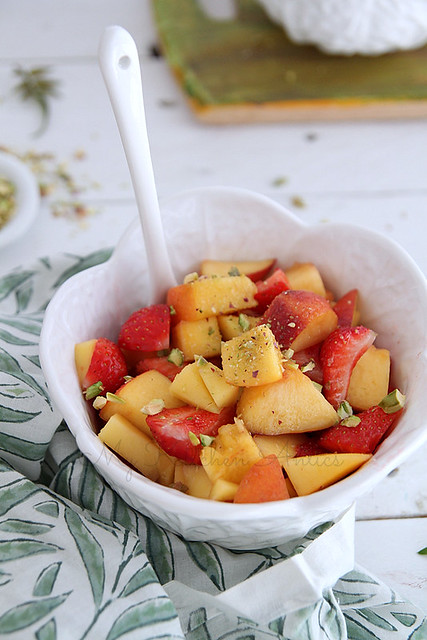
So on a warm-ish Saturday I made this mixed fruit salad to enjoy the best of British bounty. The strawberries were sent across by Sweet Eve Strawberries - one of the best I've actually tried. They are British born and bred and deliciously sweet and full of flavour. I am not very lucky when it comes to strawberries as the ones from the stores are never really sweet. But the Sweet Eve strawbs were a welcome change- almost all of them were really sweet and I kind of finished half of it at one go. With the rest I whipped up a nice smoothie and this summer salad which was a hit. The pistachio nuts add that extra crunch and the next time I do this, I'll try it with other fruits and a generous sprinkling of almonds or so.

Rosewater is one extract I've never really tasted or experimented with and was pleasantly surprised by the Nielsen Massey rose water which did lend a very Moroccan flavour to this salad. That said, it can be a very over powering flavour and not a favourite of many (the husband included). A very small quantity goes a long way and so watch how much you put in. I had guests over last weekend and I made some poached peaches with rose water and served it with vanilla ice cream and pistachio nuts. it was divine! 

Recipe adapted from here
IMG_0731
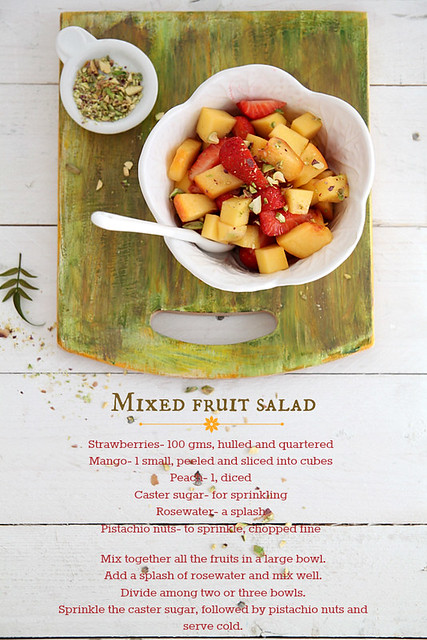
Strawberries- 100 gms
Mango- 1 ripe, peeled and sliced into cubes
Peach- 1 ripe, diced
Rosewater- a splash (optional)
Caster sugar- for sprinkling
Pistachio nuts- enough to sprinkle, chopped fine

Mix together the fruits in a large bowl.
Add a splash of rosewater and toss well.
Divide the mix between two or 3 bowls
Sprinkle the caster sugar followed by pistachio nuts and serve cold.
IMG_0742
Notes: Add any fruit of choice, except maybe bananas
If not for rosewater a splash of Marsala wine or Sherry would be good

With thanks to Sweet Eve Strawberries and Nielsen Massey for the samples.

Thursday, 8 August 2013

Sponsored review: Twinings Moroccan mint tea mojito

IMG_9801 
Both Ro and I enjoy a good cuppa tea every once in a while. Mostly weekends, we try making all these different types of tea and enjoy it with some biscuits and such. I particularly love experimenting with it..like making a macaron flavour with it, different flavours of iced tea's with it, the occasional masala chai and our favourite the mint tea.

I received a couple of boxes of Twinings tea to review and after enjoying some with our biscuits and cakes, I decided to try something new. I had never made a cocktail with tea, and my love for everything cocktail made me try this Moroccan inspired mojito. Its such a cool recipe..i mean it combines my favourite mint tea with rum and really, what's not to like about that?

IMG_9862 
I also absolutely love the whole Afternoon Tea idea. I find it incredibly romantic, to dress up and go to a fancy hotel for some tea. I have been wanting to throw a tea party at mine for a long time, but haven't had the time to do it. But I did whip up some macarons for an afternoon tea-ish session with friends beginning of summer. I served them with Twinings Earl Grey (my favourite), English Breakfast and Assam tea- all great tea's. The English breakfast makes a mean mint tea as well. But be careful to not let it steep too much, or else your mint tea is gonna taste bitter. I have wasted waaay too much tea with that mistake.

Recipe adapted from here (Makes 2 to 3 glasses)
IMG_0294-1 
Twinings English Breakfast- 2 bags
Boiling water- 1 1/2 cups
Cardamom pods- 20, crushed
Sugar- 3 tbsp (adjust accordingly)
Mint leaves- 10 to 15
Lemon juice- 3 tbsp
White rum- 3 oz
Ice
IMG_0323 
Into a measuring cup put in the tea bags and bruised cardamom pods.
Pour enough boiling water to make 1 1/2 cups of liquid in total.
Seep for about 2 to 3 minutes, remove the tea bags, but not the cardamom and store in the refrigerator till ready to use.
Meanwhile, muddle the mint and sugar together in a cocktail shaker and keep aside.
When ready to serve, add the tea mix to the cocktail shaker, followed by lemon juice, rum and some ice cubes.
Shake away and then pour into individual glasses, top with a sprig of mint, a lime wedge and some ice and you are good to go.

IMG_9853 
Notes: The drink was not sweet at all, so the second batch i made, I used sugar syrup (1/4 cup) instead of sugar and added it to the tea mix when it was still warm. The mint leaves were muddled on its own.
Add more rum if you want it super boozy :)

With thanks to Twinings for the samples

Wednesday, 3 July 2013

Tomato and cucumber salad with Fleur de Sel

IMG_9673
Its only after I starter food blogging did I come across so many different types of ingredients and methods. Fleur de Sel, meaning flower of salt, was one such ingredient that made me wonder what it tasted like. The numerous recipes that called for Fleur de Sel, like salted caramel and chocolate tarts, I had no choice but to use normal sea salt since I just couldn't get my hands on Fleur de Sel.

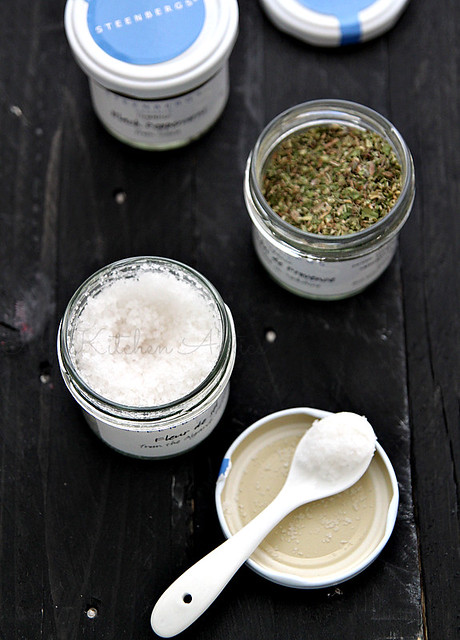
Eco Market is an online marketplace where you can buy natural products directly from the sellers that make them. I think its a really cool concept and so didn't think twice when they asked if I wanted to review any of their spices, herbs, and seasoning. I had spotted Fleur de Sel on the list and thats exactly what I wanted. It came as part of the French stack from Steenbergs, a set of 3 organic French culinary essentials - Fleur de Sel, Herbes de Provence and black pepper. Neatly packed in small glass containers, these would definitely make a great gift for those with a culinary side. 
IMG_9622
It was my first time with fds and I didn't know what to expect. I opened the bottle to find really moist salt flakes, and worried if it was supposed to be otherwise, I immediately wrote to Sophie, owner of Steenbergs. This was her reply: 
'No that is exactly how it’s meant to be. The salt is sun dried in traditional salt pans in the Algarve so it always retains some moisture, as opposed to factory dried which removes it all. The salt is part of the slow movement group and has nothing added or taken away.'

She also added, 'The Fleur de sel means it is the cream of the crop, the flakier salt that goes to the top of the pan. Not for grinding.'
IMG_9657
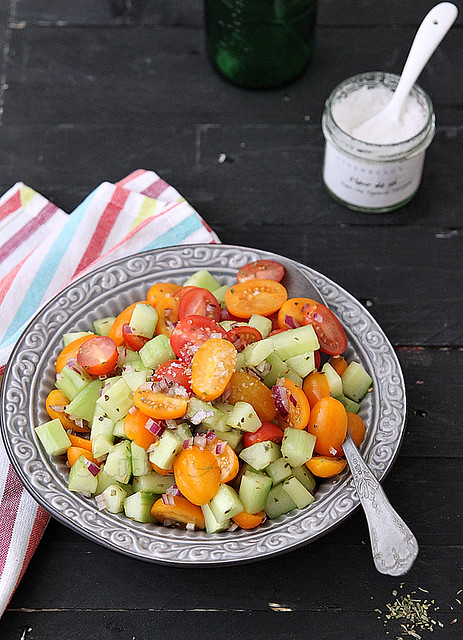
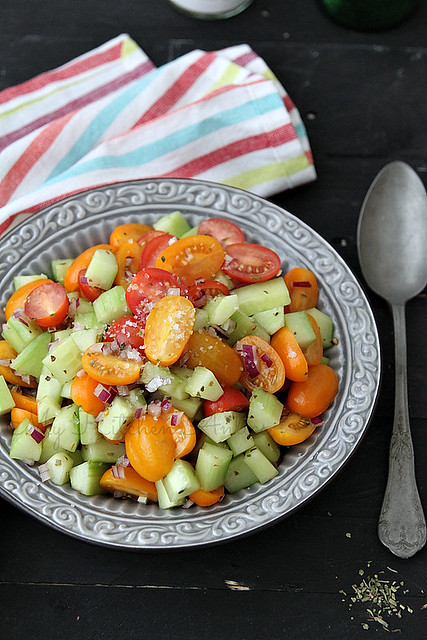
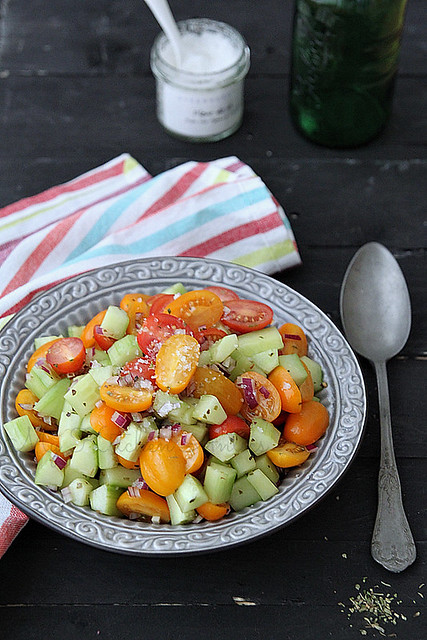
That was so helpful and off I went to make something with the gorgeous looking salt. It had to be a salad, simple and summery with a generous sprinkling of fds. This tomato and cucumber salad thoroughly did justice to the authentic taste of the salt with the saltiness cutting through the acidic tomatoes and cool cucumber. The pepper container hasn't been open as yet, but I did use the Herbes de Provence for my roasted potatoes and they were delish. 

If you have tasted fds, then its very difficult to actually go back to using normal sea salt. That said, they don't come cheap. Although I would like to sprinkle it on every possible salad, fruit and chocolate, the fact that it is expensive and not readily available in my local grocery store makes me stop and think twice. But hey, that's what Eco Market is for right? :)

Over to the recipe. There is no precise measurement for the salad, you kind of eye ball it and add/ reduce stuff. 
IMG_9644 
Mixed baby plum tomatoes- 400 gms, sliced in half
Salad cucumber- 1 large, peeled and diced (around 1 cup)
Red onion- 1/4 cup, finely chopped
Oregano- 1 tsp
Olive oil- a generous splash
Lime juice- 2 to 3 splashes
Fleur de Sel- 1/2 to 3/4th tsp (adjust as per taste)

In a salad bowl, mix together the first 6 ingredients, one after the other.
Toss them well so that the oil and lime juice and oregano gets mixed well with the vegetables.
Just before serving, sprinkle the Fleur de Sel on top of the salad and serve generous portions.
We had it with some grilled fish and garlic bread.
IMG_9655
PS: A special thanks to Finla for the gorgeous bowl in the picture. Its been treasured :)

With thanks to Eco Market and Steenbergs for sending me the sample stack to review.
Friday, 31 May 2013

Challah bread

IMG_8884
I don't have too many bread recipes on my blog. Its not because I don't bake bread, its because the process takes waaay too long in this cold weather. I have to start in the morning for it to rise (twice) and have it ready for dinner. Which makes it impossible to take pictures. This time however, I was lucky, since I had a bread bin to keep my bread in and not worry about it going stale since the next sunny day was 2 days later. You think I'm crazy? Join the club. I know a whole lot of people who think I'm crazy because I check the weather every hour to plan my photo shoot. Lucky for me, most of my readers are food bloggers and you'd know exactly what I'm talking about!

Garden Trading is this beautiful online store which provides functional everyday products for the home and garden. First look at their website and I was hooked. I wanted everything they displayed and they fit my style so so well. I'm a sucker for anything rustic with the whole country-house, farm house feel and Garden Trading has everything that fits the theme.. I was sent the Bread Bin in Flint to review and since we were on the look out for a bread bin, the timing couldn't be better. 

IMG_8940
The colour, a soft grey, blends well with my decor, the design stylish with a chrome handle lid, and the interior the same soft grey colour. The only (small) issue I had was the size, which for my tiny kitchen was a tad too big. I have very little counter space and so putting the bin there wasn't an option. It was too big to go on top of my microwave either. That said, the bin can easily hold two big loaves of bread and we've even chucked in some packs of chocolate and stuff as well. We made it work somehow and I, for one, love having the bread bin in my kitchen now.

The Challah bread (pronounced "hallah") was put in the bread bin for about 2 days and then I made some delicious French toast with it. I've wanted to make this gorgeous looking bread for so long but kept putting it off because I thought the braid was complicated. And it was!! After watching numerous YouTube videos I still didn't get it right. Tried it thrice and then on the 4th I just made a normal 3 braid challah, shaped it in a circle and called it a day. The bread is soft, slightly sweet and perfect with a spread of brandy butter. Or if you want to be more experimental, make a French toast or bread pudding with this gorgeous looking bread.

Recipe halved from here (makes one small loaf)
IMG_8883 
Plain flour- 2 to 2 1/4 cups 
Granulated sugar- 
Salt- 1 tsp
Instant yeast- 1 tsp
Egg- 1 large
Egg yolk- 1 small (take off about 1 tsp from this and keep aside to do an egg wash)
Water- 1/2 cup (lukewarm)
Vegetable oil- 1 oz

Into the bowl of a free standing mixer (or mixing bowl if using your hand) add the flour, sugar, salt and instant yeast. Stir to combine.
Make a well in the centre and add the egg, egg yolk and vegetable oil. Mix using a wooden spoon till the mix becomes wet.
Add the warm water, and using the same wooden spoon mix them all together...roughly.
Attach the dough hook and knead on medium speed for about 5 to 6 minutes, or till the dough is soft and smooth and is no longer sticky. My dough was really sticky, so I ended up adding at least 2 tbsp of flour. If you are using your hands to knead, then flour a work top and knead for about 10 minutes till you achieve the desired consistency.
Lightly oil the same bowl and place the (lightly greased) dough ball in it. Cover with a cling film and leave it in aside to rise. I preheated my oven at 100C for about 6 to 7 minutes and placed the bowl inside with the light on. It took the dough about 3 1/2 hours to double in size.
IMG_8910
Punch the dough down and separate the dough into 3 equal sizes. 
Roll each of them out into a long rope about 1 inch thick and around 8 to 10 inches long. They might shrink as you try to roll them. In that case, just leave them aside to rest for 5 minutes and try it again.
Join the ends of all the three ropes and secure tightly by pressing then together.
Then spread the three ropes and try and braid them like how you do your hair. If you mess up, don't worry, start over. (I had to.. thrice!).
Once you reach the end, carefully tuck them under the braid and shape them into a round, joining both the ends.
Place it carefully on to a baking tray lined with baking paper, cover with the same cling film, and leave it to rise in a warm place for another hour or two. I did the same oven method.

When ready to bake, pre heat the oven to 175C.
Mix the egg yolk with some egg white and 1/2 tbsp water and brush over the risen challah, generously and making sure you don't miss the cracks and sides of the loaf.
Bake for about 25 to 30 minutes, rotating the pan half way through for even cooking.
The loaf is done when it turns a golden brown colour.
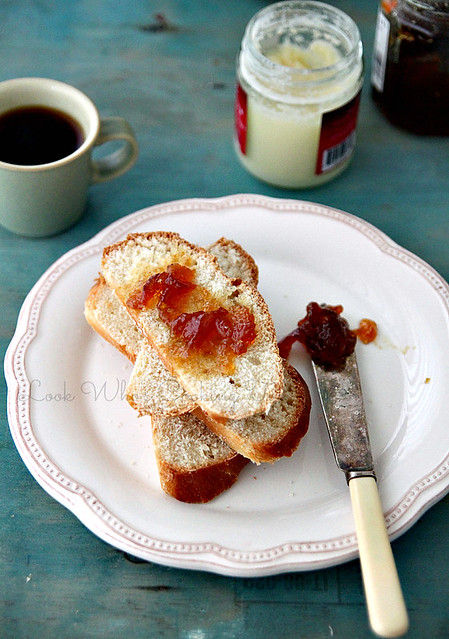
take it out of the oven and leave to cool on a rack for about 10 minutes, after which you can slice, spread some butter or jam and have it warm.
IMG_8892
Notes: The recipe can easily be doubled.
The dough is slightly sticky, so I had to use a generous amount of flour on the work surface while rolling out the rope.
The bread stayed absolutely fine for a week in the bread bin. I wrapped it in some aluminium foil and placed it in.

With thanks to Garden Trading for sending me a bread bin to review.
Friday, 26 October 2012

The Saucy Fish Co. review and an Avocado salad to go with it

IMG_4519-1
I have for you today two items that I was never fond of. After a looong gap, I gave them one more opportunity to please me, and what do you know, seems like I quite enjoy them. Shocked at this, and pleasantly surprised at how much my tastes have changed, I am embracing this new found love for Avocado's and Salmon...yes, two completely different food genres...with all my heart.

Fish has never been my favourite, and I can very strongly say, it never will be too. But of late, I have started experimenting with it at home (much to Ro's delight) and I can proudly say I eat a few varieties of it, if made the way I like with absolutely no taste of fish coming through (much to Ro's despair). So when I was asked to review a Saucy Fish Co product, I was a bit apprehensive as to how it would be, considering that they all came with their respective sauces and I didn't need to do any jazzing up of my own.
IMG_4391 
I checked out their website and was amazed at the huge variety of options available- 22 to be precise, yes 22 different types of fish products ranging from fresh fish and sauce pairings to foil bake bag fish dishes to fish cakes and standalone sauces. The fish cakes looked soooo delish on their website, I had to pick it up, and so were the sauces, perfect for some home made fish pie. So off I went to the local store only to be disappointed. The shelves were empty. This happened to me twice, which obviously means there is high demand for the product in the market (or the store does a rubbish job of stocking enough of it). I somehow HAD to get my hands on it desperately, now that my patience was running.
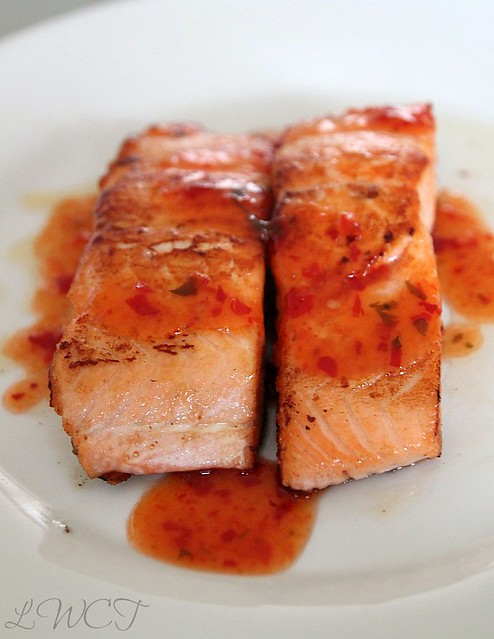
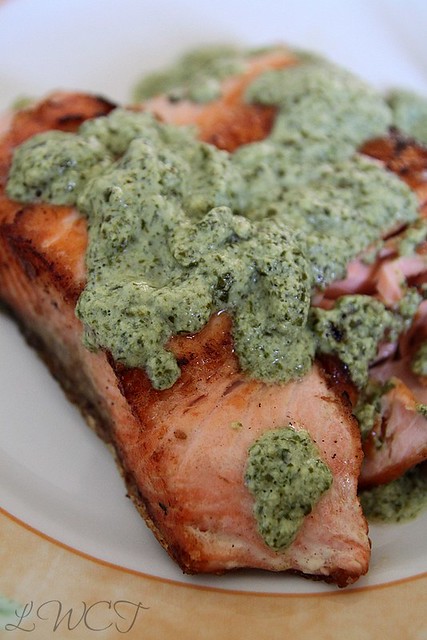
Third time, I was lucky, but not lucky enough to get the products I wanted and so had to make do with what was available. I picked up a pack of the salmon fillet with watercress and crème fraiche dressing and the salmon fillet with a chilli, lime and ginger sauce. The salmon fillets we Ro dutifully pan fried to perfection and I must say, it truly was a sight to see the colour changing and the skin getting all crispy. Even I got excited seeing it, and Ro was literally drooling. The sauce came in small sachets and just needed to be immersed in a mug of hot water for a while and was ready to be poured on top or had on the side, whichever way you prefer.
IMG_4576 
Taste-wise, both of us preferred the one with the chilli, lime and ginger sauce, which we were a bit apprehensive about in the beginning, but was pleasantly surprised at how the slightly sweet-tasting sauce paired perfectly well with the salmon. The water cress and crème fraiche dressing, after we jazzed up with some salt, was pretty good, but the first one was definitely our fav. I actually had quite a bit of it, much to my Ro's surprise. I do hope I get to try some more of their products (hopefully they would do a better job with stock) and considering how easy it is to whip up a tasty meal in minutes, I would definitely consider buying Saucy products again.

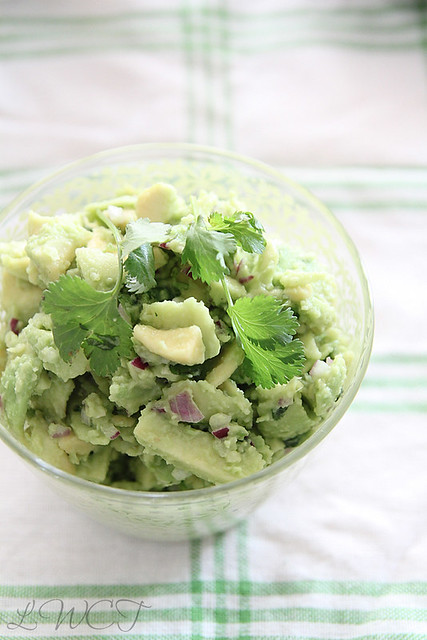
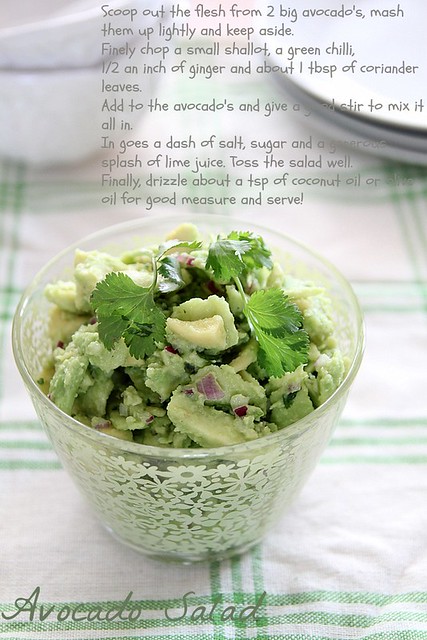
The salmon and sauce makes for a full meal if you have a salad or some roast potatoes or so on the side. We had it with this simple avocado salad, which again was a true eye opener. Thanks to my sis-in-law for passing on this easy peacy recipe, we now like avocado. Even my fussy brother who hates anything green, loved this. So you have to trust me on how good it tasted. I

Avocado salad
IMG_4545
Avocados- 2 large, flesh cooped out
Small onions- 2 to 3, finely chopped
Green chilli- 1, finely chopped
Ginger- 1/2 inch, peeled and finely chopped
Coriander leaves- 1 tbsp, finely chopped
Sugar- 1/4 to 1/2 tsp
Salt- to taste
Lime juice- a generous dash/ squeeze
Coconut oil- 1 tsp
IMG_4548 
Place the avocado flesh in a large bowl and break it up. Mash it with a fork, but not to mashed potato consistency. There should still be small chunks left.
Tip in the onions, chilli, ginger and coriander leaves into the bowl and mix well with the avocados.
Add the salt, sugar and lime juice and give it a toss. Do a taste check to see if its all good.
Finally, drizzle the coconut oil over the salad, give a final mix and serve with a garnish of some coriander leaves.
You can add any oil of choice, but coconut oil gives it that distinct taste. Ro said he would prefer olive oil, but I loved it this way. 

With thanks to The Saucy Fish Co. for the vouchers to pick up the product from the store.

Monday, 15 October 2012

Ribbon sandwiches

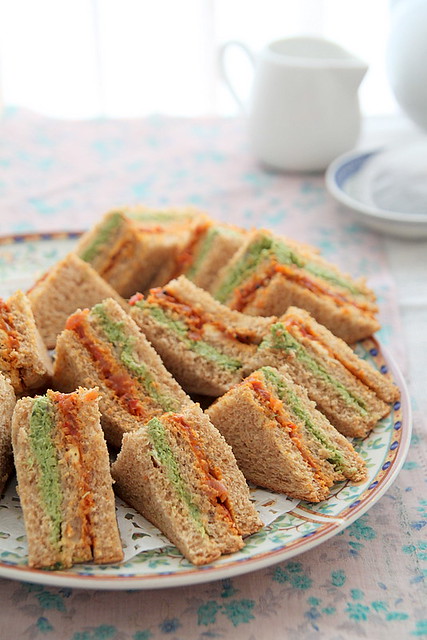
IMG_4327 
I know that picnics and days out in the open are long gone, but I couldn't resist posting these delicious ribbon sandwiches before it was ridiculously late. The temperatures have dropped significantly and its no fun waking up in the morning to a cold apartment. The moment you are out from under your duvet you shiver and wish to crawl back in. We have finally taken out our winter clothes much to my dismay and Ro is already psyching me out saying winter is gonna be horrible. After 3 years of running back to India for Christmas, this year we are staying put. But that's about 70 days away and I have enough time to whine about it ;)

Coming to the sandwiches. These, when my mum used to make way back when we were kids, were not received with much enthusiasm. In fact I hated the coconut chutney more than anything. Fast forward to some 20 years later and I think I love it. I called up mum a couple of weeks back to get the recipe and she laughed so much at the irony. Also because, Ro is not a big fan of coriander leaves or any leaf for that matter and while my mum kept mentioning coriander leaves I kept referring to it as that thing, because Ro was sitting right next to me listening in on the conversation. He finally found out that a major chunk of the sandwich was made using coriander chutney and begged and pleaded to not do so. If its one thing I've learnt after 6 years of being married, its to ignore the other half when you see signs of the drama queen surfacing. And that's exactly what I did.
IMG_3122 
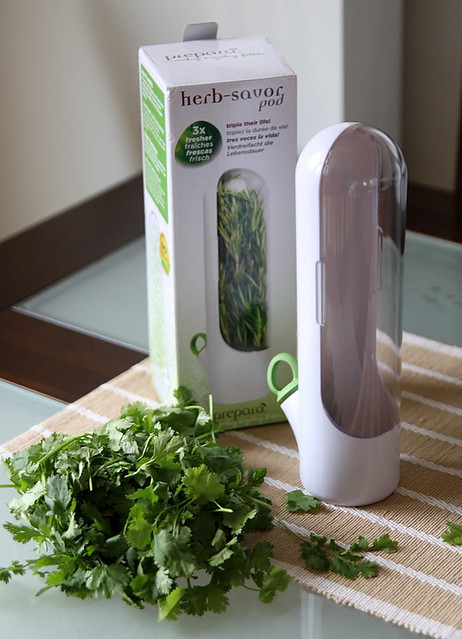
I also have to bring to your notice this uber cool gadget the lovely people over at The Handipcked Collection sent me. Its a Herb Saver Fridge Pod that keeps herb cuttings fresh and watered inside your fridge, thereby prolonging their live for a longer period. I can very happily say, 'it works.' The coriander leaves I used for this recipe were fresh even after about 2.5 weeks, except for a few leaves turning yellow here and there. I have had trouble trying to make them last in my fridge and they always end up rotting on me. If there was one downside to the product it would be that the plastic see through cover is a bit tough to handle. Its not something that just comes open with a quick pull and is a bit of a struggle. Other than that its quite a handy thing to have. It snugly fits on my fridge door and apparently can be used for vegetables like asparagus and stuff. Don't forget to check out The Handpicked collection for some great Gift ideas. I'm definitely a big fan.
IMG_4345
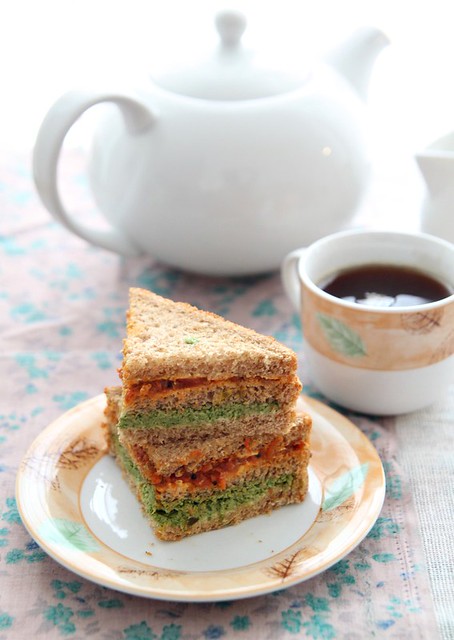
Anyhoo, once the sandwiches were done, Ro completely forgot about his coriander leaf aversion and all was good with the world. I made the two chtneys over 2 days and then on the 3rd assembled the sandwiches. If you do everything together at one go, I doubt you would ever want to make it again. So spread it out and its much easier. Will I make this again...hmm maybe when I'm in one of those proactive cooking moods. This sandwich is great for picnics and for an English Tea where finger sandwiches are a must. Its also very lah-di-dah :)

(Makes around 20 quarter sandwiches)
Bread- 15 slices (brown or white)
Coriander chutney- approx. 1 cup (recipe follows)
Tomato chutney- approx. 1 cup (recipe follows)
Butter- 1/4 cup (at room temperature)

Coriander chutney
IMG_4250-1
Coriander leaves- 2 cups, washed and roughly chopped
Grated coconut- 1 cup
Mint leaves- 10 to 12
Tamarind paste- 1 tsp (approx.)
Green chillies- 2 (adjust according to preference)
Salt- to taste
Sugar- 1/2 tsp

Grind together all the ingredients in a food processor/ blender, scraping down the sides at intervals, until you get a smooth-ish paste.
Resist the urge to add water though!
Transfer into an air tight container and refrigerate till ready to use.

Tomato chutney
IMG_4286
I followed this recipe of mine, except I didn't roast the tomatoes, just sliced them and used as it is. Feel free to roast them if you prefer it that way. I also used vegetable oil instead of olive oil and added curry leaves along with the mustard seeds. Once the chutney is done, keep aside to cool and then store in an air tight container till ready to use. It stays for about a week in the fridge.

Assembling:
Bring both the chutneys to room temperature.
Into the coriander chutney add the soft butter and mix it well. No traces of butter should be seen.
Do a taste test, add salt if required, and keep ready.
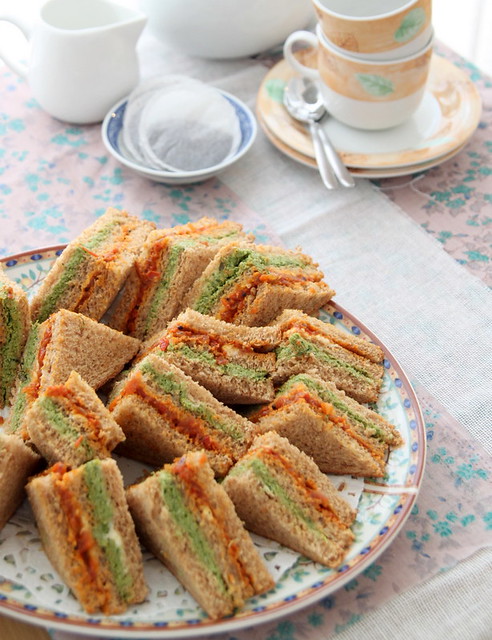
Onto the first slice of bread evenly spread about 1 tbsp of coriander chutney.
Top with another slice and spread the same amount of tomato chutney on it.
Finally top with a third slice and gently press it down to settle the fillings in.
Slice into half diagonally and then into quarters, or if you prefer, slice into smaller squares.
Serve for tea or at a picnic. It would be a hit trust me.

IMG_4375 
Notes: You can spread butter on the bread slices as well, but I didn't bother to.
I left the edges in tack as well, because Ro is a sucker for stuff like that. Feel free to slice them off if you think its too hard or something.
My mum sometimes does 3 layers with the third one being an egg mayo sandwich. Our cheap thrill when we were young was that it was made to look like our Indian flag :)
Store leftover sandwiches in an air tight container, slightly warm it in the oven for about 10 mins and have it the next day. that would make it slightly crisp as well.

Monday, 10 September 2012

Sponsored video: Rekorderlig Cider, Where's your Swedish Side?

I was introduced to this amazing drink called cider about 4 years back when we had just relocated to UK and was invited to a friends place for a BBQ. I am not so much of a beer person and so I was a bit apprehensive on trying out cider. But once I did, I knew I had found a favourite drink. So that whole year, we were on a major cider trip, buying cans by the truck loads, trying different brands and even making a visit to a cider farm to see how it was pressed...yes that's how obsessed I was, or rather we were that year.

Then we forgot all about it, discovered other drinks and life went on, Till about a couple of months back when we were at a pub and my cider instincts picked up. I asked for cider and the guy behind the bar read out the various brands available and I picked up the name Rekorderlig since I had not heard of it before. I said I'll have that and then he blurts out the various flavours available.

Now before going further, I must say I am a sucker for anything with flavour options available. The fact that there are options is a total winner for me. So there I was put forth with flavours like wild berries, mango and raspberry (which is my current fav!), strawberry and lime, orange and ginger, apple and blackcurrant and of course the basic flavours- apple and pear. Without showing that I was intimidated by the flavours available, I chose the strawberry and lime and was a happy girl.

Came back home and did my research and here's what I found. Rekorderlig is a Swedish cider from Vimmerby and it translates to being 'dependable' or 'reliable'. Made from pear and apple wine of excellent quality and the purest of spring water, the brand has become a much loved cider of many. Check out the video below, take a sip of this fruity cider and I'm sure you will find your Swedish side. I sure have found mine (over and over again!).
If you want to know more about Rekorderlig cider you can check out their website, and to get updates and such follow them on Facebook, Twitter or even subscribe to their Youtube channel here.

Article sponsored by Rekorderlig

Sunday, 5 August 2012

Baker Days (review)

IMG_2807
Recently an aunt of Ro's based in India, asked if we could get a birthday cake delivered to a cousin here and we went on a frantic search online for bakeries that did home delivery. Either they wouldn't deliver outside London or the rates for delivery was almost as that of the cake which made us wonder if it was ever possible to deliver a cake to someone special if required.

While highly leaning towards the 'not possible' mark, I received a mail asking if I could do a review for Baker Days, who sends personalised cakes for any occasion, anywhere in UK. I decided to give it a go and so went about checking out their website. With waaaay too many options to choose from., I was quite confused- Birthdays, Engagements, New Baby, Bon Voyage, and heck there is one for even passing your driving test. If that's not good enough then you can design your own cake by uploading a picture you like and getting than imprinted on the cake. 
IMG_2803 
So without wasting much time I went about ordering my cake. The website is pretty easy to navigate around and its as straight forward as it can get. You can select either the Letterbox size which would easily serve 2 to 3 people or the Medium party cake which should get you around 8 to 16 portions. Since it was just Ro and me, I opted for the Letterbox version, and also because I sooo badly wanted to see what they meant by this. You then go about selecting the flavour- plain, carrot, lemon or fruit and if you are gluten intolerant, there is an option for that as well. 

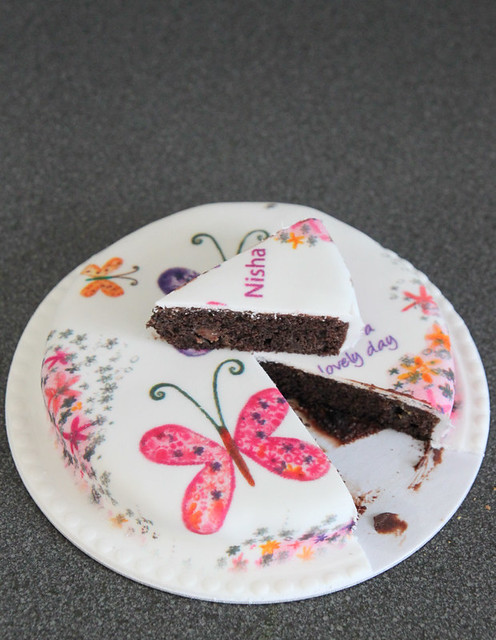
The husband being a chocolate addict, I had to order the double chocolate chip cake and since I didn't have a personalised message to put in, I left that, but it was really sweet of them to include those wordings on the cake :)

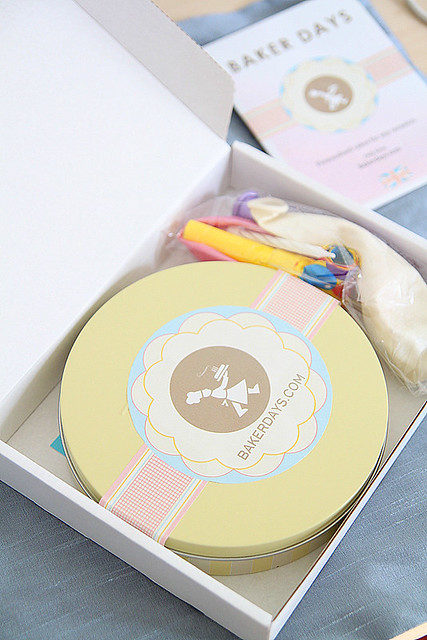
You then check out, pay for it and wait till it arrives. And when it did arrive, it was perhaps the cutest lil cake I'd ever seen. It comes neatly wrapped and snugly fit in a tin, so no cracks and such possible. Along with it in the box were balloons, candles, a party horn and a card. I thought that was indeed a great addition and quite considerate.
IMG_2812 
Taste wise, the cake was excellent, I mean super duper moist and chocolatey with those nuts in between, and both of us managed to finish the cake in no time. I seriously wonder how they manage to make them so moist in spite of it being packaged and sent. If there was one fault, well not fault really, but something my taste buds didn't quite enjoy was the icing which came across as a tad too sweet. But on my really good days, I'm sure even that sugar high wouldn't bug me. Also a couple more flavours like red velvet and caramel and fudge would have been a great addition.

Cake cost starts at GBP 14.99 and depending on the flavour and preference, rates increase marginally, but not exorbitantly high. There is also no delivery charge, unless of course you need speedy delivery or something to that extent.

I was thoroughly impressed with Baker Days and am pretty sure I'd be a regular. So next time you want to order a cake online and get it delivered to anyone, anywhere in UK, you know where to go right? Well, all my UK friends watch out, you may be the lucky one to taste one of these awesome cakes :)

With thanks to Baker Days for sending me a cake to review

Wednesday, 11 April 2012

Quorn sausages with mashed potato and onion gravy

IMG_0744 
For someone who doesn't post that many vegetarian recipes here, I actually love vegetarian food. Well not vegetables per se, but you know the Kerala sadya items are an absolute favourite of mine, but sadly I don't know how to make half of them and the only respite comes from eating at a vegetarian restaurant.

We have something non vegetarian every day and when Ro was with his previous company he used to take lunch whenever possible (read, whenever there was leftover from dinner). The occasional one time, he took something vegetarian and apparently his colleague asked him if everything was fine at home. Ro asked him why he thought so, and this person replies that Ro always had non veg for lunch and since he didn't have any that day, he assumed something was wrong at home. That kinda made me sit back and wonder why we never had vegetarian food at home. So for the next few days after that I struggled, really struggled, to manage with just vegetarian food. Quite difficult I must say when you don't eat Indian food every day. Spinach, mushroom and pasta was consumed in abundance but we soon got bored of that. That's when Quorn came to our rescue.
Here's a little about Quorn. It is made of Mycoprotein, a naturally occurring and high quality form of protein produced using a form of fermentation process and the out come is then used as the base for different food products. You get a variety of products in grocery stores- from ready meals like Quorn lasagne and tikka masala to deli foods like ham style slices, peppered beef style slices and the best, you get Quorn mince, fillets and bacon which you can just adapt to any non veg recipe of yours and have a fabulous meal. If that doesn't convince you, then the fact that it is a much healthier option, should do the trick. Being low fat, low calorie and cholesterol-free Quorn can be termed as one of those 'wonder foods.'
IMG_0707 
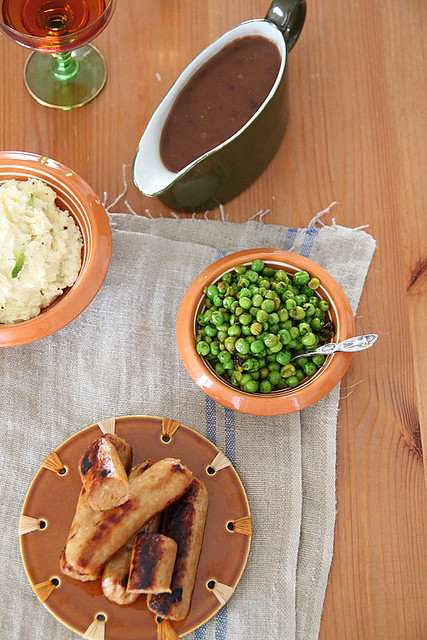
I must admit, I was a bit apprehensive about using it in my cooking. But you have to start somewhere right? So I decided to give it a go. I picked up their summer special Quorn Sizzling Bangers and decided on the Sausages and mash with gravy and green peas recipe from the Quorn website (which btw has a tonne of easy recipes and is worth checking out). Cooking is fairly straightforward, with clear cut instructions and the outcome was also fairly decent. I however found a distinct flavour difference as opposed to the husband who said it was good. I mean you would obviously know its not the sausage you are used to, but it could easily pass for one when had with the mash and gravy. I also picked up the Quorn mince after that to make some kheema masala and that I must say was a winner. I guess its the fact that its mince and the masala catches on pretty well, which completely masked the fact that it wasn't meat. So considering all this, I guess it is a good option when you want to impress those finicky vegetarian guests at home. I would however stick to chicken style strips and mince meat as opposed to the ready meals in the future.

Mashed potato (serves two as a side dish)
IMG_0661 
Yukon or Russet potatoes- 350 gms, peeled and quartered
Butter- 1 tbsp (around 15 gms)
Double cream- 2 tbsp
Mature cheddar cheese- 1 tbsp, finely grated (optional)
Milk- 1 tsp (give or take)
Salt and pepper- to taste

Boil water in a sauce pan, season with some salt and throw in the sliced potatoes.
Keeping heat on high, bring the water to a boil once again and then reduce heat and simmer for about 15 to 20 minutes or till a knife can easily break the potato.
Drain the potato properly.
Wipe the same saucepan clean and place it back on medium heat.
Tip in the drained potatoes and toss around a bit just to get rid of any water content. Transfer the warm potatoes into a bowl.
Then into the same sauce pan add the butter.
Once it melts, pour the double cream and warm gently.
Pour on top of the potato, add the cheddar cheese (if using), season with enough salt and pepper and mash either using a masher or a fork..
Add the milk, a little at a time and using a strong spoon mash further till you get a smooth, lump less mix. Don't over do it though.
Serve warm as a side to meat or vegetables or as a topping (Cottage pieOven coddled eggs)

Onion gravy (adapted from here)
IMG_0713 
Butter- 2 tsp
Olive oil- 1 tsp
Red onion- 1 large, finely chopped
Sugar- 1/4 tsp
Balsamic vinegar- 3 tbsp
Chicken stock- 300ml (made using half a stock cube)
Plain flour- 1 tbsp
Salt and pepper- to taste

Heat the butter and olive oil in a sauce pan.
Add the onions and some salt and cook on low heat for about 15 to 20 minutes, or till the onions become a darker shade. Stir in between to prevent the onions from sticking to the bottom.
Add the sugar and wait for it to caramelise, about 10 more minutes.
Pour in the vinegar, stir to combine and cook for a few more minutes.
Sprinkle the plain flour over the onions and stir in the chicken stock bit by bit.
Season with enough salt and pepper (after tasting) and bring to a gentle simmer or until the sauce is slightly thick.
Pour into a gravy boat and serve hot.

Notes: Use white onion if you want it a tad less sweet.
Original recipe called for red wine which I substituted with balsamic vinegar
Chicken stock can be replaced with vegetable stock and plain flour with cornflour.

Assembling
IMG_0748 
Cook the Quorn sausages as per instructions. I pan fried it in about a tsp of oil, tossed it around a bit till the sausages were slightly charred on the outside and cooked through. Drained on paper towels.
Place a large dollop of mashed potato on a serving plate and place the sausages on top.
Scatter a spoon full of green peas (I just stir fried in in some butter, seasoned with salt and pepper and some lime juice) and pour the onion gravy on top.
Dig in :)