Wednesday, 15 February 2012

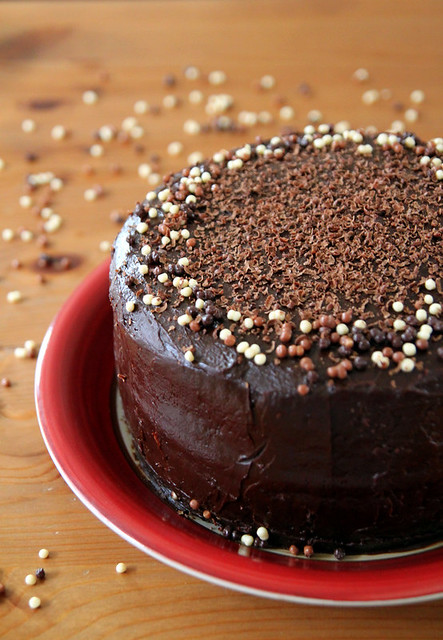
Double chocolate layer cake filled and frosted with chocolate ganache

IMG_8557-1
(Super long whiny post alert...proceed at your own risk, and please I'm sooo over the hate-comments-by anonymous-lurkers' stage, so spare them)
Is everyone over and done with the whole Valentines day drama? After an overdose of mushy stuff on FB, posts on blogs and movies on telly, I for one am done with it. You can also say its sour grapes because my husband didn't even wish me on V day. The fact that we are not really in talking terms worked for both of us because he doesn't believe in birthdays, V days and anniversaries and I believe in them too much that I am annoyed if I'm not made to feel special on all these days. But strangely enough he remembers the day we met, the day we got engaged etc. etc. which I think is cute, but who cares about dates...show some love instead (or a Tiffany's ring would make me a happy (but shallow) woman)

Today is my birthday and it went on like just another day in my boring life. The husband wished me for the heck of it and even bought me something, not because he wanted to but because I'd eat his head about it for the rest of his life, if he didn't show any gesture like that. I blame my parents and friends (and maybe my ex-boyfriends) for this. My mom threw me beautiful birthday parties when I was small and in my teenage years it was treats at restaurants and slumber parties at home. In college it was nights out with the friends and parties at clubs and gifts and flowers. And then, I got married- to someone who thinks all this is overrated-  and it abruptly stopped. Forget V day and anniversaries, (its just another damn day to prove you are stuck with the same guy..oh how I envy you single women), but birthdays are very special to me and I somehow expect something from the ONE person who fills my world. And because that one person doesn't care about the day enough, I end up brooding over my life so far and how I miss home and friends so so so much. I have cried on every birthday of mine for the past 6 years and I don't see that changing. So yesterday, I went and watched a romantic drama that made me cry from beginning to end (DON'T watch The Vow, its a waste of money), and today, I watched a horror movie (like being alone in the house wasn't enough) and made through the 95 minutes with my eyes closed, trying hard to not snap at the frikkin giggling girls sitting behind me. I then came back home, curled up on my sofa and did some more brooding (and fantasised about having a whirlwind of an affair with Mc steamy).
IMG_8605
So since I'm not gonna be getting any cake today, I decided to post a chocolate cake recipe here. It's a cake I baked for Ro (yes I still go out of my way to make his birthday fun..call me nuts) a week back , when I'd invited some friends over. As you already know, I hate chocolate and anything to do with it. Chocolate cake tops the list of things I don't like and the fact that I've had a couple of disastrous results doesn't make it any better. Since Ro doesn't care what the end result of anything with chocolate is, I started off making this cake thinking its just going to be average. Boy was I wrong. I must admit that I've never wanted to taste a cake this much in my life. The moment it came out of the oven, I knew I'd like it. Unfortunately, I had to wait for one more day to cut it and taste it which was just too much to handle. But living with a husband who spends an hour (minimum) in the bathroom kinda takes your patience level a notch higher, so pat on the back for me. 

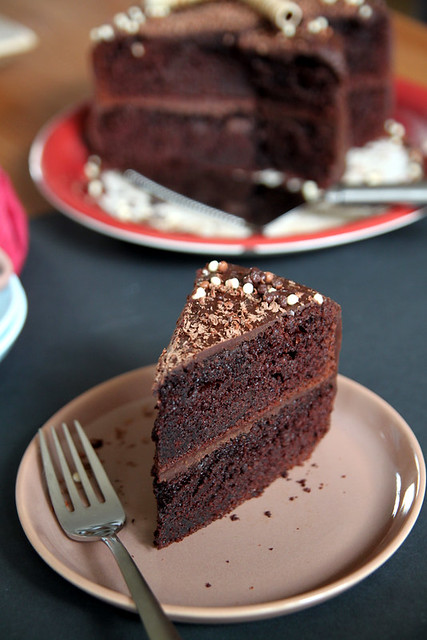
Its a super simple cake to put together and you can make a magnificent 2-layer (9 inch) cake with the said amount. If I'd tried to do the baking and filling and frosting all on the same day, I probably would have gone mad, which is why I decided to bake the cakes a day earlier and fill and frost the next day. It all worked out perfect and I was super proud of my organising skills :). I was a bit apprehensive as to how it would be when sliced into and held my breath when Ro cut into it, but everyone liked it and I didn't mind a piece myself. Ro, however, doused it with some whiskey and said it tasted even better. I don't like whiskey too much, but a bit of brandy would have probably been good. Just warning you, its not one of those super sweet cakes :)
IMG_8547-1
Recipe for the cake adapted from here
Plain flour- 1 3/4 cups
Granulated sugar- 2 cups
Unsweetened cocoa powder- 3/4 cups (I used Dutch processed Green & Blacks)
Baking powder- 1 tsp
Baking soda- 2 tsp
Salt- 1 tsp (kosher, table or sea salt)
Buttermilk- 1 cup
Flavourless vegetable oil- 1/2 cup
Eggs- 2, large
Vanilla extract- 1 tsp
Freshly brewed espresso coffee- 1 cup

For the ganache 
Plain chocolate- 200 gms + enough for grating
Double cream- 200 ml
Caster sugar- 2 tbsp (optional)
IMG_8594
Whisk together the first 6 ingredients in a large mixing bowl. You can either do this using your wire whisk or if you have a free standing mixer, use the paddle attachment and on low speed combine all the dry ingredients together.
In another bowl mix together the buttermilk, oil, eggs and vanilla extract till they all come together.
Add this to the dry ingredients and beat on low till well incorporated. 
With the beater still on low, slowly feed in the coffee and then bring up the speed to medium and beat until fully incorporated
Butter and line 2 9" pans and pour the batter into each. The best way to get more or less even size cakes are to weigh the batter in each tin. I usually do this, but this time I measured approx. 3 cups of batter for each  tin and got cakes of the same size.
Place the tins in the centre rack of an oven preheated at 176C and bake for 35 minutes or till a skewer comes out clean.
Take them out of the oven and leave aside to cool for about 15-20 minutes, after which you can turn it onto a wire rack and wait for it to cool completely.

While that's taken care of, make the ganache.
Chop the chocolate as finely as possible and place in a  heat proof bowl.
Bring the double cream to a boil in a sauce pan, over medium heat.
Take it off the flame and immediately pour over the chocolate.
Let it stand for a couple of minutes after which you can gently start stirring using a whisk or wooden spoon (without incorporating any air into the ganache) till you get a smooth glossy chocolate mix.
Add the caster sugar and gently stir until melted. Keep aside for 15 to 20 minutes for it to slightly harden. Not too much though.
IMG_8555
Assembling
OK so you can basically use the ganache in three different ways- Fill the cake with whichever icing you prefer, put on the other layer, place the cake on a cooling rack and just pour the ganache on top, enabling it to drop off the sides as evenly as possible. Messy, but good shiny, glazed topping would be the end result.
Second would be to whip it up like how you do a normal whipped cream frosting. Bring the ganache to room temperature and whip on high for 2 minutes or so. This could work for cupcakes.
Third, would be to let the ganache harden a wee bit and then use it like how you would do for a butter cream icing, for more thicker frosting and piping designs...which is what I did.
Place the cake on a stand/plate in which you are going to serve.
Generously douse a layer of ganache on top, evening it out with a palette knife, as much as possible.
Place the second cake on top and do a crumb coating by doing up the entire cake in a thin layer of ganache. Try and smooth it out as much as possible. If you ask me, this is the hardest part of frosting a cake.
Keep aside to set for a while and then do the final coating...go ballistic with the remaining ganache and coat the entire cake..again, try and smoothen it out as much as possible.
Decorate with chocolate balls, wafers, chocolate shavings or just grate some chocolate on top and place it in the fridge.
Two hours before serving, bring it back to room temperature and slice using a knife dipped in hot water so you get a neat slice.
Enjoy with some vanilla ice cream or on its own.
IMG_8607
Notes: Please use the best possible cocoa available. Dutch processed would be ideal.
One cake had a dome, so I had to slice a bit of the top using a serrated knife.
As I mentioned before, I'd baked the cakes the previous night and once they had cooled down completely, I wrapped them in cling film and stored in the oven at room temperature. They didn't dry out and was as moist as it should be.
Plain chocolate is different from dark chocolate and milk chocolate. Dark choc. would make this more bitter, but if you prefer that, go ahead with the option.
The espresso coffee can be replaced with instant fresh coffee. I put 2 tbsp of instant espresso powder into a cup of boiling water and used that.
I didn't bake both the cakes together because I only have one pan. I also have ready made cake liners (like massive cupcake liners) which I use religiously. So once cake 1 was done, I waited for 5 minutes, and moved it on to a cooling rack (with the cake liner). Placed cake liner 2 into the same cake pan, filled with batter and baked for the exact same time. Took it out and cooled as usual. This is probably not the best way to go about baking 2 cakes, but they both turned out gorgeous.


Linking this to the chocolatelove bloghop event over at Junia's 
Friday, 10 February 2012

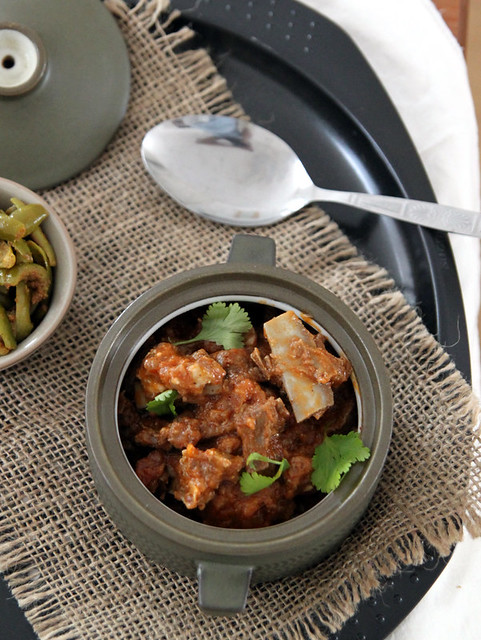
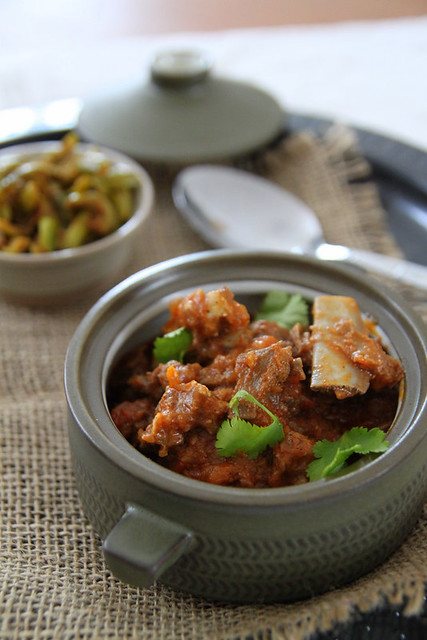
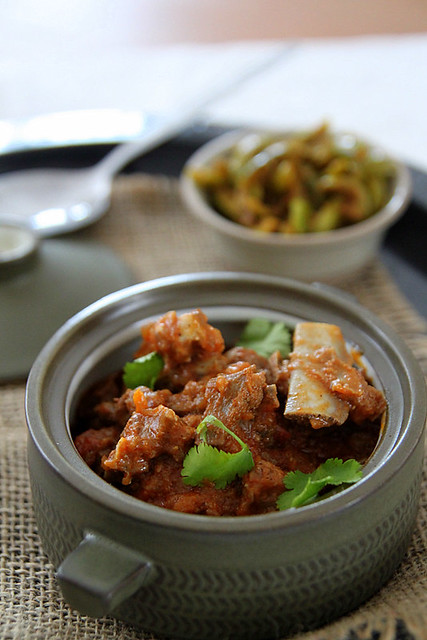
Mutton red curry

IMG_8488
I am not that much of a mutton fan. The closest I've come to liking it is in a biryani, that too if its got loads of masala and such. In my initial cooking days (like about 4 years back), the only thing I could cook with was chicken breasts. I detested the whole idea of cleaning a chicken and couldn't handle the blood and gore that came with it. Boneless breasts were comparatively easy to dissect and that was thrown into every curry possible. Now the story is different. I actually cant stand chicken breasts which I think are so tasteless and prefers the thigh fillets any day. But the cleaning bit puts me off even now, although it has tremendously improved :)

So anyway, coming back to mutton. I soon got bored with chicken and beef and so one day I picked up some lamb steaks to experiment with. Used a hard core Indian marinade, grilled it and it was horrible. I mean the smell was really bad and somehow it never clicked for either of us. We both avoided eating lamb altogether...
IMG_8499
...until a year back when Ro suddenly realised he didn't mind the lamb you get here. So Ro has been happily eating lamb in restaurants and such, whereas I cringe at the very idea. That also probably explains why this is my first ever mutton recipe on the blog. I still don't know the difference between lamb, goat, mutton and baby lamb. I was under the impression that goat was the closest to mutton we get back in India, but boy was I wrong. Ro convinced me to pick up some 'curry goat' as its called from a butcher and I did thinking it would not be bad. Sadly, it had that same weird smell and such and came loaded with fat, that Ro spent a good half hour removing it off the pieces. So till I figure out a good cut/type of goat meat, this is going to be the only recipe around.

That said, the mutton curry was good, or so Ro said. I refused to touch it, except for the gravy which tasted brilliant (honest opinion). So if the mutton is right, then the curry would be perfect is what I think. I am thinking it would be great with beef as well. Next time I suppose. The recipe has been adapted from the book Flavours of the Spice Coast by Mrs. K M Mathew, the book I picked up from Kottayam, much to Ro's and my mother-in-laws despair (saying it had basic recipes and why spend Rs. 600). I on the other hand love the book. Its got pictures (very imp.) and all the mallu things I don't know to make. I hope I try at least a handful of stuff out of the book to compensate for the money I spent on it :)
IMG_8482
Mutton- 1/2 kg, with bone
Onion- 1 cup, finely chopped + enough to garnish
Tomatoes- 3, chopped
Water- 1 cup
Oil- 1 tbsp
Salt- to taste

To grind
Kashmiri chilli powder- 2 1 /2 tsp
Coriander powder- 1/2 tsp
Mustard seeds- 1/2 tsp
Fenugreek seeds- a little less than 1/4 tsp
Cumin seeds- 1/4 tsp
Ginger- 1 tsp, grated and sliced
Garlic- 5 cloves, peeled
White vinegar- 2 tsp
IMG_8473
Wash and clean the mutton and slice into medium size pieces. 
Grind together all the ingredients under the 'to grind' section and then add the vinegar to make a paste.
Heat oil in a pressure cooker and add the chopped onions. Sauté for a couple of minutes.
Throw in the tomatoes and cook till they become mushy.
Add the ground paste and on low heat cook till the oil starts resurfacing.
At this point add the meat and salt and stir well, making sure the masala coats the mutton well enough.
Pour in the water, bring to a boil and close the lid.
Once you see the steam coming, put the weight on and cook for about 4 whistles or till the meat is cooked well. I guess this depends on the type of meat used.
Open the lid once all the pressure is released and if there is lots of water remaining, bring to a simmer and cook till the gravy thickens.
Garnish with some julienned onions and serve hot with rice, roti or puttu
IMG_8475
Notes: I used the pressure cooker because that was just easier. If you dont have one, then cover the vessel and cook till the meat is completely done (checking regularly and adding water if required) and then open the lid and simmer till the gravy thickens.
Replace Kashmiri chilli with the spicy one if you prefer it hot. This is a pretty mild curry otherwise.

Tuesday, 7 February 2012

Spend Vouchers, Get Rewards!


Before we moved to London, about 3 years back, we were in this University town called Nottingham and I absolutely loved the initial year we spent there. Needless to say, after you get a taste of London, you do not want to settle anywhere else. The husband dove into work soon after, leaving me to roam around the city centre aimlessly day in and out. I figured out the way to the mall the very next day and lucky for me, found an apartment a stones throw away. Sooner or later I knew I had to settle down and start cooking and on one of my mall exploration trips i walked into this massive grocery store Tesco. I spotted a cheesecake the moment I walked in and it was love at first sight. OK I'm exaggerating, but seriously, I can count on my hands how many times I have not walked in there in the 1 year we were in Nottingham. I must also add that we lived on the ready meals Tesco had to offer that entire year. They were so so good, even now I spot a Tesco express (a smaller version) somewhere and pick up a cheesy lasagna or bake to reminisce those good ol days. I really have Tesco to thank for the yummy meals we used to devour into.
The best part about shopping regularly at Tesco is their Clubcard. Its a completely free service wherein you can keep collecting points on almost anything you buy from Tesco, both in-store and online, and these points over time get converted into vouchers. For every 150 points collected, you get a voucher worth GBP 1.50 and, if that's not enough, you also get coupons that give you discounts and extra point options which you can redeem when you shop with Tesco. The more points you collect, the more vouchers and benefits you get back. Sounds good? Wait till you hear the rest.
These vouchers that you keep getting along with your Clubcard statements can be used in a number of ways. Some of the options are, spending them on groceries at Tesco stores and online, at their gas filling stations, Tesco direct, Tesco opticians, Mobile phones, Travel insurance and so on. All you need to do is present the voucher when you check out and the relevant value will be deducted from the shopping list. We used to thoroughly make use of  both the discount coupons as well as the Clubcard vouchers, and even now whenever I shop at Tesco, I scan my Clubcard (a permanent extension to my key chain) in the hope of getting all these perks.
But wait, it just keeps getting better. If you dont want to use your vouchers on Tesco, you can spend them on Clubcard Rewards. For every 5 pound Clubcard voucher you hold, you can get up to 20 pounds in Clubcard Rewards. So you can use them on anything- from days out with the family to a romantic dinner for two, club memberships, a holiday for the family, flight tickets, car rentals, books, cinema tickets- really, the options are endless. I myself have used it on various occassions, like restaurants and even entry tickets to amusement parks. keep a constant look out for new deals as Tesco keeps changing them on and off. Also, if you find something great, then dont think twice, just grab it immediately as vouchers may be limited for some services.
Applying for a Clubcard is also pretty straightforward. All you need to do is register online, by post or by phone, and your card will be home in a couple of days, after which you can keep swiping it each time you shop with Tesco and immediately reap benefits. For more details, log on to the Clubcard page which ill provide you with all the desired information.
This is Tesco's way of saying thank you, so why not accept it with a smiling face and open arms :)
Viral video by ebuzzing

Wednesday, 1 February 2012

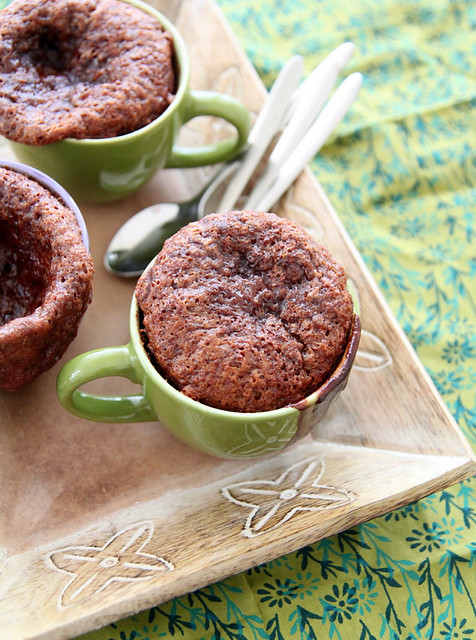
Hot chocolate fudge cake

IMG_8288
Wow I think I hit a nerve with my previous post epiphanies. All those who wrote in with their opinions, good for you. I completely salute all you ladies out there who can get a frosting to stay as frosting and substitute ingredients with what's available, in India. But I love my convenience way too much than baking or cooking to oversee it, so I am gonna stick to what I said. 

Since that's out of the way, I shall get down to discussing my favourite subject, the weather. It finally feels like winter in London. Temperatures have gone down to 0 and although there is still no sign of snow, it does get a bit frosty in the mornings. I have always dreaded February (not just because I turn a year older), its the coldest, dreariest month, I feel. 

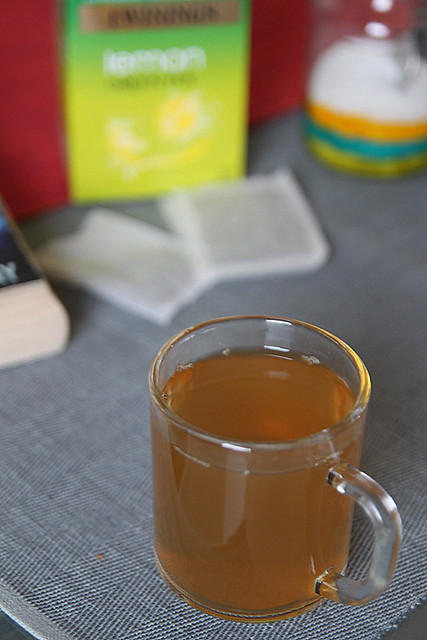
But the good thing is, I have discovered the benefits of drinking green tea. I mean I have tried it a couple of times in restaurants, but never really liked it, because, lets face, it has absolutely no taste. But then Twinings (the really popular tea brand) came out with their new Green Tea varieties like lemon, ginger, mint etc. and now I'm hooked. I was always a sucker for anything with lemon in it and oh to sip on it in this cold is absolutely soothing. Of course, the benefits like losing weight, reduced risk of heart disease, delaying signs of ageing (ooooh I like that one) are all added advantages, and if sipping on some delicious flavours of green tea is going to help me, why fight it right? So without wasting time, head on over to the Twinings Tea Shop and buy green tea to keep you going this winter.
IMG_8413
Coming to the recipe, this ones from my mother-in-law. For a chocolate hater like me, this pudding-like cake did wonders. And by that I mean, I could manage to eat a cup full, that's it. Mamma made it last year when we were in India for her chocolate obsessed son, but guess who enjoyed it more?- the daughter-in-law. The thing is, I enjoyed it way too much to not touch it for one whole year. I binge eat anything I like and then end up hating it with a vengeance. This recipe was jotted down and brought back with the hope of making it to my blog in 2011, but the thought of all that gooey chocolate put me off. Its only today that I had this craving for something warm (trust me, a brioche bread pudding topped the list), and since the ingredients for this chocolate fudge cake was readily available, I went ahead with it.

The technique and recipe is much different from the usual fudge cake and the outcome, absolutely marvellous. The batter layer rises to the top forming a cakey layer and then you dig into it to get the gooey topping which sinks to the bottom. You can either make it in a single casserole dish or in individual ramekins or mugs/cups and be more concerned about how it looks than tastes (like me). I had picked up a lot of prop for the blog from India and now I have this block when it comes to styling and photography. After 1 week there is some sun out here and I ended up with unattractive pictures. So till I get the photography mojo back, you will have to do with bleak, non-creative pictures. Enjoy!
IMG_8307
For the cake:
Flour- 1 cup
Baking powder- 2 tsp
Granulated sugar- 2/3rd cup
Cocoa powder- 2 tbsp
Salt- 1 tsp
Vanilla extract- 1 tsp
Milk- 1/2 cup
Oil- 2 tbsp

For the topping
Dark brown sugar- 1 cup
Cocoa powder- 1/4 cup
Boiling water- 1 3/4 cup
IMG_8329
Whisk together all the dry ingredients for the cake in a large mixing bowl.
In another smaller bowl, stir together the vanilla, milk, and oil.
Add the wet ingredients to the dry ingredients and mix well to combine. No traces of flour should be seen. I did this with a wire whisk. Beater is unnecessary.
Grease the dish you are using and pour the batter into it. If using individual ramekins/ cups, then fill each of it till about half full. Keep aside. 
Pre-heat the oven to 200C
Prepare the topping by mixing together the brown sugar and cocoa powder in a bowl.
Sprinkle this mixture over the cake batter as evenly as possible.
Then using the back of a spoon, slowly pour the boiling water over the batter. Do the same with all the ramekins till they are about 3/4th full.
Reduce the oven temperature to 150C and place the bowls inside.
Bake for 30 minutes. Do not over do it.
Take them out, keep aside to cool for a while and either dig in, or once they are completely cool, refrigerate for further use.
IMG_8295
Notes: I halved the recipe and got 4 mugs of pudding
The topping procedure mentioned above sounded a bit complicated to me and so mamma gave me an alternative. After you mix the brown sugar and cocoa powder, add a tbsp of hot water to it and mix it till you get a paste-like consistency. Into this add the boiling water slowly using the back of a spoon and mix it all in, Finally, use this mix to then pour on top of the cake batter. That way everything is evenly mixed and you have more control over how much to add in each ramekin.
Since brown sugar is not readily available in Kerala, mamma substitutes it with 3/4th cup of sharkara paani (jaggery syrup) or a cup of jaggery. If using the syrup, make sure you use 2 cups of boiling water instead on 1 3/4.
Add an oz of rum or brandy to the topping and it would be yummm.

Monday, 23 January 2012

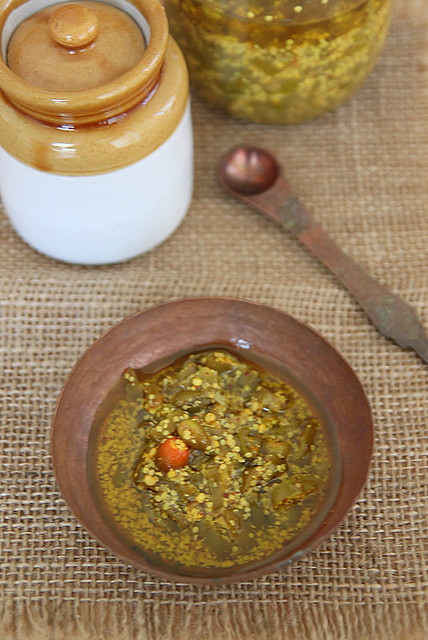
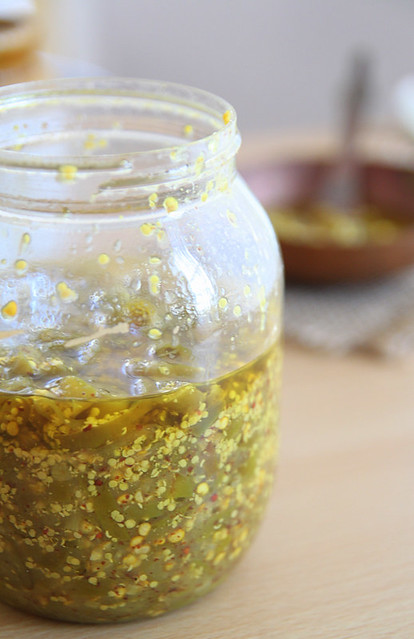
Green chilli pickle

IMG_8151-1
How are you all my lovelies? Has the New Year been fruitful to you? It has been uneventful for me so far and I want to fast forward to spring. Although winter has not been terrible this time (we haven't had to turn on the heaters regularly), I am really looking forward to spring and summer which, at the moment, is so far away. 

The trip home was good fun and 3 weeks went by so so fast and I'm kicking myself for not staying on for some more time. Its strange how a country and its ways just grow on you and you head to the place you called home only to find their ways annoying. I had a couple of epiphanies after I got home. Care to read?
1. I will give up cooking and baking altogether if I move back to India. I care too much about convenience and much less about my passion (if I can call it that) for baking. UK has spoilt me with ready made ingredients, like simple powdered sugar for instance. I hate having to grind sugar (large as rocks btw) and make a mess with the powder. The weather makes it impossible to store maida, baking powder, etc etc at room temp, which means the refrigerator is packed with things and I hate a stuffed refrigerator. I cooked thrice in 3 weeks and hated every moment of it. The 2 cakes I made was a disaster and the butter chicken, my family complained, was too bland like the Brits have it (this, after gloating on my previous post about how I figured out the perfect, traditional chicken tikka masala).
2. I expected people to stand in line at payment counters and like an IDIOT followed it twice or thrice until I realised it was never going to happen. I was jostled around and lost my cool once, after which Ro decided to never come out shopping with me. I realised I was a sucker for anything organised (This, coming from someone who thinks you don't need to organise anything. So you can imagine my shock after I realised this)
3. Zebra crossing is just a pretty design on the road. I got shouted at by a driver because i was trying to cross at a zebra crossing.
4. To prove that I could still handle street food, I went ahead and had all sorts of junk from the road side only to be gently told by my immune system that I couldn't handle it. I was devastated that even milk was creating issues for me :(
5. Movie channels are fab, and I realised I missed watching all the nonsensical mallu movies so much
IMG_8159
6. Rains are still the most awesomest in Kerala. Ah so green and lush and absolutely romantic it is. It poured like mad a couple of days I was there and unlike here when I tell Ro, 'ah I wish I could have hot vada and chai right now' and could do nothing but just wish for it, back home, I exclaimed it out loud and in an hour I actually had steaming hot vada's and chai on my table.
7. That said, I'm absolutely sick of mallu food. Although I'm having rice withdrawals now and am trying hard not to go ballistic on it, it feels great to not have anything mallu for a while.
8. I hate Indian Chinese. Its got nothing Chinese about it except a bucket full of soy sauce. We went to our fav Chinese restaurant the day we landed and it was heavenly. We both decided that getting back to London was so worth it :)
9. I am not the emotional type who misses the parents and broods about it once I'm back (unlike my brother who is still such a baby about it), but I wished for the first time the entire clan lived in the same country at least (not India though). Close enough to drop in whenever we wanted to but far enough to not be visited often. That is more likely to become a reality in the US where half of the clan already is :(
10. Its soothing to know that Ro and myself, we still miss each other when apart (even though we are about 6 yrs into our married life)
IMG_8182
Ok that's enough ranting to make up for not having written in 2 weeks right? Coming to the recipe, this is probably the yummiest chilli pickle I've ever had. My best friends mom, who is also my neighbour and like a mom to me, made this the last time I was in India. I could only bring back very little of it last time and it got over in a jiffy. I got the recipe from her, made it once by quartering the recipe and without the right ingredients and it was not delightful, to say the least. So this time I decided to just bring one whole bottle full, clicked some pics and decided to blog it since its definitely a keeper. There's no cooking involved and its super duper easy to put together. I have this with dosa's and parathas and with just about anything and trust me its divine. I have given the exact measurements, but feel free to halve it for convenience sake.
IMG_8128
Green chillies- 1 kg 
Lemon juice- 50gms
Turmeric powder- 5 gms
Split mustard seeds (kaduku parippu)- 100 gms 
Asafoetida- 2 tsp
Fenugreek powder- 5 gms
Salt- 250 to 300 gms
Gingelly oil (sesame oil)- 1 cup

Wash and pat dry the green chillies, cut into small rounds and transfer to a large bowl.
Add all the ingredients except oil and mix well till the chilli pieces are all more or less evenly coated with the masala.
Slowly pour the gingelly oil on top of the chillies and gently stir it in.
Transfer to clean bottles, seal with a tight lid and leave it to mature for a minimum of 1 week, after which the chillies would be soft and ready to be dug into
IMG_8142
Notes: Go for the mild green chillies if you cant handle the heat. Definitely not the birds eye, but finger chillies should be OK if spice is not too much of an issue. Apparently, the big ones you now get in India are not that spicy any more, so choose that if you have the option  
You can either buy split mustard seeds or make your own by coarsely grinding/ pounding black mustard seeds with a pestle and mortar, but not too fine.

Tuesday, 10 January 2012

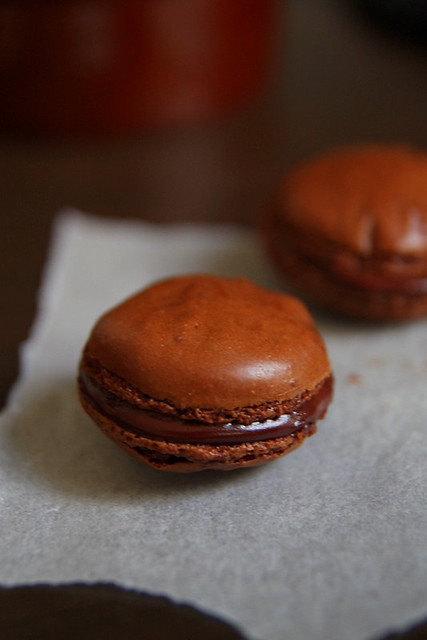
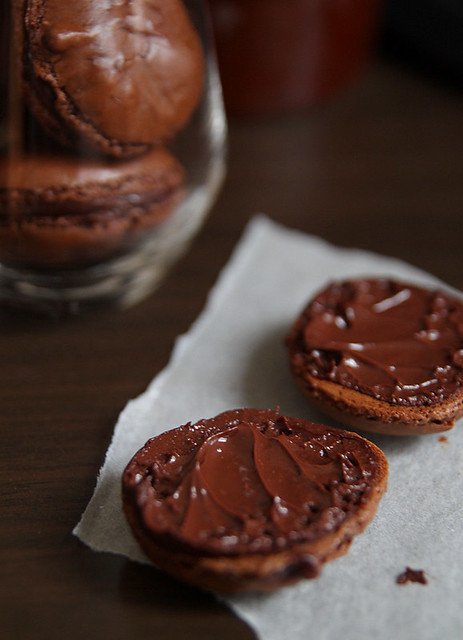
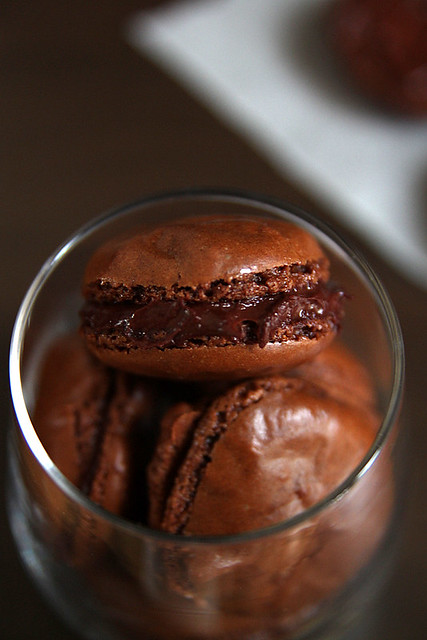
Espresso macarons filled with dark chocolate ganache

IMG_7750
I finally tackled my fear of egg whites- learning to separate them, whipping them to desired consistencies etc- and am very proud. After making the creme brulee I had some egg whites maturing in the refrigerator and I had no clue what to do with them. Well I sort of had a clue, but since my confidence levels were not up to mark, googled for hours deciding what to do with the egg whites.

Nothing interesting came out of the search and so I finally gave into the macaron frenzy that almost every food blogger is now aware of. I was very very sceptical as to how it would turn out and Shab and Finla totally helped me out with the entire thing. To be honest it was Shabs continuous FB status updates about her awesome mac flavours and finding feet that made me even consider making macs (at some point in my blog life), but it happened sooner than I thought.

I know I'm making it sound like an achievement, and trust me it is, when you see the feet (which you obviously know what it is) you feel joy (melo drama to the core, but please humour me). I would have been devastated if my macs hadn't come out decent, because for 1 it is not an easy job, 2, the quantity of ingredients used is not less and 3, its bloody messy. So after all this if my macs hadn't come out well, I would have cried, seriously, I would have screamed and cried and maybe even pulled my hair out.
IMG_7729
I went through the mac bible (as I would like to call it) like a girl studying for the exams, that if someone questioned me what the first line on page 3 was I would say it, even in my sleep. I don't think I have ever been this determined to make something right. I was warned that I would be addicted to making macs again and again and in different flavours, once I got the hang oft it...but I must say, I'm done with the whole mac thing. Its too much of work and I care way too much about feet that I cant handle that pressure again :). But like I have previously mentioned, every food blogger should have tried making a red velvet cake, baked bread and made macarons at least once in their blog life. Now that the macaron bit is out of the way, I have all the time to experiment with bread (I do bake bread, but it's still not perfect) and the red velvet cake (this doesn't count as I made it with a mix).

Word of advice to those trying to make macarons for the first time, read the mac bible mentioned above and Meeta's notes on the same and you should be good to go. If you don't find feet, that's fine too. Just sandwich them anyway and give it to your husband saying its this awesome new dessert that you came up with. Mine would believe it in a second and so I wasn't too concerned about the "omg who will eat these feetless things' part of it. Pics are not that great cos after I was done with the whole episode, it was about 3pm and there was very little light. I was also in no mood to make it presentable, and hence the gloomy pics.
IMG_7743
Recipe adapted from here
Icing sugar- 117 gms
Ground almonds- 60 gms (refer notes)
Espresso powder- 7 gms
Cocoa powder- 15 gms
Egg whites- 60 gms (refer notes)
Granulated sugar- 40 gms

Filling:
Dark chocolate- 100 gms, chopped fine
Double cream- 75 ml
IMG_7732
Get the baking tray with baking paper ready. You would ideally need two trays for this quantity.
In a food processor or grinder pulse the icing sugar, ground almonds, espresso powder and cocoa powder till nice and powdery.
Then sift the mix a couple of times and make sure there are no lumps. The mix may still be not fine as icing sugar, but it should not have any larger chunks or lumps whatsoever.
Using a free standing mixer with whisk attachment or a hand mixer, whisk the egg whites till frothy.
Then add the granulated sugar bit by bit, while continuously beating, till soft peaks form. It should hold its beak shape when you lift the whisk up, but shouldn't be too dry and stiff. (Refer the mac bible for explicit guidelines)
Into the almond-sugar mix add the meringue and fold it in using a spatula by starting from the bottom and continuing to the top (again refer the bible), till you get a smooth even mixture.
The batter should fall back in ribbons when you lift the spatula. Also put a spoonful on a plate and if it spreads out on its own, then you are good to go. If it doesn't, then give a couple more folds and it should be fine.
Place the batter into a piping bag with a plain tip, and pipe away, leaving about 2 inches gap between the shells.
Leave aside to dry for half an hour.
Towards the last 10 minutes, pre heat the oven to 140C and once the time is up, place the tray in the middle rack and bake for 12 to 15 minutes. At this point praying to the mac gods for feet would be a great idea (I swear I did this)
Once done, cool on a rack completely before doing the filling.

For the filling, bring the cream to a gentle boil and pour over the chopped chocolate. Keep aside for a few minutes.
Once the entire chocolate has melted, stir gently to mix it all in and get a smooth and silky texture.
Keep aside to cool completely
When ready to assemble, slather on to (or pipe) the macaron shells, sandwich them. EAT
IMG_7752
Notes: The espresso powder I used was really strong, so the coffee flavours were a tad too prevalent. If not a coffee fan, then you might as well replace with instant coffee powder.
The macarons are immensely sweet, so the dark chocolate ganache paired fairly well with the sweetness. Perfect balance, if you ask me.
The almond powder is a pain in the a**. The ones we get here are coarse and so I had to sieve it a couple of times, then pulse it with the other mentioned ingredients and then sieve again a couple of times to get a somewhat fine consistency. 
Use egg whites matured in the refrigerator for 2 to 3 days for best results. I brought them to room temperature before using though.
If you have a template it makes matters easy, but as usual the last minute madness made me forget all about it and so i just randomly piped them on to the paper.
YOU NEED PATIENCE to make them :)

Wednesday, 4 January 2012

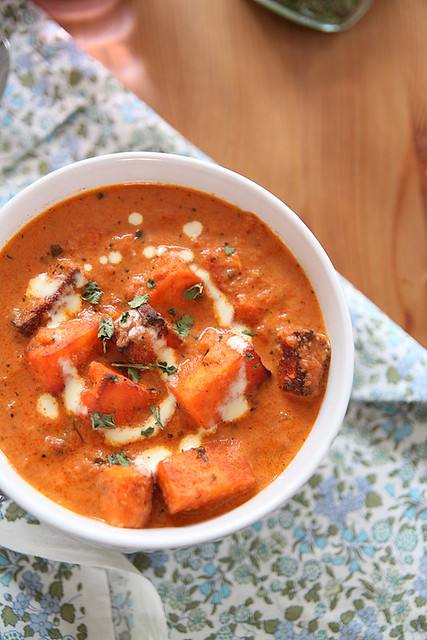
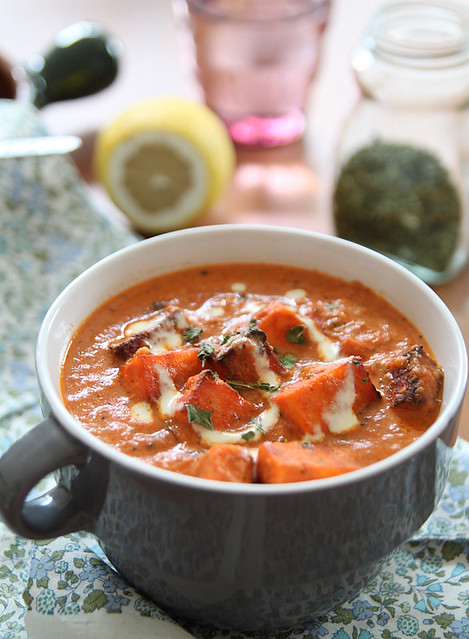
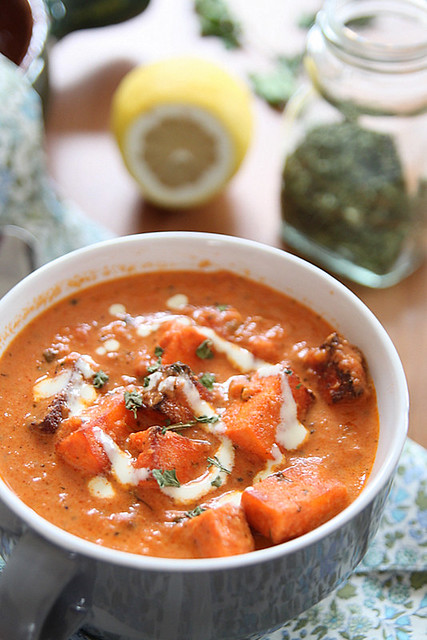
Paneer tikka masala

IMG_6900
...is such a popular dish here in UK, it puts me to shame. I mean at least the ones I have tasted are so goddamn horrible, I have no idea how people eat it assuming its one of the most awesomest Indian dishes to date. I tried it at a restaurant once and it was so sweet and horrible, I don't even want to describe how the store bought ones tasted.

See, when I first came UK 4 years back, for one whole year, we survived on store bought ready meals and such and since the tikka masala's looked popular here, I used to quench my poor Indian palate with those pathetic store bought tikka masala preparations and each time I swore never to buy it again.

It was only recently I made myself a batch of the paneer tikka masala at home and realised it was actually so so so much more different and better than the restaurant/ store bought ones. I'm sure the authentic Indian restaurants will do justice, but I've had terrible bad luck with take always and never again will I buy this.

That said, making it is no easy feat. Its time consuming and messy, not to mention highly unhealthy. But once in a while I guess its ok to indulge (although I notice, this once-in-a-while is becoming a little too often), so go ahead and make this. Its fabulous with parathas and naan.
IMG_6906
Recipe adapted from here and here
For marinade
Paneer- 200- 220 gms (around 2-21/2 cups), cut into cubes
Greek yoghurt- 3 tbsp
Chilli powder- 1/2 tsp
Ginger paste- 1/2 tbsp
Garlic paste- 1/2 tbsp
Tandoori masala- 1 tsp (optional)
Kasoori methi (dried fenugreek leaves)- 1/2 tsp, crushed
Lime juice- a few splashes
Salt- to taste
IMG_6931
For the sauce
Ginger paste- 1/2 tbsp
Garlic paste- 1/2 tbsp
Tomato purée- 1 cup
Kashmiri chilli powder- 1 tsp
Coriander powder- 1 tsp
Garam masala- 1/2 tsp
Kasoori methi- 1 tsp, crushed
Single pouring cream- around 1/4 cup
Sugar- 1/2 tsp
Oil- 1/2 tbsp
Water- 1 cup
Salt- to taste
Coriander leaves- 2 tbsp (optional)
IMG_6893
If the paneer is store bought, then cut them into cubes and pour some hot water over. Keep aside for a couple of minutes and then drain to get soft, clean paneer.
Marinate the paneer with all the ingredients under the 'to marinate' section and keep aside for 1/2 an hour.
When ready to use, preheat the oven to about 200C.
Line a baking tray with aluminium foil and layer the paneer on it.
Bake for about 5 minutes on each side and then turn the grill mode and broil on high for about 3 to 4 minutes on each side, to get a charred effect.
Remove from the tray and keep aside.
In a large saucepan heat the oil and add the ginger and garlic paste. Cover to avoid spluttering all over the place.
Add the tomato puree and cook, stirring in between, for about 5 minutes
In goes the chilli powder and coriander powder, stir it in a cook further, till you start noticing the oil separate.
Add half the water, stir and bring to a gentle boil.
Reduce heat and add the sugar and kasoori methi. Stir it in and cook for a couple of minutes
Finally slide in the paneer tikka and garam masala and stir to cover the paneer pieces with all the gravy.
Add about 1/2 cup more of water, stir well and cook for another 5 to 6 minutes. Check for salt, add if required.
Just before taking it off the flame, reduce heat and stir in the cream.
Garnish with coriander leaves and serve hot.
IMG_6879
Notes: Replace paneer with chicken, voila..chicken tikka masala :)
I am thinking, there are so many ways of making this, but this clicked for us and we loved it