Showing posts with label bread. Show all posts

Friday, 31 May 2013

Challah bread

IMG_8884
I don't have too many bread recipes on my blog. Its not because I don't bake bread, its because the process takes waaay too long in this cold weather. I have to start in the morning for it to rise (twice) and have it ready for dinner. Which makes it impossible to take pictures. This time however, I was lucky, since I had a bread bin to keep my bread in and not worry about it going stale since the next sunny day was 2 days later. You think I'm crazy? Join the club. I know a whole lot of people who think I'm crazy because I check the weather every hour to plan my photo shoot. Lucky for me, most of my readers are food bloggers and you'd know exactly what I'm talking about!

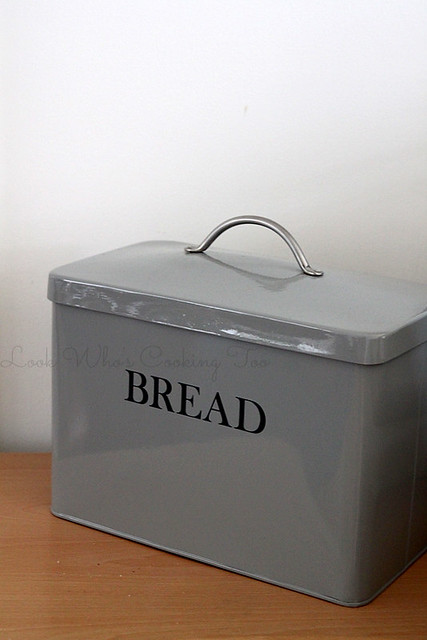
Garden Trading is this beautiful online store which provides functional everyday products for the home and garden. First look at their website and I was hooked. I wanted everything they displayed and they fit my style so so well. I'm a sucker for anything rustic with the whole country-house, farm house feel and Garden Trading has everything that fits the theme.. I was sent the Bread Bin in Flint to review and since we were on the look out for a bread bin, the timing couldn't be better. 

IMG_8940
The colour, a soft grey, blends well with my decor, the design stylish with a chrome handle lid, and the interior the same soft grey colour. The only (small) issue I had was the size, which for my tiny kitchen was a tad too big. I have very little counter space and so putting the bin there wasn't an option. It was too big to go on top of my microwave either. That said, the bin can easily hold two big loaves of bread and we've even chucked in some packs of chocolate and stuff as well. We made it work somehow and I, for one, love having the bread bin in my kitchen now.

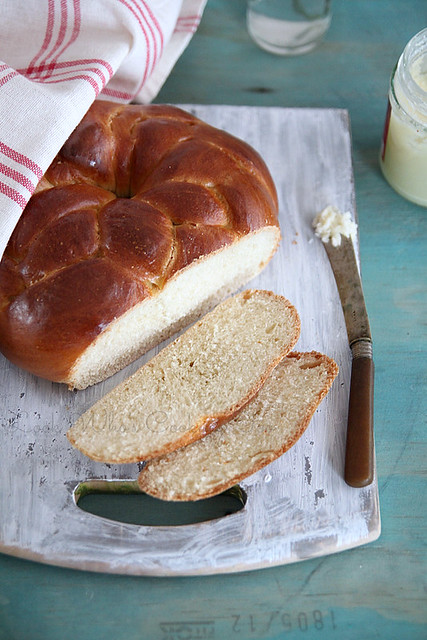
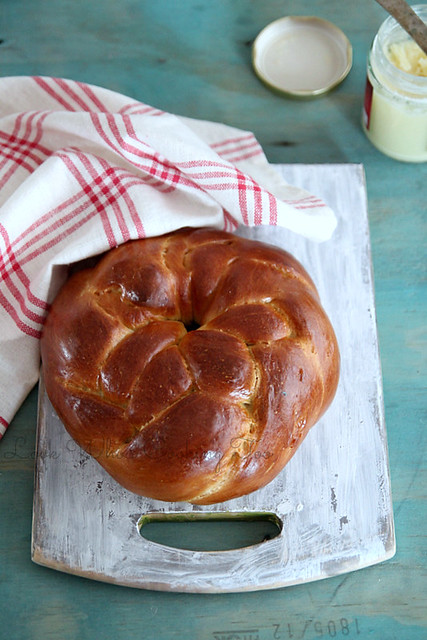
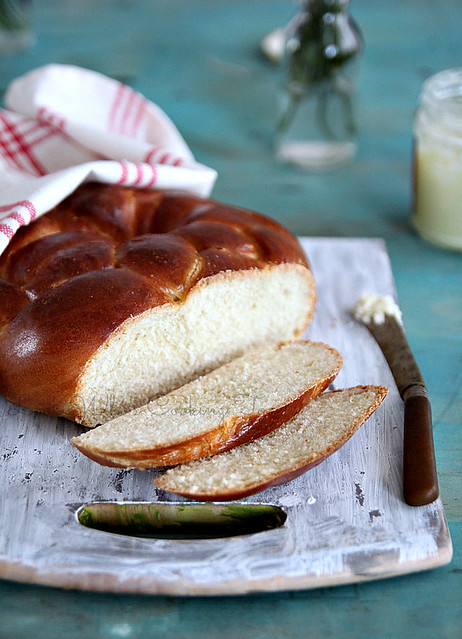
The Challah bread (pronounced "hallah") was put in the bread bin for about 2 days and then I made some delicious French toast with it. I've wanted to make this gorgeous looking bread for so long but kept putting it off because I thought the braid was complicated. And it was!! After watching numerous YouTube videos I still didn't get it right. Tried it thrice and then on the 4th I just made a normal 3 braid challah, shaped it in a circle and called it a day. The bread is soft, slightly sweet and perfect with a spread of brandy butter. Or if you want to be more experimental, make a French toast or bread pudding with this gorgeous looking bread.

Recipe halved from here (makes one small loaf)
IMG_8883 
Plain flour- 2 to 2 1/4 cups 
Granulated sugar- 
Salt- 1 tsp
Instant yeast- 1 tsp
Egg- 1 large
Egg yolk- 1 small (take off about 1 tsp from this and keep aside to do an egg wash)
Water- 1/2 cup (lukewarm)
Vegetable oil- 1 oz

Into the bowl of a free standing mixer (or mixing bowl if using your hand) add the flour, sugar, salt and instant yeast. Stir to combine.
Make a well in the centre and add the egg, egg yolk and vegetable oil. Mix using a wooden spoon till the mix becomes wet.
Add the warm water, and using the same wooden spoon mix them all together...roughly.
Attach the dough hook and knead on medium speed for about 5 to 6 minutes, or till the dough is soft and smooth and is no longer sticky. My dough was really sticky, so I ended up adding at least 2 tbsp of flour. If you are using your hands to knead, then flour a work top and knead for about 10 minutes till you achieve the desired consistency.
Lightly oil the same bowl and place the (lightly greased) dough ball in it. Cover with a cling film and leave it in aside to rise. I preheated my oven at 100C for about 6 to 7 minutes and placed the bowl inside with the light on. It took the dough about 3 1/2 hours to double in size.
IMG_8910
Punch the dough down and separate the dough into 3 equal sizes. 
Roll each of them out into a long rope about 1 inch thick and around 8 to 10 inches long. They might shrink as you try to roll them. In that case, just leave them aside to rest for 5 minutes and try it again.
Join the ends of all the three ropes and secure tightly by pressing then together.
Then spread the three ropes and try and braid them like how you do your hair. If you mess up, don't worry, start over. (I had to.. thrice!).
Once you reach the end, carefully tuck them under the braid and shape them into a round, joining both the ends.
Place it carefully on to a baking tray lined with baking paper, cover with the same cling film, and leave it to rise in a warm place for another hour or two. I did the same oven method.

When ready to bake, pre heat the oven to 175C.
Mix the egg yolk with some egg white and 1/2 tbsp water and brush over the risen challah, generously and making sure you don't miss the cracks and sides of the loaf.
Bake for about 25 to 30 minutes, rotating the pan half way through for even cooking.
The loaf is done when it turns a golden brown colour.
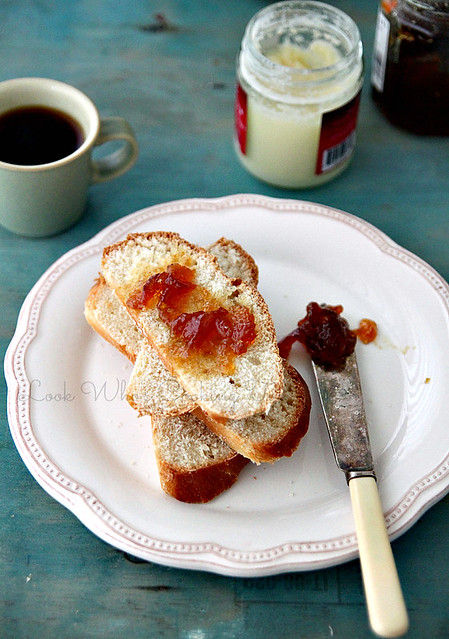
take it out of the oven and leave to cool on a rack for about 10 minutes, after which you can slice, spread some butter or jam and have it warm.
IMG_8892
Notes: The recipe can easily be doubled.
The dough is slightly sticky, so I had to use a generous amount of flour on the work surface while rolling out the rope.
The bread stayed absolutely fine for a week in the bread bin. I wrapped it in some aluminium foil and placed it in.

With thanks to Garden Trading for sending me a bread bin to review.

Thursday, 17 January 2013

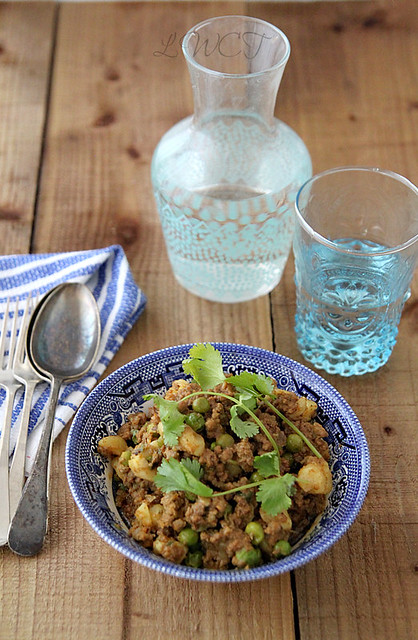
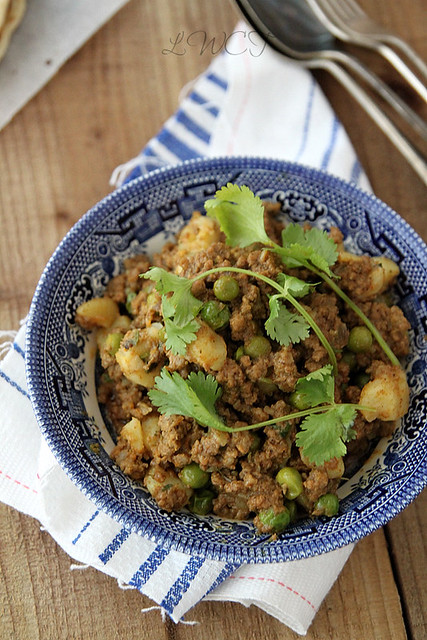
No-yeast naan and keema {quick dinner idea}

IMG_6276
Trying to figure out what to make for dinner these days has become a major chore. I mean sometimes I know what exactly I want to have and then I get all enthusiastic to source ingredients and make it happen. But on most other days I'm just lost. I'm bored with chapati and usual curries, bored with macaroni bakes, bored with dosa/ idli and bored with soup and bread. I ask Ro what he wants for dinner and he says two words all the time, Chinese or Mediterranean. Unfortunately I'm rubbish at both these and so the only option is to eat out. Which is what Ro means by Chinese and Mediterranean, but that's not an option always isn't it?

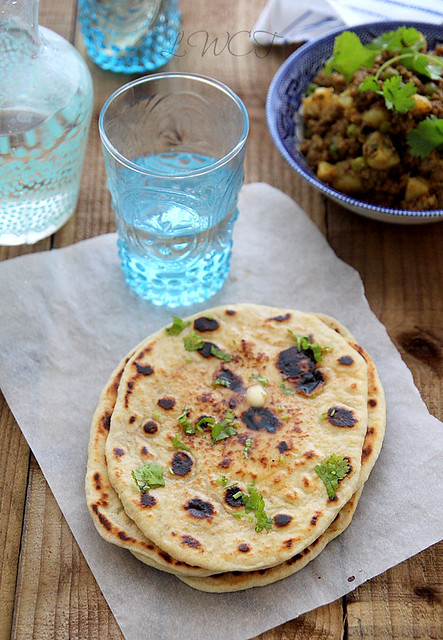
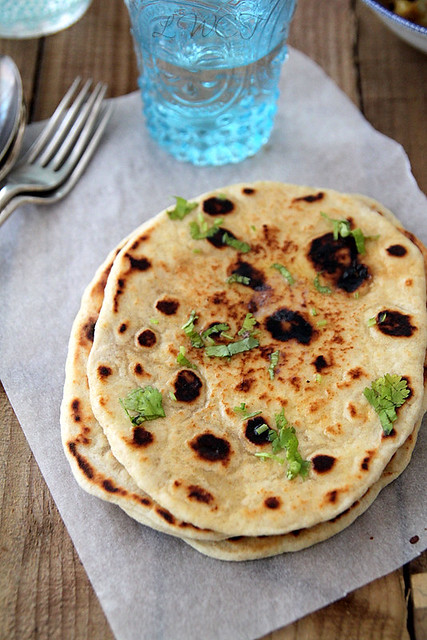
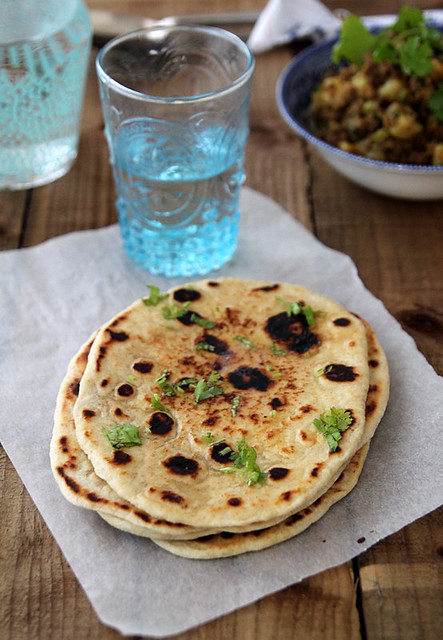
Anyways, on one of those days I was breaking my head over what to make, I did my usual scouting of blogs to get some inspiration and landed on this beautiful blog that had pretty pictures and some interesting recipes. The yohurt naan caught my eye and the fact that it didn't need any yeast and rising time and such made it even more attractive. I have always wanted to make naan at home, and have bookmarked quite a few recipes from experts out there. But that, I kept for another time and decided to try this no yeast naan the very day I found the recipe. It was so so easy to make and came out really well. In fact, I think I like this option better than the real deal, not just because it tastes fab, more so because it was all done in under half an hour. 
IMG_6303
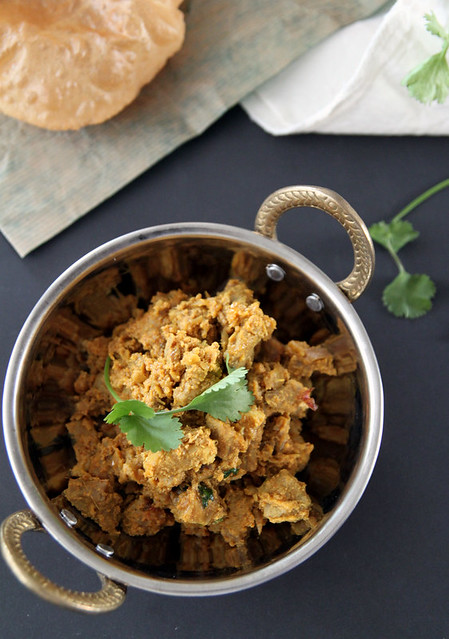
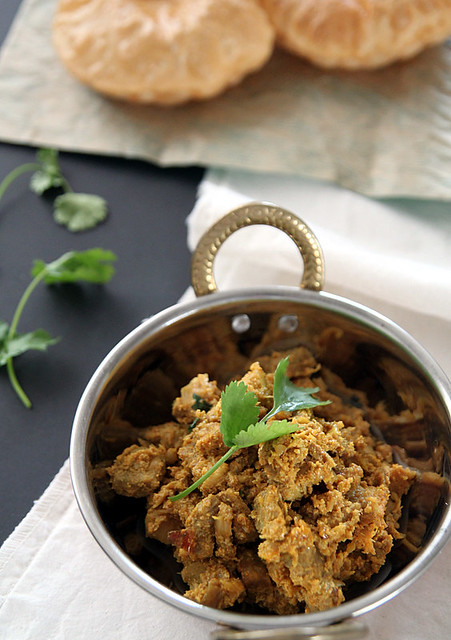
The first time I made it, I paired it with some Andhra egg curry, which was good, but not great. Yesterday I paired it with some kheema and it was fab. I'm not a big fan of minced beef/lamb, so I very rarely use them at home. This preparation was a pleasant change from the usual and so I enjoyed it. I am gonna use the left over mince meat in a stuffed bun, following this recipe. Both the recipes- naan and keema- are from the same blog and I'm so glad I chanced upon it on my frantic search for inspiration. 

On a completely different note, if you haven't entered my giveaway, do so soon, you only have 2 more weeks. And as I had mentioned before, we are having a bloggers meet in London on the 23rd of feb. Its a whole day event with lots of fun master classes, food and great company. We have been lucky enough to get some fabulous sponsors and it would be really great if you can make it to the event. Check out our event blog for details on how to register, sponsor updates and competitions.

No-yeast naan (recipe adapted from here, makes 10)
IMG_6283
Plain flour- 300 gms (3 cups)
Baking powder- 2 tsp
Baking soda- 1/2 tsp
Salt- 1 tsp
Sugar- 1 /2 tsp
Yoghurt- 60ml (approx. 2 tbsp)
Water- 140 ml
Oil- 2 tbsp
Butter- to brush on the naan
IMG_6280 
Mix together the flour, baking powder, baking soda, salt and sugar together in a mixing bowl.
Make a well in the centre and add the yoghurt and water.
Knead well, either using the dough hook of your mixer or using your hands, till the dough comes together.
Add the oil and continue kneading until you get a pliable dough. Don't over work it though.
Divide the dough equally into 10 and roll each into a ball.
Meanwhile, put a tawa on high heat and dust your counter with flour.
Roll out each of the dough balls into a round or oval- naan shape. My rolling skills are pathetic, which I'm sure you can see. But roll it out in whichever shape and size you prefer. 
Place the rolled out dough on to the tawa and wait till it puff up or you see bubbles appearing on top.
At this point flip it and cook for about a minute or so, and the naan is slightly charred.
Transfer to a plate and generously brush with butter.
Sprinkle some coriander leaves on top and serve warm.

Notes: Feel free to halve the recipe. have done it and it works fine.
I am sure you can improvise using garlic, cumin, herbs and spices etc etc. Incorporate it into the dough or sprinkle on top on you brush with butter.
To keep the naan warm, wrap in aluminium foil till ready to serve.

Beef keema with peas and potatoes
IMG_6288 
Beef mince/ Lamb mince- 500 gms
Cumin seeds- 1/2 tsp
Cardamom- 3 pods
Cinnamon stick- 1, 2 inch piece
Bay leaves- 2
Onions- 2 medium, finely sliced
Ginger-garlic paste- 2 tsp
Meat masala- 1 tsp
Turmeric- 1/4 tsp
Pepper- 1/2 tsp
Chilli powder- 1 tsp
Coriander powder- 1 1/2 tsp
Garam masala- 1 tsp + 1/2 tsp to add at the end
Yoghurt- 1 tbsp
Tomato- 1 small, finely chopped
Potatoes- 1 medium, peeled and diced into small cubes
Mint leaves- 1 tbsp, finely chopped
Coriander leaves- 3 tbsp + enough to garnish
Green peas- 1/4 cup (I used frozen green peas)
Salt- to taste
IMG_6301 
Heat oil in a pan cooker and throw in cumin seeds, cardamom, cinnamon and bay leaves and wait for it to sizzle.
Throw in the onions and sauté till they turn a golden brown in colour.
Add the ginger garlic paste and cook for 2 to 3 minutes till the raw smell disappears.
Turn the heat to high and add the minced beef.
Break the meat using the spoon and cook, stirring well, until all the meat is browned.
Reduce heat to medium and add all the masalas, making sure you mix it well into the beef.
Mix in the yoghurt and tomato followed by mint leaves, coriander leaves and potatoes.
Add a bit of bit of water and enough salt, mix well and cover and cook for about 15 to 20 minutes, or till the meat and potatoes have cooked through.
Open lid at intervals and give a good mix. 
Also, add more water if its too dry or if there is loads of water, evaporate it on high heat.
Mix in the green peas, and also check for salt. Add if required.
Finally, sprinkle the remaining garam masala, give one final mix and transfer to a serving bowl.
Just before serving, garnish with coriander leaves.
IMG_6293 
Notes: Freeze the remaining in an air tight container and use to stuff buns, Sloppy Joe's, and keema dosa.
Feel free to use the same recipe with lamb.
You can also double the recipe.
You can do the entire cooking in a pressure cooker as well.
I like my kheema without any gravy, like a semi dry consistency. If you'd like more gravy, add water accordingly.

Monday, 31 December 2012

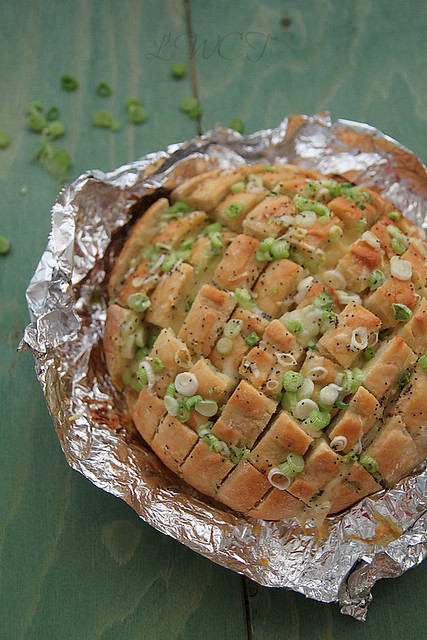
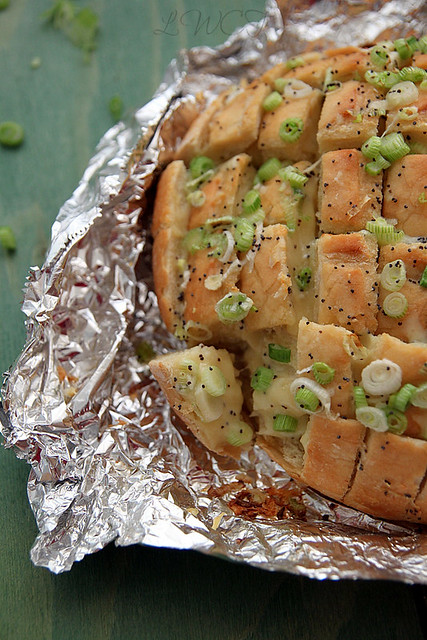
Cheese and onion pull apart bread

IMG_1968
This recipe had been doing the rounds on Pinterest a while back and I had bookmarked it then. I did make it once, since it had all things yum and was too good a recipe to keep for another day. It was so easy to put together and I did take pics with the intention of blogging it, but like loads of my recipes, this one got lost among those Picasa folders.

Yesterday I made this for dinner and that's when I realised I hadn't blogged it. Searched around and found the folder. Its a perfect appetiser idea, or if you want to serve bread with soup, then this is most certainly it. Its not something you'd want to have on a daily basis but once in a while its a treat and you deserve it. Make this if you want to feed about 5 to 6 people and like I said before its a great appetiser idea, where you can just tear and share the bread. 

The first time around I managed the whole thing on my own, but yesterday with the slicing and stuffing, I found it a bit difficult without an extra pair of hands. Ro, much to my annoyance, couldn't remember ever eating the bread. Sometimes I wonder why I even bother to try new things. Well to be honest its more for my benefit, but that's rant I shall leave for another time.

What's everyone's plans for New Years. No crazy party this year for us, just gonna chill out at my sister in laws place with some Champagne and good food, and maybe if we are up to it, head out to a club (just the ladies that is). Before signing off, here's wishing you all a Happy New Year and may you have a year filled with all goodness possible. 

PS: If you want to win a mini fridge for your home, don't forget to enter the giveaway

Recipe adapted from here
IMG_1917 
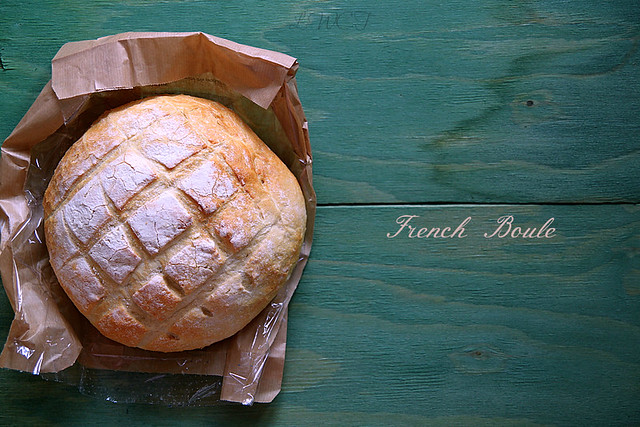
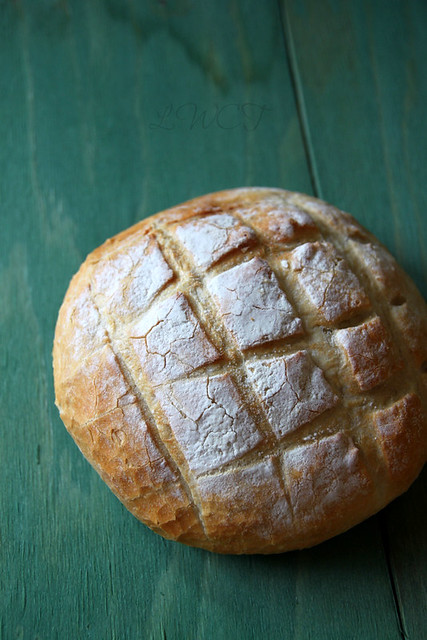
Sourdough bread- 1 loaf (I used a French Boule)
Cheddar cheese- 250 gms, thinly sliced (if you have a cheese slicer that's best)
Butter- 1/2 cup (i used a mix of garlic butter ans salted butter)
Green/ spring onions- 1/4 cup, roughly chopped
Poppy seeds- 1 1/2 tsp
IMG_1975 
Preheat the oven to 176C and line a baking sheet with aluminium foil.
Slice the bread lengthwise and widthwise without going all the way to the bottom. Don't fret about it too much, it doesn't need to be of equal size and such. Do whichever size is convenient, just make sure you don't go all the way through to the crust.
Place the bread on the foil and insert the cheese slices into the sliced crevices of the bread. Try stuffing it as deep as possible and between all the cuts.
Melt butter in the microwave and into it add the spring onions and poppy seeds.
Pour this on top of the bread as evenly as possible.
Wrap the bread with the foil and bake for about 15 minutes.
Unwrap the bread and continue baking for another 10 minutes or till all the cheese has melted.
Serve warm.
IMG_1922 
Notes: Original recipe calls for mushrooms as well. if you want to do so then saute 250gms of finely chopped mushrooms in 1tbsp of butter for about 3 to 4 minutes or till they start to sweat. Then add about 1/2 tsp of garlic powder and continue cooking the mushrooms till all the water has evaporated.

Transfer on to a plate and leave aside to cool. And just after you insert the cheese slices, pour the mushroom over the bread, again trying to stuff in as much possible between the cuts.
I have adjusted the measurements according to what the French boule could take. 
The cheese in the original recipe is Provolone. I couldn't get them here, so used Cheddar and it worked just fine. I also tried it with Gouda, but it wasn't up to mark.

Tuesday, 22 May 2012

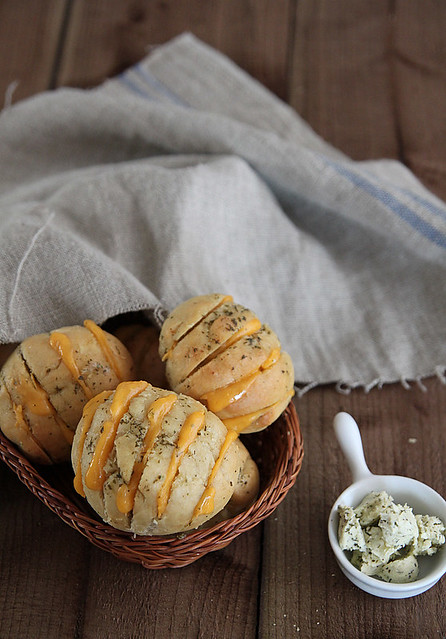
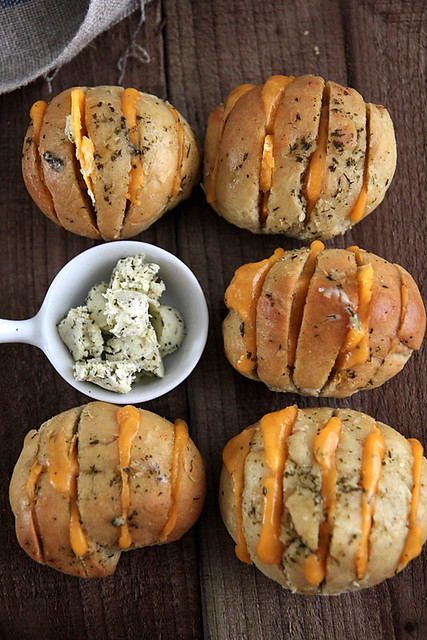
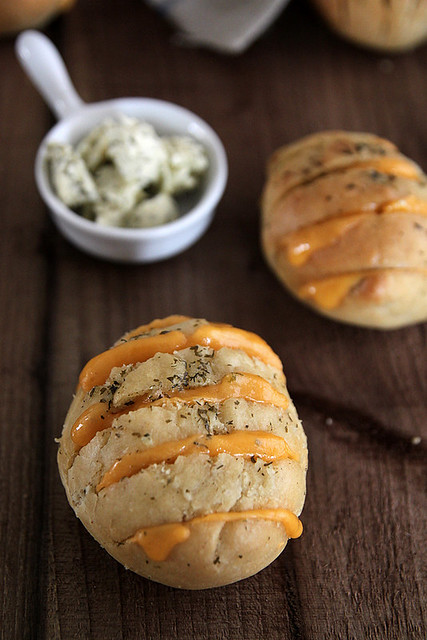
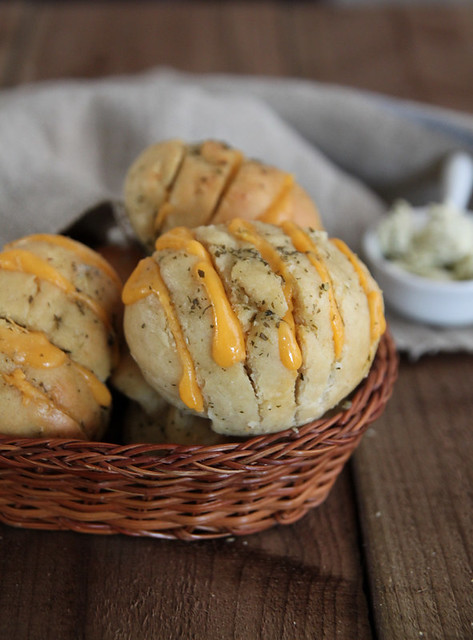
Hasselback cheesy garlic rolls

IMG_1735-1
I am not that much of a bread eater. It's strange because when I was in school/ college, I refused to pack anything else for lunch, but sandwiches, and considering I used to live on bread those days, I should have by now refused to part with it. But I guess, it rubbed off the other way for me. I don't want anything to do with it. Not that I hate it altogether, but I'm not that crazy about it either. The occasional garlic bread does the work for me these days.

Ro on the other hand, has toast every morning and I often ask him why he doesn't wanna try something else, and wont he get bored with it? This is the conversation we have every time I put forth that question:
"I would like idli, dosa or poori for breakfast, but since my wife is fast asleep during my breakfast time, I have no choice but to have toast."
Me: Do you think I work at Saravana Bhavan???? Well, you should have married a more pro-active person then, too bad I'm not. Why don't you try cornflakes, waffles or pancakes.
Ro: OK I like pancakes and waffles.
Me: Great I'll pick up a pack or two next time. All you have to do is heat them up in the microwave and you're good to go.
Ro: Oh I thought you were gonna make them for me????
Me: Wonder what gave you that idea? Remember I'm not the pro active wife.
Ro: Then I'll just stick to toast and coffee
Me: Fine by me ;)
IMG_1757 
He can toast a couple of slices of bread, but cant toast a waffle or heat a pancake?? I actually shouldn't complain because I'm not the super duper awesome wife who wakes up at 6am, grinds dosa batter, makes fresh dosa/idli and chutney and watches the husband gracefully digging into it. I'm one of those lazy brats who get Ro to even keep coffee ready for me in the mornings. But seriously, cut some slack here for me. Considering I make a fabulous (most of the time) dinner for him, toasting a few slices of bread is no ordeal?? You with me here???

Anyway, the reason I brought up bread was this...I just recently learnt the art of bread baking and I'm in love with it all over again. I'm not sure if its the baking that's making me all enthusiastic or the actual outcome, but whatever be the scene I'm slightly obsessed with working with yeast and am pretty proud of my creations. I initially started off with bread mix for the fear of working with yeast. I then decided to work with instant yeast but accidentally ended up buying active baking yeast which needed to be activated and that freaked me out. A couple (lots actually) of disasters and then I slowly got the hang of it. These sundried tomato bunscinnamon rollsFocacciabhatura and chicken stuffed buns were the successful out of the lot.
IMG_1744
(picture inspiration from here)
My mother-in-law then asked me to pick up some instant yeast for her from here and that's when I picked up some for myself. I didn't quite get the hang of that instantly and was kicking myself for not just sticking to stuff I am used to, when the other day I made some doughnuts and it rose beautifully. I realized I wasn't giving the dough enough time to double in volume (blame my patience for it) and since the error has been rectified, I've been on a bread baking spree.

This recipe was bookmarked eons ago and I must admit, after 2 disastrous trials, I got lucky the third time. The first time, the dough went straight into the bin since it dried out on me and an ugly crust had formed. The second time, I still went ahead and baked the bread, but while slicing the crust just started crumbling and the insides were not cooked. So off to the rubbish bin it was. This time, I was determined to give it my best shot and decided that if it didn't work out for me, then that's it, I was never gonna give this recipe a shot again. Luck was on my side, and in spite of the slightly screwed up beginning, I managed to get what I wanted. They were the most tastiest buns I've ever had and I cant wait to make them again. Feel free to make them into buns or loaves or whatever shape you prefer. The outcome is fantastic whatsoever.

Recipe halved from here (yields 1 loaf or 6 buns)
IMG_1750-1 
Plain flour- 1 1/2 cups
Salt- 1/2 tsp
Instant yeast- 1 1/8th tsp (just a little over 1 tsp)
Honey- 1/2 tbsp
Warm water- 1/2 cup
Olive oil- 1/2 tbsp + enough to grease

Garlic butter- 1/4 cup
Cheddar cheese- 75 to 80 gms (depending on your choice) *
IMG_1734 
Into the bowl of a free standing mixer add the flour, salt and instant yeast and mix well. 
Add the honey and olive oil and rub into the flour mix, either using your fingers or with the paddle attachment of you mixer. 
Change to the dough hook, add in the water and knead on low for a couple of seconds and then increase speed to medium and knead for about 5 minutes or till the dough becomes smooth and pliable (and releases easily from the hook).
Add some flour or water (bit by bit), if you think the dough requires either of it. (I can proudly say that I now know how to determine this..pat on the back for me).
If you are doing this by hand, then lightly flour your work top and knead the dough for about 7 minutes. 
Lightly grease a mixing bowl and the dough, cover with cling film and keep aside to rise for about 2 to 3 hours. It should have doubled in size after the proofing period. (I pre-heat the oven at a really low temp for about 5 minutes, switch it off and place the bowl inside the oven. I leave it aside for about 3 to 4 hours)
Once the time is up and the dough has risen beautifully, punch it down and knead for a couple of seconds using your hand.
Line a tray with baking paper and divide the dough into 6-7 lemon size balls.
Cover with the same cling film and leave to rise for a further 30 to 45 minutes.
You can also pre heat the oven to 175C at this point.
In the mean time, melt the butter and thinly slice the cheese.
Once the dough has risen again, brush some of the melted butter onto the rolls and bake for about 20 minutes.
Take them out of the oven brush them again with more garlic butter and place them back inside for about 5 minutes. (yes double dose...that's what I'm talking about)
By this time the rolls would be nice and brown. Leave them out to cool for about 15 minutes.
Using a serrated knife gently slice the rolls, making sure you don't go all the way through the loaf. Leave an inch gap between slices.
Brush garlic butter in between and fill each gap with the cheese.
Send them back into the oven for about 3 to 5 minutes or till the cheese have all melted.
Take them out of the oven and if there is more butter, go on and glaze them.
Serve as a side to bakes or casseroles.
IMG_1758-1 
Notes: If using active dry yeast, then mix together the honey and water, sprinkle the yeast over it, stir to dissolve and keep aside for about 10 minutes or till the yeast starts frothing. Rub the oil into the flour-salt mix and then pour the yeast mix into it to form the dough.
Use any cheese you prefer. The more stronger, the better.
*I used cheddar cheese slices, which are easier to fill in the gaps. You can use a cheese slicer if its a slab.Its ok if its grated as well, just make sure you stuff enough between the slits.
I used store bought garlic butter, because I'm lazy. Making your own is really easy. Just mix 1/4 cup of melted butter with about 1/2 tsp garlic powder, 1/2 tsp finely chopped parsley and salt to taste. I prefer using garlic powder instead of pods because i find the garlic taste too strong.
Feel free to make baguettes instead of rolls and double the recipe for larger quantities. As a rule, I always halve the recipes of any new dish I try. It's not the best way to go about it, but it somehow works for me.

Tuesday, 28 February 2012

Poori and pork (tikka) masala

IMG_9037
The weather has been brilliant the past couple of days and its (almost) like summer is round the corner. I saw the first few daffodils outside my apartment today and almost jumped up in joy. Even if its not bright and sunny, the temperature sure is in double digits and the winds are bearable. Anything to not go out in layers of clothing is a big relief for me. That said, I'm pretty bummed I couldn't wear my uber cool Coccinelle gloves enough.

So on one of those really good weather days, I was in a mood to cook. Like really, painstakingly make things from scratch. These kinda moods pass by soon, so before it did I became proactive and decided to make poori's. Now, people who know me, know my phobia about kneading, rolling and deep frying. I was willing to forego all that and made a tremendous attempt to make round-like poori's. The optimism was too good to be true, so after the first few, it was back to shapeless ones. But I decided it was high time I jotted down a poori recipe for days like these, where I didn't have to exhaust myself doing google searches for exact water measurements etc.
IMG_9026
To go with it, my initial plan was to make the usual potato masala. But that's what I'd do on a lazy day. It was a proactive day instead and so I made pork tikka masala. Now, its not one of those authentic tikka masala recipes, but kinda nice and easy in comparison. Its a slow cooker recipe and I didn't have the time for that and hence used the ever helpful pressure cooker for the same. I'm sure taste-wise, the slow cooker version would have been better, but it served my purpose and tasted great with hot poori's.

Poori (Indian fried bread)- recipe adapted from here (makes 12 medium sized ones)
Chapati flour (atta)- 1 1/2 cups
Salt- 1/4 tsp
Oil- 1 tbsp + enough for deep frying
Warm water- 1/2 cup
IMG_9031
In a large bowl mix together the flour and salt.
Rub in the oil as evenly as possible.
Add the warm water bit by bit and bring the flour together.
Knead for a couple of minutes till the dough becomes pliable.
Brush some oil on it, cover with a wet towel and let it rest for about half an hour (or 10 minutes)
When ready to roll, heat enough oil in a pan. Keep the fire on medium heat and wait for it to reach the right temperature.
Knead the dough once more and make 12 golf-ball size balls out of it.
Roll out each ball into a disc, not as thin as a chapati, and keep ready.
Pint a tiny piece of dough and drop into the oil. If its the right temperature, it would immediately float to the top.
Slowly slide in one rolled out disc. When it floats to the top, lightly press it with a ladle, allowing it to puff up.
Roll over and fry the other side similarly.
When it becomes golden brown, take it off the oil, let it drip out the oil and drain on paper towels. Repeat the same with the remaining dough.

Pork (tikka) masala- recipe adapted from here
IMG_9075
Pork shoulder/ leg (with or without fat)- 1 kg (diced into medium pieces)
Turmeric powder-1/2 tsp
Cumin powder- 1 tsp
Coriander powder- 1 tsp
Chilli powder- 1 tsp
Garam masala- 1/2 tbsp
Coriander leaves- 2 tbsp, roughly chopped
Oil- 2 tbsp
Water- 1/2 cup
Salt- to taste

Marinade
Onions- 2 large
Garlic- 8 cloves
Ginger- 2 inch piece, peeled, roughed sliced
Plain yoghurt- 1/2 cup
Chilli powder- 1 tsp
Salt- to taste
IMG_9072
Make a paste out of the all the ingredients listed under the marinade section.
Place the diced pork into a large bowl and pour half of the marinade over it. Reserve the other half.
Mix well, cover and leave aside for at least 30 minutes.
When ready to cook, place the marinated pork and water in a pressure cooker and cook till the pork is tender, still holding its shape, about 15 minutes.
Once the pressure subsides, open the lid and if there is a significant amount of water, place it back on medium-high heat and allow most of the liquid to evaporate.
Once that's done, heat oil in a large heavy bottomed pan and add the reserved half of onion paste.
Cook till it turns a light brown, about 10 to 12 minutes on medium heat.
Stir in the cooked pork along with all the masala/gravy and cook on high for a couple of minutes, stirring well.
Then, reduce flame to medium and add turmeric, cumin, coriander and chilli powder and stir fry till the meat turns darker in colour.
Once you see the oil releasing the sides, sprinkle garam masala, give a final stir and take it off the flame.
Keep covered, and just before serving, sprinkle coriander leaves.

IMG_9045
Notes: This is not a spicy preparation, add one green chilli along with the powders, if you want it spicier.
I didn't dry out the pork too much as I wanted it to be a semi-gravy-like consistency for the poori's
You can cook the pork in the pressure cooker for up to 24 hours in advance and do the last bit before you serve.
You can also freeze the dish once completely cooled. Just leave it out at room temperature to thaw and maybe sauté it in a little oil before serving.

Friday, 23 December 2011

Chicken stuffed buns

IMG_6705
Here is something to take centre stage on your Christmas table, something I absolutely love, thanks to Ria's easy recipe. I have tried this a couple of times and love it. You can play around with the stuffing and what's even better is, you can freeze them and bake as and when required.

Ria's recipe yields absolutely soft and spongy buns and although they are a delight to feast on, Ro keeps complaining about them sticking in his mouth (which I agree, but he's all dramatic about it). So I now make a whole wheat-plain flour combo which still yields soft buns and doesn't have the sticking problem. I would like to think its more healthier as well :)
IMG_6702
Recipe adapted from here & here (yields around 15 medium sized buns)
For the dough
Plain flour- 1 1/2 cups (plus enough to dust the work surface)
Wholemeal flour- 1/2 cup
Active dry yeast- 1 tbsp
Sugar- 1 tbsp
Warm water- 2 tbsp
Warm milk- 1/2 cup
Oil- 1/4 cup
Egg- 1, lightly beaten
Salt- to taste
Egg white or milk for wash
Sesame seeds- to sprinkle on top (optional)

For the filling
Minced/ shredded chicken- 400 gms
Onion- 1 large, finely chopped
Ginger paste- 1/2 tbsp
Garlic paste- 1/2 tbsp
Green chillies- 2, finely chopped (optional)
Tomato- 1 large, finely chopped
Kashmiri chilli powder- 1 tsp
Coriander powder- 1 1/2 tsp
Turmeric powder- 1/4 tsp
Potato- 1 large, diced into small cubes
Garam masala- 1 tsp
Coconut milk- 1/4 to 1/2 cup
Coriander leaves- a couple of stalks chopped fine (optional)
Oil- 2 tbsp
Salt- to taste
IMG_6710
Whisk together both the flours along with some salt and keep aside.
Take 1/2 tbsp flour from the mix and combine it with 1/2 tbsp sugar and yeast.
Add the warm water to that and mix well till the sugar and yeast has completely dissolved.
Keep aside for 10 minutes to activate the yeast. You would know its alive by the bubbles that form.
Into a large mixing bowl pour the milk, oil and remaining sugar. Stir to dissolve the sugar.
Tip in 1 cup of the flour mix and using a wooden spoon mix well till you get a paste like consistency.
Add the beaten egg followed by the yeast mix and stir it in.
Finally add the remaining 1 cup flour and stir vigorously till everything comes together. You can do this entire process using a mixer with dough hook attachment.
Otherwise, knead it well on a floured work surface for at least 10 minutes, till the dough is soft and pliable.
Oil the same mixing bowl lightly and keep the dough in it. Cover with a kitchen towel and leave in a warm place to rise. I preheat the oven to 100C for about 5 minutes, turn it off and then place the dough inside.
IMG_7148-1
While the dough is proofing, get the filling ready.
Heat oil in a large frying pan and saute the onions till they turn a light golden brown in colour
Add the ginger and garlic pastes and stir for about 2 minutes or till the raw smell disappears.
In goes the chilli, coriander and turmeric powder. Stir for a minute or so for the spices to cook
Throw in the diced tomato/ paste and cook till the oil starts separating. This could take about 6 to 7 minutes on medium heat.
Add the diced potato followed by minced/ shredded chicken, season with enough salt and stir to bring all the ingredients together.
Cook till the chicken and potatoes are done and the water has completely evaporated. 
When it is more or less dry, add the coconut milk and stir well. Cook further till you get a semi-gravy like consistency. It shouldn't be too watery, nor too dry.
Sprinkle the garam masala and coriander leaves and give one final stir. Do the taste test, add more if required.
Once done, transfer into a bowl and keep aside to cool completely.
IMG_6697
Assembling
Once the dough has doubled in size, punch it down gently using your hands, give a couple of gentle kneads and divide the dough into 15 equal parts. (If you have an obsession like me, then weigh each ball to get the exact size)
Take a dough ball, make a small disc shape (either using your rolling pin, or stretch using your hands) and place 1 tbsp of the filling into the centre.
Wrap it up by bring all the edges together and pinch the top gently to seal the filling.
Try and reshape them into a perfect ball and place on a baking tray lined with parchment paper.
Continue doing the same with all the dough balls and keep them aside for about 30 minutes to prove again.
Towards the end of your proving time, preheat the oven to 200C.
Just before you chuck them into the oven, whisk the egg white a bit and brush generously on top of the buns.
Sprinkle sesame seeds (if using) and bake in the middle shelf for 10 to 12 minutes or the tops are golden brown and glossy.
Take it out of the oven, cool for about 3 to 4 minutes, arrange them in a bread basket and serve with all the Christmas charm you can muster up :)
IMG_6733
Notes: If you cant get hold of chicken breasts, then get chicken breasts, slice them into small chunks and precook in a saucepan along with a pinch of turmeric powder, salt and 2 tbsp of water. Once cooked, shred them and use that instead.
If you plan on making the buns only the next day, then place them in the refrigerator overnight. Bring it to room temperature before proceeding with the filling.

Sunday, 25 September 2011

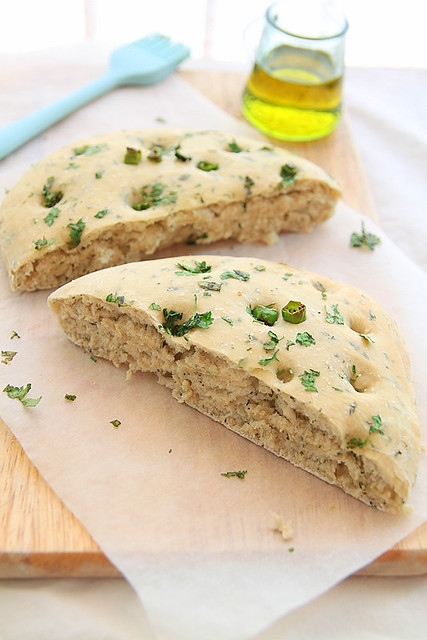
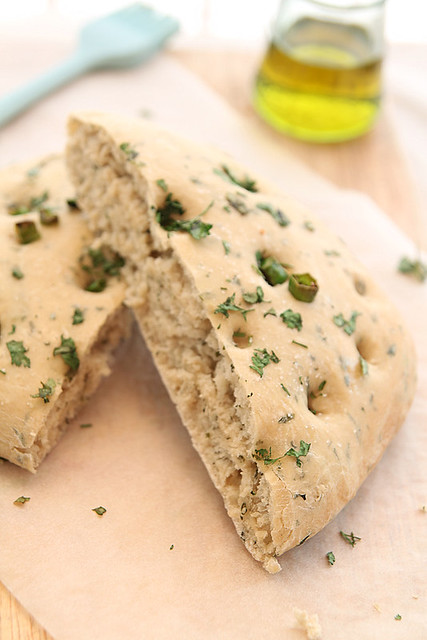
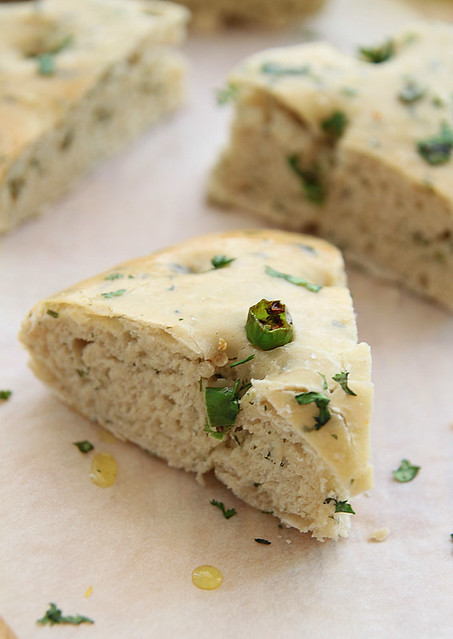
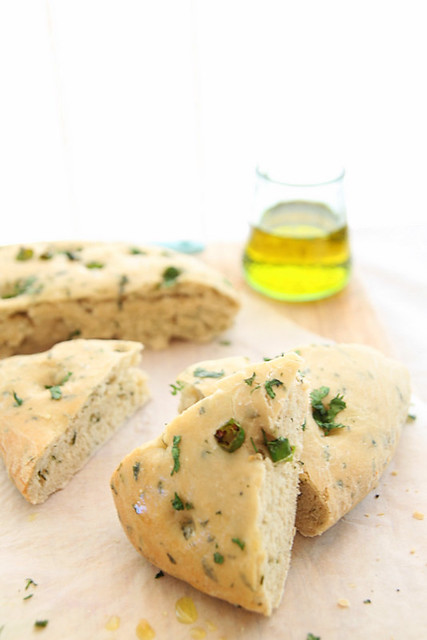
Chilli, ginger and coriander focaccia

IMG_5575-1
Its unbelievable that we are having awesome weather and apparently it continues on to next week. We have been enjoying it thoroughly and as we do every year we also went for the open air movies at the London Scoop. We have one more coming up on Wednesday and that should officially end our summer sojourns :)

I am also super thrilled, I've managed to post another recipe without much of a gap, thanks to a 'no working on weekends' rule Ro has come up with. So while he's spread out on the sofa reading Asterix and watching the F1 highlights, here I am typing out a recipe. Its been ages since we've spent a weekend at home and today also would have been no different if it wasn't for the Greenwich marathon that passes through our place and they've shut down all transport and even the tube station.
IMG_5584
So all day we lazed around, got drunk and the initial plan was to just not do any cooking, but the past few days we've been eating out and so I got down to it and cooked. This focaccia was the outcome and we dunked it in olive oil and munched away with a chicken roast. Discovered this fab website with a lot of baking tips and recipe ideas and I have already bookmarked a few. Do head over and check it out when time permits.

I must admit that the first time I tried out a focaccia recipe, it flopped on me, big time. This time however, I was determined to follow instructions properly and although a couple of ingredient substitutions did leave me confused, I managed to pull it back together. The coriander leaves add a great flavour to the bread and you know the chillies are present, but not in an over powering sort of way.
IMG_5573
Recipe has been adapted from here
Plain flour- 200 gms
Sea salt- 1/2 tsp + enough to sprinkle
Chillies- 3, finely chopped
Coriander leaves- a small bunch, finely chopped
Ginger- 1/2 tbsp, grated
Active dry yeast- 3.5 gms
Water- 112ml (roughly 4oz), warm
Olive oil- 1/2 tbsp
IMG_5582
Slightly warm the water and add the yeast. Whisk to dissolve and leave aside for 6 to 7 minutes to reactivate.
In the meantime whisk together the flour, salt, half of the chillies and coriander leaves and ginger in a mixing bowl.
Once the yeast has frothed, add it to the flour mix and knead using a dough hook attachment for about 5 to 6 minutes or if using your hands, flour the work top and knead well for 10 minutes, till the dough is no longer sticky, but smooth and pliable.
Lightly grease a bowl, place the dough in it, cover with a wet cloth and set aside in a warm place to rise.
After about 2 hours, the dough would have doubled in size, so punch it down, knead for about 2 to 3 minutes and make it into a presentable round shape. Roll it out if you cant really stretch it, but don't thin it a lot.
Place on a baking tray lined with parchment paper and dimple it at intervals with your finger.
Top with the remaining coriander leaves and chillies and keep aside for an hour or so to proof again.
Once the dough has risen again, brush with olive oil generously, sprinkle some sea salt and place in an oven preheated at 190C.
Bake for 17 to 20 minutes or till golden brown.
Take it out, cool on a rack for about 5 minutes and then slice and serve.
IMG_5586
Notes: The ginger was a wee bit over powering for my liking, so id go easy on it or maybe even avoid it altogether next time.
The original recipe called for a mix of very strong and strong bread flour. Didn't have any, so used plain flour instead. I'm sure the outcome would have been much better if I'd used bread flour.
If using instant yeast, then add everything together to the mixing bowl and knead. You can also go directly to the second proofing stage if using instant yeast.
Replace the toppings with garlic, sun dried tomatoes, olives etc. if you want variety.

Monday, 24 May 2010

Pear & Walnut Loaf

I made some Poached Pears with orange and spices some 2 weeks back when we had guests over and there were about 5 pears i had completely forgotten about and while Ro was looking for something under a shelf, he came across the pears in a plastic cover. The green pears had become super ripe and i was shouted at saying i always buy so much of everything and then it gets spoilt and needs to be thrown out....which is not always true. C'mon cut me some slack..i buy them with great enthusiasm saying id make this and that, and i do too....but sometimes I forget or most of the time laziness gets the better of me and i ignore.
So these pears were transferred from the shelf to the refrigerator where it hatched for about 4 or 5 days and then again i got shouted at by Ro saying i don't have any intention of doing anything with it, might as well throw it out and save some space. I had just gotten back from the gym after a really "vigorous" work out and this happened just as i plopped on the sofa. I was so pissed off and decided to prove him wrong. Did some super fast research online and decided on a Pear Loaf by Smitten Kitchen. I halved her recipe because it was my first attempt at making a fruit based bread. I am glad i tried it out because it was super easy and one of the moistest, yummiest and exotic recipes i have ever tried. It is definitely gonna make its way back into my kitchen and then it would hopefully not be with pears waiting to be rescued:)
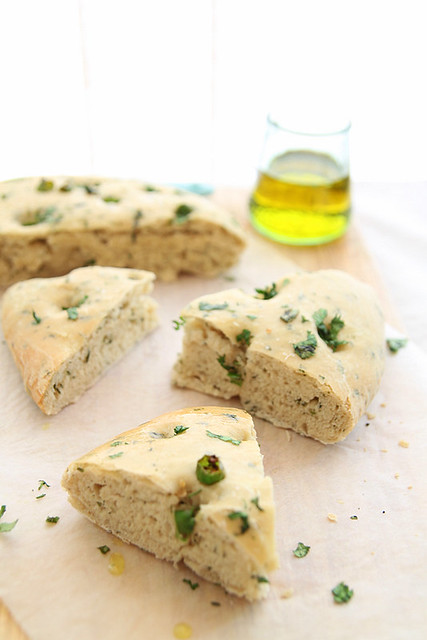
Ro ate quite a few slices with some left over cream cheese frosting dabbed on top..and oh i also made him say I'm so awesome and a whole lotta things like that :)

Plain flour- 1 1/2 cups
Baking soda- 1/2 tsp
Baking powder- 1/4 tsp
Salt- 1/2 tsp
Cinnamon powder- 1/2 tsp

Chopped walnuts- 1/2 cup
Oil- 1/2 cup
Eggs- 2
Sugar- 1 cup
Conference Pears or dessert pears- 4 or 5, cored, peeled and pureed. I got about 2 cups of puree.
Vanilla extract- 1 tsp

Combine the first five ingredients together in a bowl.
Transfer a bit of this mix into another bowl, add the walnuts and toss it around so they are all evenly coated.
Beat the eggs using a whisk in a mixing bowl and add the oil, sugar, pureed pear, vanilla extract and the coated walnuts and stir to combine well.
Add this to the flour mix and stir till combined well and no flour is seen.
Transfer the batter into a 9 inch greased and lined bread tin or a square pan and bake in a pre heated oven (175C) for about 50 to 60 minutes or till a skewer inserted in the centre comes out clean.
Take it out of the oven and about 5 minutes later, place it on a wire rack till it is completely cooled.
Cut it into slices and store in an air tight container.

Notes/ Changes I made: I pureed the pear instead of grating it and that's why the colour is a deeper brown I guess.
I reduced the quantity of cinnamon down to a half tsp since we are both not too fond of the strong taste and in spite of that it still had a nice tang of cinnamon, not too strong but you knew it was there.
I chose to use oil instead of butter and also added walnuts.

Sending this to the Green Gourmet event hosted by Preeti of Relishing Recipes and to the Blog Bites event hosted by Nupur of One Hot Stove, where this months theme is Adaptation.

I would also like to thank Nitha of Amateur Perceptions and S S of Treat your Tongue for passing on the lovely awards. I have waaaay too many pics i like and over 1000's of pics to choose from. These two were on the recent albums and so here you go:

This was at about 4pm in the quaint town of Salisbury near Stonehenge. The sky was just brilliant. Ro and myself are doing a photography series on skies and this is one of my personal favourites.

This is again on the way to Stonehenge where we stopped to take in all of the English countryside and the road was covered in these colourful leaves....autumn at its best. I had to take a self pic and then i started this whole 'shoe series' of my own :)