Showing posts with label Cakes and Cookies. Show all posts

Friday, 20 March 2015

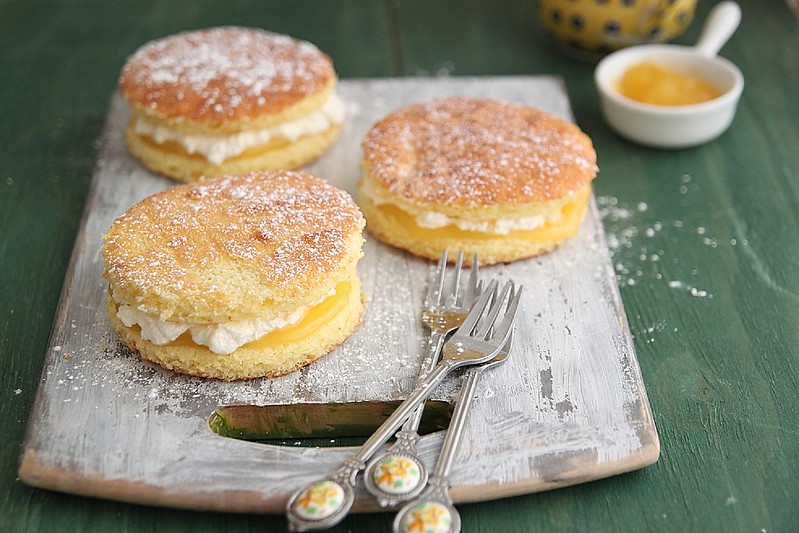
Lemon Griestorte

IMG_5668 
So... we are moving! No not moving to another country, although at this point that's how i feel. Ro has been wanting to move out of central London into the suburbs for, well, bigger house, more space, not wanting to stare into the neighbours rooms, countryside a stones throw away and so on. I on the other hand have been clinging on to our conveniently located apartment and every time Ro brought up moving I'd retaliate and it would end up in a fight. And then it happened. The owners decided to sell the apartment and in 4 days it got sold. So we had no choice but to take that decision to finally move out. On one hand i want a bigger house, more space to store my junk etc etc, but on the other i really don't care about a larger place..its just more difficult to maintain and I'm so not a suburb girl, im a hard core city girl..which makes me realise after 9 years how different Ro and I are. Why did we not talk about things like this when we were courting?

So yes, we are moving to the other end of London (well, if i can still call it London), to Amersham. It is a beautiful lil place, the kind i love- quaint cafes, nice shops, no high street brands etc etc. But its on the last possible stop on the Metropolitan line, is an easy 45 minute to an hour trek into c. London and worse of all, i have to start driving. I have been so used to hopping on a bus from right in front of my apartment and now with this move i have to drive and do all the formalities that come with it. I thought i'd left behind driving and traffic back in India!
IMG_5612 (1) 
Ro and I have been arguing ever since this move has come up because unlike all other men, Ro needs to have an opinion about every thing. Even what frikking colour the table cloth should be. We have been looking at houses to buy and have given us till end of the year to settle on something. I have been pinning things for 'the' home right from when Pinterest came into existence and Ro (being all technical and practical and bloody irritating to the core) has just taken all the fun out of setting up a new home. I know, its a long way off, so i have, for the moment decided to back off and cross the bridge when i get to it. Unfortunately, he doesn't seem to notice I'm upset and angry and has conveniently gone about figuring things out on his own!!!!

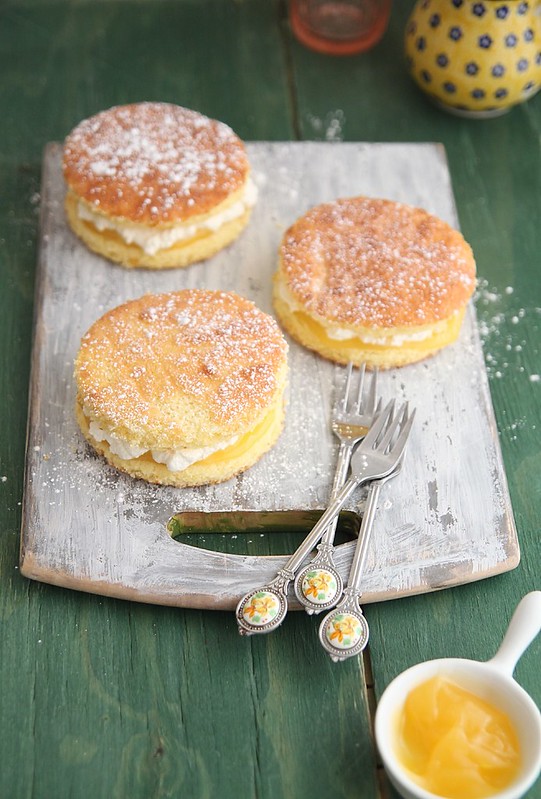
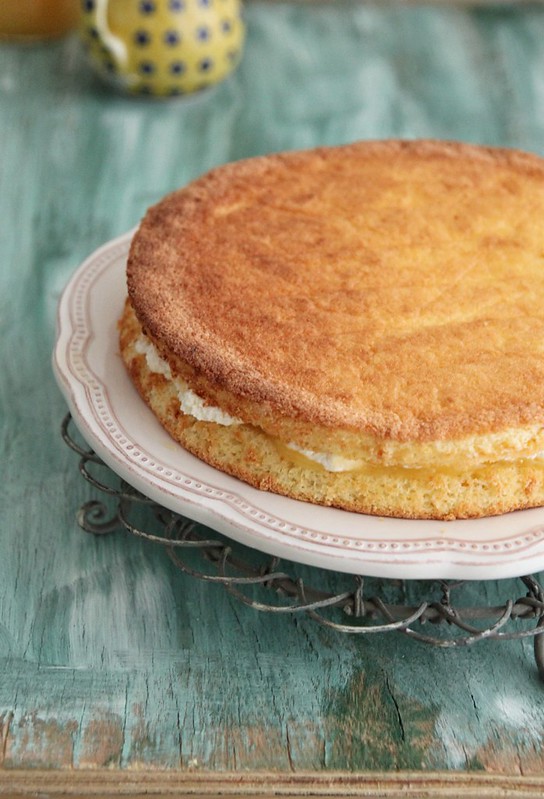
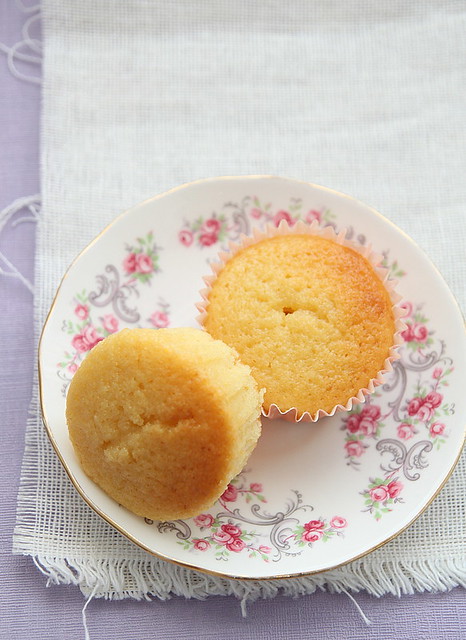
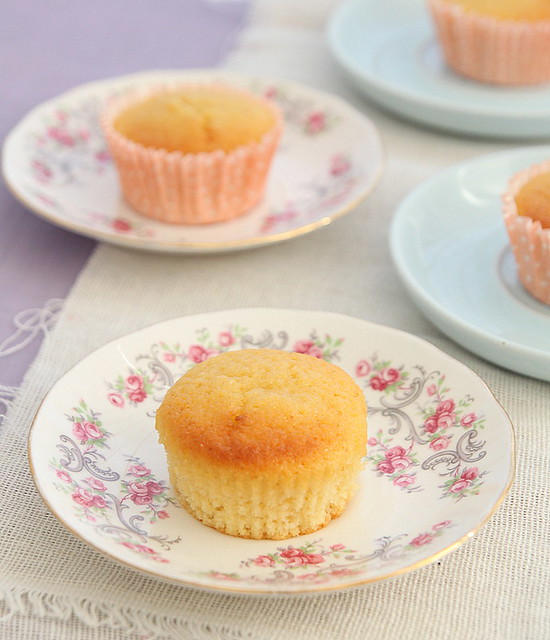
Anyhoo, we move end of the month and it takes 3 weeks to get a darn Internet connection, so this is going to be my last post for a while. I baked this cake to take to a friends and it was well received. It screams of summer (wishful thinking) and takes absolutely no time to bake. Its apparently a German cake and gries means semolina. I baked it twice in a weeks time and that says a lot about the cake. Its quite versatile in the sense you can change the flavours from lemon to orange to passion fruit to plain vanilla, fill with fruits of choice, and end up with a gorgeous cake. There is no rising agent or oil or butter, its purely the eggs that give it the light and airy texture. Don't deflate the eggs and more importantly, don't over cook. If you feel that the cake springs back to the touch, just take it out of the oven irrespective of the time.

Recipe adapted from here
IMG_5693 
Eggs- 3 large, separated
Caster sugar- 110 gms
Lemon juice- of half a large lemon
Vanilla extract- 1/4 tsp (optional)
Lemon zest- of one large lime
Fine semolina- 50 gms
Powdered almonds- 1 tbsp

Double cream- 150 ml
Icing sugar- 1 tbsp 
Vanilla extract- 1/4 tsp
Lemon curd- 3 tbsp
IMG_5712
Pre-heat oven to 180C, grease and line a 9 x 2 inch jelly roll pan (or 2 6 inch cake pans) with baking paper
Place the separated egg yolk into a large bowl and whisk well with the caster sugar, lemon juice and vanilla extract till they turn pale and thick. I just whisked using a wire whisk but feel free to use a hand blender or free standing mixer.
Fold in the lemon zest, semolina and powdered almonds gently and keep aside. A spatula makes this easier.
Whisk the egg whites in a clean bowl until soft peaks form. A hand blender or a free standing mixer with whisk attachment is advised or else you'd just end up with aching arms. That said, I've done it a few times before and its not as bad as it sounds.
Using a spatula fold the egg white into the yolk mix gently, making sure you don't deflate the batter.
Transfer the batter into the prepared cake pans and bake in the centre rack of the oven for about 17 minutes for the jelly roll pan and about 20 minutes for the 6 inch cake pans. Make sure you don't over cook or it becomes tough. 
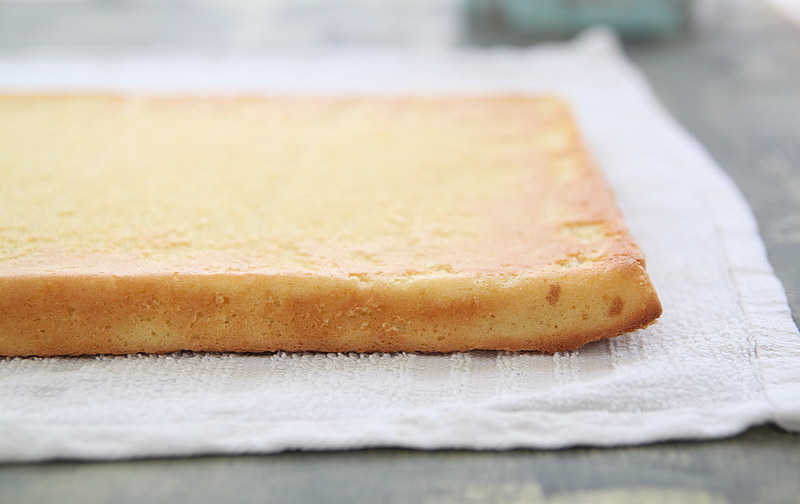
Its done when you gently press down the cake with your finger and it springs right back.
Take out of the oven and let it sit for about 10 minutes after which you can turn it out on to a cooling rack, peel off the baking paper and leave to cool completely.
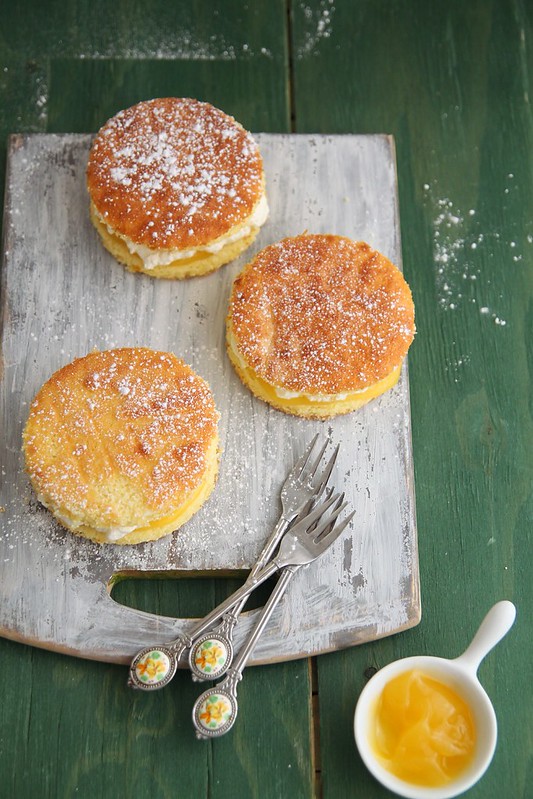
Use a round cutter to cut out mini cakes of your choice and assemble. 

For the filling, whip the double cream with icing sugar and vanilla extract till peaks form, again make sure you don't over do this or it will start to curdle.
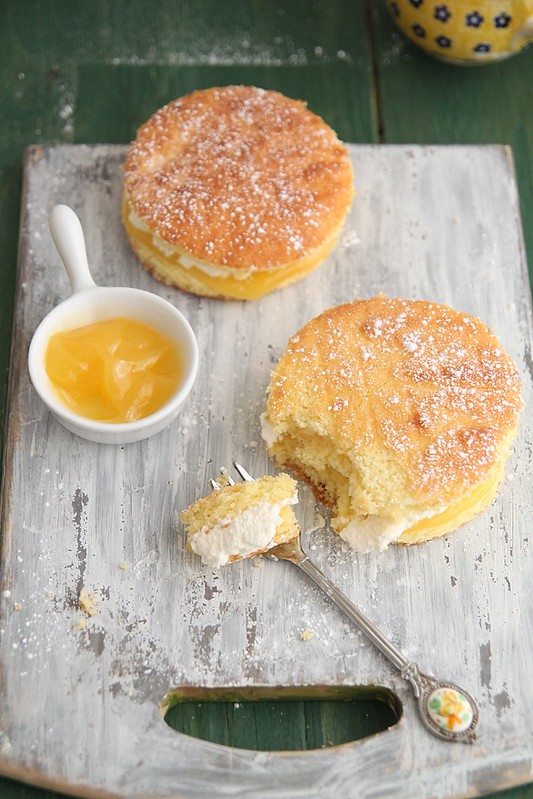
Place the cake on a plate and spread the lemon curd generously.
Top with the whipped cream, spread it around, it really doesn't need to be all even.
Top with the second cake, sift some icing sugar on top and serve.
IMG_5681
Notes: The cake can be refrigerated for up to 2 days. Bring it to room temperature before serving (if its not too warm) if possible.
The sponge can be made a day or two ahead , cooled, cling wrapped and kept in a container till ready to assemble.
Cooking time is crucial for a sponge cake. I  took mine out in about 18 minutes and it had cooked a bit too much already. However, when i did the layer cake the first time, it took me 20 minutes and it was perfect consistency.
From the above measurement you'd get only around 3 cakes, and the rest of the cake was eaten up on its own. I suggest you double the recipe if you wanted to serve it as a dessert for a larger group. I did this method for some variety, but i strongly suggest the layer cake if you wanted to serve at a party. It would serve 6 to 7 people.
Replace the lemon curd with any curd of choice- mango, passion fruit etc.

Wednesday, 20 August 2014

Basic vanilla sponge cake- the best so far

IMG_3789
Its been ages since I've posted a cake recipe here. Truth is, i haven't baked a cake in ages. In spite of tempting Ro every now and then saying, I'll bake a cake, I never get around to doing it. I did bake once or twice in between, but fetched not so nice results- that and the lack of motivation to take pictures left me hanging.

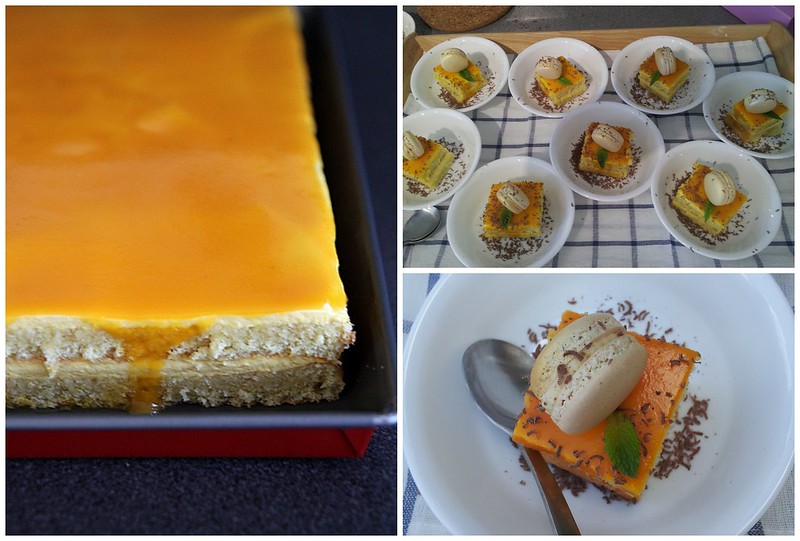
This cake was baked way back in June. My sister in law and family were throwing a BBQ party at theirs and I was in charge of dessert. I decided to make Ria's Tropical Mango Pudding Cake, and after harassing her with numerous questions, I was confident enough to go ahead with the recipe. It was probably one of the best desserts I've made so far. Got really good reviews from all the guests and even though it was a bit time consuming, I'm so totally going to make it again, and blog it. Managed to take some pictures with the phone, just so you get an idea of what it looked like. 

Coming to the genoise cake. I suck at it. Like I've never ever got a sponge that is so so soft and spongy, but always managed to over bake it, over fold it, under fold it, under bake it and whatever can go wrong with it, it always used to happen to my sponge cakes. I love eating sponge cakes, and every time i try a new recipe, its a disaster, hence absolute deprivation of sponge cakes.
PicMonkey Collage
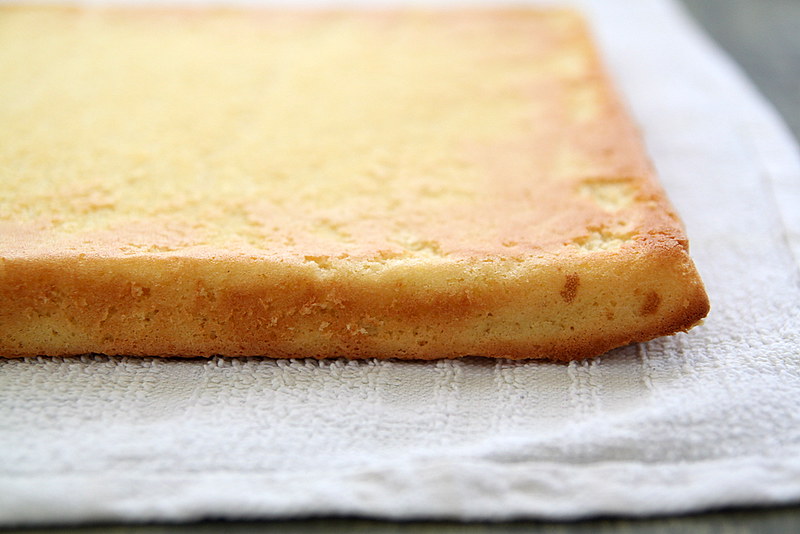
I was petrified about Ria's sponge cake recipe and since i was baking for a party, I couldn't afford to screw up. So i searched and searched and searched for a less intimidating one and the search led me to Jo Pastry website which i must say is a treasure trove of information on pastries. His recipe and description and comments on tackling the genoise put me at ease and i decided to go ahead with it. I was so so nervous while the cake was in the oven, but the moment i took it out, i knew id nailed it. It was soft, spongy, evenly/perfectly cooked and all what a sponge cake was supposed to be. There was a bit of left over batter that i used for 2 cupcakes and they were immediately consumed without any regret. 

I had to record this recipe for posterity and its certainly one I'm going to be fall back on for all my sponge cake bases. For those intimidated by the whole genoise cake making process, this is for you. Try it and I'm sure you wont need to look elsewhere.

PS. I baked 2 cakes with the above measurement. Didn't want to take a chance and double it.

Recipe adapted from here (Makes 1, 9x12" sheet cake) 
Milk- 1/4 cup
Butter- 3 tbsp
Vanilla extract- 1 tsp
Eggs- 3, at room temperature
Egg yolks- 3, at room temperature
Sugar- 6 oz (1 cup minus 2 tbsp)
Plain flour- 3/4th cup
IMG_3787
Preheat oven to 205C and grease a 9x12 inch jelly roll pan and line with baking paper.
Mix together the milk, butter and vanilla extract in a saucepan and bring to a simmer. 
Take off heat and keep aside.
Into the bowl of your free standing mixer, add the eggs, egg yolks and sugar and beat on high using your paddle attachment for about 8 minutes or till the mixture is really thick and when the paddle is lifted the batter falls down in ribbons and hold its shape for about 5 seconds before dissolving. This step is very very important, don't skip.
Slowly trickle the warm milk mix through the side of the bowl.
Sift in the flour in 3 additions, folding well after each. I did this using the slowest speed on my mixer, just until incorporated. But if you are not comfortable doing this in your mixer, do it by hand using a spatula.
Make sure you scrape the bottom of the bowl while folding, but not too harsh that you deflate the mix.
Pour into the prepared pan and using an offset spatula spread the batter around, making it into corners etc. Even the top so there is consistency in the baking
Bake in the middle shelf of your preheated oven for about 12 minutes till golden and springs back to your touch
Take it out of the oven and when still hot, loosen the sides using a blunt knife.
Turn it out into a wire rack carefully, cool completely and use as required.

Thursday, 9 May 2013

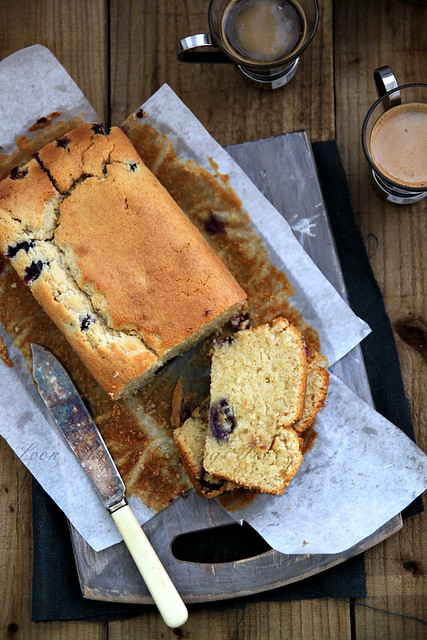
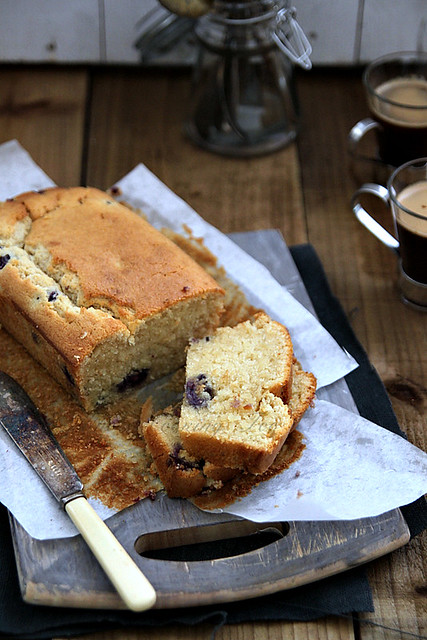
Blueberry cream cheese butter cake

IMG_8754-1
Its been ages since I updated the blog, and even longer since I posted a cake recipe. I have half written posts in my drafts and loads of reviews to be done, but somehow my days have become really busy..ever since I started working part time. I love my job and its opened up a completely new world of baking and cooking and such for me. More on that later.

I am not going to ramble today, yes, time constrained, so I'll go straight to the recipe. Like I said before, I hadn't baked a cake in a looong time and so on a day I felt the need to eat something seriously unhealthy, cake was what came to my mind. My usual Google searches led me to this fab recipe, tried by 3 of my fav bloggers and so I knew it was going to be a winner. 
IMG_8715
Loads of butter, loads of sugar and loads of cream cheese is what nice things are made of. So by no means think that this is a low calorie cake...which I think is bull shit any way. There is nothing called low calorie cake. If you want to eat cake then go all out and eat the real thing is my motto! Which is also probably why I need to go on a crazy diet :O

I usually don't like to bake with butter, more so because the whole creaming it with sugar etc etc is messy and time consuming, as opposed to oil which is soo cool, you just pour it into the batter (and also I can be a teeny tiny happy its a bit better than butter). But once in a while I don't mind going all out and, although I cringed at the amount of ingredients needed, that's exactly what I did with this cake! The outcome was delicious. I mean really, really delicious. Its so moist, like melt-in-your-mouth moist, and the blueberries break down the sweetness at intervals. It so versatile, you can definitely make this cake plain or add any other flavouring like orange or lemon and it would be great. TRUST ME!

Recipe adapted from here (makes an 8 inch loaf cake + an 8 inch square cake)
IMG_8738
Caster sugar- 1 cup
Butter- 250 gms, softened
Vanilla extract- 1 tsp
Eggs- 3, medium at room temperature
Cream cheese- 250 gms
Milk- 1/3rd cup
Self-raising flour- 2 1/4 cups
Blueberries- 150 gms, fresh or frozen (I used fresh)
IMG_8748
I didn't have self raising flour so I made my own by sifting together 3 1/2 tsp of baking powder with 2 1/4 cups of plain flour. The ideal measurement is 2 tsp baking powder to 1 cup plain flour.
Pre heat the oven to 160C and line an 8 inch loaf pan and 8 inch square brownie  pan with baking paper
Beat together the sugar butter and vanilla extract in a free standing mixer, using the paddle attachment, till soft and fluffy. You can use your hand beater as well.
Add the eggs, one at a time, beating well after each addition.
Change to the whisk attachment and add the cream cheese and milk. Whisk till the mix turns lump free and you get a smooth batter.
Add the flour and whisk just until mixed.
Using a spatula, fold in the blueberries.
Pour the batter into the lined pans till about 1/4th full and bake for about 50 minutes or till a skewer inserted into the centre comes out clean. My brownie pan took only 40 minutes to bake.
Once done, cool completely on a wire rack and before eating either dust with some icing sugar or have it plain.
IMG_8733
Notes: Original recipe called for 1 1/2 cups of sugar. Even for an ardent sugar lover I thought that was a bit too much, so i reduced it to 1 cup. It was pleasantly sweet.
I changed to whisk attachment half way through because i noticed that the cream cheese was still in lumps and not smoothening out with the paddle attachment. The whisk worked like a charm.
The cake keeps well in the refrigerator for about a week. I cling wrapped it properly and refrigerated it. It also freezes well.
Replace the blueberries with any berry of choice.

Wednesday, 10 April 2013

Almond crinkle cookies

IMG_8157
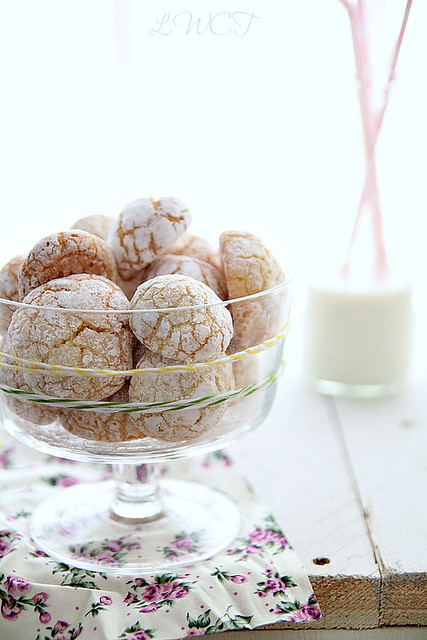
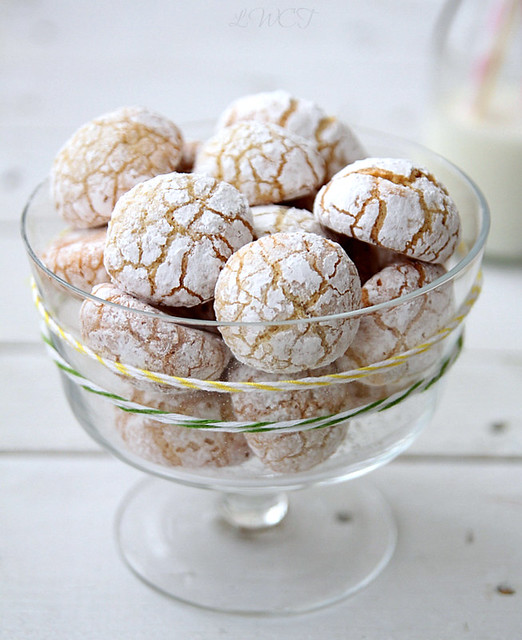
After a really long time I took my camera out to take some pics only to realise there was absolutely no motivation. But since it was a sunny day (for a change) and since I didn't have anything in my drafts to post, I decided to bake and make use of the lighting to take some pics.

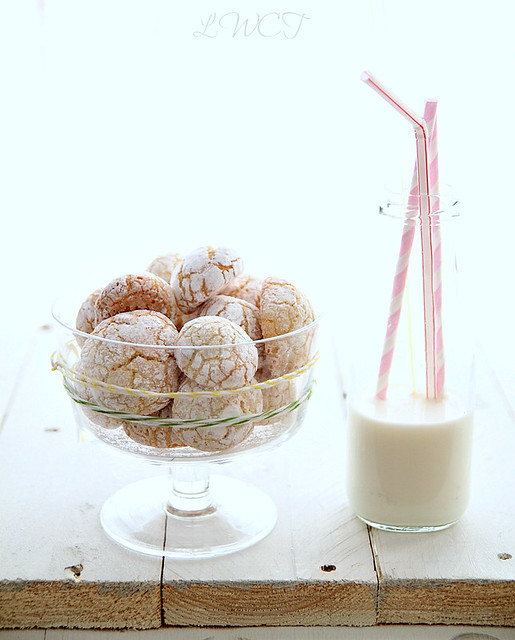
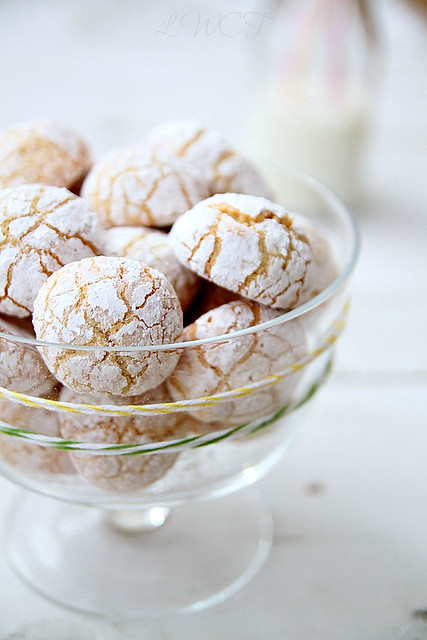
I had bookmarked a recipe for almond crinkle cookies, but then the measurements seemed a bit confusing and so I ended up doing my own thing. I was 90 percent sure it wouldn't work out, but was pleasantly surprised at the end result. I made chocolate crinkle cookies a long time back and it is one of my most popular posts on the blog. They are an absolute crowd pleaser and perfect gifts- especially Christmas, because those powdered sugar tops make them look like snow mountains.
IMG_8139 
Anyways, we are not here to talk about the chocolate crinkles are we? The star here are the almond crinkles which are not bad at all, in fact I like them better than the choc crinkles and hot out of the oven, they are delish. I also thought they were easier to put together compared to the choc ones- the entire process was done in half an hour. Its a one-bowl, no-fuss recipe which I'm sure I'll be making again.

The pictures however, are horrible. Once I was done with baking, my mind just went blank. I just didn't know how to style them and make them look great. Even the perfect lighting couldn't inspire me. So I just chucked them all in a bowl and did the easiest possible thing...used a white background and back lighting to take boring pics. That said, I took 125 pics of the same damn thing in different angles. Transferred them on to the computer only to realise most of them were out of focus and the harsh lighting was hurting my eyes. So I had to re-do the whole setting with diffused lighting and then cleaning up the mess just made it so exhausting, I stayed away from pictures and editing and writing for two days. Hence the delay in posting the recipe after teasing you all with the picture on fb. Apologies!

Makes 20 small cookies
IMG_8095
Egg- 1 medium
Granulated sugar- 63 grams
Lime juice- 1/2 tsp (optional)
Vanilla extract- 1/2 tsp (optional)
Ground almonds- 150 gms
Fine semolina- 40 gms
Baking powder- 1/2 tsp
Vegetable oil- 1 tbsp 
Powdered sugar- to roll the cookies
IMG_8142
Beat the egg and sugar together in a mixing bowl till pale yellow. I used my hand whisk to do this, but feel free to use a hand blender if you please.
Add the lime juice and vanilla extract to it and continue whisking till well mixed.
Throw in the ground almonds, semolina and baking powder one after the other and fold it all in using a spatula. The mix would be slightly coarse, but that's ok. Just make sure you mix it well.
Pour the vegetable oil and give a thorough mix till they all come together.
You can either chuck the bowl into the refrigerator for a couple of minutes for the dough to set which would make it easier to roll, but I didnt need to do this as the dough was of perfect consistency.
Even after you have refrigerated, if your mix still is a little too loose, just add more semolina, or if its too thick, loosen it up with a few drops of milk.
In the mean time, preheat your oven to 160C and get the baking tray ready with baking paper.
Put a couple of spoons of powdered sugar on a plate and start rolling the dough.
Wet you hands lightly and make small balls with the dough (about half tbsp per ball) and roll in icing sugar. The ball should be completely covered with icing sugar.
place them about an inch apart on the baking sheet. The cookies expand when baking and the icing sugar cracks giving it that crinkly top effect.
Bake in the oven for 20 minutes. Take out of the oven and cool for about 5 minutes after which you can (eat them non stop or) transfer on to a wire rack and cool completely before storing in air tight containers or zip lock bags.
IMG_8077
Notes: Feel free to double the recipe for a larger batch
I used gluten free baking powder.
The cookies are not really crunchy, but more cakey in consistency (in a nice sort of way, I promise). bake them a little longer if you want them crunchy

Wednesday, 13 February 2013

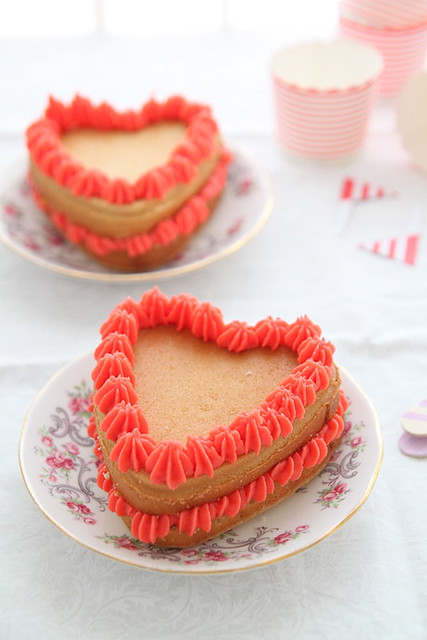
Sour cream vanilla cake with vanilla butter cream frosting and a Tala cake pan review

IMG_6958
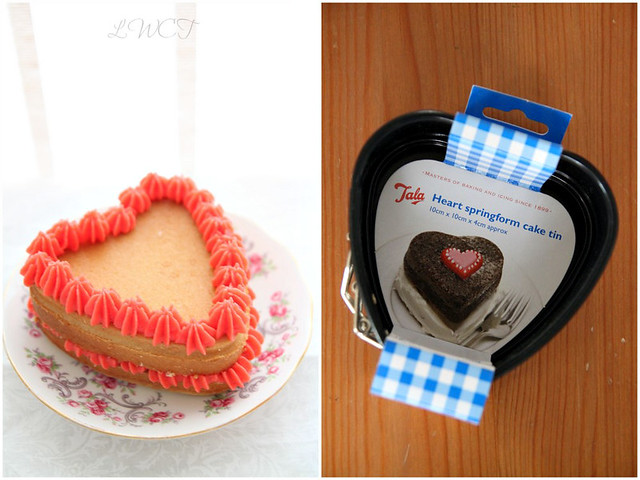
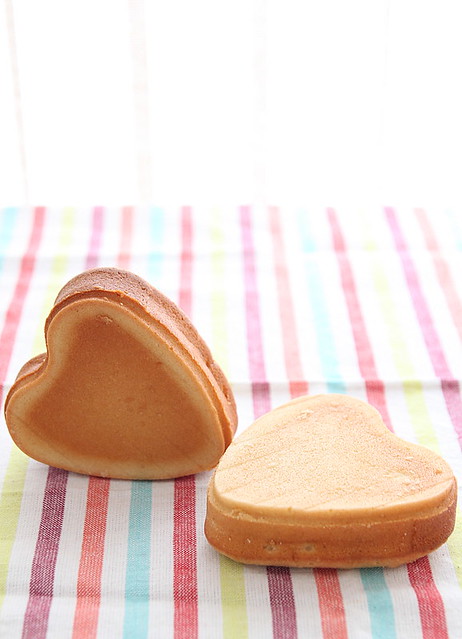
As cliche as it sounds, here's wishing all you guys a Happy Valentines Day in advance. I used to get all excited about the day during my school and college days when cards, flowers, gifts etc. were all part of the fun. Now, if the husband wishes me, its celebration time :) Other than the one time just after we got married, we have never actually celebrated V-day. This year isn't any different and so the most I could do was make these cute lil heart cakes and call it a day.

Talking of which, how adorable are these hearts? I think they are the perfect size, especially in households like mine where its just two of us and don't want to bake a huge cake to satisfy those sweet cravings. Tala is a very popular brand in UK and their retro-looking products are a fave of mine. This mini heart cake pan is from their bake ware range and is perfect for a V-day treat. The springform base makes it easy to release the cake and the non-stick interior does its job really well. The only issue I had was the batter seeping through the base when it went into the oven, but like all springform pans, its better to line the interior or place it on a baking tray to catch all the drips. Other than that, I am very happy with the cake tin.
112
I didn't want to actually bake a cake in the pan, I wanted to do something different, but lack of planning and a busy schedule meant a normal vanilla cake it was. I had some sour cream in the fridge and thought of putting it to good use. Hence the sour cream vanilla cake. The husband will be disappointed because a lot of vanilla-ness has been doing the rounds here. He will have to bear with this one too. I, on the other hand, love plain vanilla cakes and this one was great as well. 

About the frosting...I hate butter cream icing and that's the very reason why its not made its mark on my blog. Today however, I broke my vow, and went ahead and made it. Since a very small quantity was needed, I thought it should be fine. The taste, I still am not a fan, but the fact that you can pipe it out in whichever design, shape etc makes it a winner. I shall not be trying it out again, but maybe incorporate butter into my cream cheese frostings to make it hold firmer..yes that's a possibility.

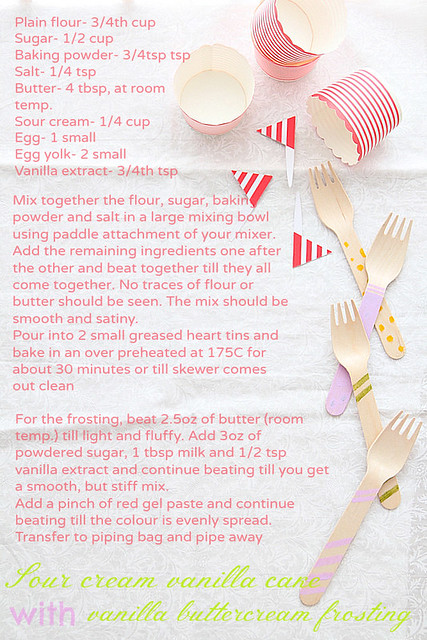
Recipe adapted from here (makes 2, 10cm hearts)
IMG_6908 
Plain flour- 3/4th cup
Sugar- 1/2 cup
Baking powder- 3/4th tsp
Salt- 1/4 tsp
Butter- 4 tbsp (57gms), unsalted and at room temperature
Sour cream- 1/4 cup
Egg- 1 small
Egg yolk- 2 small
Vanilla extract- 3/4th tsp

Mix together the flour, sugar, baking powder and salt in a the bowl of your mixer using the paddle attachments.
Into it add the remaining ingredients one after the other and continue beating on medium speed everything is mixed well. There shouldn't be any traces of butter or flour visible.
Increase speed and beat well till you get a smooth and satiny mix.
Transfer the batter into the pans (greased lightly) and bake in an over pre heated at 175C for about 30 minutes or till a skewer comes out clean.
Take the hearts out of the oven and after 10 minutes release them onto cooling racks. 
Once completely cool, wrap them in cling film and refrigerate till ready to frost.

Vanilla buttercream frosting (recipe adapted from here) makes enough to fill and frost the cake as in the pic
IMG_6941
Butter- 70gms, unsalted and at room temperature.
Powdered sugar- 85gms
Vanilla extract- 1/2 tsp
Milk- 1 tbsp
Red gel paste- a pinch

Beat the butter till light and fluffy.
Add the sugar, vanilla and milk and continue beating till they all come together. It should be smooth but stiff.
Add more milk (but by bit) to loosen the mix if needed or if too loose then add more sugar.
Add the red colour and mix till the colour is evenly spread throughout the  ix.
Fill the piping bags and pipe away.

Assembly
IMG_6961
Bring the cake to room temperature and slice into half. It was really easy to slice these darls.
If you want, moisten the cake with some sugar syrup, or even coffee.
Fill with the butter cream and top with the other half. Pipe on the sides, and also fill the top if needed.

With thanks to Tala for sending me the heart shaped cake tin to review.

Thursday, 29 November 2012

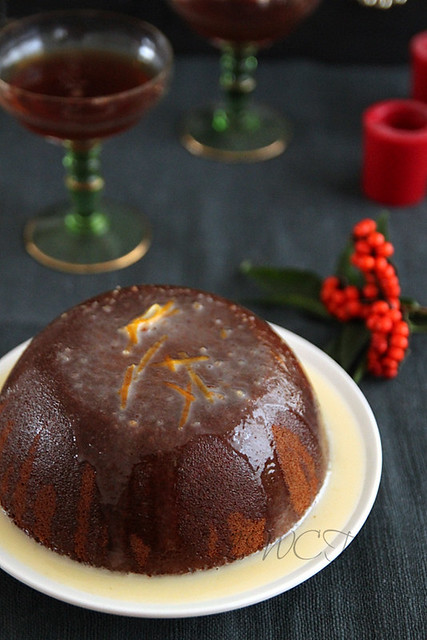
Jan Ellis Pudding with a brandy-orange sauce

IMG_5687
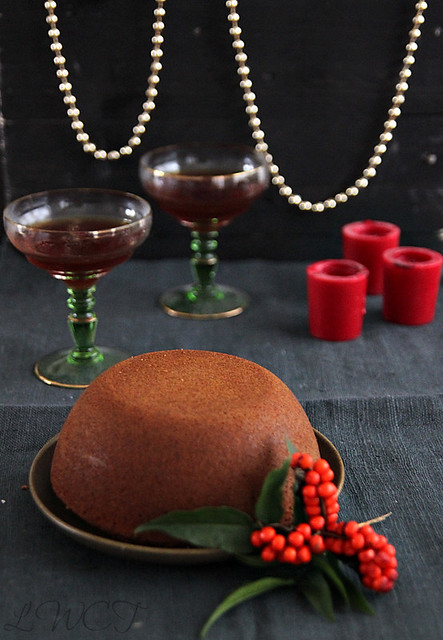
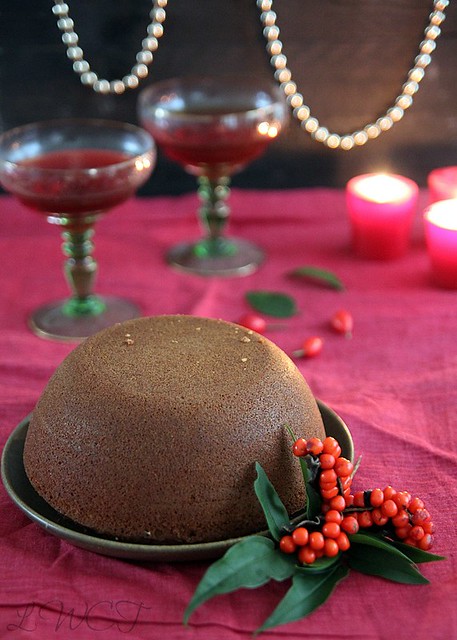
I finally steamed my Christmas pudding two days back. The recipe said 10 to 12 hours but I just couldn't bear to carry on for that long and so after about 8 hours I checked it with a skewer, nothing stuck to it and so I decided it was time. While it was steaming, there was no divine smell of the soaked fruits in brandy or anything and I was disappointed. But once the cake was put aside to cool, the smells that filled my house was sooo good. It was like Christmas in a bowl. Ro on the other hand could have been a bit more enthusiastic about it..but instead he asked:
'cant we just buy a pud from M & S like we always do?' 
No we cant because I STIRRED this pud with aching arms and now I want to flambé it for Christmas. OK then this months electricity bill is coming out of your salary. 
Hmm, OK, screw the stirred pud, maybe we can actually just buy it from M & S

But then we agreed to still go ahead with this, with the bill situation still unresolved. But when those smells wafted through the house, I had a slight feeling it was thoroughly worth it. Its now well wrapped up and put in a cool, dark corner for the flavours to develop and then on Christmas day it has to steam for another 2 more house, after which it will be ready to be flambéed.
IMG_5676
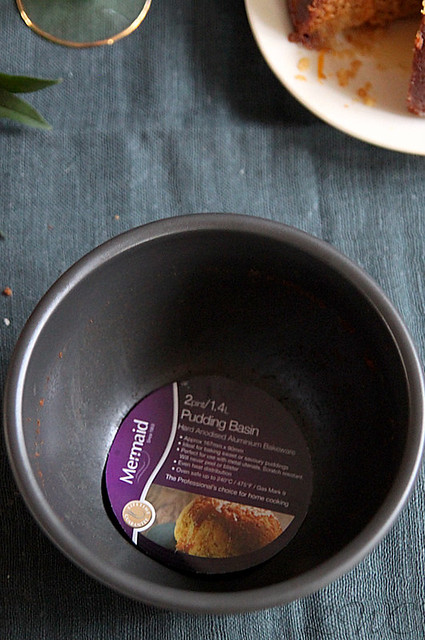
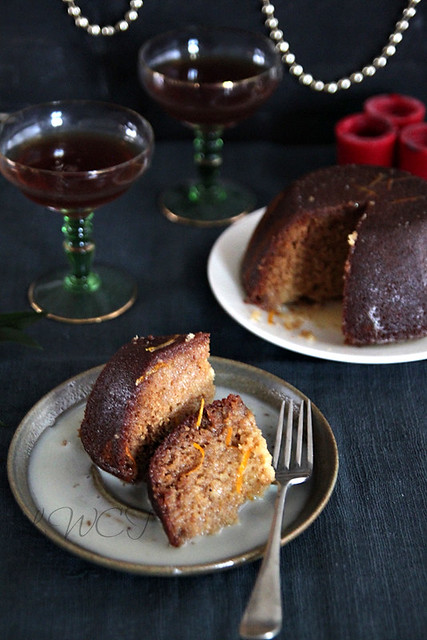
Since I couldn't eat the pudding I steamed, I went and baked another pudding yesterday. I am a novice when it comes to steamed puddings and after the 8hr experiment, I didn't want another steamed one. So I opted for the Jan Ellis Pudding which is probably the simplest but tastiest pud I have had in a while. I made it in a 2 litre Mermaid pudding basin which was absolutely perfect for the deed. Made of hard anodised aluminium, the basin is extremely solid and durable and there is even heat distribution which is great for the pudding to cook all the way through. I did butter the basin a bit with fear of not being able to turn it out on to a plate easily, but I doubt that was necessary, as it came out nice and smooth and with no fuss. The only thing I noticed was that, about 10 minutes into the baking time the top started to brown severely. I don't know if it was because of the heat from the basin or just the oven, but it was solved by covering with a silver foil sheet.  

The pudding is traditionally South African and you can read more about it on Cook Sister where I saw the recipe a loong time back and had book marked it. The pudding on its own is pretty average, but the sauce that accompanies it just takes it to a whole different level. Soaked in the sauce, this dessert will definitely be a hit. Go on, try out something different for Christmas and I assure you wont be disappointed.

Recipe adapted from here and here (serves 4 to 6)
IMG_5711 IMG_5700
Milk- 1/2 cup
Baking soda- 1 tsp
Plain flour- 1 1/2 cups
Granulated sugar- 1/2 cup
Salt- 1/4 tsp
Apricot jam- 2 tbsp
Eggs- 2
Butter- 2 tbsp, melted
Cinnamon powder- 1/8th tsp (optional)

For the sauce
Double cream- 3/4 cup
Boiling water- 1/2 cup
Granulated sugar- 1/2 cup
Orange zest- 1/2 tbsp
Vanilla extract- 1/2 tsp
Brandy/ Cognac- a few splashes 
IMG_5660 
Dissolve the baking soda in the milk and keep aside.
Mix together the flour, sugar and salt in a large mixing bowl and into that add the remaining ingredients. Mix well using a strong wooden spoon, breaking down the apricot jam as you go.
Pour in the milk mix and continue stirring till all the ingredients come together and you get a smooth batter.
Pour into a lightly greased 2 litre pudding basin and bake in an oven preheat at 180C for about 40 to 45 minutes.
Once the skewer comes out clean, take the basin out of the oven and leave to cool for about 5 minutes after which you can turn it on to a wire rack to cool completely.

While the pudding is in the oven, you can get working on your sauce.
Mix together the cream, boiling water, sugar and orange zest in a sauce pan and bring to a boil over medium heat.
Take it off the heat and add in the vanilla and brandy, give a good stir and leave aside till your pud is ready.

When ready to serve, douse the pudding with enough syrup and have it hot or cold.
What I did was, I transferred the pud into a deep plate, warmed it up a wee bit in the microwave and poured over the some of the sauce. 
Left it aside for a couple of minutes and it had soaked up pretty well.
If you don't want to do this, then once you slice the pud, you can pour over the sauce then and serve. Not everyone might enjoy a soaked up pud. I sure did though :)
IMG_5707 
Notes: Feel free to halve the recipe, in which case you may need to reduce cooking time and also use a smaller pudding basin.
That said, you are free to bake this in any pan you like, a 9 inch cake pan would work perfectly well. But again watch out for cooking time.
I think i over baked my pud  a bit more than necessary and so it wasn't it soft soft. But once the sauce went over, it was no problem at all.
Jeanne of Cook Sister has used orange zest in her batter as well. Feel free to use about 2 tsp of zest if you please.
The cinnamon powder can be replaced with a pinch of nutmeg powder, or completely avoided. Your choice.
The brandy is purely optional. Avoid if not a fan.
I thought the apricot jam would lend a nice taste to the final product, but was disappointed I couldn't even taste it. I wonder why???

With thanks to Mermaid Bakeware for sending me the Pudding Basin for this challenge. All views expressed are my own.

Tuesday, 6 November 2012

Blueberry breakfast muffins

IMG_3856
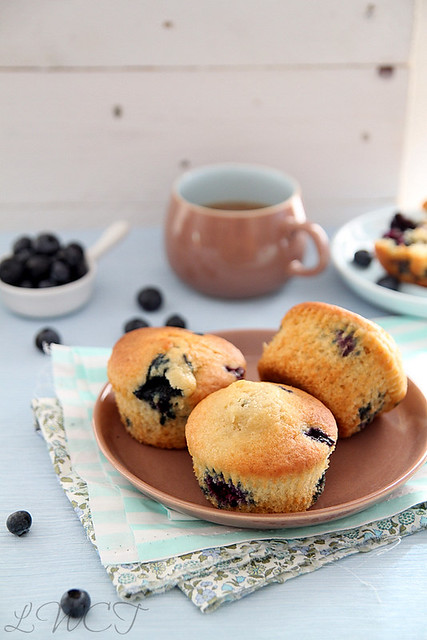
The husband started complaining about how boring his morning breakfast of toast, butter and cold meats were getting too monotonous and I thought I'll whip up some blueberry muffins for him. The muffins came out ok but our gluttonous minds set to work the moment they came out of the oven and so we were left with around 3 by the next morning. Since its just me and Ro doing all the eating, I usually make small quantities of all the cakes and bakes and cookies and such. This was no exception and yes, out of 8 large muffins, we ate around 5 within a time span of about 3 hours and then resisted the urge to have them as dessert after dinner.

So the muffins lasted for exactly one morning and it hasn't made its way through ever since. But please don't judge them by what I just said. It's got nothing to do with taste, just that blueberries went out of season right after this and the husband went back to having toast and cold meats because the muffins still left him hungry!!!!

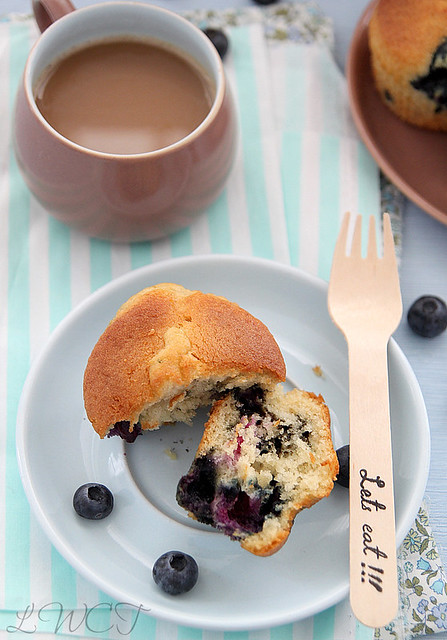
I have tried making muffins numerous times before and except for the time I tried them with whole wheat, the rest have all been disastrous. I keep wanting them to taste (and look) like the Starbucks ones, but they don't come anywhere close. These, however, were moist, easy to put together and good to look at, and I was sold. If I ever make blueberry muffins again, I shall be sticking to this recipe. Well unless Starbucks actually gives me the recipe for their mother of a muffin :)

Recipe adapted from here (makes 8 of them)
IMG_3881-1 
Egg- 1 large
Sugar- 1/2 cup
Vegetable oil- 1/4 cup
Vanilla extract- 1/4 tsp
Plain flour- 1 cup
Salt- 1/4 tsp
Baking soda- 1/4 tsp
Plain yogurt- 1/2 cup
Blueberries- 1/2 cup (heaped)
IMG_3863-1 
Mix together flour, salt and baking soda in a small bowl. Keep aside
In a large mixing bowl, using a wire whisk or a wooden spoon, beat the egg till light and fluffy.
Gradually add in the sugar, while continuously whisking, followed by oil.
Stir in the vanilla extract.
Tip in the dry ingredients alternating the yogurt and mix it all in, without any traces of flour being obvious.
Slowly fold in the blueberries and using a large ice-cream scoop add the batter to a muffin pan, lined with muffin cases/ cups.
Bake in an oven preheated at 200C for about 20 to 22 minutes or till a skewer comes out clean (if you by chance pierce a blueberry, it wont come out clean, so don't take that into consideration)
Transfer the tray on to a wire rack and after about 5 minutes, remove the muffin cups and leave to cool completely.
Stays fine at room temperature for 2 days.

Notes: Original recipe calls for sour cream, but I had only yogurt at hand and used it instead. came out super moist whatsoever.

Tuesday, 9 October 2012

One bowl passion fruit-yogurt cupcakes

IMG_4433
I made macarons a couple of days back. Well..tried to make would be more apt. I started with major enthusiasm but by the time I was done with sifting the damn ground almonds twice, all I could think of was a nice glass of wine and a movie. I somehow wanted to get it over and done with, which resulted in macs with feet, oh yes, but crinkled tops and weirdly shaped ones. While the macs were set aside to rest for an hour, Ro came by the kitchen and he even had the audacity to say 'looks like rats pissed in small pools.' Thank you very much, you shall sleep on the couch today, was my reply! Anyhoo, the macarons were a disaster and they are still on my table, waiting to go into the bin, but I'm waiting, for what? I don't know. I should just go chuck it right this minute. 

So after my macaron disaster I was a bit bummed because the sun was out shining and it was perfect for photography. I had major plans with the macs and was a lil disappointed. And then, I decided to browse (my own blog that is, how vain right?) and I came upon my all time favourite recipe..the French Yoghurt Cake. Of course, I shall just make these to prove that some things do come out nice, was my first thought. So I went and did one quick check to see if I had all the ingredients. Other than 1 egg, I had everything else. And then my second thought, why not improvise? Something I'm not very comfortable doing, especially with cakes, but what the hell...if it was a day of disasters, then I shall add fuel to fire. 
IMG_4515
So I got hold of some passion fruit lying around (begging to be used) and decided to make a cake. In between all this I convinced (begged) Ro to go out to the store and buy me eggs. The fact that he came back with a whole grocery bag full of rubbish is another story, but hey I got my eggs, I shall not complain. 

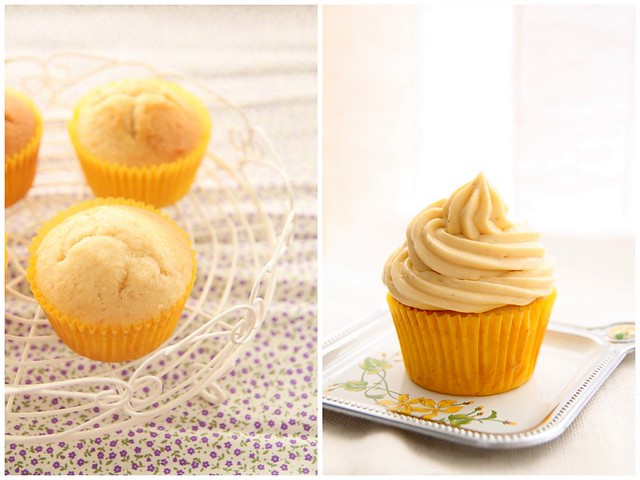
These lil darlings are so so so so so good, you will finish it all up in one go. They are also so easy to put together..no beating things separately, put it all into one bowl and there, you have the batter. You don't even need a beater. The recipe has never failed me and now that I know it can be improvised, its a winner. They are the softest, moistest cupcakes I have ever had and its because of this same reason that I use them as the base for all my upside down cakes. No fail recipe peeps, no fail. Even for amateur bakers, this is a brainless one, so do try it and tell me how it was. Here's the recipe.

Makes 7 to 8 medium size cupcakes or 1, 9inch cake
IMG_4483
Granulated sugar- 1/2 cup
Eggs- 2 small
Vanilla extract- 1/2 tsp
Plain yoghurt- 1/4 cup (I used Total Greek Yoghurt)
Passion fruit pulp/juice- 2 1/2 tbsp * (from 3 small passion fruit)
Plain flour- 1/2 cup
Baking powder- 1 tsp
Salt- a pinch
Flavourless oil- 1/4 cup
IMG_4409 
Into a mixing bowl whisk together (using a wire whisk, or even a wooden ladle) the first five ingredients till pale and well mixed.
Sift over the flour, baking powder and salt and continue to whisk, making sure no traces of flour is visible.
Add the oil and fold it all together to get a smooth, slightly loose batter.
Arrange the cupcake liners into the tray and fill each cup with the batter, till about 3/4th full.
Place the cupcake tin on a tray and bake in an oven pre-heated at 175C for about 20 to 22 minutes. I accidentally keep it for about 3 minutes longer and the tops began to brown. You know your oven best, so bake accordingly.
Do the skewer test and if it comes out clean, take the tin out of the oven and leave to cool for about 5 minutes after which you can carefully remove the cupcakes from the tin and leave to cool completely on a wire rack.
Serve along with tea and biscuits or store in an air tight container at room temperature for about 2 to 3 
days.
IMG_4441 
Notes: Feel free to experiment with any type of fruit juice. Replace passion fruit with orange juice, lemon juice (maybe a little less than the mentioned amount), or even honey to get a different flavour.
Also add some lemon/ orange zest to the batter.
If you cant find fresh passion fruit, you can use passion fruit juice instead. May be a bit on the sweeter side, so adjust sugar accordingly. 
*Scoop out the flesh from the fruit and run it through a sieve to get the juice.
The seeds and pulp taste yum, so don't throw it off. You can eat it all up (like I did) or mix with some confectioners sugar to do a glaze and pour over the cupcakes.

PS: On a different note... in case you are wondering what all this Sponsored Posts and videos are doing on my blog, its just that I have registered with a few marketing sites and they pay me to put up articles on certain products. Its just some pocket money generation for the blog to quench my prop shopping, ingredients sourcing fetish. So on and off you will find these posts and please don't be disheartened by the recurrence. If it is becoming a hindrance, I shall be the first one to take them off. Thanks for understanding.

Friday, 21 September 2012

Fraisier trifle and a master class with Eric Lanlard

IMG_3724
(Ridiculously long post with loads pics and info, so feel free to scoot right away)
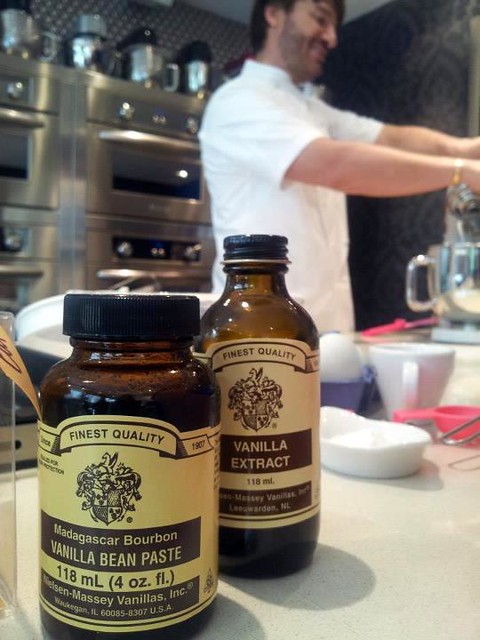
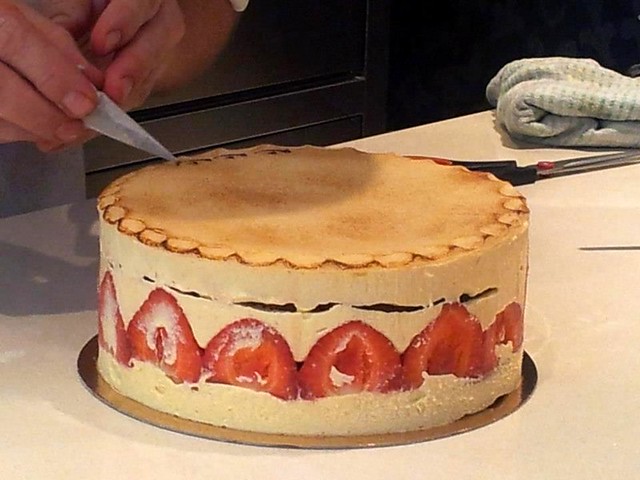
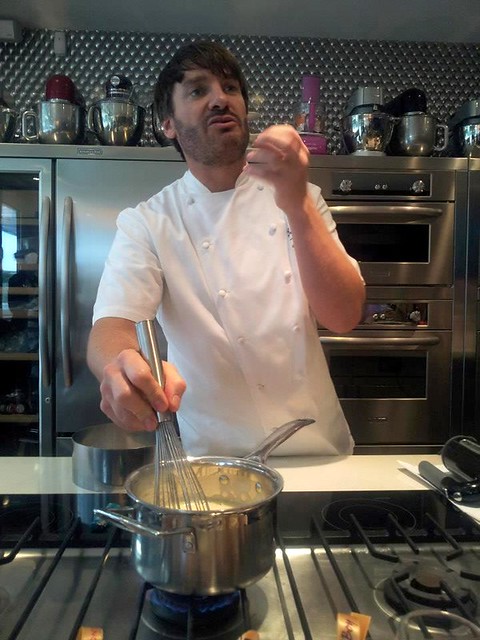
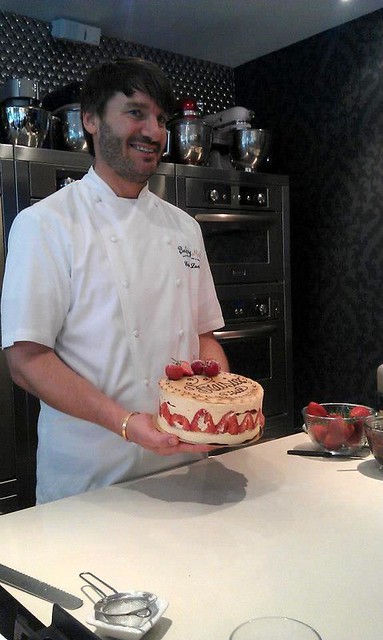
A few weeks back, some of us food bloggers were invited to a master class with Eric Lanlard featuring Nielsen-Massey Vanilla products at his signature store Cake Boy in London. It was an evening packed with loads of information on vanilla (which was truly an eye opener), yummy canapés and of course Eric Lanlard showcasing his fabulous baking skills by making a gorgeous French Fraisier, a cake so gorgeous to look at, you wont feel like cutting into it. And what a charming patissier he is...so full of energy, clearing our doubts, engaging us in conversation about baking and of course cute!!! :)

The class ended on a fine note with all of us getting goody bags along with the recipe of the fraisier cake and a challenge at hand. We were asked to create something to rival Eric's fraisier and blog about it. I have been breaking my head about it for so long to an extent it started haunting me in my sleep. I finally got around to doing the challenge a couple of days back and here is my take on it.
378253_396302733756158_1961166869_n 
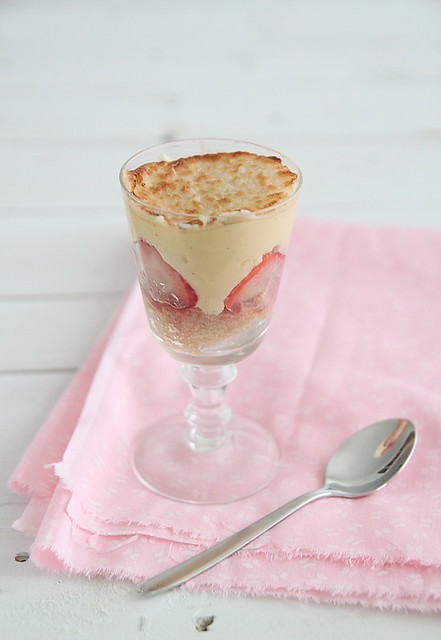
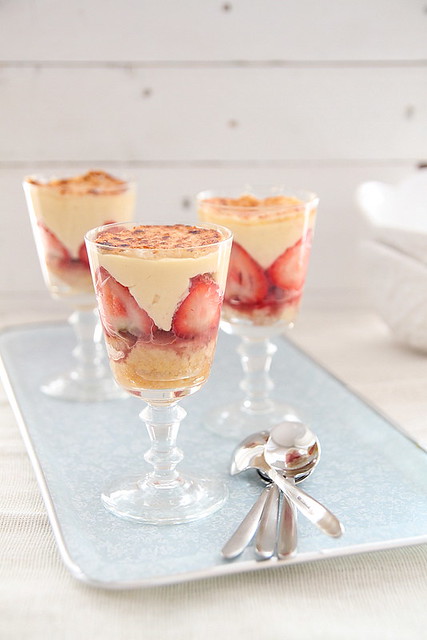
Since a fraisier cake was slightly out of my league, well mostly because it was just the two of us at home and scared that we would both finish it off in one sitting, I steered away from it. Instead I went ahead with a Fraisier trifle with all the goodness of the cake, but half the effort and oh so pretty they look in a glass and a great dessert idea since individual portions are less messier and storage in refrigerator is easier. 

I had baked a cake the day before for a friend and had some remaining which was on my kitchen counter nicely wrapped in cling film waiting to be assembled. I then set about making the filling of custard butter cream or fancily referred to as crème mousselini which I think is gods gift to bakers, especially to bakers who hate plain butter cream and cant pipe a frosting for nuts. I started off convinced I would screw it up somewhere and end up wasting a whole lot of ingredients, but when I saw it all come together, I knew I'd succeeded. And OMG I couldn't stop licking it from the mixing bowl and when I tried piping it on to a cupcake, it worked out just as fine and for the first time I had managed to pipe it without it it falling flat or it being too stiff it refuses to come out of the nozzle. I can very well say this is going to be my fav frosting as of now and my next experiment would be to try this with custard powder instead of making it from scratch. Yes laziness is my second name, in case you hadn't figured it out by now.
428942_396302973756134_2091831608_n 
Although Eric's recipe was the base of all this experimenting, I did tweak it a bit here and there to suit my availability of ingredients. Eric's cake was a basic sponge cake, (which I am definitely going to try some day) whereas I used a vanilla buttermilk cake which has provided me with great results. I feel its best on its own as a tea cake, but of course so versatile you can use it as a base for any other fancy stuff, like a Tiramisu cake for example. It is light and airy, and moist at the same time making it impossible to hate. My love for plain cakes and that too vanilla flavoured ones never end, so this is the latest addition to the list, with the French yoghurt cake still topping the list (more so because of how easy it is)

Anyhoo, the final outcome was great and we did enjoy scooping it out and eating mouthfuls. Next time however, I would omit the toasted marzipan, only because I'm not a big fan, not because its bizarre or anything. When I have something to celebrate, I would also try doing the entire cake like the one above so I can share the calorie intake with others and not suffer on my own. In the mean time, I am thoroughly enjoying the Nielsen-Massey Vanilla paste and extract that is making its way through to almost all my cooking expeditions (sweet of course) ;)

For Eric's original recipe, follow this link. I am giving my version here, with Eric's recipe as the base. The measurements given are for the fraisier cake on the whole and not the trifle. I have, however, explained how I went about getting the trifle in order.

Vanilla Buttermilk cake (recipe adapted from here, makes 2- 9 inch cakes or 12 large cupcakes)
14 
Cake flour- 2 cups (make your own by measuring 2 cups of plain flour and taking out 2tbsp of flour from that and replacing it with 2tbsp of cornflour. sift it together. This results in a more tender crumb)
Baking powder- 2 tsp
Baking soda- 1/8th tsp
Salt- 1/4 tsp
Unsalted butter- 10 tbsp, at room temperature (or 142 gms, 1 1/4 sticks)
Sugar- 1 cup
Eggs- 3 large
Egg yolk- 1 large
Vanilla extract- 1 1/2 tsp (of course I used Nielsen-Massey)
Buttermilk- 3/4th cup

Sift together the first 4 ingredients into a bowl and keep aside.
Into the bowl of a free standing mixer with paddle attachment, add the butter and beat on medium speed till soft and creamy.
Add the sugar and continue beating till the mix becomes light and fluffy, about 3 minutes.
In goes the eggs one at a time, beating well after each addition. Follow with the egg yolk and beat it in.
Beat in the vanilla. At this point the batter may look curdled, don't panic, just keep doing the good deed.
Now reduce the mixer speed to the lowest and add the dry ingredients and buttermilk alternatively, starting and ending with the flour mix.
Scrape down the sides, making sure no traces of flour is seen and everything is mixed well.
Pour into the lined cake pans and bake in an oven pre heated at 176C for about 30 minutes or till golden brown and the skewer test comes out positive.
If making cupcakes, fill liners till about 3/4th full and bake for about 20 to 22 minutes, checking in between.
Cool completely on wire racks and then cling wrap it and leave it at room temperature for up to 2 days.

Creme Mousselini (combination of Eric Lanlard's recipe and from here, makes 1 cup)
309288_396302783756153_80501488_n 
Creme patissiere/ pastry cream- 1 cup (recipe below)
Unsalted butter- 150 gms cut into cubes, at room temperature

Creme patissiere
Whole milk- 1 1/4 cups
Sugar- 1/4 cup
Egg yolks- 3 large or 4 small
Plain flour- 2 tbsp
Corn flour- 2 tbsp
Vanilla bean paste- 1 tsp (I used Nielsen Massey)
Kirsch liqueur- 1 tsp (optional)

Into a heat proof bowl throw in the sugar and egg yolks and whisk till you get a smooth mix.
Sift together the plain flour and corn flour and add to the egg, whisking till you get a lump free, smooth mix. Don't let this mixture sit for too long as the sugar will start eating into the eggs, thus making pieces of egg form. (thanks to cake boy for that piece of valuable information)
Meanwhile, pour the milk into a saucepan placed over medium heat, and bring to a gentle boil, just till the milk starts foaming up.
Take it off the flame and add it to the egg mix, bit by bit, whisking continuously till well incorporated. If you find pieces of curdled egg don't panic just run it through a sieve.
Return this mix back to the saucepan placed over medium heat and cook till boiling, whisking continuously to prevent the custard from sticking to the bottom and forming lumps. This takes quite a while, so patience is highly recommended.
When the custard boils and has become thick and silky smooth, continue whisking for about a minute longer and then take it off the flame.
Transfer to a mixing bowl and add half of the butter, whisking well to incorporate it into the custard.
Cover with a cling film and leave to cool in the refrigerator. Or if you have time on the kitchen counter.
Once completely cool, add the vanilla bean paste and liqueur (if using) and whisk it in.
Add the remaining butter bit by bit whisking well after each addition to get a smooth and gorgeous creme mousselini which makes a perfect frosting.

For assembling
Ripe strawberries- 1 kg, hulled
Marzipan- 200 gms, rolled out and cut into 9 inch circle.
Melted chocolate- for decoration
309259_274400052661791_234769332_n 
When ready to assemble, unwrap the cake and slice off the top if it has domed.
Then place the cake at the bottom of a cake ring and using a palette knife, spread a thin layer of creme mousselini over it.
Cut some of the strawberries in half and place it around the edge of the ring, cut half facing out.
Fill the centre with the remaining strawberries, making them stand upright. (the trifle version is as below).
Spread the remaining creme mousseline on top of the strawberries, trying to fill in the gaps as much as possible.
Place the second layer of cake on top and press down to settle them all in.
Place the cut out marzipan on top, flute the edges and toast using a blow torch.
Melt the chocolate and use it to write 'Fraisier' on top and decorate the cake a bit. Also use some strawberries dipped in chocolate to adorn the sides.
Chill for a few hours before you unmould to get a gorgeous looking cake.

Fraisier trifle     
141
Crumble some of the cake roughly and keep ready. You can also cut them into the exact size of the glass, but I didn't have the patience.
Get 3 see through glasses, tumblers, martini glass, pudding mould...anything you fancy and layer the bottom with the crumbled cake...generously and tuck it in lightly.
Melt about 3 tbsp of strawberry jam lightly and mix with 1 tsp water.
Spread a thin layer of jam on top of the cake.
Cut the strawberries as mentioned above and place them inside the glass, cut side outward.
Fill with one large strawberry upright.
Top generously with creme mousselini, filling in the gaps as much possible, but really its no big deal because the messier a trifle looks, the better.
Top with a toasted marzipan and chill till ready to serve.
IMG_3701
Notes: I don't own a blow torch so I rolled out the marzipan, cut them into rounds and placed under the grill for about 2 to 3 minutes to lightly toast it. But as you can see I ended up burning most of it. Take extreme care when you do this as one blink of the eye and you can end up with black marzipan.

Now I'm gonna say a lil prayer and hope I become the competition winner :)

Disclaimer: I was invited to attend Eric Lanlard's masterclass

Wednesday, 12 September 2012

Honey chocolate cake

IMG_3323-1
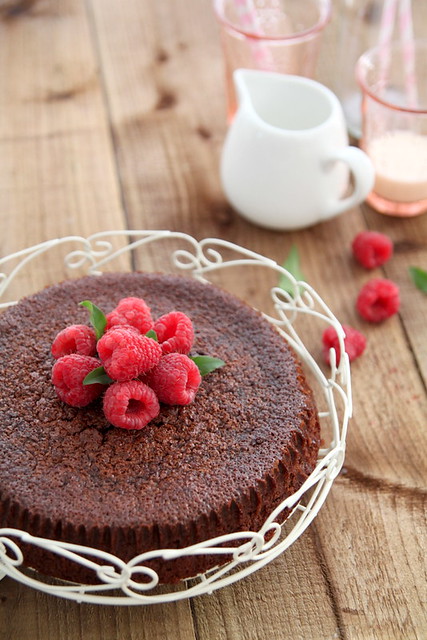
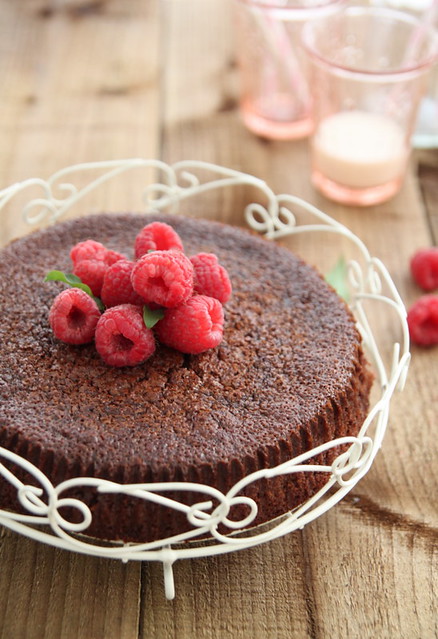
First of all, how incredibly pretty is my cake stand???? Searched high and low for something like this and finally found it for a 7 quid steal. I cant stop gushing about it. Ok, on to the recipe now...I have this ongoing relationship with honey and honey based recipes desserts/cakes...at least for now. One fine day I could wake up and just flip it around and would never want to see or even be called honey, for that matter!!! I was so obsessed with it at one point that I used to search for honey based desserts and cakes, make it, bin it, struggle with it, and on the very rare occasions savour it. Yes, most of it were disastrous, but that's how a food blogger rolls right? No don't answer that, I'd just be upset if that's not how you guys roll.

Anyhoo, two of my favourite recipes to this day when it comes to cakes (and honey) is the Jewish honey cake and this honey chocolate cake by none other than the Domestic Goddess Nigella. Say whatever you want, but I love Nigella and her super duper, throw-in-whatever-you-can recipes. I have tried loads of her recipes and its always a hit, except for the one time I tried a banana butterscotch muffin and that wasn't a fav, but that could be because I bought wrong butterscotch and the bananas weren't ripe enough. 
IMG_3348 
I have made this honey chocolate cake quite a few times and its never failed me. I cant believe it took me this long to post it on my blog, its simply because I've not had any left over to take pics. I realised that honey and chocolate is a match made in heaven and it pairs so beautifully. There is a faint taste of honey when you bite into a piece, and the chocolate just takes it to a whole different level. Sorry about being dramatic about this..but being pleasantly surprised by how chocolate paired with something can make it likable..is worth mentioning, especially to someone who doesn't think chocolate makes the world go round. Yeah, I'm talking about myself!

Its a dense, moist cake, rather than a light airy one which makes it perfect as a dessert/ party cake if you do all the glaze and stuff. But it work just as fine if you omit the fancy stuff and just bake the cake on its own for a tea time accompaniment. I've tried it both ways and personally, I would chuck the glaze and just serve the cake with a dollop of ice cream and a generous splash of Kahlua. ITS DIVINE! trust me. 

I am only giving you the recipe for the cake and not the sticky honey glaze. Also, feel free to halve the cake.

Recipe adapted from here
IMG_3337
Dark chocolate- 100 gms, broken into pieces (more than 70% cocoa preferred)
Dark Brown sugar- 275 gms
Unsalted butter- 225 gms, softened
Honey- 125ml (runny)
Eggs- 2, medium
vanilla extract- 1/2 tsp (optional)
Plain flour- 200 gms
Baking soda- 1 tsp
Cocoa powder- 1 tbsp
Boiling water- 250ml
Kahlua (coffee liqueur)- 3 to 4 tbsp (optional)
IMG_3344 
Place the chocolate chunks in a large bowl and melt over a pot of simmering water till smooth and keep aside to cool slightly. You can also do this in the microwave by heating it in bursts till all the chocolate melts. 
Sift/ mix together the flour, baking soda and cocoa powder and keep aside.
Into a large mixing bowl add the sugar and butter and beat together till light and fluffy, either using a hand beater or the paddle attachment of a free standing mixer. You can also just use a strong whisk to do this.
Add the eggs, one after the other beating well after each addition, followed by vanilla extract (if using).
Fold in the melted chocolate with a spatula, making sure its all well mixed.
Tip in the flour mix and mix well, making sure there are no lumps.
Finally add the boiling water and beat well to get a slightly runny batter, but smooth and without any traces of flour.
Pour into a 9inch baking pan which has been buttered and lined with baking paper, and bake in an oven pre heated at 180C for about 1.30 hours.
Check the cake after about 45 minutes and if you think its browning on top, cover loosely with foil paper and continue baking. Keep checking every 15 minutes or so to see if its done.
Once a skewer inserted into the centre of the cake comes out clean, you can take it out of the oven and cool on a rack.
While still a tad hot, poke small holes in the cake using a skewer and pour over the Kahlua so it soaks up well. Alternatively, you can just do as I'd mentioned above.
IMG_3334 
Notes: Original recipe calls for light muscavado sugar, but brown sugar works perfectly fine.
Use good quality honey.
Nigella's procedure is slightly different from the one I have mentioned, both methods work fine, I just prefer to do it this way because its more organised (that's right, I said organised).
She also says you can blitz together everything except the boiling water which you can pour down the funnel with the motor running. Haven't really tried doing that, but if she says it works, IT WORKS!
Replace Kahlua with coffee for an almost similar taste.
The cake stays for about 3 days at room temperature, provided you can manage to keep it that long.