Showing posts with label Easy Recipes. Show all posts

Monday, 27 April 2020

Easy peacy spinach rice

Serves 3 as main meal

Cooked basmati rice- around 4 cups
Ghee- 1 tbsp
Cumin seeds- 1/4 tsp
Onions- 1/4 cup
Ginger- 1/2 tbsp
Garlic 1/2 tbsp
Green chilli- 2, slit (increase or decrease as per choice)
Spinach- 3 cups, packed, roughly chopped
Meat masala- 1 tsp
Lemon juice- 1 tsp
Salt- to taste
Coriander leaves- 2 tbsp (optional)

Cook the basmati rice with whole spices. 
Drain and keep aside. Ideally the rice should be a day old and refrigerated. 

Heat ghee in a wok and once hot, add the cumin seeds.
Wait for it to sizzle, and then throw in the onions, ginger, garlic and green chillies.
Cook till the onions turn translucent, they dont need to brown.
Add the spinach and give a good mix.
Wait for the water from the spinach to evaporate, and once it becomes semi-dry, add the meat masala, lemon juice and salt to taste.
Tip in the rice and carefully mix with the spinach. Try not to break the rice, or else it will turn mushy.
Top with coriander leaves, give one final mix and serve warm.

Notes: If you are using rice just prepared, rinse with cold water and leave to drain completely. I sometimes chuck it into the fridge for a while.
Add some grated coconut at the very end to amp the taste a bit.
A spoon of ghee mixed at the very end after you add the coriander leaves works wonders.

Monday, 4 February 2019

Tawa fried prawns

Serves 2 as a side dish
IMG_20190203_124030 
Raw prawns- 250 gms
Kashmiri chilli powder- 1 tsp
Turmeric powder- 1/4 tsp
Ground pepper- 1/4 tsp
Ginger garlic paste- 1/2 tsp
Salt- to taste

Coconut oil- 1 tbsp
Curry leaves- a generous amount

Wash and clean the prawns if required and then pat dry. You need to make sure they are dry or else the masala is not going to stick to it.
Make a paste with all the masalas using a wee bit of water. The mix shouldnt be watery. Add a 1/4 tsp at a time until you get a thick paste.
Rub this mix onto the prawns as evenly as possible. You can marinate it for a bit but i didnt have time so used it immediately.
Heat coconut oil in a tawa (a flat pan, like a pancake pan or dosa pan. If its cast iron even better) on almost high heat and place the prawns in one layer.
Cook for about 2 minutes or so and then flip the prawns and cook for a further 2 to 3 minutes. If the prawns ooze out a lot of water, then increase heat to high and evaporate the water. If there is water then the prawns end up steaming in them rather than frying.
Once the water has evaporated throw in a handful of fresh curry leaves and mix it with the prawns. If at this point you feel the pan needs a bit more oil, add a dash.
Roast for a few more minutes till they start to brown, but dont cook for too long or the prawns will turn rubbery.
Squeeze some lime juice if you like, and serve hot.

Notes: Its only mildly spicy, so increase the chilli powder and pepper powder.
Coconut oil gives it a distinct (in a good way) taste, if not that then ghee, then butter and then vegetable oil :)
If you are doubling the recipe, then fry the prawn in batches and avoid over crowding the tawa. Prawns should be in one layer.

Monday, 12 November 2018

Broccoli-egg thoran

Serves 4 as part of side dish

00100dPORTRAIT_00100_BURST20181112120603038_COVER-02
Minced broccoli- 300gms 

Garlic- 2 pods
Red chilli flakes- 1 tsp

Coconut oil- 2 tbsp + 1/2 tsp
Mustard seeds- 1/2 tsp
Dried red chilli- 2
Curry leaves- 2 sprigs + 4 leaves
Turmeric powder- 1 tsp
Cumin powder- 1/2 tsp
Desiccated coconut- 1/3rd cup
Eggs- 3
Salt- to taste

Into a food processor add broccoli florets and mince to resemble coarse bread crumbs. If you dont have a processor you can either grate the florets using a grater or chop them up really fine using a knife.
Crush together the garlic and chilli flakes using a pestle and mortar to a coarse mix. You can adjust the chilli as per your tolerance level.

Heat coconut oil in a pan and splutter mustard seeds followed by dried red chilli and curry leaves. Saute for a few seconds and tip in the minced broccoli.
Stir well for a couple of minutes and then add the turmeric powder, cumin powder, crushed chilli-garlic and salt and cook covered on medium heat till the raw smell of the garlic disappears.
Open the lid and stir in the desiccated coconut, continue cooking for a few minutes till all the moisture has evaporated and the broccoli is cooked. (the broccoli mince doesnt take too long to cook)
Increase heat, separate the broccoli a bit to make a well in the centre of the pan and add in the eggs and scramble well, scraping the base to remove all the egg thats stuck to the bottom if any.
Mix well with the broccoli, add more salt if needed and finally sprinkle 3-4 curry leaves on top and drizzle the 1 tsp coconut oil on top, mix well and cover with lid. 
Remove from heat and keep aside for about 5 minutes and then serve with rice or chapathi.

Notes: We get ready made broccoli mince called broccoli rice. So i just used that.
You can do the same with cauliflower as well.
If its a small pan you are using then scramble the eggs one after the other instead of adding all three and then scrambling.

Saturday, 10 March 2018

Cauliflower poha (Low-carb, KETO recipe)

Recipe adapted from here
fafe4c7a-2eaa-4874-b33c-15646bf515df 
Cauliflower rice- 300 gms, one medium head of cauliflower 
Peanuts- skinless, around 3 tbsp

To cook
Ghee- 1 tbsp
Mustard seeds- 1/2 tsp
Dried red chilli- 1
Curry leaves- 1 large sprig
Onion- 1 medium size, finely diced
Ginger- 1 tsp (optional)
Green chilli- 1 small (adjust according to heat)
Turmeric powder- 1/2 tsp
Salt-- to taste
Coriander leaves- to garnish
562c4b1a-95a3-44d5-9f01-9312fe41f567
Slice the cauliflower into big chunks and use a food processor or grater to mince them to resemble fine rice or couscous.
In a large frying pan, dry roast the peanuts to a golden brown. Keep aside.

Into the same frying pan, melt the ghee and once hot throw in the mustard seeds.
Once they crackle, add the dried red chilli and curry leaves and saute for a few seconds.
Add the onions, ginger, green chilli and turmeric, season with some salt and cook for a few minutes, till the onions become soft.
Tip in the peanuts and give a good mix.
Finally, add the minced cauliflower, and mix it all together.
Season with salt, add a dash of water, and cover and cook on medium heat for about 5 to 6 minutes.
Keep checking in between and give a mix so that it doesn't stick to the pan.
Once the cauliflower is cooked, remove from heat and generously garnish with coriander leaves,
Mix before serving
I served this with Sri Lankan egg curry

Sunday, 12 November 2017

Prawn vada/ balls with chilli mayo dip

24514cca-34f2-48c0-99c5-578be16f74de 
Recipe adapted from here
Prawns- 200-225 gms
Grated coconut- 1 cup
green chillies- 4
Shallots- 1/4 cup, peeled and roughly chopped
Ginger- 1/2 tbsp, peeled and roughly chopped
Garlic- 6, peeled and roughly chopped
Curry leaves- 1 big sprig
Turmeric powder- 1/2 tsp
Kashmiri chilli powder- 1 tsp
Pepper powder- 1/2 tsp
Salt- to taste

Oil- to fry

Chilli mayo dip
Mayonnaise- 1/2 cup
Tomato ketchup- 2 tsp
Green chilli sauce- 1 tsp (you can also use the green Tabasco sauce but reduce the quantity as they are more potent
23eac0fc-510d-4135-8d8a-77ed1811c8a1
For the vada, grind together all the ingredients to a coarse paste.
Grease your palm with a little oil and make small balls out of the mixture.
(You can also flatten it to make them look like vada)
(You can freeze them at this point and then defrost at room temp and make them into balls for frying)
Heat oil in a deep pan and add the prawn balls into them in batches
Fry till brown on all sides, about 2 to 3 minutes on each side.
Serve with a dip as an appetiser or as a side to rice.

Mix together all the ingredients for the sauce in a small bowl. Adjust the heat by increasing or reducing the amount of green chilli sauce. Refrigerate till ready to use.

Thursday, 24 August 2017

Simple potato fry

IMG_20170823_j163215 
My mum makes this potato fry back home and its so so tasty, i can eat just that and rice and be content. Its a very simple recipe with not a lot of ingredients but you will need patience to make it, as it needs a wee bit of slow roasting. 

Serves 3-4 as part of side dish
Potato- 2 large, peeled and sliced into small cubes
Coconut oil- 2 tbsp
Mustard seeds- 1/2 tsp
Dried red chillies- 3
Curry leaves- 2 sprigs
Kashmiri chilli powder- 1 1/2 tsp
Turmeric powder- 1/2 tsp
Water- 1/4 cup
Salt- to taste

Slice the potatoes into small cubes. The trick here is to try and get them all as uniformly as possible. My mum cubes them much smaller which is even better.
Heat coconut oil in a frying pan and splutter mustard seeds followed by dried red chillis (break them in half) and curry leaves. 
Keeping heat on medium low, stir for a few seconds and then add the potato.
Saute well with the infused oil, preventing the potato from sticking to the pan.
Add the chilli powder, turmeric powder and salt and mix well with the potatoes, making sure they are all coated well with the masala.
Pour in water, give a final stir and close with a lid. 
Cook on medium/low heat, stirring in between carefully without breaking the potatoes.
Once they are partially cooked, open the lid and continue cooking till the water evaporates and the masalas are dry and coats the potato. 
On medium low heat again slow roast it, till the sides of the potatoes slightly crisp up. It takes a while, but don't skip this step as that's what makes it taste so much better. Scrape the base of the pan to get all the masalas off it.
Serve with rice, moru kachiyathu and pappadam.

Notes: Be extremely careful while saunteeing the potatoes as they will easily break and become a mushy mess.
You can add a tsp of coconut oil and curry leaves towards the end for some extra taste, but i avoided it.
Coconut oil imparts that gorgeous taste, so do try with it or a mix of coconut and vegetable oil at least.

Tuesday, 6 June 2017

South Indian garlic and coconut rice

298fcbad-aab5-4959-96d7-2506e60ebac1
Serves 4 as part of main meal (recipe adapted from here)
Oil- 1tsp
Curry leaves- 6 to 8 leaves
Garlic- 15 medium size pods, peeled and roughly chopped
Dried red chilli- 1 large (add more if you want it spicy)
Fennel seeds- 1/4 tsp
Grated coconut- 1 cup
Kashmiri chilli powder- 1 tsp

Ghee- 1/2 tbsp
Oil- 1 tsp
Mustard seeds- 1 tsp
Curry leaves- 1 sprig
Urad dal- 1 tsp
Dried red chilli- 2

Cooked rice- 6 cups (could be basmati, or any leftover rice)
IMG_3715
Heat the oil in a wok and keeping heat to medium low, add the curry leaves, garlic, dried red chilli, fennel seeds, grated coconut and chilli powder.
Roast till the coconut changes in colour a bit and all the spices are aromatic, for about 5 minutes or so. Keep stirring continuously or they will burn. 
Once cool, grind to a coarse mix.

Heat the ghee in the same wok and splutter mustard seeds.
Add curry leaves, urad dal and the dried red chilli to temper.
Add the ground mix and saute for a couple of minutes, just to warm it up.
Add cooked rice into the wok and mix it into the tempered ingredients and ground mix slowly, without breaking the rice.
Keep on heat just enough to warm the rice.
Serve with cold raita and pickle and papad.

Notes: Its a dish that is very strong on the garlic flavour. Reduce it if you want to mellow it down a bit.
Cold cooked rice, or rice that has stayed a couple of days in the fridge is best in this recipe.
You can ease the process by adding the ground mix with the rice in a bowl and then pouring the tempered ingredients on top of the rice and giving a good mix.

Friday, 7 April 2017

Harissa and garlic smashed potatoes

IMG_3666 
Serves 3 as part of side
Charlotte potatoes- 10
Olive oil- 4 tbsp
Harissa paste- 2 tsp
Garlic- 6 pods, peeled and finely chopped
Salt- to taste
Parmesan or Grana Padano cheese- 1/4 cup, finely grated
Chopped parsley- to garnish

Wash and scrub the potatoes and cook them in a pan of boiling water for about 20 minutes or till they are just about fork tender.  
Drain and keep aside.

While the potatoes are boiling, take a small bowl and pour in the olive oil.
Into it add the harissa paste, garlic pods and salt to taste.
Give a thorough mix and keep aside till ready to use.
dc4455f8-86ed-497b-b30e-8da467bd95cf
Preheat oven grill/broiler to 200C and line a baking tray with kitchen foil.
Generously brush the foil with some of the olive oil (without any garlic bits). You can also use an oil spray if that's more convenient.

Place the potatoes on the tray, a few inches apart and using a potato masher, slightly smash them, without going all the way through, and by retaining the shape. If you mash it too much, the potatoes would break.
Douse or brush the smashed potatoes with the harissa paste and garlic olive oil, making sure there are a few garlic pieces on top of each of the potatoes. Be generous here and use up all the oil, as it adds to the flavour and also helps crisp up the potatoes a bit.

Place under the grill for about 10 to 12 minutes.
Take it out, top the grilled potatoes with the cheese and place it back under the grill for another 3 minutes or so, just until the cheese is melted.
Just before serving, sprinkle the chopped parsley, and serve warm.

Notes: We served this as a side to Roast pork and it was great.
You can use melted butter instead of olive oil for an enhanced taste.

Monday, 20 March 2017

Kerala fish fry

ce7eeb7e-622e-4311-b96d-23395a97832a 
Serves 2 as part of side dish 
Fish fillets- 350 gms, sliced (around 4 big pieces). I used Basa fillets. King fish or any firm fish would be ideal.
Chilli powder- 3/4th tbsp
Turmeric powder- 1/2 tsp
Fennel powder- a generous pinch
Ginger garlic paste- 1/2 tbsp
Lime juice- 1 tbsp
Salt- to taste
Oil- enough to shallow fry
Curry leaves- a sprig (optional)
Lemon wedges and sliced onions to serve

Make a paste with all the ingredients except oil.
Add a wee bit of water if required, but make sure its not too loose.
Apply the marinade generously on all the fish slices and keep aside for about 15-20 minutes.

Heat oil in a frying pan and slide in the fish slices, in batches if needed.
Keep the heat on medium and shallow fry, flipping it over after a while.
Once the fish has browned on both sides and cooked well, remove and drain on paper towels.
Don't over cook the fish or it will become hard. 
Throw in some curry leaves while frying for some extra flavour.
Serve with lemon wedges and sliced onions.

Tuesday, 14 March 2017

Brioche French Toast

db9479a8-13fa-4709-8e4d-4e424f7cd43c
Serves 3 as part of breakfast
Whole milk- 1 cup
Double cream- 1/4 cup
Eggs- 3
Vanilla extract- 1/2 tsp
Dark brown sugar- 1/4 cup
Salt- a pinch
Brioche bread- 6, one inch thick slices
Butter- 1 1/2 tbsp

Whisk together the milk, double cream, eggs, vanilla brown sugar and salt in a bowl until well combined.
Arrange the brioche slices in a high rimmed baking tray, without overlapping each other
Pour the milk-egg mix over the bread slices, making sure all the pieces are soaked.
Cover with a cling film and leave in the fridge for about an hour.
Remove after 2 hours and flip the bread slices over, carefully.
Cover with cling film and place back on the fridge for another hour.
73829406-c65e-41cc-b224-ee5b5e7ec89a 
When ready to cook, place a frying pan over medium heat and melt about 1/2 tbsp butter.
Fry the bread slices till they turn golden brown on both sides. 
Do them in batches of 2, as its easier to manage. Make sure you dont burn them. 
After each batch, add more butter, 1/2 tbsp at a time and continue frying.
If you feel the butter is getting burnt, use a kitchen towel to wipe off the burnt butter before proceeding with the next batch.
Dust some icing sugar on top and serve with honey, maple syrup or golden syrup and fruit on the side.
If you would like to try a butterscotch brioche bread pudding, you can find the recipe here

Notes: Add 1/2 tsp cinnamon or a pinch of nutmeg to the batter for another version.
Soaking the bread till all of the liquid is used up is ideal, but if you are short of time, you can leave it for just half an hour or so just till the bread slices are pretty well soaked.
I fried the bread in my Le Creuset cast iron pan and it worked wonders because of the heat retention.

Monday, 27 February 2017

Stuffed Welsh Rarebit

878f7098-1681-4e9b-a2fe-288c9d97a8f6 
Serves 4
For the cheese sauce
Grated mature Cheddar cheese- 1 heaped cup + enough to top the slices of bread
Goats cheese- 3 heaped tbsp
Double cream- 1/2 cup
Milk- a generous splash
Paprika- 1/2 tsp (optional)
Mustard- a generous pinch
Worcestershire sauce- 1/2 tsp
Pepper- to taste

4 slices of chunky bread
Leftover roasted chicken- 3/4th cup, shredded (or any chicken, I've used breaded ones from the supermarket)
Thyme leaves- a sprig, to garnish

Mix together all the ingredients for the cheese sauce in a saucepan.
Keep the heat on medium and keep cooking till all of the cheese is melted and the mixture becomes thick. 
Keep stirring at intervals to make sure the sauce doesn't stick to base, and keep scraping the sides while you go.
IMG_2676
Simultaneously, toast the slices of bread either in a toaster or under the oven grill. Make sure you don't burn them.
Place the toasted slices in an oven proof tray or a cast iron skillet and top them with shredded chicken.
Pour the cheese sauce on top of the chicken and bread slices, to cover them quite generously. Its ok if the sauce drips along the sides.
Grate some more cheese on top, sprinkle some thyme leaves on top and place under the oven grill for about 5 minutes, just to melt the cheese and warm the chicken a bit.
Dig into this devilishly decadent dish  straight out of the oven and with a salad side if needed.

Notes: You can use any cheese of choice. I once tried it with spicy Mexican cheese and it was bloody brilliant. 
The goats cheese is also purely optional, but that little bit does make a difference in taste.
Stuff it with any meat of choice, pulled pork would be a great alternative as will be prawns.

Sunday, 12 February 2017

Kerala Tuna thoran

Tuna thoran (serves 4 as part of a main meal)
IMG_20170212_153914

A staple in most of the Kerala households, a thoran is nothing but a vegtable of choice cooked with basic ingredients like turmeric and chilli and finished off wwith freshly grated coconut that takes this dish to its delicious level. Mostlly had as a side to rice.
PS: Made in a Le Creuset shallow casserole.

Coconut oil- 2 tbsp
Mustard seeds- 1/2 tsp
Dried red chillies- 2
Curry leaves- a sprig
Shallots- 1/2 cup
Ginger- 1 tsp, grated
Garlic- 1 tsp, grated
Green chilli- 1, slit
Red chilli powder- 1/2 tsp
Turmeric powder- 1/4 tsp
Meat masala- 1 tsp
Ground pepper- 1/2 tsp
Garam masala- 1/4 tsp
Salt- to taste
Canned tuna- around 250 gms (2 cans), drained
Grated coconut- 1/4 cup

Heat oil in you frying pan and add the mustard seeds.
Once they splutter add the red chillies and curry leaves, stir for a second and then throw in the shallots.
As soon as the shallots become slightly brown, add the green chilli, grated ginger and garlic and continue to cook till it no longer tastes raw. 
Add all the masala powders and salt to taste and stir it all together and cook till no longer raw.
Stir in the tuna and cook on medium heat for about 5 to 6 minutes.
If it becomes too dry, mix in a spoon or two of water.
Finally add the grated coconut and cook for a further 3 to 4 minutes, just to get the flavors in.
Turn off the heat, close with a lid and keep aside for 5 minutes.
Serve as a side to rice, roti or even as a sandwich filling (its great with mayo).

Tuesday, 9 August 2016

Cheesy Mascarpone and Mozzarella meatball bake

IMG_0729 
I'm clearly in Italy mode still and have been whipping up some Tuscan dishes. The only dish we were quite glad to give a miss for a while were pizzas, but otherwise still enjoying a good pasta and bruschetta. This meatball bake ended up being so darn good, I finished almost half of it on my own. The sauce is really thick and dunking a good slice of bread into it and letting it soak for a while before savouring it, gosh, the thought is making me hungry again.

Serves 4 as a main dish
Ground beef- 500 gms
Onion-  1 small, finely chopped
Italian seasoning- 1 tbsp
Oregano- 1 tsp
Garlic powder- 1 1/2 tsp
Worcestershire sauce- 1 tsp
Pepper- to taste
Salt- to taste
Oil- 3 tbsp, or enough, to fry the meatballs

Onion- 1 large
Baby spinach- 3 cups
Chilli flakes- 1 tsp
Tomato based Pasta sauce- 1 cup
Mascarpone cheese- 100 + 100 to scatter
Garlic- 3 pods, grated
Salt- to taste
Mozzarella cheese- 100 gms, grated
IMG_0698
Mix together the ground beef, onion, Italian seasoning, oregano, garlic powder, Worcestershire sauce, salt and pepper together in a mixing bowl. Either using your hands or a wooden spoon, but over work it or the beef turns brown. Bring together until just mixed.
Make small balls out of the mix, around the size of a small lime, and keep ready. I got 25 meatballs out of the mix.
Heat oil in a frying pan and fry the meatballs in batched, till just done. If the oil temperature is right, it would take you around 2  minutes per side for a batch of meatballs. Of course this is dependent on how big the meatballs are.
Drain on paper towels and continue frying all the meatballs.

Into the same pan, add more oil if needed, add the onions and baby spinach and cook till the spinach is wilted and all the water has evaporated.
Stir in the chilli flakes and pasta sauce. 
Spoon 100gms of the mascarpone cheese into the sauce and mix well.
Add the grated garlic and salt to taste and bring the whole sauce to a gentle boil. If you feel the sauce is too thick, add water to loosen it a bit.
Add the meatballs into the sauce and simmer for a couple of minutes and take the pot off heat.
IMG_0737
Preheat oven to 180C and transfer the meatball mix into an oven safe casserole/baking dish.
Scatter around scoops of the remaining mascarpone cheese and grated mozzarella cheese. Try to spread it around evenly.
Place in the oven for about 20 minutes or till the cheese has melted and the sauce is bubbling.
Remove from the oven and keep aside for 10 minutes before dunking your crusty bread into it.

Notes: You can do the entire cooking and baking in a single pot if you use an oven safe container to do the frying, sauce and baking. I used my cast iron pan.
You can use any store bought pasta sauce or make your own and even omit the mascarpone if you dont want it to be creamy.
The bake freezes well.

Monday, 11 July 2016

Roasted aubergine and yoghurt sauce

IMG_9336 
I am a big Ottoleghi fan and though not much of a vegetarian food fan (only because i really am rubbish at cooking anything vegetable based, and making them taste good), whenever i go to his restaurant I always opt for the salad selection as they are seriously good. It was during one of those visits that i came across this aubergine and yoghurt combination which i absolutely loved and have been making at home ever since. A grilled chicken slice and this aubergine and yoghurt side is like the perfect summer lunch combo.

The yoghurt i used for this recipe is the Natural Yoghurt from Lactofree which is equally creamy and as flavourful as any other yoghurt. You wouldnt realise its Lactose-free and I've used it quite a few ways- as a dip, salad dressing, marinade,and my favourite, baking my French yoghurt cake. Results have been great so far and ive already suggested it to a friend whose daughter is lactose intolerant. Its great that brands like Lactofree are introducing more and more products for those with food intolerances and it makes life so much more nicer, they get to eat yoghurt! 

Recipe is super duper easy, and the use of Za'atar makes it just even more delectable. Just sprinkling some of this glorious Middle Eastern spice on to yoghurt and serving as a side to anything can do the trick. 

Recipe adapted from here, originally from Plenty by Yotam Ottolenghi (serves 4 as a side)
IMG_9314 
Aubergine/ Egg plant- 2 large
Good quality olive oil- 1/4 cup
Thyme leaves- 1 tsp (I used dried ones)
Za'atar spice- 1 tsp
Salt and pepper- to season

Yoghurt- 1/2 cup
Olive oil- 1 tbsp plus enough to drizzle
Garlic- 1 small clove, finely grated
Za'atar- 1/4 tsp
Salt- to taste
Pomegranate seeds- 4 tbsp
PicMonkey Collage
Preheat oven to 200C and line a baking tray with baking paper.
Slice the aubergines in half, lengthwise, and using a sharp knife make incisions on the cut side, without going through the skin. 
Place on the baking tray and generously brush in the olive oil.
Sprinkle the thyme leaves, za'atar spice, salt and pepper and chuck into the oven for about 30 to 40 minutes or till the flesh is soft, roasted and completely cooked.

While the aubergines are in the oven, get the yoghurt sauce ready.
Just whisk together the yoghurt, olive oil, za'atar and salt in a bowl and keep refrigerated till ready to use.

Take the aubergines out of the oven, transfer to a serving plate and scoop generous amounts of yoghurt on top of them. 
Finish off with the pomegranate seeds and serve as a side to cous cous or grilled meat or fish.

With thanks to Lactofree for the yoghurt.

Monday, 6 June 2016

South Indian coconut rice

IMG_8008
On days I make rice, I make a bit extra and use it for variety rice, which is what we refer to rice that has been flavoured with various ingredients- lemon, tamarind, curd, tomato, coriander- to name a few. These are perfect when made with rice that is a day or two old and cold out of the refrigerator. Its also a one pot meal which pairs well with just a pickle, poppadom and maybe some yoghurt if needed,

This coconut rice recipe is an absolute favourite and it makes its way into my kitchen at least twice a month. Its perfect for summer (or whatever they call this ridiculous weather we've been having), light, not too spicy but with brilliant flavours and if you are feeling a bit indulgent you can of course pair it with a chicken curry and serve at a party.

Serves 2 as part of main meal
IMG_7992

Cooked basmati rice- 2 1/2 cups
Ghee- 1 tsp
Vegetable oil- 1/2 tbsp
Mustard seeds- 1/2 tsp
Dried red chillies- 3, crushed or torn
Curry leaves- a sprig
Cashew nuts- 2 tbsp
Asafoetida- a generous pinch
Urad dal- 2 tbsp
Grated coconut- 1/2 cup
Salt- to taste
IMG_7995
In a large wok, heat together the ghee and vegetable oil.
Add the mustard seeds and once they begin to pop, add the dried red chillies and curry leaves. Stir until they become almost crisp.
Add the urad dal, cashew nuts and asafoetida and continue stirring, making sure the dal and cashew nuts get ricely roasted and turn a light golden brown in colour. Make sure they do not burn, as this may change the flavour to a slightly smoky one.
Add the dessicated coconut and keep stirring on medium heat till the wetness from the coconut disappears and it becomes fragrant and lightly toasted- it should turn a reddish brown. This should take 7 to 8 minutes. keep a close eye as coconut can burn pretty quickly.
Add the rice, breaking it down carefully.
Add salt, mix them all together and take off the heat.
Transfer to a serving plate and serve hot with pickle and poppadoms.

Wednesday, 23 March 2016

Creamy potato soup

IMG_p9466
The lighting in my new home is fabulous. Even on an overcast, gloomy day I still have pretty decent light coming into my living room and although my backyard isn't south facing, the huge French windows bring in enough light there as well. I did contemplate where i should be setting up my photography station and although it mostly depends on the time of the day and the sun position, I think I'm going to like the French windows than the living room, purely because i can use my gorgeous new dining table for the set up and not drag my photography table (which has doubled up as a side table at the mo) around, and also I'm lazy (maybe this is the only factor, now that i think of it).

(If interested, do follow me on instagram: mykitchenantics, to see nooks and corners of the house while i set it up).
IMG_9477 
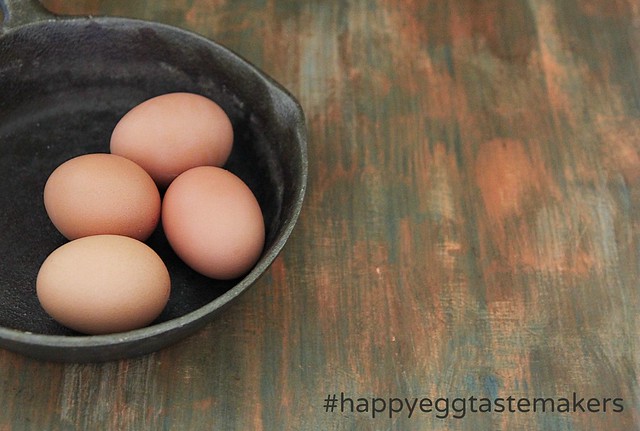
My props are all 'propped up' up stairs and that's kind of a pain because it means i need to plan my shoot. Believe it or not, I don't plan my photo shoot in advance. I do a spur of the moment thing which means my set is a disaster zone after I'm done. I try the food in various serve ware before deciding on the one i like. Now that i have to go upstairs each time and since we've already established that I'm the lazy kinds, it requires a bit more planning.

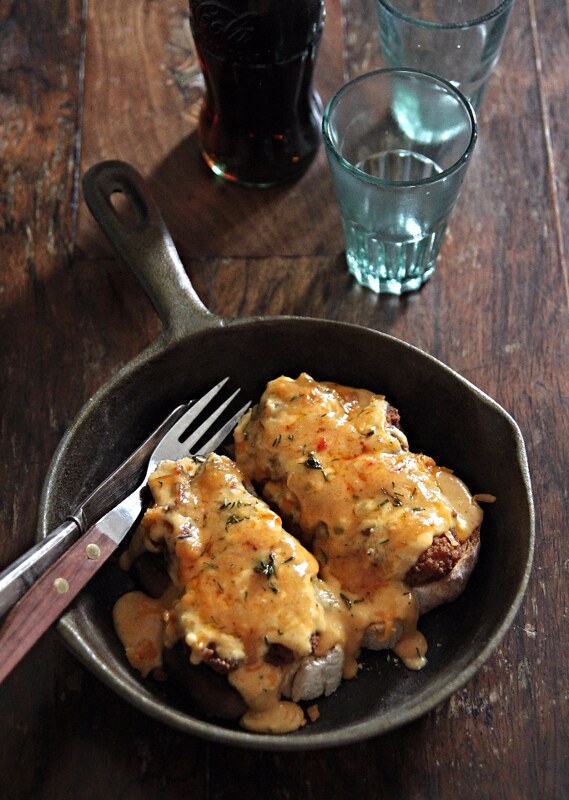
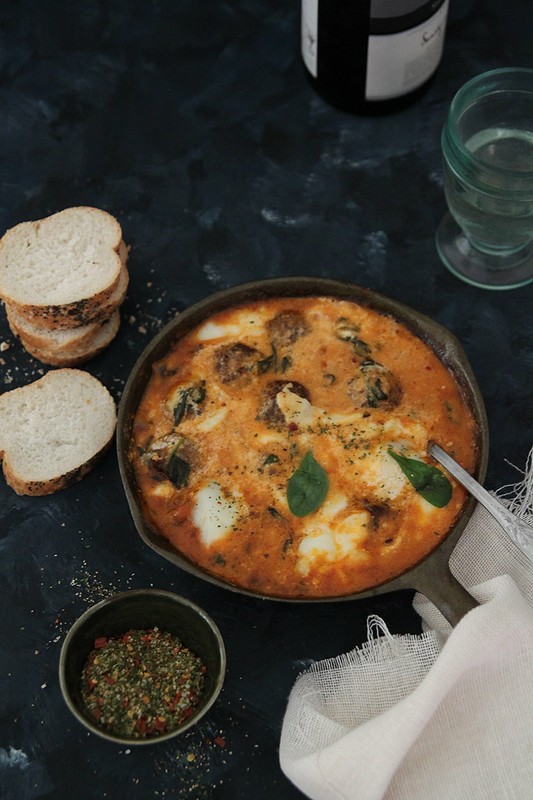
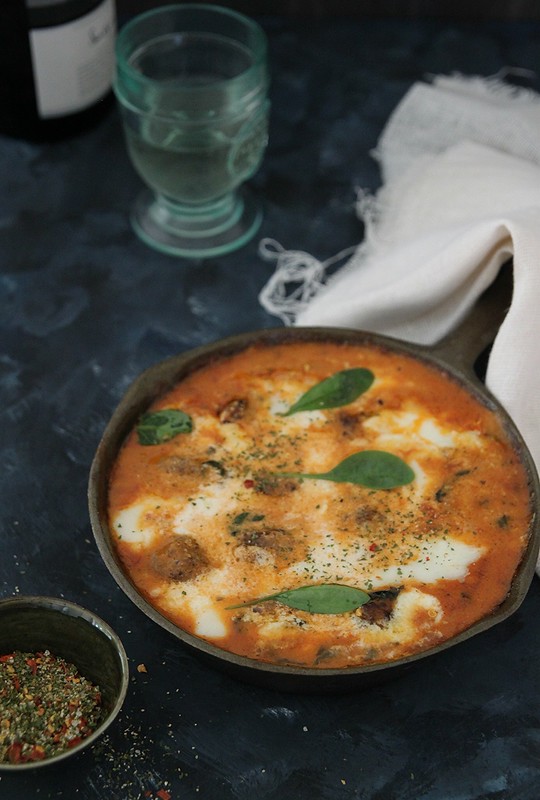
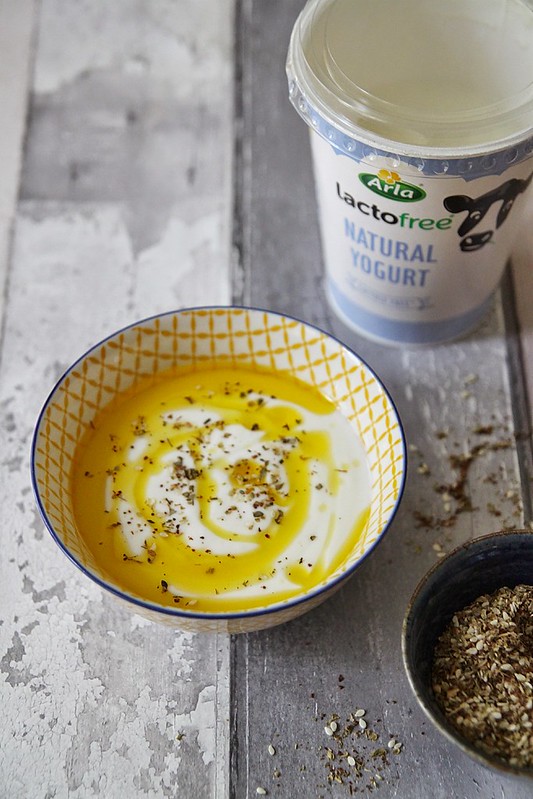
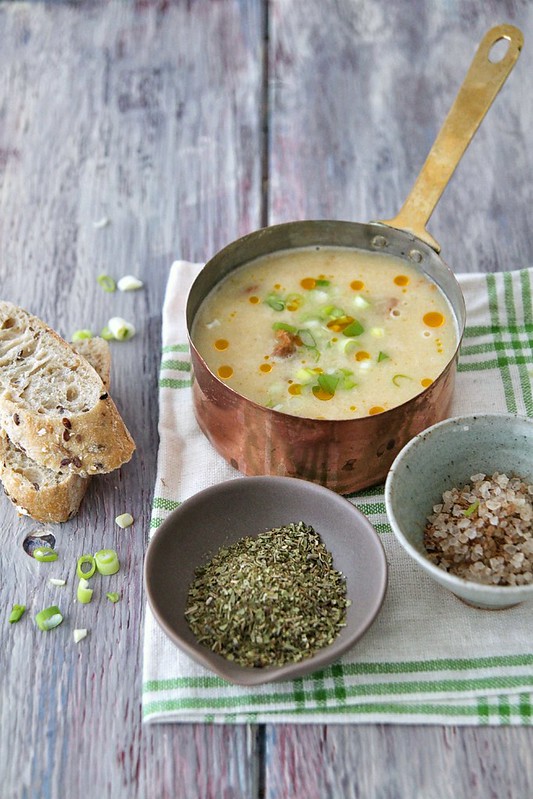
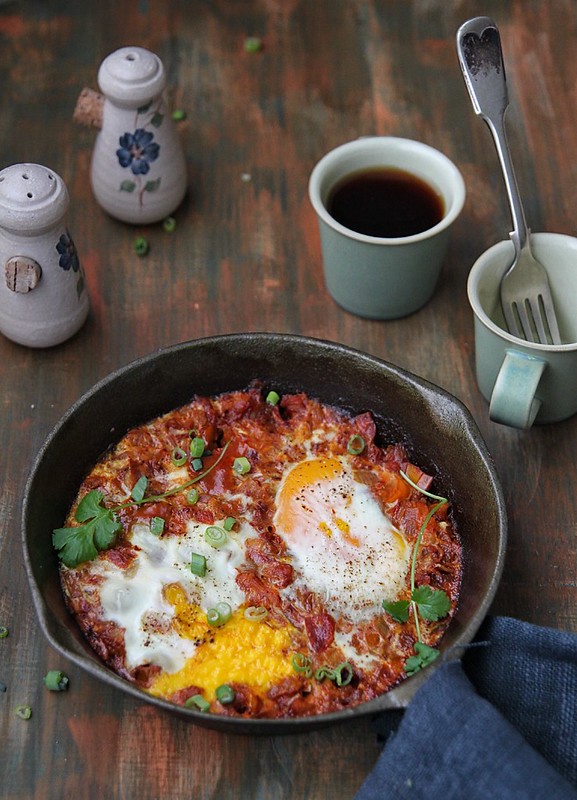
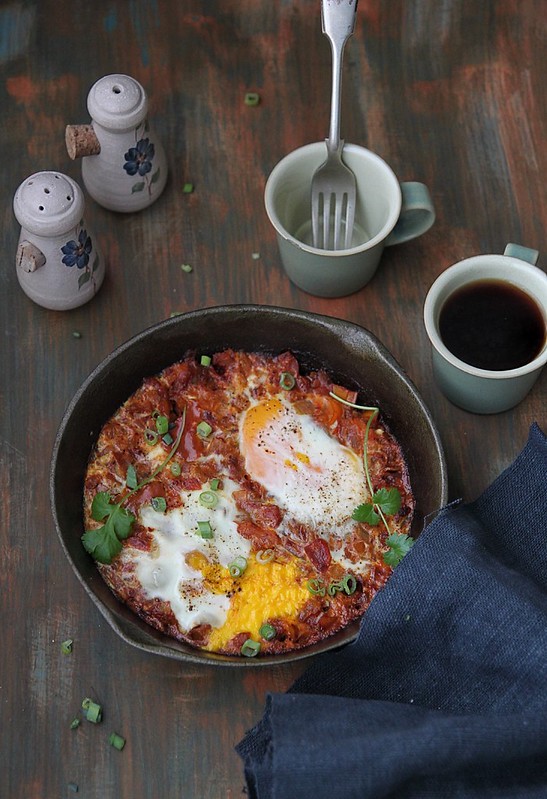
Well, the reason I'm saying all this is because i nailed this setting with the first try. Although i brought down soup bowl and such, i tried this setting first and it worked for me. This is my mums recipe, well most of it. I've made it a couple of times and have created my own version with stock cube, cream and spring onions. her version is much more simpler, made with leftover chicken and potatoes, which is also great but i jazzed it up a bit more to make it more creamier and delicious. It takes almost no time to prepare especially because of the pressure cooker, but you can of course do this is a stock pot or sauce pan and derive the exact same or maybe tastier result. Its still cold in my part of the world, so soups are still welcome at the dinner table.

Serves 2 as part of main meal
IMG_9474
Potato- 350 gms (around 2 large ones), peeled and cut into big chunks
Garlic- 2 large pods, peeled and lightly crushed
Leftover chicken on bone- 3 leg, thigh or wing pieces
Chicken stock cube- 1 1/2 cubes diluted in 3 1/2 cups warm water
Double cream- 1/4 cup
Salt- to taste
Freshly ground pepper- to taste
Spring onions- 2 sprigs, finely chopped
Herbs de Provence- to garnish (optional)
Chilli oil- to drizzle (optional)
IMG_9497
Into a pressure cooker add the potato, garlic, chicken and diluted stock cube. Don't add the salt at this point as the stock cubes may be salty.
Pressure cook for about 15 minutes (around 3 whistles), wait for the steam to die down and then open the cooker.
The potatoes should be cooked, almost mashed or easily mashable consistency. If you feel its still hard, put it on for another whistle or so.
Remove the chicken pieces from the soup and leave the cooker open for the soup to cool down a bit.
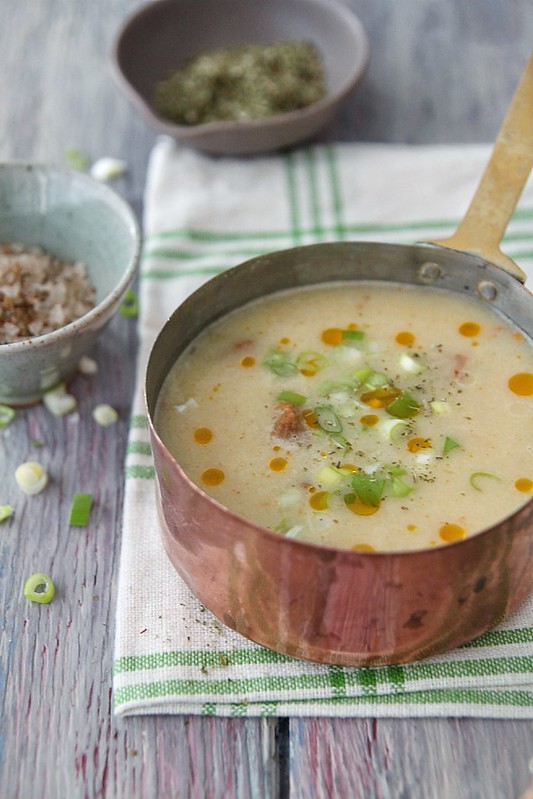
Once cool, add the double cream, give a stir and using an immersion blender puree the soup to a creamy mix. Its ok if the potatoes don't get puréed, i like to have a bit of a bite between spoonfuls. But of course if you want it completely smooth, go all out. But make sure the garlic is not left behind in chunks.
Shred the meat off the chicken bone and add to the soup.
Check for salt and add more if needed, also season with a generous dose of pepper.
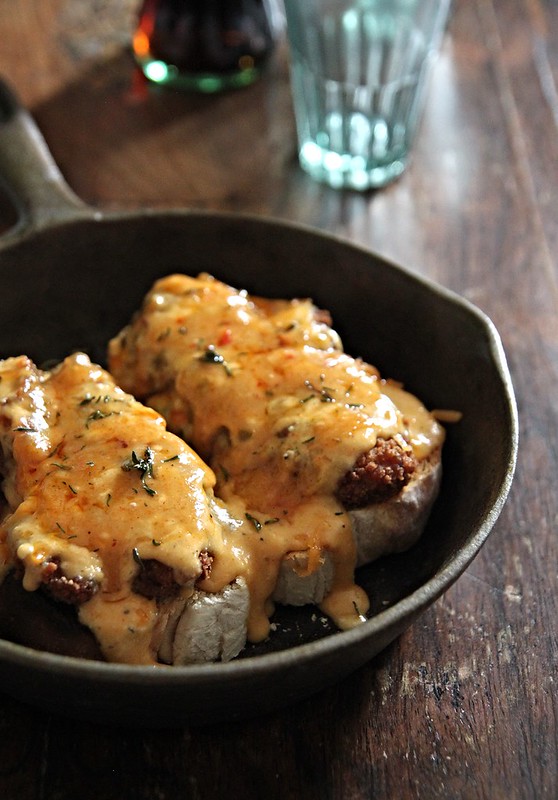
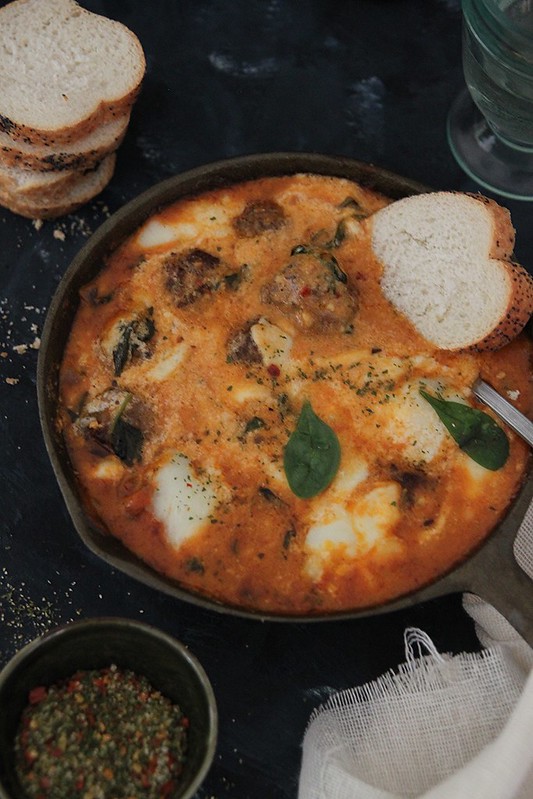
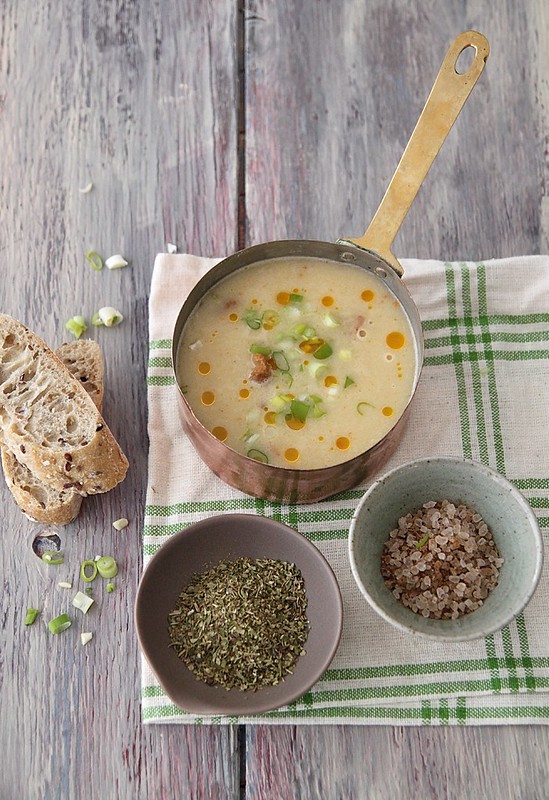
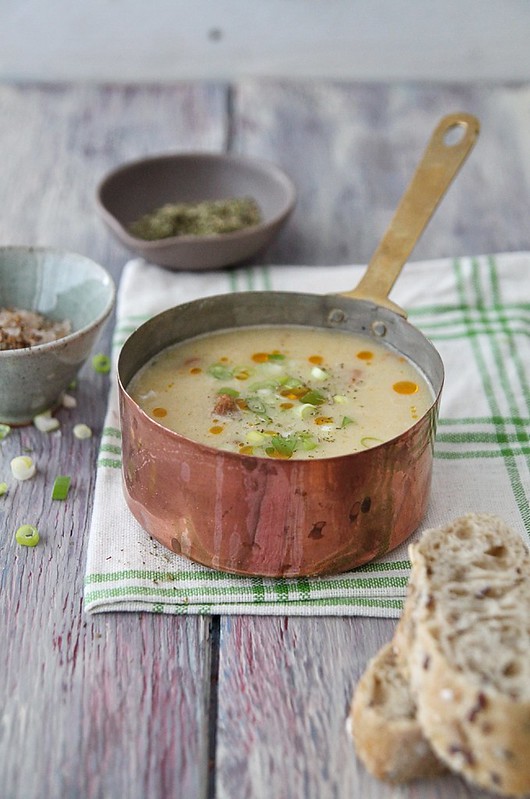
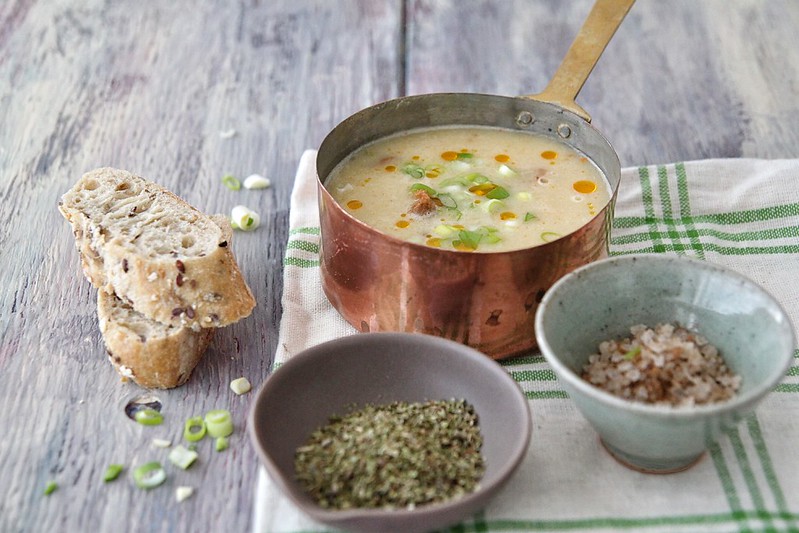
Just before serving, lightly warm the soup and garnish with spring onions, a light sprinkling of herbs de Provence and some good quality chilli oil.
Dip some crusty bread into it and sink into comfort heaven.
IMG_9499
Notes: Break down the chunks of potato with a fork before blending, to make it a bit easier.
You can of course, chuck the entire thing into a smoothie blender and do the job. However with an immersion blender its just a tiny blade that needs cleaning and not an entire jar :)
You can add any leftover meat (or prawns even) of choice into the soup, doesn't have to be chicken. You can also just shred and add cooked chicken at the end, if you don't have them on the bone.
Add vegetables like spinach, carrots, peas etc to make it a completely veg soup.
The left over chicken i used was spicy, so the soup was too, if you do want to give a bit of heat, add a tiny piece of birds eye chilli while cooking the potatoes

Wednesday, 21 October 2015

Häagen-Dazs coffee ice cream - 2 ways

nn
I'm back after a short trip and jumped straight into work without having any time to brood over the holiday getting over. Deadlines, macaron orders, supper clubs and pop-ups fill my time for the next couple of weeks and then the much awaited trip to India end of December. While I was away Haagen Dazs sent me a gorgeous parcel (the husband kept sending me pictures of the package) and I couldn't wait to get back and check it out. In my gift pack was a Nespresso Inissia, a personalised silver plated spoon, a really nice OXO ice cream scoop, an egg timer and of course vouchers and the new Haagen Dazs coffee ice cream.

We don't do ice creams that often but when we do its always Haagen Dazs. I'm sure its a brand we are all familiar with and we all have that one flavour we are addicted to. Mine was the dulce de leche and it was a struggle getting over it. I had attended the launch of the Haagen Dazs Master Ice Cream Academy a couple of months ago and learnt a thing or two about how sounds and sights affect taste and of course got to taste a fabulous strawberry ice cream. Dan Doherty from Duck & Waffle made us an interesting ice cream float, one that I've been meaning to try at home, but before the blink of an eye summer whisked by without any warning.
IMG_8545
That said, there is no rule you can have ice cream only in summer. Which brings me to these 2 desserts i whipped up with the new coffee flavour, so intensely coffee and perfect for an addict like me. I broke my head trying to decide what to make and I wanted to do something different than the usual pairing of the coffee ice cream with a cake or brownie. Cookie dough slices sandwiched with coffee ice cream and an affogato were the two easy to do options i came up with.

Haagen Dazs coffee ice cream Affogato (makes 1)
IMG_8566
The Affogato happened quite by fluke and i ended up enjoying that much more than the slices. I could also put the Nespresso machine to good use, making a kick ass espresso for the affpgato and I'm hooked. You can whip it up in no time and tastes absolutely delicious. I added a dash of Amaretto for some good measure. No regrets.

Strong espresso coffee- 1 espresso cup
Amaretto (or any liqueur of choice)- 1 tbsp
Haagen Dazs coffee ice cream- 2 scoops
Praline- 2 tsp (recipe below)
IMG_8547
Use your favourite coffee beans to make a strong shot of espresso.
Scoop the ice cream into the serving glasses and pour over the Amaretto.
Top with the steaming hot espresso by pouring it gently over the ice cream.
Sprinkle praline over the ice cream and enjoy.

Praline (recipe adapted from here)
Granulated sugar- 3 tbsp
Plain cashew nuts- 10 whole
Butter- 1/2 tsp
IMG_8571
Melt the sugar in a non stick pan on low heat till it starts to caramelise and turns a light golden brown in colour.
Add the cashew nuts and butter and stir till it turns darker, but make sure you don't burn it.
Remove from heat once the cashew nuts look roasted,and pour on to a tray lined with baking paper.
Leave to cool completely and then break into smaller pieces or pulse it in your processor for a couple of seconds to get a coarse mix.

Haagen Dazs coffee ice cream and cookie dough slices (recipe adapted from here)
IMG_8538 
Cookie dough slices were a unique choice, and I could imagine what a strong coffee flavour would do to a vanilla-y cookie dough. I decided to keep the filling and the dough thin so we could just hold it in our hands and eat as opposed to having it as a formal dessert with a plate and such.

Unsalted butter- 1/2 cup
Dark brown sugar- 1/3 cup
Granulated sugar- 1/4 cup
Milk- 2 tbsp
Vanilla extract- 1/2 tsp
Salt- 1.2 tsp
Plain flour- 1 1/4 cup
Chocolate chips- a generous handful
Haagen Dazs coffee ice cream- 1/2 a tub, spreadable consistency
IMG_8527
Melt the butter and both sugars in a saucepan, stir till the sugar has completely melted.
Take it off the heat and pour in the milk, vanilla and salt.
Stir in the plain flour till well combined and you get a smooth mix without traces of flour.
Keep aside to cool and then fold in the chocolate chips. Its ok if it starts to melt, but stop before it completely does so.

Have a tray ready with 3 sheets of baking paper.
Place one sheet on the tray and spread out or roll half of the dough on to the sheet, around 1/2 inch thick (or thicker or thinner if you prefer it that way)
Top with another baking paper and roll out the second half of the cookie dough into the same thickness as before.
Press the third sheet on top of the rolled out dough and freeze for about half an hour.
IMG_8538
Remove the top cookie dough layer and spread the coffee ice cream as evenly as possible.
Top with the second cookie dough layer, gently press down, cover with baking paper and refreeze till ready to use.
Let it sit at room temperature for a couple of minutes to make slicing easier.
Slice into squares and eat immediately.

This is a sponsored post for Haagen Dazs in association with Great British Chefs. Thanks for the gift pack that was sent to put together the recipes.

Monday, 21 September 2015

Butternut squash loaf cake

IMG_8286
I am part of The Happy Egg Co. Taste 100 Blogger network comprising of taste makers and I absolutely love it. They send us challenges every month with of course a winning prize, and its one of those emails i absolutely look forward to. In fact I won the May challenge which was photography and styling oriented and was pretty stoked to have Marte Marie Forsberg select my post as the winning entry. I won an 8 course tasting menu meal for two at the award winning L'Atelier de Joel Robuchon and i cant wait to check out the place (waiting for an occasion to celebrate to make a booking).
H-ZOD5M1JD9zHWBpjpRZ3LhM-b2GuEp6NgM903Ke8sI 
In July The Happy Egg Co. decided to rustle things up a bit and organised a baking masterclass for bloggers at the Central Street Cookery School. It was conducted by Bee Berrie of Bee's Bakery and it was an afternoon filled with baking. We made a sponge cake and went berserk flavouring it, layering it and decorating it, an Eton Mess, an easy version of puff pastry and Custard tarts. By the end of the evening we were all in a sugar coma, but absolutely satisfied with our work and went back home loaded with all the goodies.
IMG_8240 
The fact that i had to distribute my custard tarts on the bus back home and among friends that weekend is another thing (I would have ended up eating it all on my own if i hadn't done that). I now use only Happy Eggs at home (thanks for the vouchers) and love the sizes they come in. I had some left over butternut squash after the gnocchi expedition and I put it to good use in this super moist butternut squash loaf cake with all the flavours (and colours) of autumn, not to mention how easy it was to put this together.

Recipe adapted from here (makes 2 large loaves or 3 small loaves)
IMG_8308 
Plain flour- 1 3/4 cups
Baking powder- 1 tsp
Baking soda- 1/2 tsp
Salt- 1/2 tsp
Ground cinnamon- 1/2 tbsp
Ground nutmeg- 1/2 tsp
Ground allspice- 1/2 tsp
Granulated sugar- 1 1/4 cups
Eggs- 2 large
Vegetable oil- 1/2 cup (any flavourless oil can be used)
Milk- 2 tbsp (refer notes)
Vanilla extract- 1/2 tsp
Butternut squash purée- 7 1/2 oz ( a little less than 1 cup) (refer notes)
IMG_8264
Preheat oven to 175C and line your baking pans with baking paper.
Sift together the flour, baking powder, baking soda, salt, cinnamon, nutmeg and allspice together till well combined.
In another bowl whisk together the sugar, eggs, oil, milk and vanilla until well combined. This may need a bit of work, but absolutely achievable by hand and you don't need an electric mixer.
Add the squash puree and continue to mix well.
In batches, add the flour and fold until just combined, and no traces of flour is visible. Resist the urge to over mix.
Pour into the prepared cake tins and bake in the middle shelf of the oven for 35 to 40 minutes (for small loaves and around 1 hr for a large loaf) or till a skewer inserted into the centre comes out clean.
Cool completely on racks, after which you can wrap them in cling film and refrigerate for up to a week.
IMG_8304
Notes: The butternut squash can be replaced with pumpkin purée, mango puree or any fruit purée for a different flavoured cake.
To make butternut squash purée, slice the squash into two, apply some oil on each side and roast in a 200C oven for about an hour or until tender. Keep aside to cool and scoop the flesh into a food processor/blender and make into a purée.
If you find that your purée is quite watery, avoid adding the milk.

With thanks to The Happy Egg Co. for inviting me to the baking masterclass and for the vouchers to be redeemed at supermarkets.

Thursday, 14 May 2015

Harissa spiced eggs on cheesy English muffins

IMG_6220
My boss Dora is one of the best cooks I've come across. Till we moved to our professional kitchen a year back, I had the privilege of enjoying some of her cooking during lunch breaks and it was my first foray into the world of French food. Not only are her creations delicious, the fact that she used to whip them up in no time was something that amazed me. Be it a simple puff pastry pizza, or her signature vegetable lasagna- the taste was consistent all throughout, not to mention the copious amounts of mint tea we used to drink during brainstorming sessions.

I mentally wrote down her quick recipes and of course threw so many doubts her way as well. She is the one who made me experiment with aubergines for the first time, and enjoy fish in various forms (Ro secretly thanks her for my tolerance to mackerel now). Dora's Tunisian routes (which is her strong point, even when it comes to macaron flavours) made the dishes even more interesting. She introduced me to harissa, ras-el-hanout, brik pastry and so many other ingredients and dishes that were then new to me.
IMG_6234
This recipe or rather creation is truly Dora's. When we were short of time she would whip this up in a matter of minutes and i would devour it without batting an eyelid. I have watched her do it so many times, but even now it just doesn't taste as unique as hers. I remember making it at home the first time and it was an instant hit with Ro. I have then made it at several brunch sessions and everyone s absolutely enjoyed it.

Over time i changed the procedure and ingredients a bit, but it still is hands down one of the best recipes I've learnt from Dora. I have also used the authentic home made harissa paste she gave me, which is as authentic as it can get.. Once you taste the real thing, you will not want to try any of the store bought versions.
IMG_6188
On a different note, i think i have cracked my lighting issue. It's still a bit harsh, but i have narrowed down my light source and that is half of the issue sorted there. Now i just have to play around with diffusing and stuff to get it right. Talking about photography, this recipe goes straight to the #happyeggtastemakers challenge this month, which is to cook something using the happy eggs co and photograph it using food stylist and instagrammer Marte Marie Forsberg's top 5 tips for creating the best looking food. I hope i have done justice to the image, seriously, it tasted fab.

This harissa spiced baked eggs are so easy to make, you have to try it out. You can do so many different versions of it, and it would just not go wrong. Thank you Dora, for all those cooking lessons which you unknowingly instilled in me. I really do miss it :)

Serves 2
IMG_6194
English muffins- 2, sliced in half to get 4
Cheddar cheese slices- 4


Spring onion greens- 2 tsp (to garnish)

Olive oil- 1 tbsp
Shallot- 1 large, finely chopped
Bell pepper- 1, finely chopped
Garlic- 1/2 tbsp, finely chopped
Harissa paste- 2 generous tsp
Tomato- 2 small, finely chopped
Double cream- 1/4 cup
Salt and pepper- to taste
Eggs- 4
IMG_6239
Preheat oven to 175C and line a baking tray with foil paper.
Place the muffins, cut side up and top with the cheddar cheese slices
Heat the oil in a cast iron skillet and saute the shallot, bell pepper and garlic till soft, around 3 minutes on medium high heat.
Make a paste with the harissa and some water and add to the pan.
Stir till it loosens and coats the vegetables.
Add the tomato slices and cook till they turn mushy, after which you pour in the double cream and mix it all together
Season with salt.
Separate the mix in a few places and break the eggs into them.
Break the yolk and stir it gently into the mix. This is purely optional, you can of course leave the yolk intact
Bake for 10 minutes, or till the eggs are cooked. 
Around 5 minutes into the baking time, put in the tray with the muffins.
IMG_6213
Once done- the eggs cooked and the cheese on the muffins melted, take them out of the oven, wait for a few minutes for the bubbling to settle.
Slice the baked eggs into four and place on the cheesy muffins.
Garnish with spring onions and serve warm.

Notes: You can use bread slices, ciabatta, crumpets (these are the best) and any break of choice as the base
Add prawns, shredded chicken, minced meat etc to the mix before topping with the egg

With thanks to the happy egg co for the voucher