Saturday 29 September 2012

Domino's pizza vs the Naanizza I made

IMG_4103
As mentioned loads of times before, Fridays are pizza days for us. We mostly have pizza for dinner and if Friday is inconvenient, then Saturday it is. We are ardent pizza lovers and even the frozen ones make us drool. Well not so much, but you know we would have it without complaining much if that was our last choice!

Since we had guests visiting for the past 3 months, our pizza ritual had come to a standstill. We were just wondering how to revive it when I was asked to review the new Gourmet Pizza Range by Domino's. Of course I said yes, because its one of our favourite Pizza brands especially since we have had a couple of bad experiences with some of the other bands and we always return to Domino's. So off we log on to their website and make an order for a take away pizza. It's so convenient, I'm not joking. The wait for the pizza to arrive is the worst but since we are pro's at this whole thing, we time it perfectly well and get the pizza just when our stomachs start to rumble.

The Gourmet range from Domino's offers 4 different types of pizzas- the Firenze with salami, pepperoni and roquito peppers, the Florentine which is a vegetarian option with spinach, sun blush tomatoes, and feta cheese, the Rustica with chicken, bacon, spinach and tomatoes (which is what we ordered) and the Four seasons with a 1/4 of all the 3 above mentioned pizza's and sun blush tomato topping.
24
The Rustica was a good change from the usual Mighty Meaty which, as the name suggests, is loaded with all kinds of meat (delicious if I may add). This one was much mellow in nature with the individual flavours coming right through. If there was one complaint, I would say that the tomato was a bit too tangy for my liking and a bit over powering. I loved the addition of smoked bacon rashers and of course spinach is a winner for us any time.

To make the review more exciting, I was also asked to create my own pizza and compare it to that of Domino's. I decided to go ahead and try making my version of the Rustica pizza at home. Since I was a bit time constrained, I chose to use Naan as the base. I have done it a lot of times before and must say its a really easy and tasty alternative to a normal pizza base. If you manage to get flavoured naan then even better because you get the best of both worlds. I also used pancetta instead of bacon which was probably not the best idea because bacon would have done more justice to it taste wise. The pancetta was not a bad choice but in the larger scheme of things, its flavour just got lost. Comparing mine to the Domino's Rustica- I love the pizza sauce Domino's uses, which of course I couldn't get right, so full points to Domino's for that. I used normal cherry tomatoes instead of the sun blushed ones since I thought that was what made it a tad too tangy, so points for me on that one. The chicken strips, I shall keep them bigger next time because Id shredded them too fine for it to stand out, Rustica did a great job with the size of the strips. Since I didn't want to keep any leftover filling, I loaded my naanizza with toppings, which was perhaps one advantage over the Domino's. But then you cant have it all right :)
IMG_4070
But on the whole Rustica stayed true to its name and I would definitely be trying out more pizza's from their Gourmet Range. People, if you haven't given it a go as yet, do try it and oh please do yourself a favour and also try the chicken kickers which I think is so yummy it makes me want to eat the entire thing without sharing with Ro. 

Naan- 4 small/ 2 big (plain or flavoured)
Pizza sauce- 4 tbsp
Baby spinach- 1/2 cup
Shredded chicken- 1 cup
Cherry tomatoes- 1/2 cup, sliced into halves
Pancetta- 4 to 5 rashers, cooked and sliced long
Mozzarella cheese- 1/4 to 1/2 cup (as required)
dried oregano- 1 tsp
Olive oil- to drizzle
IMG_4074
Dice the chicken into chunks and marinate with salt and pepper. Cook in a saucepan till well done and keep aside to cool.
Shred using a fork and keep aside. You can store remaining chicken in an air tight container in the refrigerator for 2 to 3 days, and use it in a sandwich or you can even freeze it.
Place the naan on a baking tray that has been lined with aluminium foil or baking paper.
Slather on 1 tbsp of pizza sauce on to each naan if using small ones, or 2 tbsp per big naan.
Arrange a layer of spinach leaves on top followed by shredded chicken.
Arrange the sliced cherry tomato cut side up. You may want to go easy on this if they are too tangy.
Either crumble the cooked pancetta and throw onto the naan or for a more orderly look, slice it lengthwise and place it strategically 
Finally add the mozzarella cheese, again in any way you like, over the toppings or next to it. Its cheese, you can eat it however:)
Sprinkle the oregano, drizzle olive oil and place in an oven preheated at 200C for about 6 t0 8 minutes.
Don't keep it in for too long, it can go crunchy on you.
Take it out of the oven and eat while hot, otherwise its rubbish.

Notes: Feel free to marinate the chicken with any spice you like. I kept it simple.
Some grated Parmesan would take it to the next level.

With thanks to Dominos Pizza for gift vouchers to pick up the pizza

Wednesday 26 September 2012

Sponsored video: Method cleaning products

In our household there is a deal. If one of us does the cooking, then the other does the cleaning. Most of the time I am in charge of cooking and the other half takes care of cleaning. I must say its a convenient arrangement because I make a hell of a lot of mess while cooking and the husband bears the brunt of it all. Needless to say, its an on going feud at home regarding this and we never ever come to a conclusion.

We are also constantly on the look out for new products and better ways to ease up this process and that's where Method comes into play. I was thoroughly interested in finding out more about their range of cleaning products and when I did, it was a complete eye opener. Method is a brand that makes non-toxic products for people who want to go about the entire cleaning process in a greener, better way. They have a wide variety of products ranging from non-toxic surface cleaners to bathroom cleaners (like tub scrub and flushable wipes), laundry detergents, hand care gels in various fragrances and even the speciality range which comprises of cleaners and wipes for leather, wood, granite and marble and floor. Yup, so many choices!

There's more good news. Method is also a brand that prides itself in striving for sustainability. Going green is something they value and so their aim is to reduce carbon footprint as much as possible, both for the products as well as the company itself. They do not perform any animal testing and has been certified by PETA as a vegan and cruelty free company. The products are also absolutely fine to be used around children, as they do not contain any hazardous ingredients.

Not convinced yet?? Then go on and watch this fun video and be inspired to move against dirty. That's my motto henceforth.


The post has been sponsored by Method cleaning products.

Friday 21 September 2012

Fraisier trifle and a master class with Eric Lanlard

IMG_3724
(Ridiculously long post with loads pics and info, so feel free to scoot right away)
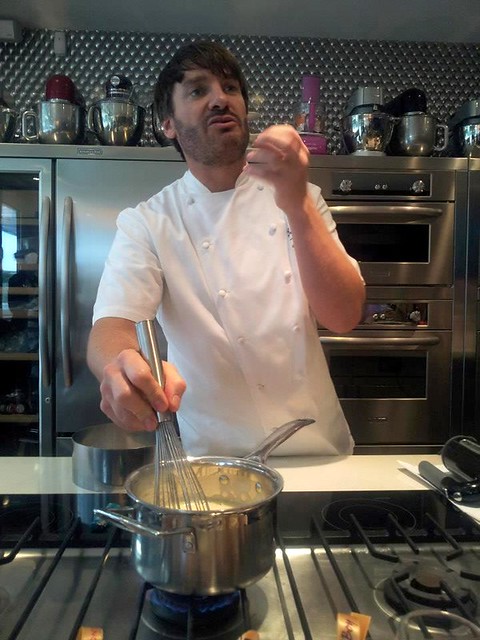
A few weeks back, some of us food bloggers were invited to a master class with Eric Lanlard featuring 
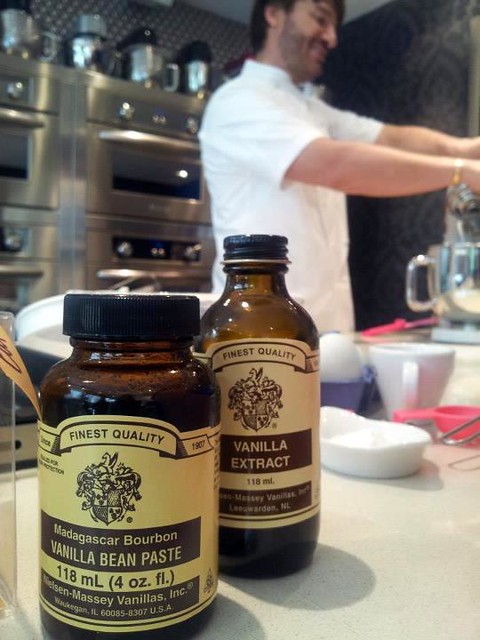
Nielsen-Massey Vanilla products at his signature store 
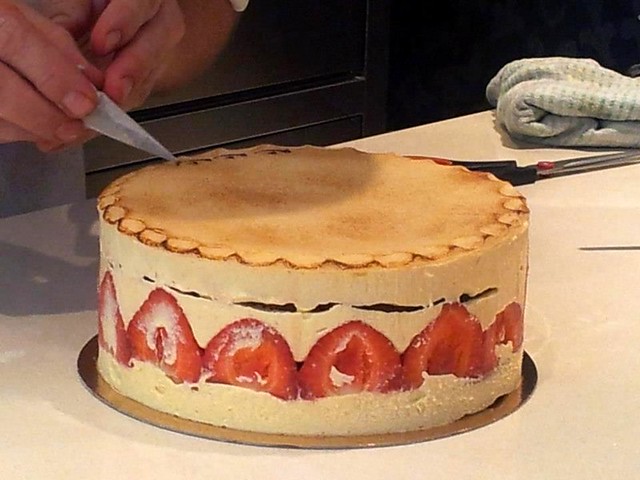
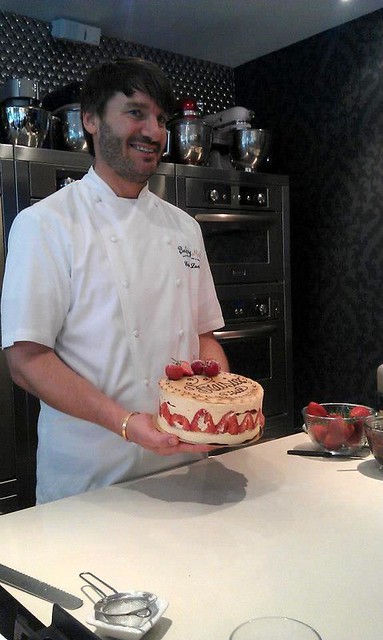
Cake Boy in London. It was an evening packed with loads of information on vanilla (which was truly an eye opener), yummy canapés and of course Eric Lanlard showcasing his fabulous baking skills by making a gorgeous French Fraisier, a cake so gorgeous to look at, you wont feel like cutting into it. And what a charming patissier he is...so full of energy, clearing our doubts, engaging us in conversation about baking and of course cute!!! :)

The class ended on a fine note with all of us getting goody bags along with the recipe of the fraisier cake and a challenge at hand. We were asked to create something to rival Eric's fraisier and blog about it. I have been breaking my head about it for so long to an extent it started haunting me in my sleep. I finally got around to doing the challenge a couple of days back and here is my take on it.
378253_396302733756158_1961166869_n 
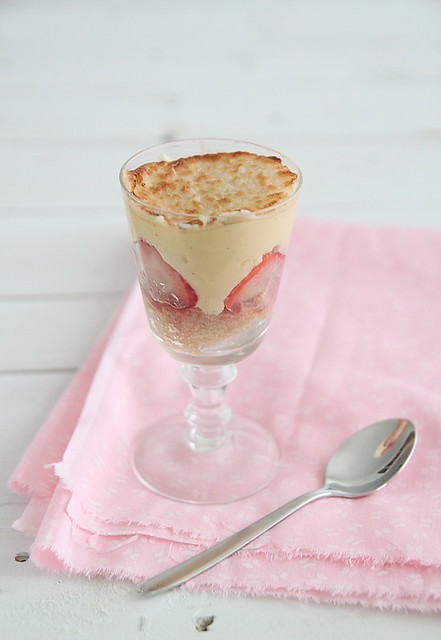
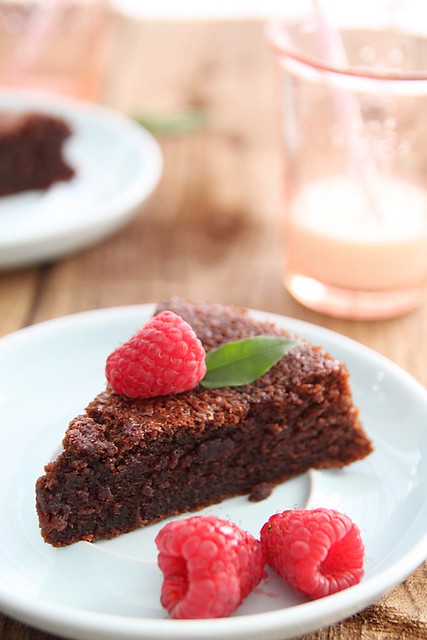
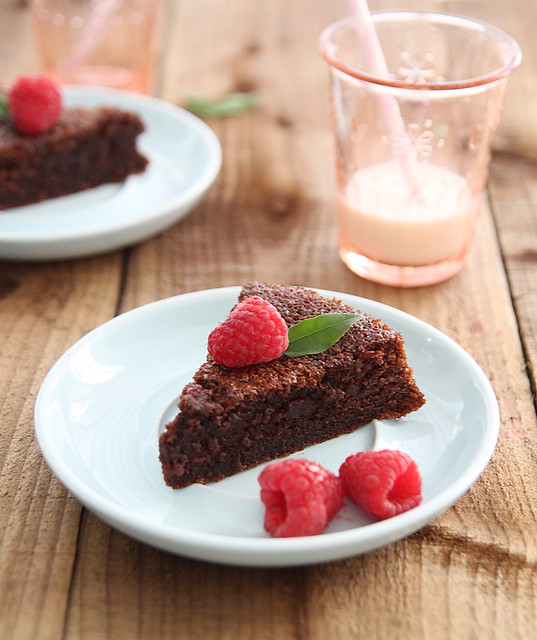
Since a fraisier cake was slightly out of my league, well mostly because it was just the two of us at home and scared that we would both finish it off in one sitting, I steered away from it. Instead I went ahead with a Fraisier trifle with all the goodness of the cake, but half the effort and oh so pretty they look in a glass and a great dessert idea since individual portions are less messier and storage in refrigerator is easier. 

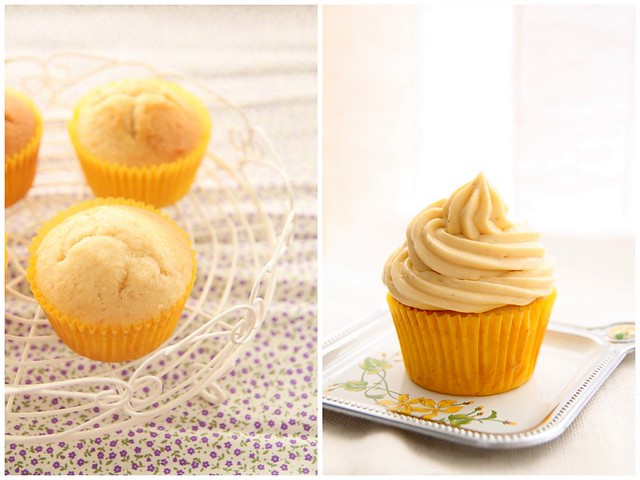
I had baked a cake the day before for a friend and had some remaining which was on my kitchen counter nicely wrapped in cling film waiting to be assembled. I then set about making the filling of custard butter cream or fancily referred to as crème mousselini which I think is gods gift to bakers, especially to bakers who hate plain butter cream and cant pipe a frosting for nuts. I started off convinced I would screw it up somewhere and end up wasting a whole lot of ingredients, but when I saw it all come together, I knew I'd succeeded. And OMG I couldn't stop licking it from the mixing bowl and when I tried piping it on to a cupcake, it worked out just as fine and for the first time I had managed to pipe it without it it falling flat or it being too stiff it refuses to come out of the nozzle. I can very well say this is going to be my fav frosting as of now and my next experiment would be to try this with custard powder instead of making it from scratch. Yes laziness is my second name, in case you hadn't figured it out by now.
428942_396302973756134_2091831608_n 
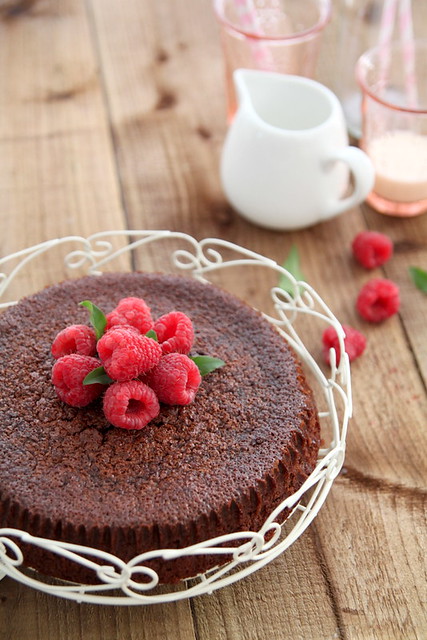
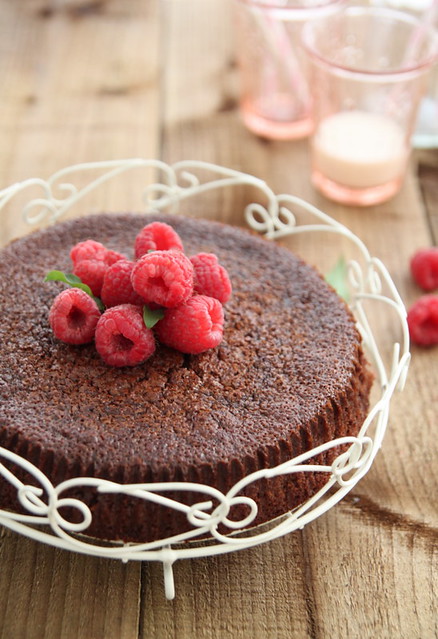
Although Eric's recipe was the base of all this experimenting, I did tweak it a bit here and there to suit my availability of ingredients. Eric's cake was a basic sponge cake, (which I am definitely going to try some day) whereas I used a vanilla buttermilk cake which has provided me with great results. I feel its best on its own as a tea cake, but of course so versatile you can use it as a base for any other fancy stuff, like a Tiramisu cake for example. It is light and airy, and moist at the same time making it impossible to hate. My love for plain cakes and that too vanilla flavoured ones never end, so this is the latest addition to the list, with the French yoghurt cake still topping the list (more so because of how easy it is)

Anyhoo, the final outcome was great and we did enjoy scooping it out and eating mouthfuls. Next time however, I would omit the toasted marzipan, only because I'm not a big fan, not because its bizarre or anything. When I have something to celebrate, I would also try doing the entire cake like the one above so I can share the calorie intake with others and not suffer on my own. In the mean time, I am thoroughly enjoying the Nielsen-Massey Vanilla paste and extract that is making its way through to almost all my cooking expeditions (sweet of course) ;)

For Eric's original recipe, follow this link. I am giving my version here, with Eric's recipe as the base. The measurements given are for the fraisier cake on the whole and not the trifle. I have, however, explained how I went about getting the trifle in order.

Vanilla Buttermilk cake (recipe adapted from here, makes 2- 9 inch cakes or 12 large cupcakes)
14 
Cake flour- 2 cups (make your own by measuring 2 cups of plain flour and taking out 2tbsp of flour from that and replacing it with 2tbsp of cornflour. sift it together. This results in a more tender crumb)
Baking powder- 2 tsp
Baking soda- 1/8th tsp
Salt- 1/4 tsp
Unsalted butter- 10 tbsp, at room temperature (or 142 gms, 1 1/4 sticks)
Sugar- 1 cup
Eggs- 3 large
Egg yolk- 1 large
Vanilla extract- 1 1/2 tsp (of course I used Nielsen-Massey)
Buttermilk- 3/4th cup

Sift together the first 4 ingredients into a bowl and keep aside.
Into the bowl of a free standing mixer with paddle attachment, add the butter and beat on medium speed till soft and creamy.
Add the sugar and continue beating till the mix becomes light and fluffy, about 3 minutes.
In goes the eggs one at a time, beating well after each addition. Follow with the egg yolk and beat it in.
Beat in the vanilla. At this point the batter may look curdled, don't panic, just keep doing the good deed.
Now reduce the mixer speed to the lowest and add the dry ingredients and buttermilk alternatively, starting and ending with the flour mix.
Scrape down the sides, making sure no traces of flour is seen and everything is mixed well.
Pour into the lined cake pans and bake in an oven pre heated at 176C for about 30 minutes or till golden brown and the skewer test comes out positive.
If making cupcakes, fill liners till about 3/4th full and bake for about 20 to 22 minutes, checking in between.
Cool completely on wire racks and then cling wrap it and leave it at room temperature for up to 2 days.

Creme Mousselini (combination of Eric Lanlard's recipe and from here, makes 1 cup)
309288_396302783756153_80501488_n 
Creme patissiere/ pastry cream- 1 cup (recipe below)
Unsalted butter- 150 gms cut into cubes, at room temperature

Creme patissiere
Whole milk- 1 1/4 cups
Sugar- 1/4 cup
Egg yolks- 3 large or 4 small
Plain flour- 2 tbsp
Corn flour- 2 tbsp
Vanilla bean paste- 1 tsp (I used Nielsen Massey)
Kirsch liqueur- 1 tsp (optional)

Into a heat proof bowl throw in the sugar and egg yolks and whisk till you get a smooth mix.
Sift together the plain flour and corn flour and add to the egg, whisking till you get a lump free, smooth mix. Don't let this mixture sit for too long as the sugar will start eating into the eggs, thus making pieces of egg form. (thanks to cake boy for that piece of valuable information)
Meanwhile, pour the milk into a saucepan placed over medium heat, and bring to a gentle boil, just till the milk starts foaming up.
Take it off the flame and add it to the egg mix, bit by bit, whisking continuously till well incorporated. If you find pieces of curdled egg don't panic just run it through a sieve.
Return this mix back to the saucepan placed over medium heat and cook till boiling, whisking continuously to prevent the custard from sticking to the bottom and forming lumps. This takes quite a while, so patience is highly recommended.
When the custard boils and has become thick and silky smooth, continue whisking for about a minute longer and then take it off the flame.
Transfer to a mixing bowl and add half of the butter, whisking well to incorporate it into the custard.
Cover with a cling film and leave to cool in the refrigerator. Or if you have time on the kitchen counter.
Once completely cool, add the vanilla bean paste and liqueur (if using) and whisk it in.
Add the remaining butter bit by bit whisking well after each addition to get a smooth and gorgeous creme mousselini which makes a perfect frosting.

For assembling
Ripe strawberries- 1 kg, hulled
Marzipan- 200 gms, rolled out and cut into 9 inch circle.
Melted chocolate- for decoration
309259_274400052661791_234769332_n 
When ready to assemble, unwrap the cake and slice off the top if it has domed.
Then place the cake at the bottom of a cake ring and using a palette knife, spread a thin layer of creme mousselini over it.
Cut some of the strawberries in half and place it around the edge of the ring, cut half facing out.
Fill the centre with the remaining strawberries, making them stand upright. (the trifle version is as below).
Spread the remaining creme mousseline on top of the strawberries, trying to fill in the gaps as much as possible.
Place the second layer of cake on top and press down to settle them all in.
Place the cut out marzipan on top, flute the edges and toast using a blow torch.
Melt the chocolate and use it to write 'Fraisier' on top and decorate the cake a bit. Also use some strawberries dipped in chocolate to adorn the sides.
Chill for a few hours before you unmould to get a gorgeous looking cake.

Fraisier trifle     
141
Crumble some of the cake roughly and keep ready. You can also cut them into the exact size of the glass, but I didn't have the patience.
Get 3 see through glasses, tumblers, martini glass, pudding mould...anything you fancy and layer the bottom with the crumbled cake...generously and tuck it in lightly.
Melt about 3 tbsp of strawberry jam lightly and mix with 1 tsp water.
Spread a thin layer of jam on top of the cake.
Cut the strawberries as mentioned above and place them inside the glass, cut side outward.
Fill with one large strawberry upright.
Top generously with creme mousselini, filling in the gaps as much possible, but really its no big deal because the messier a trifle looks, the better.
Top with a toasted marzipan and chill till ready to serve.
IMG_3701
Notes: I don't own a blow torch so I rolled out the marzipan, cut them into rounds and placed under the grill for about 2 to 3 minutes to lightly toast it. But as you can see I ended up burning most of it. Take extreme care when you do this as one blink of the eye and you can end up with black marzipan.

Now I'm gonna say a lil prayer and hope I become the competition winner :)

Disclaimer: I was invited to attend Eric Lanlard's masterclass

Tuesday 18 September 2012

Curried spinach and mushroom tarts

IMG_3386-1
I have this knack to do things wrong. Its not a very frequent thing (although if you ask Ro, he would say its a recurring event), but since you cant ask him, I'm just going to go ahead and say its not always that I do idiotic things. I have the inane ability to tear packets and boxes without reading instructions. I rip them apart the wrong way which in turn makes it impossible to seal them back and then I have to hide it from Ro (who is annoyingly systematic and precise) so I don't get a dose from him. I attribute it to my 'no patience' trait which I don't know who I inherited from..mum, dad??? a little help here???

So the latest to the list are these mini tart tins. Every day for the past couple of weeks I used to pass by it in Sainsburys and notice that it was on a roll back- 3 pounds for 4 mini pans- but I could never decide whether or not I wanted it. I mean you get the sweet and savoury pre-made tart shells to buy so why bother to make them from scratch, was my logic.
IMG_3361 
Until one fine day I woke up and decided it would make a grand (also, unnecessary) addition to my already existing pans and pots, and also I could make tarts from scratch, show off a bit and blog it. Afterall how difficult is it to store 4 small tart tins. So off I went to Sainsburys and what do I see? Its no longer on a roll back but the damn thing now costs 5 bucks for 4 tins. Without even flinching (ya all that logic went down the drain) I put them in my basket, since by then I was already psyched about wanting tart tins and making some tarts for dinner that very day. 

I was also instantly lazy to make pastry from scratch so I picked up ready rolled pastry, did a tiny skip and headed home with my bounty. The tarts came out well, to say the least. In fact super duper well and I am very proud of my acquisition, although Ro later pointed it out to me that they weren't dishwasher safe, oh well bummer! But since he does the dishes anyway, I gave some gyan about how they are 'never' dishwasher safe. He bought it since he has no clue about tart tins :) :) :)

So yes, I do stupid things like that. But thanks to this trait of mine, you now get to see these yummy spinach and mushroom tarts. They are more quiche-like, and is a great breakfast item. Ro is now in the 'i am sick of bread for breakfast' phase and so I am trying to make some fun breakfast items for him. I hope he snaps out of it soon, because I sure am running out of ideas. Spinach and mushrooms are a fav combination of mine and I end up using it in pasta bakes, stir fries and such. Give it a go, and if you don't like it, you can come back and leave hate comments ;)
IMG_3376 
Makes 5 to 6 small tarts
Shortcrust pastry- 1 sheet (recipe follows)
Shallots- 2 medium, thinly sliced
Button mushrooms- 150 gms, cleaned and sliced
Spinach- 100 to 125 gms, washed and chopped roughly
Garlic- 2 tbsp, chopped fine
Curry powder- 1/2 tbsp
Eggs- 2 large
Cheddar cheese- 1/4 cup, grated
Milk- 3/4th cup
Butter- 1 tbsp
Salt and pepper- to taste

Pastry recipe adapted from here
Plain flour- 200 gms
Baking powder- 1/4 tsp
Salt- 1/4 tsp
Cold butter- 100 gms, cut into cubes
Cold water- 3 to 4 tbsp/ as required
IMG_3367-1
Mix together the flour, baking powder and salt in a large mixing bowl.
Add the cubes of butter and rub it into the flour, using your hands. It should resemble coarse bread crumbs.
Add the cold water bit by bit till it all comes together and you get a soft pliable dough.
Cling wrap it and place in the refrigerator while you get the filling going.

Meanwhile, melt the butter in a frying pan and sauté onions and garlic till soft and fragrant, for about 4 to 5 minutes on medium heat.
Add the curry powder and mix thoroughly.
Throw in the chopped mushrooms and sauté till all the water evaporates and is dry.
Finally, add the spinach, salt, a few twists of pepper and cook till the mixture becomes semi-dry in consistency. It shouldn't be too dry, but all the water from the spinach should have disappeared.
Transfer to a bowl and keep aside to cool.
Break the eggs into a bowl and whisk lightly.
Add the milk, season with enough salt and pepper and whisk the mixture well. Keep aside.
IMG_3375-3
When ready to bake, pre heat oven to 180C and lightly grease the tart tins with butter or oil.
Take the dough out of the refrigerator and roll it out on a lightly floured surface.
Cut out circles large enough to fit the tart tins and carefully place the pastry into the cases. Crimp the sides if required. Don't press it in too hard, taking them out can be a problem.
Add about 2 tsp each of the filling into the tart tins, spread it around and pour the milk-egg mix on top of the filling till about 3/4th full.
Repeat till all your filling and milk is used up.
Sprinkle the cheese on top of the filling and place all the tins on a baking tray.
Bake for about 20 to 25 minutes or till the eggs are cooked through. 
Once done, cool on a rack for about 15 minutes and then carefully unmould.
They taste the best on the very same day, but I stored them in an air tight container in the fridge for up to 3 days and used to reheat in the microwave for about a minute or two. Was perfectly fine!
IMG_3391 
Notes: You can either roll out the large ball of pastry and then use a lid or bowl to cut out circles or make small balls from the dough and roll it out to the size of the tart tins. If you already have rolled out pastry, then the first method works best.
Although I bought ready made pastry, I have used Maria's pastry recipe before and it is very easy and works great.
Use any filling of choice, eg, shredded chicken, sausages or even paneer. Paneer and spinach is a great combo BTW!
Store leftover dough, cling wrapped, in the freezer. Thaw completely in the fridge compartment and use as required.
Instead of milk, use double cream for a more richer filling.
Curry powder can be replaced with any meat/chicken masala.

Wednesday 12 September 2012

Honey chocolate cake

IMG_3323-1
First of all, how incredibly pretty is my cake stand???? Searched high and low for something like this and finally found it for a 7 quid steal. I cant stop gushing about it. Ok, on to the recipe now...I have this ongoing relationship with honey and honey based recipes desserts/cakes...at least for now. One fine day I could wake up and just flip it around and would never want to see or even be called honey, for that matter!!! I was so obsessed with it at one point that I used to search for honey based desserts and cakes, make it, bin it, struggle with it, and on the very rare occasions savour it. Yes, most of it were disastrous, but that's how a food blogger rolls right? No don't answer that, I'd just be upset if that's not how you guys roll.

Anyhoo, two of my favourite recipes to this day when it comes to cakes (and honey) is the Jewish honey cake and this honey chocolate cake by none other than the Domestic Goddess Nigella. Say whatever you want, but I love Nigella and her super duper, throw-in-whatever-you-can recipes. I have tried loads of her recipes and its always a hit, except for the one time I tried a banana butterscotch muffin and that wasn't a fav, but that could be because I bought wrong butterscotch and the bananas weren't ripe enough. 
IMG_3348 
I have made this honey chocolate cake quite a few times and its never failed me. I cant believe it took me this long to post it on my blog, its simply because I've not had any left over to take pics. I realised that honey and chocolate is a match made in heaven and it pairs so beautifully. There is a faint taste of honey when you bite into a piece, and the chocolate just takes it to a whole different level. Sorry about being dramatic about this..but being pleasantly surprised by how chocolate paired with something can make it likable..is worth mentioning, especially to someone who doesn't think chocolate makes the world go round. Yeah, I'm talking about myself!

Its a dense, moist cake, rather than a light airy one which makes it perfect as a dessert/ party cake if you do all the glaze and stuff. But it work just as fine if you omit the fancy stuff and just bake the cake on its own for a tea time accompaniment. I've tried it both ways and personally, I would chuck the glaze and just serve the cake with a dollop of ice cream and a generous splash of Kahlua. ITS DIVINE! trust me. 

I am only giving you the recipe for the cake and not the sticky honey glaze. Also, feel free to halve the cake.

Recipe adapted from here
IMG_3337
Dark chocolate- 100 gms, broken into pieces (more than 70% cocoa preferred)
Dark Brown sugar- 275 gms
Unsalted butter- 225 gms, softened
Honey- 125ml (runny)
Eggs- 2, medium
vanilla extract- 1/2 tsp (optional)
Plain flour- 200 gms
Baking soda- 1 tsp
Cocoa powder- 1 tbsp
Boiling water- 250ml
Kahlua (coffee liqueur)- 3 to 4 tbsp (optional)
IMG_3344 
Place the chocolate chunks in a large bowl and melt over a pot of simmering water till smooth and keep aside to cool slightly. You can also do this in the microwave by heating it in bursts till all the chocolate melts. 
Sift/ mix together the flour, baking soda and cocoa powder and keep aside.
Into a large mixing bowl add the sugar and butter and beat together till light and fluffy, either using a hand beater or the paddle attachment of a free standing mixer. You can also just use a strong whisk to do this.
Add the eggs, one after the other beating well after each addition, followed by vanilla extract (if using).
Fold in the melted chocolate with a spatula, making sure its all well mixed.
Tip in the flour mix and mix well, making sure there are no lumps.
Finally add the boiling water and beat well to get a slightly runny batter, but smooth and without any traces of flour.
Pour into a 9inch baking pan which has been buttered and lined with baking paper, and bake in an oven pre heated at 180C for about 1.30 hours.
Check the cake after about 45 minutes and if you think its browning on top, cover loosely with foil paper and continue baking. Keep checking every 15 minutes or so to see if its done.
Once a skewer inserted into the centre of the cake comes out clean, you can take it out of the oven and cool on a rack.
While still a tad hot, poke small holes in the cake using a skewer and pour over the Kahlua so it soaks up well. Alternatively, you can just do as I'd mentioned above.
IMG_3334 
Notes: Original recipe calls for light muscavado sugar, but brown sugar works perfectly fine.
Use good quality honey.
Nigella's procedure is slightly different from the one I have mentioned, both methods work fine, I just prefer to do it this way because its more organised (that's right, I said organised).
She also says you can blitz together everything except the boiling water which you can pour down the funnel with the motor running. Haven't really tried doing that, but if she says it works, IT WORKS!
Replace Kahlua with coffee for an almost similar taste.
The cake stays for about 3 days at room temperature, provided you can manage to keep it that long.

Monday 10 September 2012

Sponsored video: Rekorderlig Cider, Where's your Swedish Side?

I was introduced to this amazing drink called cider about 4 years back when we had just relocated to UK and was invited to a friends place for a BBQ. I am not so much of a beer person and so I was a bit apprehensive on trying out cider. But once I did, I knew I had found a favourite drink. So that whole year, we were on a major cider trip, buying cans by the truck loads, trying different brands and even making a visit to a cider farm to see how it was pressed...yes that's how obsessed I was, or rather we were that year.

Then we forgot all about it, discovered other drinks and life went on, Till about a couple of months back when we were at a pub and my cider instincts picked up. I asked for cider and the guy behind the bar read out the various brands available and I picked up the name Rekorderlig since I had not heard of it before. I said I'll have that and then he blurts out the various flavours available.

Now before going further, I must say I am a sucker for anything with flavour options available. The fact that there are options is a total winner for me. So there I was put forth with flavours like wild berries, mango and raspberry (which is my current fav!), strawberry and lime, orange and ginger, apple and blackcurrant and of course the basic flavours- apple and pear. Without showing that I was intimidated by the flavours available, I chose the strawberry and lime and was a happy girl.

Came back home and did my research and here's what I found. Rekorderlig is a Swedish cider from Vimmerby and it translates to being 'dependable' or 'reliable'. Made from pear and apple wine of excellent quality and the purest of spring water, the brand has become a much loved cider of many. Check out the video below, take a sip of this fruity cider and I'm sure you will find your Swedish side. I sure have found mine (over and over again!).
If you want to know more about Rekorderlig cider you can check out their website, and to get updates and such follow them on Facebook, Twitter or even subscribe to their Youtube channel here.

Article sponsored by Rekorderlig

Thursday 6 September 2012

Sri Lankan egg curry

IMG_3310
How are you all doing??? Embracing the last few days of summer? Well, I am and I think I'm now ready to let go and welcome gloomy, chilly days and sweaters and pull overs. Last week was depressing with rains and winds and gloomy weather and I almost got out my night socks. Good thing I didn't because for the last 4 days we have been having brilliant weather, warm and sunny and still summer like.

Since I am still getting into the groove of cooking and stuff, it is an effort to make dinner. I am still exhausting stuff from my freezer and realised if I didn't start cooking soon I'd just get used to it and even worse ignore my blog and photography and such. So last week when we were a bit under the weather (literally) I brought out this new cook book called Serendip by Peter Kuruvita which has an array of Sri Lankan recipes and some gorgeous gorgeous photographs.

This is my current fav book and I have already tried out a couple of recipes which have all been fruitful. Usually my first trial at new recipes are always a failure and it very rarely tempts me to make them again, but this one somehow has managed to hit the spot and I have so so so many awesome recipes to try from the book. The book costs quite a bit and if I didn't use it as much as I promised Ro, I am never gonna hear the end of it. So for the past couple of days anything on the dinner table is Sri Lankan in nature. (I plan on doing it till Ro tells me, enough with it already!!!)
IMG_3252 
Truth be told, the picture of this egg curry tempted me more than the recipe. The fact that I'm impulsive doesn't really work always. I had already put the eggs to boil and then decided to go through the recipe which is when I realised it had 3 ingredients I hadn't even heard of and wondered, what now??? I still decided to go ahead with the recipe, omitting the two and it still was a welcome change to the usual Kerala egg curry. Very few ingredients are used and seriously, how can anything with coconut milk ever taste bad??? 

I had picked up some frozen idiyappams from the Indian store a while back and served it along with the curry. It was a brilliant combo and I'm kicking myself for not picking up a few more packs. Ro was quite thrilled to see them and asked where I got it from to which I pretended to be insulted and said what do you mean, I slogged it out in the kitchen and made them from scratch. How did you do the strings without the press was his next question. I avoided it saying there was a technique I'd learnt on youtube which I shall explain later and he bought that. And then just when we were about to eat I opened my big mouth and said, 'hey just check if the idiyappams have been cooked through, it was frozen.' Ro who usually doesn't listen to crap I say, picked this one up immediately. I will be teased about it for quite a while. Dammit!! :)

Recipe adapted from Serendip: My Sri Lankan Kitchen by Peter Kuruvita
IMG_3275 
Eggs- 4, plunged into boiling water for 5 minutes and then refreshed in cold water.
Oil- 1 tbsp + enough to shallow fry the eggs
Cumin seeds- 1/2 tsp
Cinnamon stick- 1 inch piece
Onion- 1 medium, thinly sliced
Green chillies- 2 small, slit lengthwise
Curry leaves- a sprig
Chilli powder- 1 tsp
Turmeric powder- 1/4 tsp
Maldive fish flakes - 1/2 tbsp
Pandanus leaf- 1 inch piece
Dill seeds- 1/4 tsp
Coconut milk- 1 cup
Salt- to taste
IMG_3239-1 
Peel the cooked eggs, prick them all over with a fork and lightly salt them.
Heat enough oil in a pan and fry the eggs until golden, flipping sides as and when required. Drain on paper towels and keep ready.
Into a wok, tip in all the other ingredients and simmer for about 8 to 10 minutes or till the onions have become soft and the sauce has slightly thickened.
Add the eggs and continue to cook for 5 more minutes.
Season with enough salt, give a final stir and take it off the fire.
Serve with appam, idiyappam, roti or even bread.
IMG_3288 
Notes: I didn't have the fish flakes, pandanus leaf and the dill seeds which I presume were the main ingredients that gave the curry its distinct taste.
I also sautéed the onions with cumin, cinnamon, chillies and the powders till the onions grew soft and then added the coconut milk and let it simmer for about 5 to 6 minutes.
Although I'd pricked the eggs with a fork, I found that the masalas hadn't caught on to it. So next time I would halve the egg and throw it into the curry.
The base curry is perfect for a fish molee and even vegetable curries.