Showing posts with label afternoon tea. Show all posts

Friday, 30 April 2021

Cardamom cake with crackly almonds and sugar

Recipe adapted from here
Butter- to grease the cake tin
Caster sugar- around 2 tbsp
Almond flakes-  1/2 cup

Caster sugar- 264 gms
Eggs- 4 large
Plain flour- 160 gms
Salt- 1/4 tsp
Cardamom seeds- 1/2 tbsp (powdered)
Butter- 150 gms, melted
Vanilla extract- 1/2 tsp

Preheat oven to 170c (fan assisted) and grease a 9 inch pan using the butter. Make sure you generously do this.
Also line the base of the pan with grease proof paper.
Put the 2 tbsp sugar into the cake pan and swirl around/shake/tap to coat the side and base of the pan, as evenly as possible. Leave the remaining sugar if any at the base of the pan.
Cover the bottom of the pan with almond flakes. keep aside.
In a bowl whisk together the caster sugar and eggs using a hand held blender or in a free standing mixer., till it becomes pale and double in volume. This step is important so dont skimp it. It took me around 6 minutes.
Slowly fold in the flour and salt without deflating the batter.
Pour in melted butter, vanilla extract and cardamom powder and give a good mix, again without deflating the batter too much. The melted butter may go right to the bottom, so do scrape well and fold.
Pour slowly into the prepared cake tin, give a good tap on the counter and put into the oven.
Bake for about 45 minutes or till a skewer inserted into the centre of the cake comes out clean (original recipe said to bake at 35 minutes, but it just wasnt done, so mine took about 45 minutes. Start checking at 35 minutes and keep increasing just 5 minutes at a time.)
Remove from oven and leave on the counter.
After five minutes run a knife around the sides of the pan and invert onto a cooling rack (i inverted it directly on to a serving plate)
Peel off the grease proof paper slowly, while the cake is still warm and leave to cool completely before cutting.

Thursday, 26 November 2020

Chicken sandwich

Makes 4 loaded paninis or about 10 bread sandwiches
Boneless chicken- 500gms, cut into medium pieces (I've used breasts here, you can use thighs as well, but make sure you remove all the fat)
Pepper powder- 3/4th tsp
Salt- to taste

Mayonnaise- 4 to 5 tbsp
Bell pepper- 1 small, chopped into small cubes
Spring onions- 2, finely chopped
Seasoning of choice- 1/2 tsp (optional. I've used everything but the bagel seasoning here, but Italian herbs work great as well)

Bread slices- 20 (you can remove the crust if you prefer. I usually keep it on)

Season the boneless chicken with salt and pepper and cook covered in a frying pan over medium heat.
The chicken will ooze out enough water, but if not add a tbsp or so to aid the cooking.
Open the lid in between and give a good stir. 
Once the water has oozed out, cook without lid till the chicken is done and all the water has evaporated.

Once cool, transfer to a big bowl and shred the chicken using a fork, or if you have a food processor pulse a few times, just to shred the chicken. Make sure you dont make it paste like.
Add the mayo, bell pepper, spring onions and seasoning and mix till well combined.
Check for salt and add more if required.
The mix should be moist and not dry, so add mayo as  required.

Fill the bread slices generously with the filling and serve at room temp.
Notes: I've used the exact same filling as canape fillings on top of sliced cucumber and in vol-au-vent cases.
Ive also used it as a chicken salad along with lettuce, tomatoes and olives.
Add a green chilli or two while you chop up the chicken and it will add a hit of spice.
Replace spring onions with finely chopped red onions for a different taste.

Tuesday, 27 March 2018

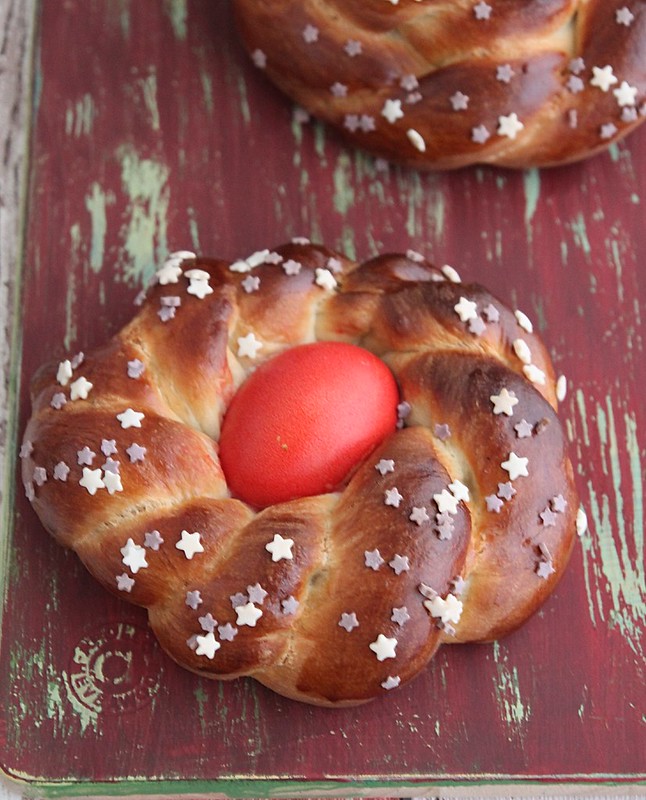
Italian Easter Bread

Makes 6
IMG_5822 
White bread flour- 390g, plus more if needed
Active dry yeast- 2 1/4 tsp 
Salt- a pinch
Granulated sugar- 95g 
Eggs- 2
Vanilla extract- 1/2 tsp (optional)
Butter- 80g, melted
Milk- 295ml 

To decorate
Eggs
Egg white, for egg wash
sprinkles
Red food colouring, or colour of your choice
IMG_5817
In the bowl of a free standing mixer throw in the flour, yeast, salt and sugar. Mix well
Melt the butter in the milk, either in a saucepan or in the microwave. Don't boil it, warm it just until the butter melts. If it's too hot, it will kill the yeast
Beat the egg into the flour mix followed by the vanilla and milk and butter mix. Give a stir to roughly mix it. Put on the dough hook and knead on medium for about 7 to 8 minutes
If you find that the dough is still wet, add some flour, bit by bit, till the dough starts pulling off the sides of the bowl
If you don't have a mixer, then follow all the steps and knead the dough by hand on a floured work surface until pliable and no longer sticky. This might take around 10 to 12 minutes
Transfer the dough into a greased bowl, loosely cover with a cloth or cling film and leave to prove for about 2 hours in a warm place or until it doubles in size. I usually keep it in an oven at about 20°C and it works
While the dough is proofing dye the eggs. Dilute the food colouring of your choice in warm water and gently place the egg in it. I used a brown egg, so lighter colours like pink and yellow wouldn't show, so I used red. Let the egg stay in the solution for at least an hour. The longer it sits, the stronger the colour.
IMG_5862
Once the dough has doubled in size, punch it down lightly and transfer on to a lightly floured surface. Knead for 2 minutes and divide the dough into 12 pieces
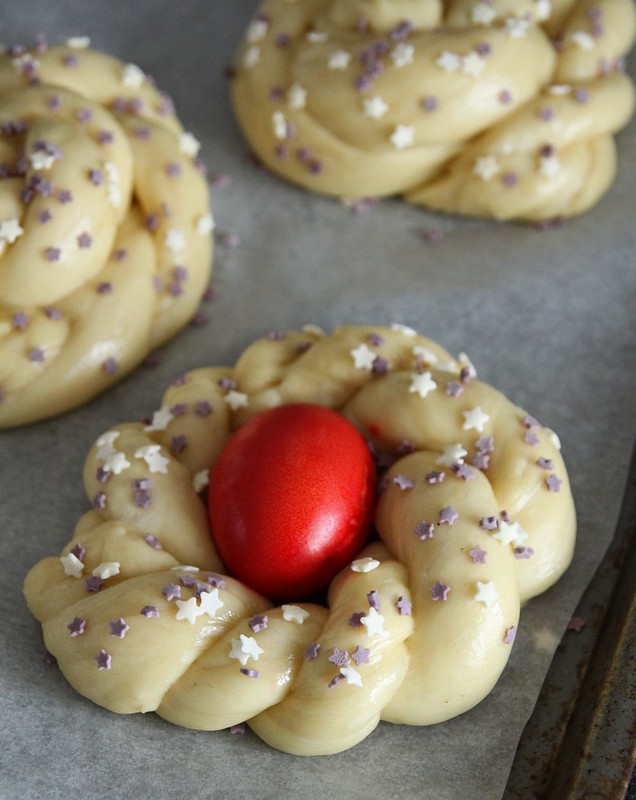
Roll each piece to form a rope around 1 inch in thickness and pair them up in two. Pinch the edges and twist them to form a braid of sorts and bring both the ends together to form a circle
Transfer to a baking tray lined with baking paper and place the dyed egg into the centre of the circle. Keep aside to proof for another hour or so. When ready to bake, do an egg wash on the braided dough and spread the sprinkles on top
Preheat the oven to 180°C/gas mark 4
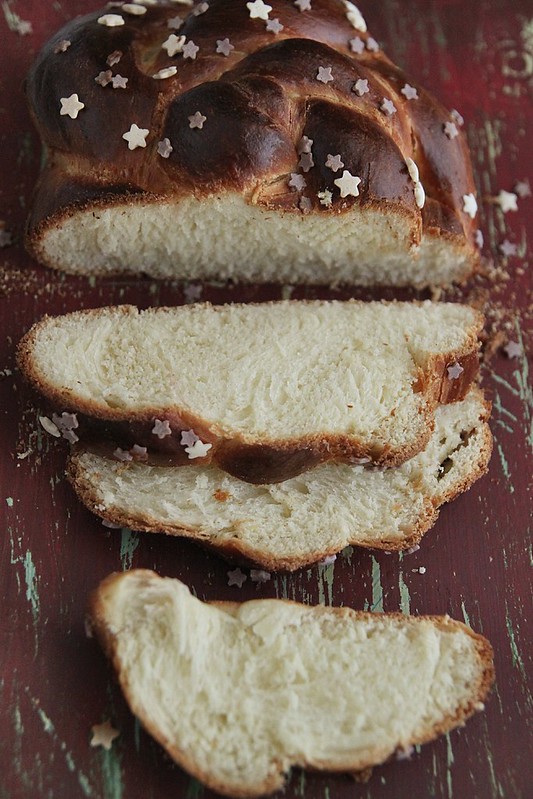
Bake in the oven for about 22 minutes or until the bread is golden in colour. Cool on racks before slicing.

Monday, 26 June 2017

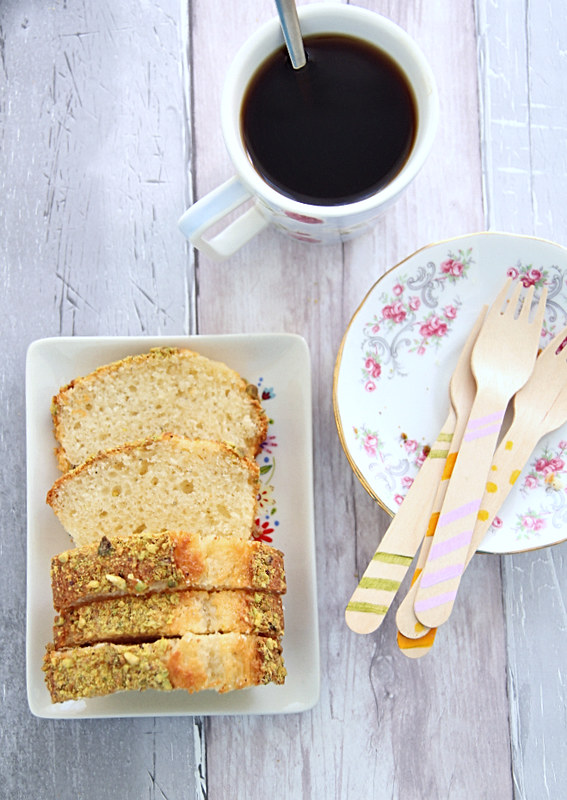
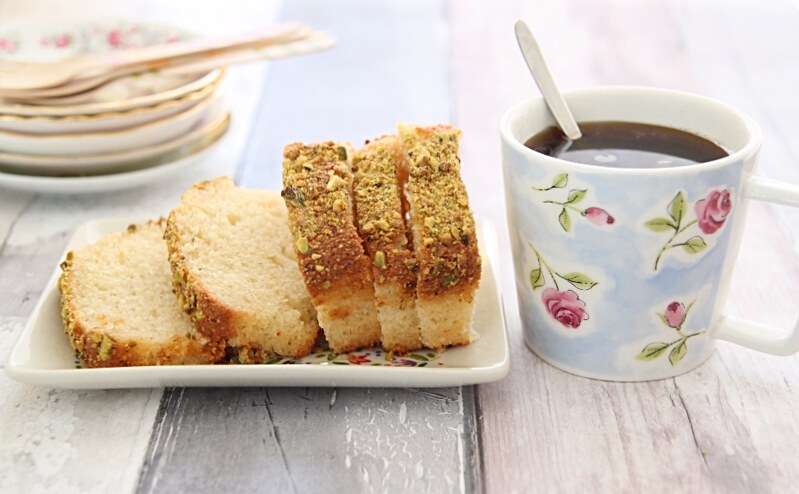
French yogurt cake with cardamom and pistachio

Makes 1 loaf cake (double the recipe for an 8inch round cake)

c05ed260-ae3b-442e-908f-c094490a28f4
Granulated sugar- 1/2 cup
Eggs- 1 large
Vanilla extract- 1/4 tsp
Plain yoghurt- 1/4 cup

All purpose flour- 1/2 cup + 2 tbsp
Baking powder- 1 tsp
Salt- a pinch
Ground cardamom- 3/4th tsp

Flavourless oil- 1/4 cup
Pistachio nuts- 1/2 cup, lightly crushed
2fdb8d0c-239f-42e0-bf30-c3625c22bcf0

Preheat oven to 175C and line a small loaf pan with baking paper.
In a mixing bowl whisk together the sugar, eggs, vanilla extract and yogurt till well combined and pale yellow..approx 3 to 4 minutes.
Add the dry ingredients (flour to cardamom) and mix well to combine.
Pour in the oil and fold lightly, don't have to whisk vigorously, but make sure its all mixed well
Pour the batter into the pan and top with the chopped nuts.
Bake for about 30 minutes or till a skewer comes out clean.
Take them out and leave to cool completely on a cooling rack.
Slice and have with a cuppa.

Thursday, 2 April 2015

Vanilla and matcha green tea latte

IMG_5753 
Well I guess i jinxed my wow of silence too soon. I decided to be proactive and plan and schedule a post for when I'm MIA. I thought I was going to be super busy with packing and such but I kind of am done with 90 percent of it. Ro has been fab and did a lot of it and now I'm just left with my humongous prop shelf which I have to start on. One good thing that has come out of this move is the fact that I've done one big massive spring cleaning. Gave a lot of clothes, bags and shoes to charity, cleaned out the fridge--waaay too many chutnies and sauces that i don't like/ use- threw out all those expired packs of gulab kamun and jelebi mixes and it feels great. 

IMG_5740
So i decided to put my time to good use and taste test the teapigs kit that was sent to me a couple of days back. Teapigs is a brand I'm quite familiar with. They have a fab variety of tea's which catch my attention every time i go to a nice cafe. I am quite a big fan of their fruit teas and if i do find any at a cafe then that's what i go for. Teapigs have been around for the past 8 years and they indeed produce a range of very best quality teas. Their everyday brew which i taste tested is rather string and is a good option if you want to add some milk in, but still maintain the strength. Teapigs also gives you more bang for your buck by incorporating more tea into their tea temples than most other teas (precisely 14% more than PG tips) so you get more out of you cuppa. Now who'd not want that??

Coming to matcha..I'm a matcha virgin and so was kind of looking forward to what the matcha hype was all about. I had a vague idea how it would taste and must say I wasn't wrong. I'm still making up my mind about whether I like it or not. It took me about a year to like green tea, so I'm pretty sure I'll be a convert soon. This latte on the other hand was bearable, in the sense, its got vanilla in it and that makes anything taste fab. I am more excited about the Aerolatte frother that came with the kit and i love love love it, Yup, all that froth you see is with that beautiful thing. Matcha is something I'd like to experiment with a bit more, especially in baking and see the results. I shouldn't judge it already.

Makes 2 small cups (recipe from here)
IMG_5731
Matcha green tea powder- 1 tsp (I used teapigs matcha powder)
Hot water- 1/3 cup
Granulated sugar- 2 tsp (adjust to taste)
Vanilla extract- 1/4 tsp
Milk- 1/2 cup

Into two cups add 1/2 a tsp each green tea powder.
Top with 1 tbsp each hot water and mix well to dissolve the tea powder. Make sure there are no lumps, and mix it in well. You can use a frother to make this job easier.
Pour in the remaining hot water and stir to combine.
Add the sugar and vanilla extract, mix well till the sugar dissolves.
Warm up the milk to a simmering point or warm it up in the microwave for about 30 seconds, making sure you don't bring it to boiling point.
Using the frother, froth the milk. Don't over do it to the point where the milk gets too thick, or else you'll have trouble mixing it with the tea.
Slowly pour the froth over the tea and dust with some matcha powder.
Mix well before you drink.
IMG_5769
Notes: Next time id reduce the green tea powder to 1/2 and use that between two cups. The tea is very strong and a lesser dosage would have tasted much nicer.
You can replace the vanilla with almond extract to give it a twist.
If you don't have a frother, use a French press, like i have explained in this post

With thanks to the PR agency for the teapigs kit.

Friday, 13 February 2015

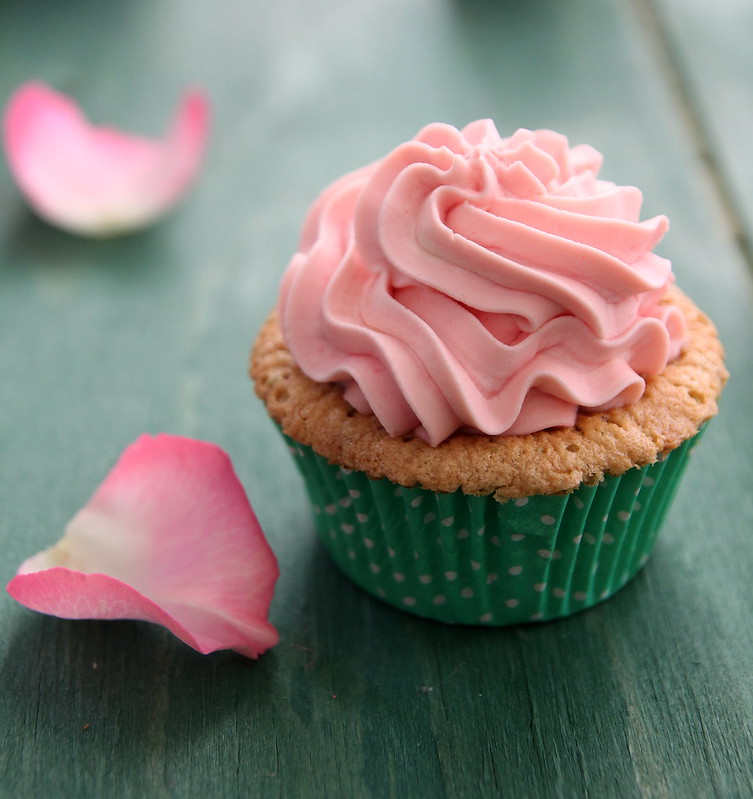
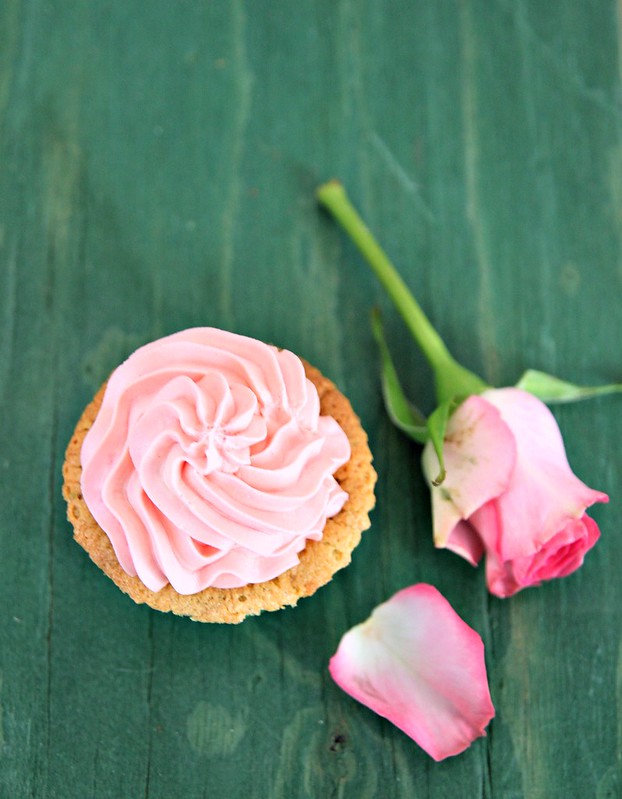
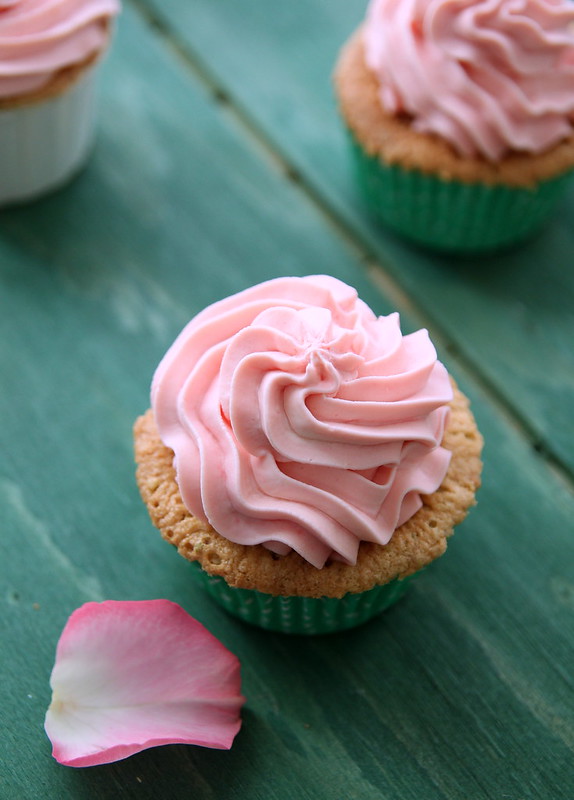
Rosewater pistachio cupcakes with mascarpone cream frosting

IMG_0900
Because its Valentines day and because no ones going to do anything special for me and because I felt like eating cake :)

I used to get all upset cos Ro hates everything to do with celebrating something (although he gives me some darn gift these days so i wouldnt sulk and make his life hell). These cupcakes were baked eons ago for Great British Chefs. I'm not a rosewater fan but the pistachio cake on its own is brill. Try it, cos you know, its Valentines day and all.

Makes 8 cupcakes
IMG_0892
Pistachio nuts- 50 gms
Ground almonds- 60 gms
Plain flour- 25 gms
Baking powder- 1/2 tsp
Butter- 100 gms, at room temperature
Caster sugar- 100 gms
Eggs- 2 small
Milk-2 tbsp
Rosewater- 1 1/2 tsp
Vanilla extract- 1/2 tsp (optional)
9776683646_65464c1d4a_o
Preheat oven to 176C and line a cupcake pan with 8 liners
Grind together the pistachio nuts, almonds and plai flour in a grinder or food processor. Make sure you dont over do this, or else you will be left with lumps.
Transfer to a bowl and add the baking powder.
In a separate bowl beat together the butter and sugar till light and fluffy.
Add the eggs, one after the other, beating well after each addition.
Pour in the milk, followed by rosewater and vanilla (if using) and mix well until well combined.
Fold in the ground mix using a spatula, till there is no trace of it in the batter.
Pour into the cupcake liners till about 3/4th full and bake for about 20 to 25 minutes or till a skewer inserted into the centre of the cupcakes come out clean.
Take them out of the oven and leave to cool completely on a cooling rack while you get the frosting done.

Mascarpone cream frosting
IMG_0898
Double cream- 100 ml (cold)
Mascarpone cheese- 250 gms 
Icing suagr- 2 tbsp
Red food colouring- a small bit to get the rose colour (optional)

Whisk the double cream in a large, clean bowl using the whisk attachment of your mixer or even a hand held whisk till stiff peaks form. Be careful to not overdo the beating or else it would split.
In another bowl mix the mascarpone cheese and icing sugar slowly till well combined.
Add this to the whipped cream, followed by vanilla and food colouring and continue whisking on low speed till they all come together and are mixed well.
Transfer into a piping bag and once the cupcakes are completely cool, pipe them.
Store in refrigerator for up to 4 days.

Sunday, 21 December 2014

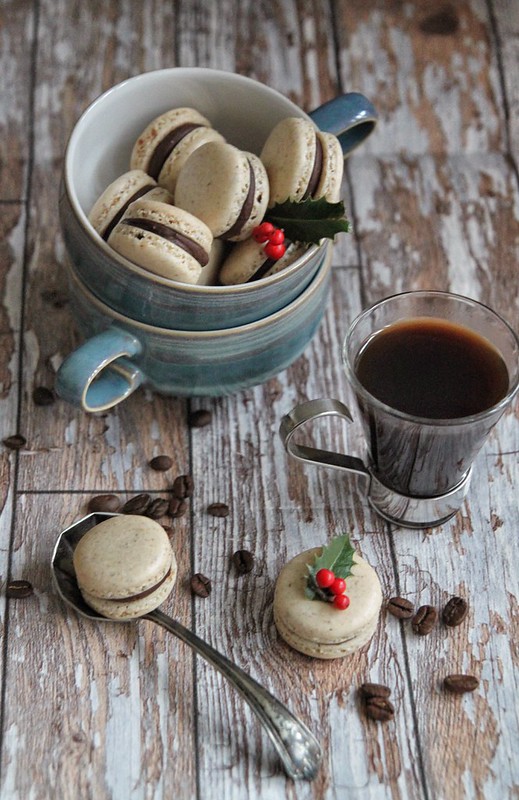
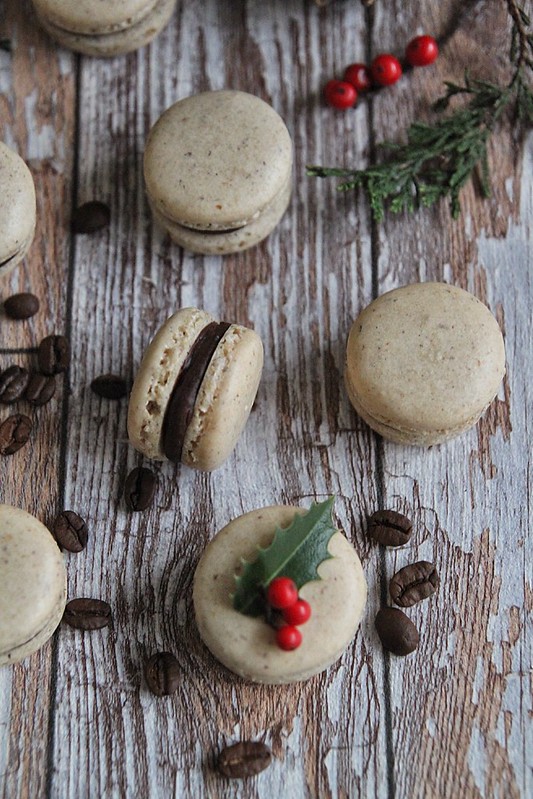
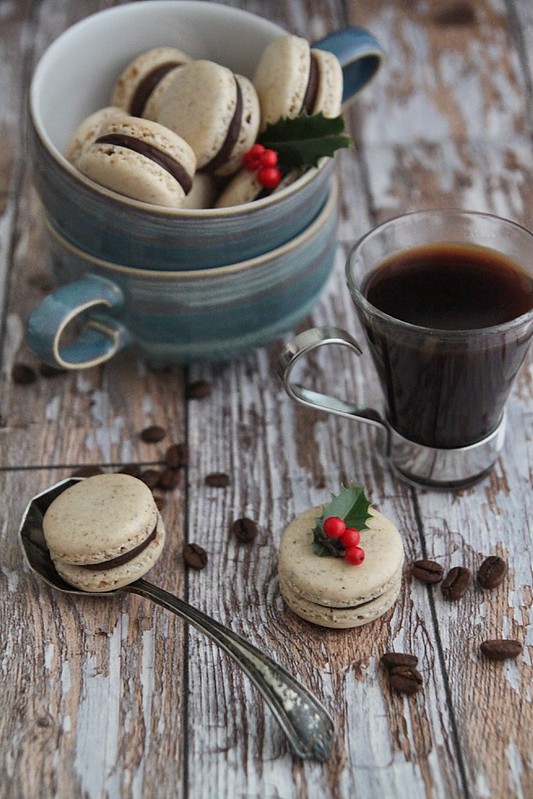
Christmas morning macarons: hazelnut macarons with spiced coffee and chocolate ganache

IMG_514h4 
I once tried making hazelnut macarons, quite arrogant of me really, because it was the second time i was ever trying out macarons. I hadnt even perfected normal almond macarons, so its no surprise that the hazelnut ones didnt turn out nice. So without even trying to figure out what went wrong, that was put to rest.

Now that i eat, breathe, live macarons, I thought i should try the hazelnut ones a go, also because i was getting a bit bored of serving the almond ones to friends and family and before they started complaining about it, thought I should play around with the recipe a bit. Macarons are so temperamental, and fails with the slightest of changes, so technically I should have gone with a recipe using powdered hazelnut, but I couldn't find one that follows the French meringue method, hence I just sub'ed the almond measurement in my regular recipe with hazelnut. Of course my heart was in my mouth till i saw the feet, but it all worked out well in the end.
IMG_5188
When its baking it smells just like nutella and taste wise, its not as neutral as the almond ones, so you need to be quite careful with the filling flavour. They are obviously nuttier and if you didn't know its hazelnut, you would be a bit confused as to what the taste is. I loved it, but Ro was not too sure, he said I should stick to almonds, how boring! Anyways, to play it safe I filled them with my spiced coffee stash (from my Harrods Hamper- yes i know eons back, but its only taken out every Christmas), perfect for Christmas morning and since hazelnut and coffee is a gorgeous match it went down very well with me :)

Talking about Christmas, have you all planned your feast yet? My house is all decorated (yes, as you can see, this year i went a bit crazy with diy christmas decorations), presents are all wrapped and i am all ready for my huge Christmas feast. I have invited a couple of friends over and have already planned my menu starting with cocktails and champagne all the way to cheese, dessert and coffee. Hopefully I'd be able to post one more recipe before the year ends, but if I don't come back, here's wishing My Kitchen Antics' readers a very merry Christmas and a kick ass New Year.

Makes 22 medium size macarons
IMG_5143 
Ground hazelnuts- 60 gms, after sifting
Powdered/ icing sugar- 100 gms
Egg whites- 60 gms
Caster sugar- 40 gms
Vanilla bean paste- 1/4 tsp (optional)

For a detailed macaron making process, check out this post of mine.
Get the baking tray with baking paper ready. Make sure you cut them exactly to fit the size of your pan without any folds or dents, because this will affect the shape of your macaron. You would need 2 trays for this quantity.
Sift the ground hazelnut with the icing sugar to remove any lumps.
Using a free standing mixer with whisk attachment or hand mixer, whisk the egg whites till frothy.
Add the caster sugar bit by bit, while continuously beating the egg white, till soft peaks form. (When in doubt, beat till still peaks form, so you don't deflate the meringue too soon)
Into the meringue mix add the sifted hazelnut-sugar mix and vanilla bean paste and fold gently using a spatula, starting from the bottom and continuing to the top till you get a smooth even mixture, with no meringue visible.
Go really easy on the folding because if you over do it, you could end up with disfigured macarons when you pipe them out. To test of the batter is of correct consistency the batter should fall back in ribbons when you life the spatula and the ribbons should have disappeared in about a minute or so. If it doesn't, then give a couple more gentle strokes and test again.
IMG_5207 
Pour the batter into piping bag with a plain round tip and pipe small round, leaving about 2 inches gap between the shells for them to spread and expand.
Leave aside to dry for 20 to 30 minutes. Again, this completely varies, If the batter is towards the looser side, it would take longer to dry, if it is humid it would take longer to dry and sometimes with no particular reason it just takes forever. If you don't leave it to dry enough, you wont get a proper developed feet.
Lightly touch the piped batter with your finger and if it doesn't stick them it means you are good to go.
When the batter is drying pre heat the oven to 140C and once ready place the tray in the middle rack and bake for 13 to 15 mins.
If your macarons are undercooked, it becomes crinkled and hollow. It also becomes too delicate to handle as well. So when it doubt, bake a little longer, but make sure you don't burn them.
Once done, cool completely in the tray itself before filling.

Spiced coffee and chocolate ganache
IMG_5212
Dark chocolate- 1/2 cup
Double cream- 1/4 cup
Spiced coffee- 1/4 cup (brewed with 2 heaped teaspoons of spiced coffee)

Melt together the chocolate and cream in the microwave, in bursts of 30 to 45 seconds.
Stir in the spiced coffee and make sure its all mixed together.
Pour into a piping bag and place in the fridge to firm up, and till ready to use.
IMG_5180 
When ready to fill, pair the macarons with similar sized ones and pipe the filling on to the shells.
Sandwich them and store in an air tight container till ready to serve.
They taste better when the flavours have mixed well and has moistened in the fridge for a couple of hours.
If you leave it in the fridge for a long time, it would moisten too much leaving you with soggy shells.

Notes: If you want to do your own spiced coffee, add a 1/4 tsp cinnamon, 1/4 tsp all spice and a pinch of nutmeg
Of course, just replace the 60gms of ground hazelnuts with ground almonds and you'll get the original almond macarons

Tuesday, 17 June 2014

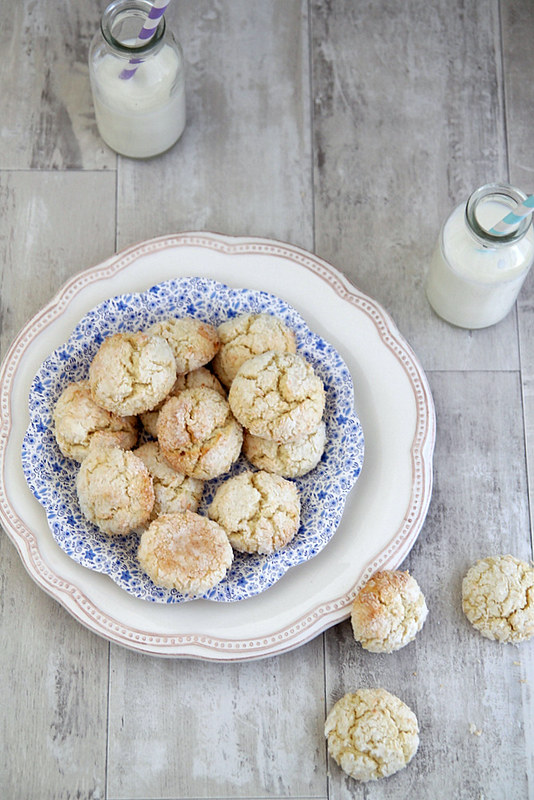
Lime and coconut crinkle cookies

IMG_3779
Its been a while since I posted a cookie recipe on the blog. Well, that's because I rarely make cookies and other than biting into them fresh out of the oven, I kinda don't like them that much. Of course its a different story for Ro, who claims he buys Oreo cookies just because I don't make any at home.

So last week I was heading over to G's place for a fun afternoon dress-up session (more about that later) and I had to take something for her lil boy who is so so adorable. I was on a tight schedule and had to figure something that could be easily made, with available ingredients and of course tastes good. I scouted around my bookmarked recipes and found this recipe, and I strangely had a couple of limes lying around in the fridge.
IMG_3763 
I've developed this new found love for lime (well, I always liked it in a margarita), mostly after tasting the awesome lime filling my boss makes for the macarons. It's perhaps one of my fav fillings, closely followed by passion fruit. I was a bit sceptical about whether kids would like lime and coconut as a flavour, as its somehow very adult-y, but then I had to give it a shot to see if it was worth it. I for one, loved it. G told me she and her nanny loved it, but I didn't get around to asking if lil S liked it. I served the leftover few to my niece and nephew the next day and they loved it, so I'm thinking even kids may actually have a thing for that flavour.

To be honest its very lime-y and coconutty. If you don't like these two flavours that much, then don't even bother scrolling down. If you like the lime flavour, but the coconut not so much, then do as the original recipe calls for where you roll the dough in granulated sugar and not coconut. The 15gms of coconut in the cookie doesn't really bring out too much of its flavour. I wanted it to be coconutty and hence rolled it it coconut.

Recipe adapted from here (makes around 36 to 38 cookies)
IMG_3749
Unsalted butter- 80 gms, at room temperature
Caster sugar- 100 gms
Egg- 1, small
Lime zest- from 1 lime
Lime juice- 2 tbsp
Dessicated coconut- 15 gms + enough to roll the cookies
Plain flour- 220 gms
Baking powder- 2 tsp
Icing sugar- to roll the cookies (around 2 tbsp)

Cream together the butter and sugar in a large mixing bowl, till light and fluffy. I used a silicone spatula for this as my butter was of a nice easy-to-handle consistency. Use the paddle attachment of your stand mixer to make the creaming easier.
Into the mix add the egg, lime zest and juice and dessicated coconut.
Mix till you get a smooth mix. I switched to a wooden spoon to make this job easier. You can use the same spatula, or even a whisk if that's easier for you.
Sieve together the plain flour and baking powder and add it to the butter mix, bit by bit, mixing after each addition. Use a fork to do the mixing.
One the mixture has come together, cover with a cling film and refrigerate for about 1/2 an hour.
IMG_3785
When ready to bake, preheat the oven to 180C and line 2 baking trays with baking paper.
Into a large plate add the icing sugar on one side and the dessicated coconut on the other. 
Keep a cup with water ready by the side because you'd need to keep wetting your hands to roll the dough.
Make small balls with the dough, first roll it in the dessicated coconut, followed by a generous roll in the icing sugar and place on the baking tray about an inch apart.
Continue till you finish the entire dough.
Bake for about 10 minutes and 12 if its a bit on the bigger side but not longer.
Cool on wire racks and enjoy them immediately or store in air tight containers and use up in 2 to 3 days (if you can stay away from it that long) :)
IMG_3757
Notes: The mix curdled quite a bit when i started mixing and of course I panicked but once you add the flour, it becomes alright
The original recipe used granulated sugar for the first coat, but i thought coconut was a better option. Feel free to replace it with granulated sugar.
The cookies are really lime-y, so reduce it to 1 tbsp if you don't want it too strong.

Wednesday, 12 March 2014

Macarons for grown ups- Cosmopolitan and Mojito macarons

IMG_2883-1
OK! I'm super duper excited about these macaron flavours and even more about the photographs, that turned out exactly the way i imagined. It was a crazy week of baking for us at Bobo Macarons. More than 1000 macarons baked, printed, filled and packed for a wedding and I was beyond exhausted. I did not want to do any baking for a really long time, or so I thought, until this fabulous idea for flavours developed in my head. I HAD to make it immediately. And so I did.
IMG_2844
I decided to go with two of my favourite cocktails- Mojito and Cosmopolitan. I make these at home quite often and I'm soooo in love with the flavours, it HAD to work in a macaron. I must admit though, it wasn't easy. I wasn't sure how to make the flavours pop and if adding liquid to the filling was a good idea, but I had to give it a go to see if it was feasible...and well, here they are...spot on with the cocktail flavours. Next on the list is margarita and sangria and maybe even a pink champagne one ;)

I have a basic macaron recipe that I fall back on and it fetches me perfect results. I halved the batter and added hot pink to one set and kiwi green to the other. I got 12 macarons in each colour. For the mojito macarons, I grated some lime zest and sprinkled over the shells about 10 minutes after I piped them out. This totally made a difference.

Mojito Macarons
IMG_2889
The mojito ones- lime, mint and rum being the main ingredients, were easy to put together. I mean I decided to do a white chocolate ganache filling and incorporate these flavours into it, keeping the base simple. I would however increase the alcohol a bit more the next time, as the lime was overpowering (in a good way, of course) with this batch. I'm so kicked about how the styling for this came through and its one of my favourite shoots till date.

Double cream- 45ml + 1/4 to 1/3rd cup to whip
White chocolate- 2 oz, roughly chopped
White rum- 1 tbsp
Lime juice- 3 tbsp
Lime zest- of one lime
Mint leaves- 2 to 3, finely chopped
IMG_2877
Gently heat the double cream, either in a sauce pan, or in the microwave and pour over the chopped up white chocolate. Keep aside for a couple of minutes.
Gently stir, without incorporating air into it, till you get a smooth mix. Keep aside to cool.
Add the rum, lime juice, lime zest and chopped up mint leaves and mix it in well.
Keep refrigerated till ready to use.

When ready to pipe, whip the ganache with 1/4 to 1/3rd cup of double cream with a hand held blender or in a free standing mixes with whisk attachment, till stiff peaks form. Make sure you don't over do this, or you'll end up with split cream.
Transfer into piping bags and pipe on to macarons and sandwich them.
Keep refrigerated in an air tight container till ready to use.

Cosmopolitan Macarons
IMG_2839
These - taste wise- were spot on but I did have a bit of trouble getting the right consistency. I used a butter cream filling for the macs and the amount of liquid that went into it, made it a lot difficult. I know that vodka is an important component in a cosmo, but i shied away from it because of the Cointreau and cran juice that was already making it quite fluid. I had to keep adding icing sugar to reach the desired consistency, which meant, the filling was a bit too sweet for my liking. I will find a way to work around that, but for now here's the recipe. 

Unsalted butter- 55 gms, at room temperature
Icing sugar- 6 tbsp
Cointreau- 1 tbsp
Cranberry juice- 1 tbsp
Orange zest- 1/4 tsp (optional)
IMG_2853
Beat together the butter and icing sugar till light and fluffy.
Add all the liquid ingredients plus zest and continue beating till they all come together.
If the mix looks like its curdled, add some more icing sugar to bring it back to desired consistency.

Thursday, 8 August 2013

Sponsored review: Twinings Moroccan mint tea mojito

IMG_9801 
Both Ro and I enjoy a good cuppa tea every once in a while. Mostly weekends, we try making all these different types of tea and enjoy it with some biscuits and such. I particularly love experimenting with it..like making a macaron flavour with it, different flavours of iced tea's with it, the occasional masala chai and our favourite the mint tea.

I received a couple of boxes of Twinings tea to review and after enjoying some with our biscuits and cakes, I decided to try something new. I had never made a cocktail with tea, and my love for everything cocktail made me try this Moroccan inspired mojito. Its such a cool recipe..i mean it combines my favourite mint tea with rum and really, what's not to like about that?

IMG_9862 
I also absolutely love the whole Afternoon Tea idea. I find it incredibly romantic, to dress up and go to a fancy hotel for some tea. I have been wanting to throw a tea party at mine for a long time, but haven't had the time to do it. But I did whip up some macarons for an afternoon tea-ish session with friends beginning of summer. I served them with Twinings Earl Grey (my favourite), English Breakfast and Assam tea- all great tea's. The English breakfast makes a mean mint tea as well. But be careful to not let it steep too much, or else your mint tea is gonna taste bitter. I have wasted waaay too much tea with that mistake.

Recipe adapted from here (Makes 2 to 3 glasses)
IMG_0294-1 
Twinings English Breakfast- 2 bags
Boiling water- 1 1/2 cups
Cardamom pods- 20, crushed
Sugar- 3 tbsp (adjust accordingly)
Mint leaves- 10 to 15
Lemon juice- 3 tbsp
White rum- 3 oz
Ice
IMG_0323 
Into a measuring cup put in the tea bags and bruised cardamom pods.
Pour enough boiling water to make 1 1/2 cups of liquid in total.
Seep for about 2 to 3 minutes, remove the tea bags, but not the cardamom and store in the refrigerator till ready to use.
Meanwhile, muddle the mint and sugar together in a cocktail shaker and keep aside.
When ready to serve, add the tea mix to the cocktail shaker, followed by lemon juice, rum and some ice cubes.
Shake away and then pour into individual glasses, top with a sprig of mint, a lime wedge and some ice and you are good to go.

IMG_9853 
Notes: The drink was not sweet at all, so the second batch i made, I used sugar syrup (1/4 cup) instead of sugar and added it to the tea mix when it was still warm. The mint leaves were muddled on its own.
Add more rum if you want it super boozy :)

With thanks to Twinings for the samples

Thursday, 9 May 2013

Blueberry cream cheese butter cake

IMG_8754-1
Its been ages since I updated the blog, and even longer since I posted a cake recipe. I have half written posts in my drafts and loads of reviews to be done, but somehow my days have become really busy..ever since I started working part time. I love my job and its opened up a completely new world of baking and cooking and such for me. More on that later.

I am not going to ramble today, yes, time constrained, so I'll go straight to the recipe. Like I said before, I hadn't baked a cake in a looong time and so on a day I felt the need to eat something seriously unhealthy, cake was what came to my mind. My usual Google searches led me to this fab recipe, tried by 3 of my fav bloggers and so I knew it was going to be a winner. 
IMG_8715
Loads of butter, loads of sugar and loads of cream cheese is what nice things are made of. So by no means think that this is a low calorie cake...which I think is bull shit any way. There is nothing called low calorie cake. If you want to eat cake then go all out and eat the real thing is my motto! Which is also probably why I need to go on a crazy diet :O

I usually don't like to bake with butter, more so because the whole creaming it with sugar etc etc is messy and time consuming, as opposed to oil which is soo cool, you just pour it into the batter (and also I can be a teeny tiny happy its a bit better than butter). But once in a while I don't mind going all out and, although I cringed at the amount of ingredients needed, that's exactly what I did with this cake! The outcome was delicious. I mean really, really delicious. Its so moist, like melt-in-your-mouth moist, and the blueberries break down the sweetness at intervals. It so versatile, you can definitely make this cake plain or add any other flavouring like orange or lemon and it would be great. TRUST ME!

Recipe adapted from here (makes an 8 inch loaf cake + an 8 inch square cake)
IMG_8738
Caster sugar- 1 cup
Butter- 250 gms, softened
Vanilla extract- 1 tsp
Eggs- 3, medium at room temperature
Cream cheese- 250 gms
Milk- 1/3rd cup
Self-raising flour- 2 1/4 cups
Blueberries- 150 gms, fresh or frozen (I used fresh)
IMG_8748
I didn't have self raising flour so I made my own by sifting together 3 1/2 tsp of baking powder with 2 1/4 cups of plain flour. The ideal measurement is 2 tsp baking powder to 1 cup plain flour.
Pre heat the oven to 160C and line an 8 inch loaf pan and 8 inch square brownie  pan with baking paper
Beat together the sugar butter and vanilla extract in a free standing mixer, using the paddle attachment, till soft and fluffy. You can use your hand beater as well.
Add the eggs, one at a time, beating well after each addition.
Change to the whisk attachment and add the cream cheese and milk. Whisk till the mix turns lump free and you get a smooth batter.
Add the flour and whisk just until mixed.
Using a spatula, fold in the blueberries.
Pour the batter into the lined pans till about 1/4th full and bake for about 50 minutes or till a skewer inserted into the centre comes out clean. My brownie pan took only 40 minutes to bake.
Once done, cool completely on a wire rack and before eating either dust with some icing sugar or have it plain.
IMG_8733
Notes: Original recipe called for 1 1/2 cups of sugar. Even for an ardent sugar lover I thought that was a bit too much, so i reduced it to 1 cup. It was pleasantly sweet.
I changed to whisk attachment half way through because i noticed that the cream cheese was still in lumps and not smoothening out with the paddle attachment. The whisk worked like a charm.
The cake keeps well in the refrigerator for about a week. I cling wrapped it properly and refrigerated it. It also freezes well.
Replace the blueberries with any berry of choice.

Monday, 29 October 2012

Afternoon tea with Champagne at the Corus Hyde Park

IMG_4880
Some time around last week we turned 7 (OK fine, I don't know the exact date, but that's besides the point really). Yes! 7 years since we met each other in a small cafe in Chennai. Me, never wanting to get married, He, enthusiastic about getting married. Poles apart on a lot of things, but on the same page for a few other. Yet! we somehow have managed to make it this far. Its been a rough 7 years with me Ro would say, but I would shrug and say that's marriage. I think Ro's good husband material :)

After so long, we don't even bother wishing each other remembering 'petty' occasions like this. Although, the die hard romantic in me, sometimes do wish it wasn't so. I had been wanting to do an Afternoon Tea session for a long time and when an opportunity came up, I grabbed it thinking we will have a nice afternoon out together. But Ro of course had better things to do than spend an afternoon having 'tea' with me, and so had to change plans. Determined to not dampen my spirits, I grabbed a good ol' girlfriend of mine and headed out into Central London for a fun afternoon out. And boy, am I glad I did, because believe it or not, a day out with a girl friend can sometimes prove to be so much more therapeutic than a romantic afternoon out with the husband :)
IMG_4878
Afternoon Tea is such a big deal here its not funny. Some hotels like The Ritz and Inter Continental are soooo known for their Afternoon Tea deals, you have to book a table waaay in advance. Although that was the kind of afternoon tea I had in mind, this deal was good enough for me, and its Groupon that I have to thank for this fabulous offer. From hair cuts to restaurant deals to cooking classes to mini breaks I have done it all. In the initial days after signing up, it used to be a struggle to not pick up the amazing voucher deals.  Now I have a grip on myself and although I scout the website frequently, its only when I absolutely need something do I pick it up. The Afternoon Tea with Champagne for two was too good a deal to pass and I am glad I picked it, because it was so worth it.
IMG_4869 
Corus Hyde Park is located bang opposite the park (as the name suggests) and is a 3 min walk from Lancaster Gate tube station. We headed straight to Olio's Brasserie, just off the reception area, and waited a good 5 minutes for someone to come greet us (not a good start, if you ask me). So I asked at the reception and was politely told someone would be with me soon. No luck again but then I spotted a stewardess at the counter and she guided us to our table. When we were kept waiting, I thought we would be placed somewhere near the stairs or something, but was pleasantly surprised to be seated right next to the huge windows, with good views of the autumn colours of Hyde park (not to mention enough lighting for my pictures, although it was such a gloomy and rainy afternoon, they haven't turned out that great).
photography post1
We were dutifully given our menu's and asked to pick the tea of choice. There were quite a few interesting options- from the traditional blends like Winchester Breakfast, Darjeeling and Earl Grey to the more contemporary ones like Rooibos orange and eucalyptus, Milk oolong and if that's not fancy enough for you, then try the Lavender hibiscus, a Blooming Tea, which literally does the same in your tea cup. We were not too adventurous with this and so settled for the Winchester breakfast and Classic Chai. Both were brought to the table promptly and we enjoyed the steaming cups of tea while it was pouring cats and gods outside. Oh and we also had to figure out how to handle the two flutes of Baron de Marc Gobillard, Brut Champagne in between sips of tea. Needless to say, the Champagne was happily welcomed, and the tea left to go cold in the tea pots.
IMG_4883IMG_4871 
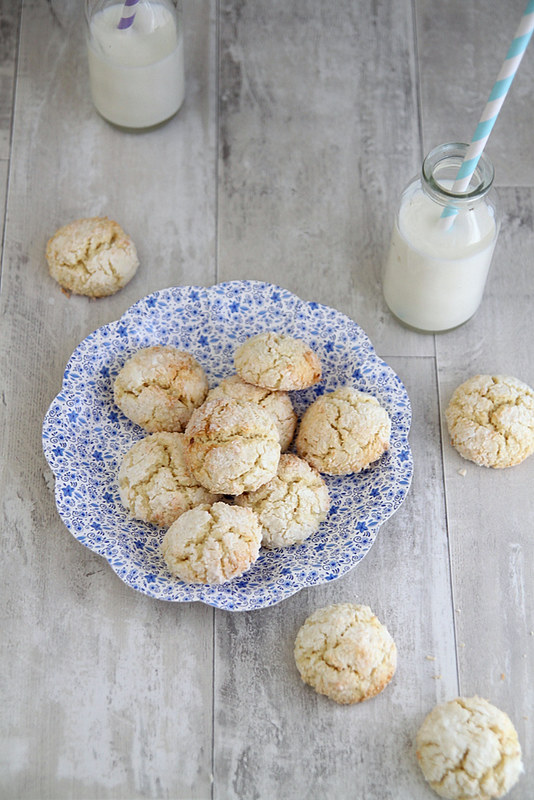
Then came the exciting bit, the array of tarts, cakes, scones and sandwiches. Arranged in traditional 3-tiered plates, they were a pretty sight. Taste-wise, however, we were a tad bit disappointed. The cupcakes were too dry and the brownie (I think it was a brownie) was anything but moist. The carrot cake was good, but it was not with cream cheese, but more like butter cream. The tartlets were teeny tiny pastry cups filled with something like butter cream with a blackberry perched on one and a raspberry on another. I don't think they can technically be called fruit tarts, but they were pretty cute and we liked it. That said, the scones were to die for and we smothered ours with clotted cream and jam and had a blast getting some extra calories into our bodies. The sandwiches were also pretty good, with the cucumber and cream cheese being my favourite and the ham and cheese a close second. The macarons also did their job of being all good looking with the perfect feet and stuff and the flavours- orange and coffee- were not disappointing either. 
27
Our tea session stretched on for about 2 hours, because you just cannot stuff everything into your mouth at one go (and also because we weren't shooed out of the restaurant) and its something you really need to enjoy at a slow pace. So the next time you are in London, or anywhere in UK, make sure you treat yourself to a good English Afternoon Tea session. Also, don't forget to check out Groupon for some good deals in your area and trust me, its a decision you wont regret.

Thanks to Groupon for a gift voucher with which I picked up this deal.