Monday, 28 May 2012

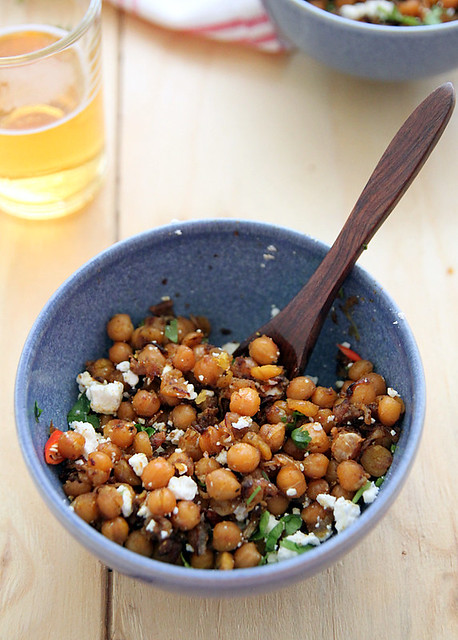
Curried chickpea salad with Apetina cheese (Summer Salad Recipe 2)

IMG_1869-1
Finally we have been blessed with bearable weather. Temperatures are still not in the 20's yet, but there is plenty of sunshine to get me going through the day. I have been making a lot of summer dishes to celebrate that (yes like I mentioned before, I'm thoroughly obsessed with the weather) ..with salads, cocktails and mocktails topping the list.

Honestly speaking, I am not that much of a salad eater, which probably also explains why I dont have that many salad recipes on my blog. I can occasionally gorge on a ceaser salad or a caprese as a side, but can never really eat an entire salad as a main dish, in spite of it being in trend and such. That is why, this curried chickpea salad came as a major surprise. We just couldnt stop with a couple of spoonfuls. In fact, we ended up polishing it off at one go, leaving a much anticipated lunch date for another day, since we were not gonna be able to do justice to it.
IMG_1893 
The salad is perfect for a summer picnic in the park, goes well with BBQ'ed meat, or just dress it up a bit and give it centre stage at the dining table when you are entertaining guests, and it will do the rest. Which brings me to the star attraction in the salad- a new cheese I recently discovered called Apetina. It's this fabulously creamy, slightly tangy cheese that does wonders to your palate. It is semi-solid in nature, which means consistencies can be according to your liking. Crumbling it, making it paste like or just slicing it up to throw into a salad is no big feat with Apetina cheese. Apart from the classic blocks or cubes, you can also choose from varieties such as the garlic and herb cubes, basil and oregano cubes, the sundried tomato snack pack, the garlic and olive snack pack and for the health conscious ones- the light blocks and cubes (with only 10 percent fat) should do the trick. Seriously, if you havent tried it yet, you most certainly must and wont be disappointed!
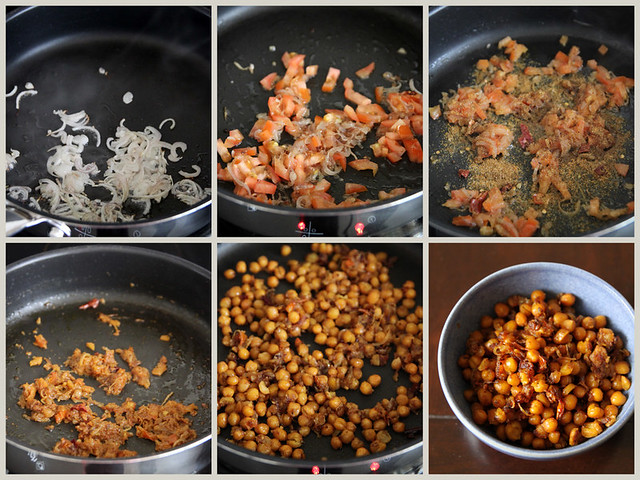
I have used the cheese as pizza topping, used it in filo parcels and even ate a few cubes just like that. What tops the recipes I've tried is this chickpea salad, which, whether you serve hot or cold, cannot go wrong. Its as summery as it can get with full of fresh and bold flavours and the slight heat from the chillies. I have tried to do a step by step procedure here, so warning you of the photo overload in advance.

Curried chickpea salad with Apetina cheese
Chickpeas- 1, 400gm can.
Olive oil- 4 tsp
Shallot- 1, thinly sliced
Tomato- 1 small, finely chopped
Curry powder- 1/2 tsp
Garlic powder- 1/2 tsp
Cumin powder- 1/4 tsp
Freshly ground pepper- 1/4 tsp
Dried chillies- 2, crushed
Salt- to taste
Lemon juice- 1 tsp
Apetina (classic block) cheese- 100 gms, drained and crumbled
Coriander leaves- 2 tbsp, finely chopped
Red chilli- 1, sliced (optional)
IMG_1895 
Rinse and drain the chickpeas.
Gently pat with a kitchen towel and tip them into a baking dish large enough to accommodate the chickpeas in one layer.
Drizzle 2 tsp of olive oil over them and toss well to combine.
Roast in an oven preheated at 200C for about 30 minutes, taking it out at intervals and giving a good toss/ flip for even roasting.
Keep a close eye, as you dont want to burn them.
They should be golden brown in colour once done.
201-1
 Meanwhile, heat the remaining oil in a frying pan.
Throw in the onions and saute till they turn light brown in colour.
Add the tomatoes and continue to stir till they become slightly mushy.
Mix together the curry, garlic, cumin and pepper powders along with the crushed dried chillies and add to the tomato-onion mix.
Add enough salt and saute on medium heat till the oil starts separating slightly.
Tip in the roasted chickpeas and stir for a couple of minutes, just to get the curried masala to coat the peas properly.
Take them off the fire and transfer onto serving bowls.
Add the lemon juice and give a quick stir.
202-1
If you plan on serving it immediately, then scatter the crumbled Apetina cheese on top (generously) followed by the chopped coriander leaves and garnish with the sliced red chilli for good measure.
If you want to have it cold then chill the curried chickpeas and just before serving sprinkle the cheese and coriander.
Served with a huge mug of beer, it tasted heavenly.
IMG_1883 
Notes: Roast the chickpeas in a frying pan on medium heat, stirring continuously, instead of doing it in the oven 
If you cant get hold of curry powder, then use any meat masala in its place.
The salad is a little on the spicier side. Omit the crushed red chillies if you dont prefer the heat.

There is also a FB competition going on, where in visitors who like the Apetina FB page and vote for their favourite salad will be entered into a prize draw for a picnic hamper (you really cant say no to that) and ultimately the final week prize which will be a BBQ (gasp!). So dont forget to head on over to their page and vote!
Viral video by ebuzzing

Friday, 25 May 2012

Sponsored Video: The Cube by Electrolux, London


I just know for a fact that London in summer this year is going to be spectacular. For one, the Olympics is hosted here and two, the Queens Jubilee celebrations are the talk of the town. There are events and street parties and all sorts of fun stuff happening around London. The latest addition to this is The Cube by Electrolux, a pop up restaurant on the top of the quintessential Royal Festival Hall in South Bank.

After making its presence felt in Brussels and Milan, Londonites now have the chance to experience this spectacular restaurant, strategically placed in such a way that you have fabulous views of some of the most prominent structures in London. If that's not good enough, then here's the best part, you also get to experience the culinary expertise of Michelin starred chefs like A A Gill, Tom Kitchin, Daniel Clifford, Jonray and Peter Sanchez-Iglesias etc., who will present their unique menu using locally sourced ingredients.

The Cube can house 18 guests at a time and the communal sort of dining experience where all the guests are seated around on large table makes it sort of fun and personal at the same time. As part of the whole experience, each of the chefs would cook in front of you, making it more of an interactive session where they would offer tips and hints on how to create the perfect meal while entertaining at home. 

Open from the 1st of June through September, The Cube is most certainly one of the most unique experiences London will have on offer this Summer. If you are not afraid of heights and want to enjoy food of the utmost quality in a gorgeous setting, then make your bookings right away. And with a bit of planning, you can kill two birds with one stone by booking it on the day of the Queens Jubilee pageant and watch the flotilla from up above. Ah! now that's something worth considering.

This is a sponsored article by Electrolux.

Tuesday, 22 May 2012

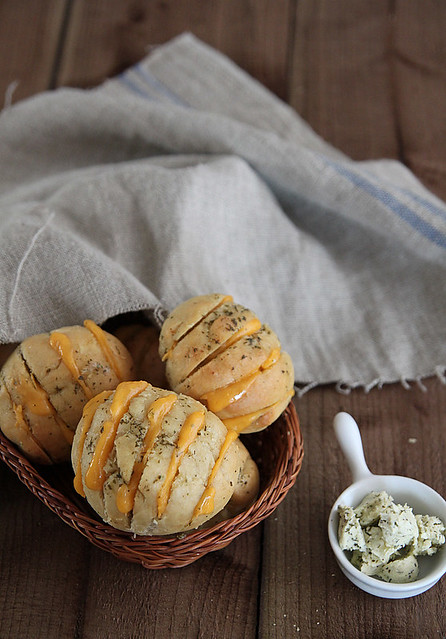
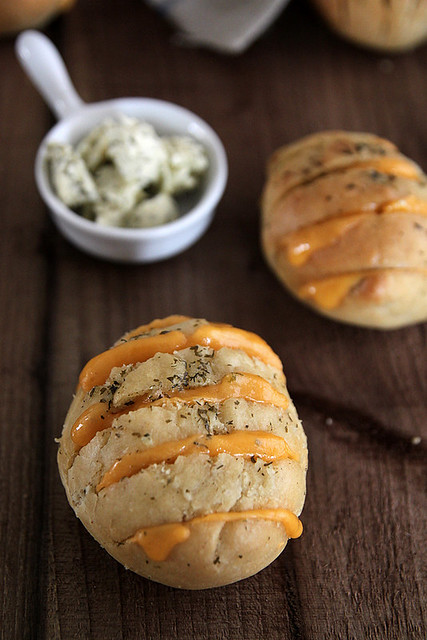
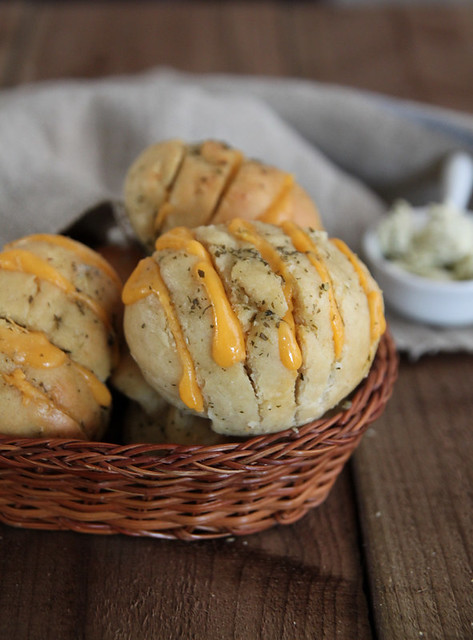
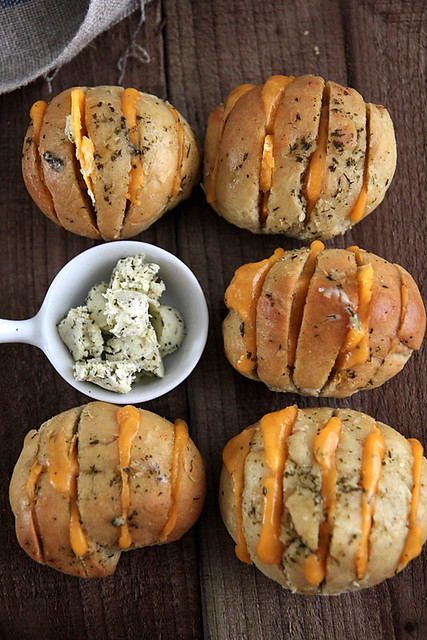
Hasselback cheesy garlic rolls

IMG_1735-1
I am not that much of a bread eater. It's strange because when I was in school/ college, I refused to pack anything else for lunch, but sandwiches, and considering I used to live on bread those days, I should have by now refused to part with it. But I guess, it rubbed off the other way for me. I don't want anything to do with it. Not that I hate it altogether, but I'm not that crazy about it either. The occasional garlic bread does the work for me these days.

Ro on the other hand, has toast every morning and I often ask him why he doesn't wanna try something else, and wont he get bored with it? This is the conversation we have every time I put forth that question:
"I would like idli, dosa or poori for breakfast, but since my wife is fast asleep during my breakfast time, I have no choice but to have toast."
Me: Do you think I work at Saravana Bhavan???? Well, you should have married a more pro-active person then, too bad I'm not. Why don't you try cornflakes, waffles or pancakes.
Ro: OK I like pancakes and waffles.
Me: Great I'll pick up a pack or two next time. All you have to do is heat them up in the microwave and you're good to go.
Ro: Oh I thought you were gonna make them for me????
Me: Wonder what gave you that idea? Remember I'm not the pro active wife.
Ro: Then I'll just stick to toast and coffee
Me: Fine by me ;)
IMG_1757 
He can toast a couple of slices of bread, but cant toast a waffle or heat a pancake?? I actually shouldn't complain because I'm not the super duper awesome wife who wakes up at 6am, grinds dosa batter, makes fresh dosa/idli and chutney and watches the husband gracefully digging into it. I'm one of those lazy brats who get Ro to even keep coffee ready for me in the mornings. But seriously, cut some slack here for me. Considering I make a fabulous (most of the time) dinner for him, toasting a few slices of bread is no ordeal?? You with me here???

Anyway, the reason I brought up bread was this...I just recently learnt the art of bread baking and I'm in love with it all over again. I'm not sure if its the baking that's making me all enthusiastic or the actual outcome, but whatever be the scene I'm slightly obsessed with working with yeast and am pretty proud of my creations. I initially started off with bread mix for the fear of working with yeast. I then decided to work with instant yeast but accidentally ended up buying active baking yeast which needed to be activated and that freaked me out. A couple (lots actually) of disasters and then I slowly got the hang of it. These sundried tomato buns, cinnamon rolls, Focaccia, bhatura and chicken stuffed buns were the successful out of the lot.
IMG_1744
(picture inspiration from here)
My mother-in-law then asked me to pick up some instant yeast for her from here and that's when I picked up some for myself. I didn't quite get the hang of that instantly and was kicking myself for not just sticking to stuff I am used to, when the other day I made some doughnuts and it rose beautifully. I realized I wasn't giving the dough enough time to double in volume (blame my patience for it) and since the error has been rectified, I've been on a bread baking spree.

This recipe was bookmarked eons ago and I must admit, after 2 disastrous trials, I got lucky the third time. The first time, the dough went straight into the bin since it dried out on me and an ugly crust had formed. The second time, I still went ahead and baked the bread, but while slicing the crust just started crumbling and the insides were not cooked. So off to the rubbish bin it was. This time, I was determined to give it my best shot and decided that if it didn't work out for me, then that's it, I was never gonna give this recipe a shot again. Luck was on my side, and in spite of the slightly screwed up beginning, I managed to get what I wanted. They were the most tastiest buns I've ever had and I cant wait to make them again. Feel free to make them into buns or loaves or whatever shape you prefer. The outcome is fantastic whatsoever.

Recipe halved from here (yields 1 loaf or 6 buns)
IMG_1750-1 
Plain flour- 1 1/2 cups
Salt- 1/2 tsp
Instant yeast- 1 1/8th tsp (just a little over 1 tsp)
Honey- 1/2 tbsp
Warm water- 1/2 cup
Olive oil- 1/2 tbsp + enough to grease

Garlic butter- 1/4 cup
Cheddar cheese- 75 to 80 gms (depending on your choice) *
IMG_1734 
Into the bowl of a free standing mixer add the flour, salt and instant yeast and mix well. 
Add the honey and olive oil and rub into the flour mix, either using your fingers or with the paddle attachment of you mixer. 
Change to the dough hook, add in the water and knead on low for a couple of seconds and then increase speed to medium and knead for about 5 minutes or till the dough becomes smooth and pliable (and releases easily from the hook).
Add some flour or water (bit by bit), if you think the dough requires either of it. (I can proudly say that I now know how to determine this..pat on the back for me).
If you are doing this by hand, then lightly flour your work top and knead the dough for about 7 minutes. 
Lightly grease a mixing bowl and the dough, cover with cling film and keep aside to rise for about 2 to 3 hours. It should have doubled in size after the proofing period. (I pre-heat the oven at a really low temp for about 5 minutes, switch it off and place the bowl inside the oven. I leave it aside for about 3 to 4 hours)
Once the time is up and the dough has risen beautifully, punch it down and knead for a couple of seconds using your hand.
Line a tray with baking paper and divide the dough into 6-7 lemon size balls.
Cover with the same cling film and leave to rise for a further 30 to 45 minutes.
You can also pre heat the oven to 175C at this point.
In the mean time, melt the butter and thinly slice the cheese.
Once the dough has risen again, brush some of the melted butter onto the rolls and bake for about 20 minutes.
Take them out of the oven brush them again with more garlic butter and place them back inside for about 5 minutes. (yes double dose...that's what I'm talking about)
By this time the rolls would be nice and brown. Leave them out to cool for about 15 minutes.
Using a serrated knife gently slice the rolls, making sure you don't go all the way through the loaf. Leave an inch gap between slices.
Brush garlic butter in between and fill each gap with the cheese.
Send them back into the oven for about 3 to 5 minutes or till the cheese have all melted.
Take them out of the oven and if there is more butter, go on and glaze them.
Serve as a side to bakes or casseroles.
IMG_1758-1 
Notes: If using active dry yeast, then mix together the honey and water, sprinkle the yeast over it, stir to dissolve and keep aside for about 10 minutes or till the yeast starts frothing. Rub the oil into the flour-salt mix and then pour the yeast mix into it to form the dough.
Use any cheese you prefer. The more stronger, the better.
*I used cheddar cheese slices, which are easier to fill in the gaps. You can use a cheese slicer if its a slab.Its ok if its grated as well, just make sure you stuff enough between the slits.
I used store bought garlic butter, because I'm lazy. Making your own is really easy. Just mix 1/4 cup of melted butter with about 1/2 tsp garlic powder, 1/2 tsp finely chopped parsley and salt to taste. I prefer using garlic powder instead of pods because i find the garlic taste too strong.
Feel free to make baguettes instead of rolls and double the recipe for larger quantities. As a rule, I always halve the recipes of any new dish I try. It's not the best way to go about it, but it somehow works for me.

Monday, 14 May 2012

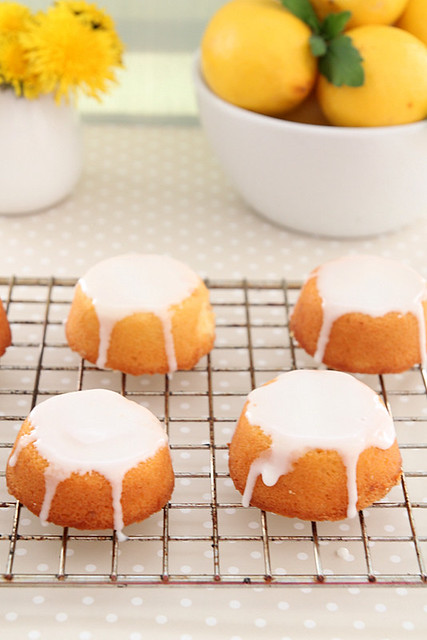
Mini lemon cakes

IMG_0252
I had planned on writing this post waaay earlier but, you know how it is right...you get back home after a short holiday and you don't feel like doing anything, leave alone cooking. Even if we were away for only 3 days, it kinda put me in a state of lethargy and laziness and that's the reason why I'm about a week late in doing the deed.

The short break did us both good. We stayed in a cute lil B&B in the middle of nowhere and trekked around New Forest National Park which was an absolute beauty, areas of it at least. On our way back we stopped by Winchester, walked around the magnificent cathedral and headed back before rush hour. It didn't rain at all while we were there (much to my disappointment) but the moment we were on the M25 back into London, it started pouring like crazy. After gorging on pub food for 3 days continuously, we were dying to eat something spicy, and so invariably ended up ordering chicken biryani from a fav restaurant of ours. Here are some pics we took during the break.
IMG_1488 IMG_1511 IMG_1481 IMG_1519 IMG_1405 
Ro was out drinking and dining that entire week which meant no cooking at home and I was a happy girl eating sandwiches and quick fix meals junk. To add to the misery, the oven is still not fixed and I have started panicking slightly, especially since I have guests one after the other starting this month end.

Ok enough of complaints. Coming to this recipe...its again from the same book which had the Nanaimo bars and although I'm not that big a fan of citrussy food/ desserts, this one was not too bad, in spite of the lemon over dose. I wanted to post this on a day the sun was shining and everything was bright and yellow and lovely (which was last week), but since I'm thoroughly late in doing so, its pouring outside now and probably not the colour id associate with it. But with the hope that summery, sunshine days are not that far behind, here's kick starting the season with citrussy sweet mini lemon cakes.

Recipe halved from The Boy Who Bakes by Edd Kimber
IMG_0244 
Butter- 113 gms (at room temperature)
Caster sugar- 113 gms
Lemon zest- from one lemon
Plain flour- 63 gms
Ground almonds- 50 gms
Eggs- 2, lightly beaten
Vanilla extract- 1/2 tsp (optional)

Lemon syrup
Lemon juice- from one lemon
Granulated sugar- 25 gms

Lemon glaze
Lemon juice- 2 to 3 tbsp
Icing sugar- 50 gms
IMG_0233 
Whisk together the flour and ground almonds in a bowl. Keep aside.
Using a hand beater or free standing mixer beat together the butter, sugar and lemon zest till light and fluffy, about 5 minutes on medium speed.
Mix the vanilla extract (if using) with the eggs and add this to the creamed mix, bit by bit, beating until well combined.
In two additions tip in the flour mix, beating/ folding until just combined.
Pour into greased muffin cups until about 3/4th full and bake in an oven pre heated at 180C for about 18 to 20 minutes or till a skewer inserted into the centre comes out clean.
Take it out of the oven and let it sit on a cooling rack

While the cakes are baking, you can make the syrup and glaze.
For the syrup, combine the lemon juice and sugar in a saucepan and set over medium heat.
Simmer for a few minutes, or till all the sugar has dissolved.
Remove from the heat and set aside till ready to use.
For the glaze, whisk together the lemon juice and icing sugar till you get a smooth mix. It shouldn't be too loose, nor too thick.

Once the cakes are ready, when still warm to touch, prick the cake all over, using a tooth pick or wooden skewer. 
Brush generously with the lemon syrup and let the cakes stay in the muffin pan till completely cool
Then tip them onto the cooling rack, turn then upside down and spoon over the glaze, allowing it to drip down the sides.
IMG_0237 
Notes: Use lemon extract instead of vanilla to take the citrussy flavour a notch higher.
If the cakes have a pointed dome, just slice off the top a bit for a more level surface.
If you don't want the lemon flavour to over power, reduce them drastically.
The cakes taste even better the next day with the flavours completely catch on. Also, there is no fear of the cakes drying off because the lemon syrup makes sure its always moist.

Wednesday, 2 May 2012

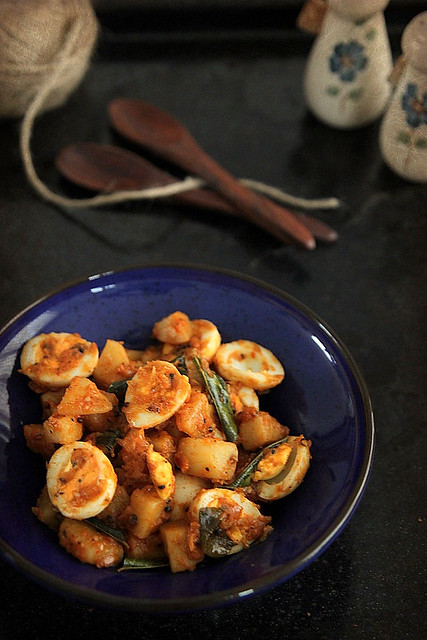
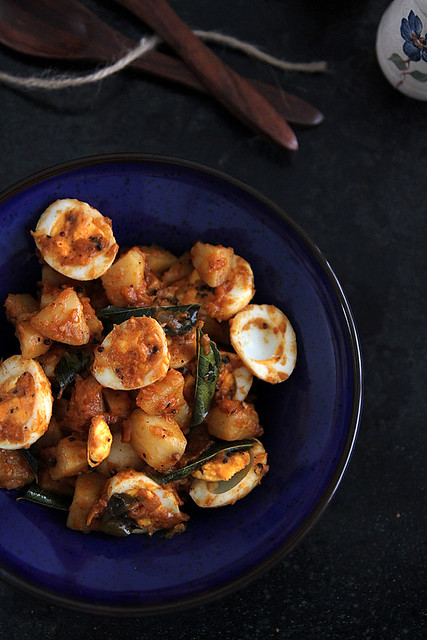
Quails eggs with spicy potato (kaada mutta uralakizhangu mezhukkupuratti)

IMG_1073-2
I was supposed to post this about 2 days back, but life got the better of me and I had to run off tending to certain issues, with an impromptu trip this coming weekend topping the charts. I love being spontaneous. I don't care for planning and such, much to Ro's annoyance. Which is why he made a big deal about travelling on a long weekend when every B&B would be packed, prices would be over the roof, infested with tourists and of course the weather (which btw hasn't improved since my last update).

But me... I found that challenging. I said I'd do all the planning and he agreed. But it was only when I started planning that I realised every decent B&B was indeed occupied or they all needed a minimum of 3 days stay on a long weekend (Bank holidays as we call it here). It still didn't stop me, and I spent my entire time researching and sending out emails to such extent that when I received replies, I was thoroughly confused as to which B&B it was and where, which- thanks to my poor organisational skills- I hadn't bothered to document. So it was double the job, going back and figuring out where it was etc etc.
IMG_0943 
I also wanted to make this an 'explore the nature' kinda trip which meant no castles, churches, museums and such, but trekking around the national parks in the rain and cold weather...maybe even hire cycles and go around the countryside. It all does sound awesome now, I know, but like Ro says, after walking for about a mile, I get tired, need to rest, need food, need to spot a tiger or elephant (yes I find monotonous scenery absolutely boring). I have only trekked along coasts and the scenery is not too diff all along, but this time I'm thinking exploring a national park would be more exciting. Even if I don't spot a tiger, I love coming across small streams and such. Its all in the planning process still and considering we need to leave by Friday afternoon, I think we are running out of time. If we don't end up going this weekend, I'm gonna take up on Ro's offer to take 3 days off during the week and set of. Nopes, not gonna let it fizzle off this time.

So that's precisely why this post took a while to make it here. I made this a couple of weeks back, when the weather was good and sunny hours filled my days. I haven't touched the camera in a while and its slowly beginning to grow on me. My oven is still not fixed and till I get that done, I guess I shall be very quiet around here. It's also my second time experimenting with quails egss. Initially I was a bit psyched out by them and I cant really explain why. But this time was more peaceful and the teeny tiny birds didn't come to my mind when I was boiling it. This is perfect as a side dish to rotis and parathas and even appams, but a word of warning, its bloody spicy. So go easy on the chillies if you don't want to have a heart burn.
Recipe adapted from Lekshmi Nair's cookery show
IMG_1091
Quails eggs- 12
Potatoes- 2 large, peeled and diced into medium size pieces
Shallots- 5 small or 1 large
Dry red chilli- 2
Garlic- 10 cloves, peeled and roughly chopped
Whole peppercorn- 1 tsp
Kashmiri chilli powder- 1 1/2 tsp
Oil- 2 tbsp
Mustard seeds- 1 tsp
Curry leaves- 2 to 3 sprigs
Water- 1/4 cup
Coconut milk- 1/2 cup (optional)
Salt- to taste
IMG_0957 
Cook the quails eggs in boiling water for about 5 minutes. Drain, peel, slice in half and keep aside.
Similarly, cook the potatoes in boiling water till about 3/4th done. Drain and keep aside
Grind to a coarse consistency the shallots, dry red chillies, garlic and peppercorns, either using a pestle and mortar or in a food processor/ grinder. It need not be smooth.
Heat the oil in a kadai and add the mustard seeds.
Once they start to splutter throw in the curry leaves followed by the crushed masala.
Once the raw smell of the masala disappears, add the Kashmiri chilli powder.
Sauté on medium heat till the oil starts separating, could take about 6 to 8 minutes.
Add the pre-cooked potatoes and salt and toss around, making sure they are well coated in the masala.
Add the water and coconut milk, stir and close with a lid. Let it cook for about 5 to 6 minutes on medium-high heat.
Open the lid and stir, scraping the bottom if the masala has stuck to the pan.
Add the sliced eggs and fold them in together with the potatoes and masala. It is ok if some of the yolk gets mixed with the masala, but don't over do the stirring bit.
Check for salt, add if required, give one final stir and take it off the flame.
Serve with roti, parathas or even appam and idiappam.
IMG_1084 
Notes: The original recipe calls for ducks eggs but I just went ahead and used quails eggs instead. You can of course replace it with hens eggs, about 5 would be good enough. You just have to dice it smaller.
If you are not using coconut milk, increase the water amount to 1/2 cup.
Original recipe called for about 4 dry red chillies. I only used only 2 and we couldn't handle the heat.
This is a semi dry preparation. If you want a gravy version, add more water or coconut milk.

Monday, 23 April 2012

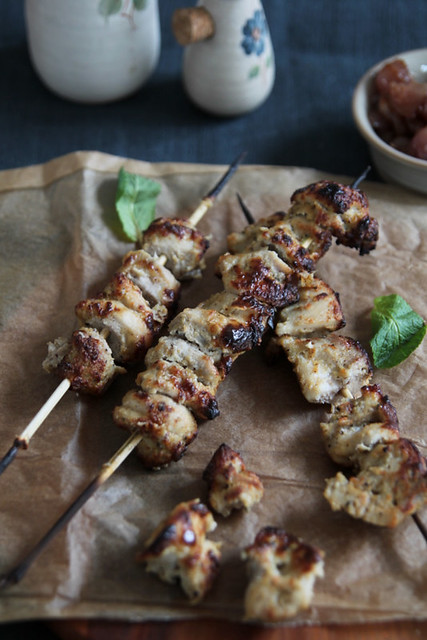
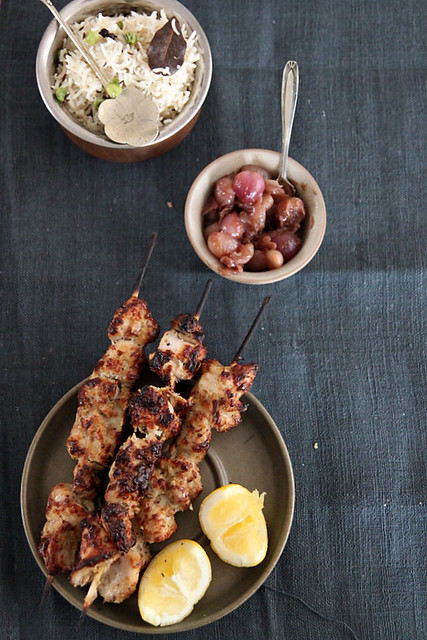
Afghani murg (chicken) malai kebabs with cumin flavoured rice

IMG_0376
After a week of glorious weather (where everyone thought summer arrived early, even the weather man jumped up in glee) its back to winter like drab this part of the world. Its been filled with rainy days the past 2 weeks and although the trees are in full bloom and the birds are chirping and there is peace in the world, the temperatures are 10C and 12C and the fierce winds make it feel like 5 or 6. Since weather reports form a major chunk of my life these days, I had to update you on it :)

In all honesty, I love rains. The heavy, you cant see whats in front of you, making loads of noise kinda rains, like the monsoons in Kerala. The story is different here because, you wont even know its raining unless you look outside. It comes and goes like a thief and quite unpredictably, like a woman. Like for example, yesterday I woke up to bright sunshine and brilliant 14C temperatures, windows were left open and beer bottles were opened. I went about making lunch thinking I would be able to take some pics finally (oh ya its always that way and not the other way round). 
By the time lunch was done, it was overcast and gloomy, threatening to rain. It finally did, around 4pm and I thought, perfect, let me grab a cup of tea and cosy up with a cookbook. Made tea in 5 mins, settled down on the couch with a throw and the rains had disappeared and the sun was out. So I jumped up immediately, frantically arranged my props, prepped up the food and yes, you guessed it right, it started raining. I was so pissed off, I didn't even have the energy to put back all the stuff I had painstakingly arranged (strewn all over the floor would be more precise). I hoped it would be sunny again and it did become bright for a couple of minutes, but by then I was so engrossed in the book, I couldn't care less. It's sad really, because it was a recipe I would have definitely loved to put up here. This morning isn't any better and the weather forecast says, its raining all week. So I guess the recipe is not meant to be displayed as yet..Sigh!
IMG_0385 
That brings me to this kebab recipe, which I did make on a rainy Sunday and was just the perfect thing to eat on a cold dreary day. The difference, however, was that in spite of the horrid lighting I still managed to take pics (of course they are not really the best, but I still made it work). A friend and I were chatting about food a couple of weeks back and she said she tried these kebabs and they were great. I asked her for the recipe but she said she couldn't find it. So Google came to my rescue and I found a recipe which had all the yummy ingredients and immediately knew it would be a success. So I went about sourcing the stuff and made it the very next day.

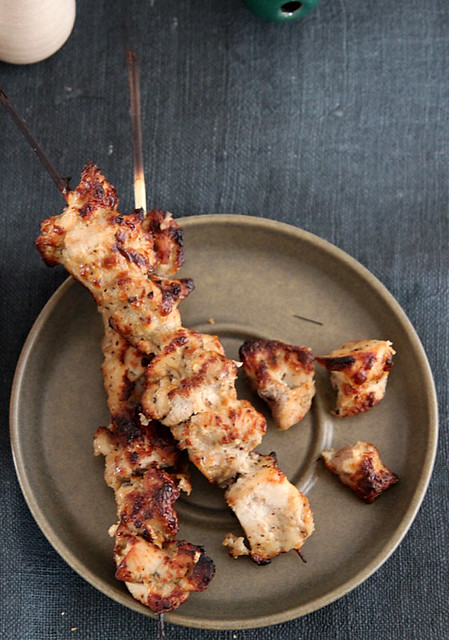
The outcome was this really cheesy, juicy and absolutely delicious kebab. The recipe is more or less similar to the Reshmi kebab, but I would say this one is waay better and so so good, it puts other kebabs to shame, really, it does! I don't usually brag about the food i make unless its extremely good. and this definitely is high up there on the food pedestal. I cant wait to make it again (once my oven gets  fixed). I must admit however, that the cardamom taste in this recipe is prominent and this, in spite of reducing it drastically from the original recipe. But I guess that's really one of the specialities of the dish. Do reduce it even more or omit it completely, if you cant stand it.

Recipe adapted from here
IMG_0336-1 
Boneless chicken- 500 gms (I used chicken thighs)
Ginger paste- 1 tsp
Garlic paste- 1 tsp
Rice vinegar- 1 tbsp
Cashew nuts- 3 tbsp
Milk- 3 tbsp
Cheddar cheese- 2 tbsp, finely grated
Cardamom powder- a little less than 1/4 tsp or to taste (powder the seeds alone from about 5-6 pods)
Freshly ground black pepper- 1 1/2 tsp
Garam masala- 1 tsp
Egg- 1, lightly beaten
Double cream- 2 tbsp
Salt- to taste
IMG_0377 
Cut up the boneless chicken pieces into bite size pieces (not too small) and marinate it with ginger, garlic pastes, vinegar and salt and keep aside while you get the remaining preps going.
Soak the cashew nuts in milk for about 15 minutes and then blend to a smooth paste.
Transfer the mix into a bigger bowl and add to it the grated cheese, cardamom powder, black pepper, and garam masala.
Whisk the egg and cream together separately till just combined, and add it to the cashew-cheese mix.
Mix till you get a smooth paste.
Pour this mixture onto the marinated chicken and mix well, making sure all the pieces are well coated with the paste
Cover with a cling film and marinate it for a minimum of 1hr. I kept it in the refrigerator over night.
About an hour or so before cooking, soak around 6 to 8 bamboo skewers in water. 
Also bring the marinated meat to room temperature.
When ready to cook, preheat the oven in the grill mode.
Thread the chicken on to the skewers, about 4 to 5 pieces per skewer (of course depending on the size of the pieces) and place on a baking tray lined with aluminium foil.
Place under the grill and cook for about 6 to 7 minutes on one side.
Take the tray out, turn the chicken pieces over, baste with remaining marinade if required, and place it back under the grill for a further 6-7 minutes or till the meat is tender and cooked through.
Test this by inserting a fork into the centre and separating the flesh. If it falls off easily, you are good to go.
Keep aside for about 5 minutes before digging in.
Serve with a green chutney as appetiser or with flavoured rice and raita as part of mains.
IMG_0358 
Notes: Feel free to use chicken breasts instead of thighs. I find breasts absolutely tasteless- contextually speaking of course ;)- so never bother using it in any cooking.
Use apple cider vinegar or any vinegar of choice (except for maybe balsamic and red wine vinegar).
Cheese variety also can be varied I guess, but make sure you grate it fine because only then will they stick to the meat.
Replace double cream with yoghurt or crème fraiche.
If you don't want to grill the meat, then bake in an oven preheated at 176C for about 30 minutes, flipping sides and basting occasionally.

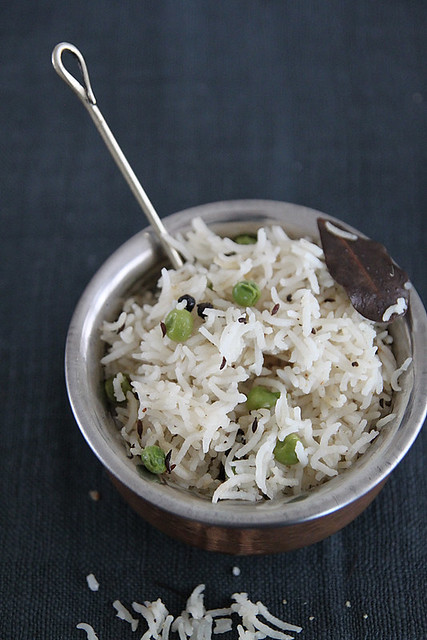
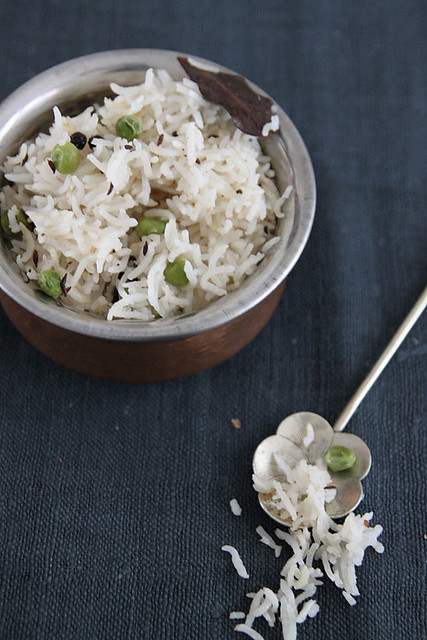
Cumin flavoured rice
IMG_0396 
Basmati rice- 1 cup
Oil- 1 tsp
Cumin seeds- 1 tsp
Whole black pepper- 1 tsp, lightly crushed
Green peas- 1/4 cup (optional)
Lime juice- a dash (optional)
Salt- to taste
Water- 2 cups
IMG_0386 
Wash and drain the rice. Keep aside.
Heat the oil in a wide, deep pan and add the cumin seeds.
Once they start to splutter, add the black pepper, garam masala and green peas.
Stir for a couple of seconds after which you add the drained rice.
Stir fry on medium heat till the rice becomes slightly translucent.
Meanwhile, boil 2 cups of water in a kettle and pour into the rice.
Add enough salt and a dash of lemon juice (this prevents the rice from sticking to each other).
Give on final stir, cover the pan with a tight lid, reduce heat to low and cook for about 15-20 minutes or till the rice is well done.
Remove from heat, fluff the rice using a fork and serve immediately.
IMG_0393 
Notes: Use ghee instead of oil for a richer flavour.
You can of course do a pulao version by sautéing onions etc etc,.
Garnish with coriander leaves for that extra kick.

Monday, 16 April 2012

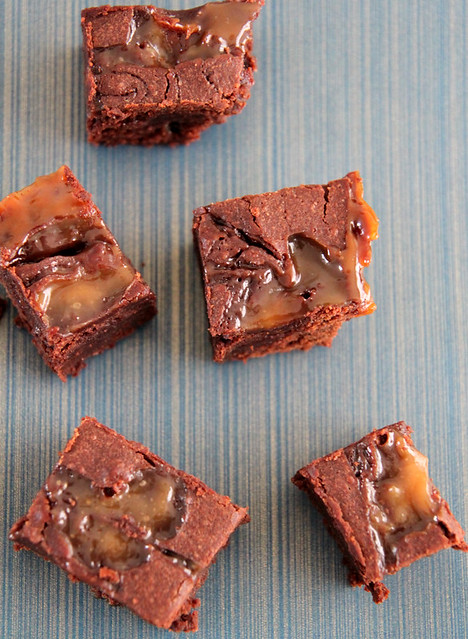
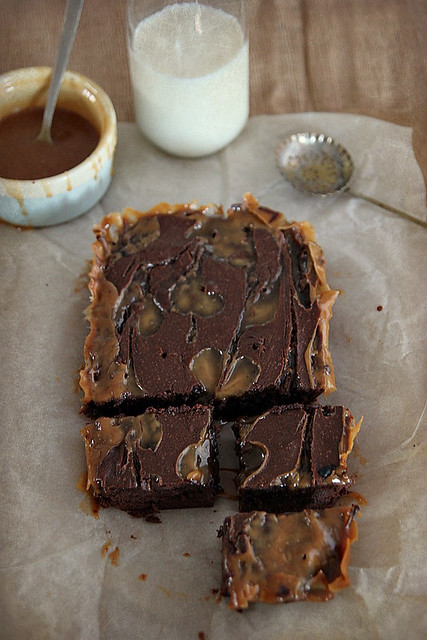
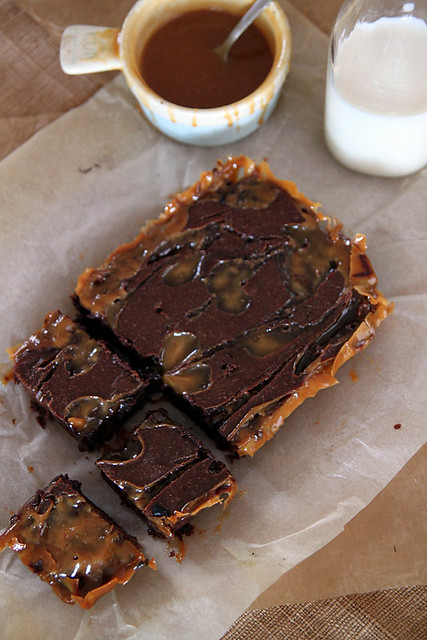
Salted caramel swirl brownies

IMG_0870-1
I got this massive salted caramel Easter egg by Hotel Chocolat as an Easter gift, from a website I write for and I am in love with salted caramel. I mean initially I couldn't figure the saltiness, but a couple of bites later and I knew what the hype was all about. I went around in search of ready made salted caramel in some of the gourmet shops in London, but no luck there. Hell I couldn't even get my hands on some Fleur de Sel which is apparently a major ingredient in salted caramel. I could have picked it up online, but Ro not being a fan of anything caramel, butterscotch etc. made me wonder if it was worth spending that much money on sea salt.

Usually I would just shrug and say, oh then I shall just forget about salted caramel and not be tempted to make a batch on my own. Yes, that way I am a disgrace to the food blogger community. If I can buy something easily, I usually just do that without the thought making it at home. If it involves more than a couple of steps, then I just shrug and say, 'oh ok I don't think I'm that desperate to have xyz.'. Not what you had in mind about a food blogger right? Well, I am the lazy, blogging-only-so-I-can-take-pics kinda blogger with no qualms whatsoever in trying out ready made sauces, meals, mixes and hell, even whipped cream :)

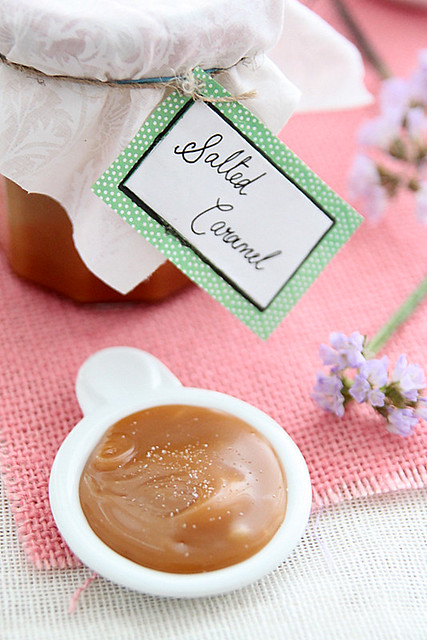
But this time, I had other plans. I decided to make salted caramel at home (pat on the back for that). It was an easy peacy task and one that required no specific skill set. I keep digging into the caramel on and off and even use it as a spread on croissants and such for brekky. It is also perfect to gift friends and family. Do up a pretty little jar with labels and all the works and send it away with all the love (next Christmas I'll definitely do it!!!)
IMG_0855 
So since I had a jar of salted caramel ready, I decided to make use of it in every way possible (other than of course digging into it for a sugar rush after meals). Brownies were first on my mind and went around scouting the internet for recipes. I didn't come across many, so I just decided to adapt David Lebovitz's Dulce de Leche brownie recipe and make these salted caramel swirl brownies. It was a great idea because (I officially hate DdL now) caramel and chocolate is a match made in heaven. You bite into the absolutely chocolatey brownie and then reach the slightly sticky salted caramel centre and  there is no looking back. I also used the salted caramel for a fabulous brioche bread pudding (recipe to follow) which is on my dessert list the next time I have people over. Yes! it's that goooooood (cant stress it enough).

On another note, I don't know what happened while the brownies were baking, but my oven suddenly made this rattling sound and just conked. Thankfully the brownies were already done and Ro claims the caramel exploded inside the oven causing it to break down. I would just consider that as a dramatic proposition, since he wasn't too happy seeing the caramel swirls on the brownie. I halved the recipe because I wasn't sure how it would turn out, and now I'm kicking myself for not having baked more, especially since I'm oven-less for a while. I'm already having withdrawals

Recipe adapted/ halved from here
IMG_0894
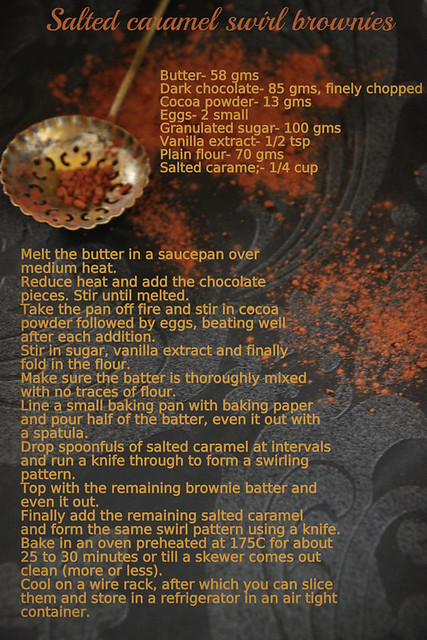
Unsalted butter- 4 tbsp/ 58 gms
Dark chocolate- 3 oz/ 85 gms, finely chopped
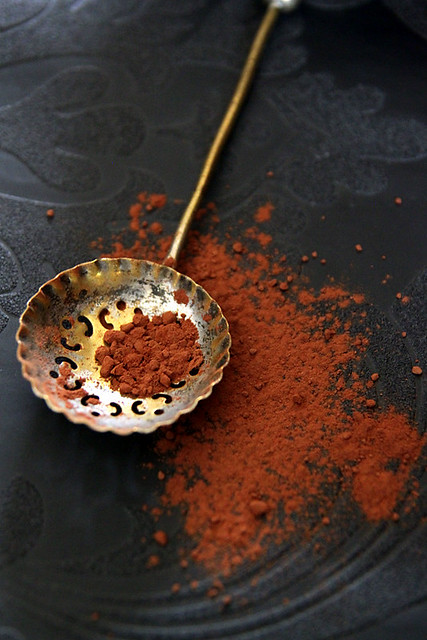
Cocoa powder- 13 gms (Dutch processed)
Eggs- 2 small
Sugar- 1/2 cup/ 100 gms
Vanilla extract- 1/2 tsp
Plain flour- 1/2 cup/ 70 gms)
Salted caramel sauce- 1/4 cup (recipe follows)
IMG_1047 
Melt the butter in a saucepan over medium heat.
Reduce heat to low and add the chopped chocolate pieces into it. Stir until melted
Take the pan off fire and stir in the cocoa powder, followed by eggs, beating well after each addition.
In goes the sugar and vanilla extract, stir to combine.
Finally fold in the flour, making sure the batter is thoroughly mixed with no traces of flour.
Line a small baking pan with baking paper and pour half of the batter into it. Even it out with a spatula.
Drop spoonfuls of the salted caramel at intervals and run a knife through to create a swirling pattern (like how you would do for a marble cake)
Top with the remaining brownie batter and even that out as well.
Add the remaining salted caramel and follow the same swirling procedure as before.
Bake in an oven preheated at 175C for about 25 to 20 minutes or till a skewer comes out clean (more or less).
Cool on a wire rack after which you can slice them and store in a container at room temperature for about 2 days or in the refrigerator for a week.
IMG_0861 
Notes: If you don't want the salted caramel to be over powering, then don't do the middle layer, just do the swirling effect on the top layer alone.
Using salted butter is fine, in which case, reduce the salt in the salted caramel
The salted caramel will harden a bit, but that's really fine, it wont be annoyingly chewy or anything.
Under cook a bit if you want it absolutely gooey.
Add pecans or walnuts, if you prefer, to the batter after you fold in the flour.

Salted caramel sauce (makes a little less than 1 cup. Recipe adapted from here)
IMG_1122 
Granulated sugar- 1/2 cup
Water- 1 1/2 tbsp
Unsalted butter- 3 tbsp
Double cream- 1/4 cup
Sea salt- 3/4 tsp
IMG_0638
Heat together the sugar and water in a heavy bottomed pan. Stir to help the sugar dissolve but stop once it comes to a boil. You can swirl it around a bit if you want.
When all the sugar has melted and the colour become a deep amber add the butter. It will foam up a bit so stand back.
Whisk continuously till the butter has melted and then take it off the flame.
Whisk in the double cream (again it might foam up a bit) and then add the sea salt.
Continue whisking till the caramel is nice and smooth.
Let it completely cool and then store in clean containers which can then be stored away in the refrigerator for a couple of weeks.
Just before use, warm it up a wee bit to loosen.

IMG_1109 
Notes: Add a dash of brandy or Baileys for that extra kick.
Add Fleur de Sel if you have any and also adjust it according to your taste. Use only half tsp if you are not too much of a salt-sweet combo fan.