Showing posts with label autumn. Show all posts

Tuesday, 15 September 2015

Grana Padano Italian Cooking Maestro blogger challenge

IMG_8129
Grana Padano is a cheese I'm familiar with, and so very happily welcomed the cooking challenge judged by none other than the renowned Italian Chef Francesco Mazzei. I was supposed to create a starter and a main or a main and dessert using the cheese as the star ingredient. Broke my head about if for a few days and then the surprise fresh produce and grocery arrived at the door, courtesy Grana Padano, and i knew i had to make use of the beautiful butternut squash, if not for the autumn transition period we are in.

I decided to do a starter of posh chips with truffle oil and Grana Padano, and a main course of butternut squash gnocchi with sage and burnt butter. Although I've tied making pasta at food events and in cookery schools I never thought I'd attempt making something similar at home. I've had gnocchi at restaurants and knew it was not one of those easy to make things. Of course the food blogger in me wanted to try it at least once, and this just happened to be the best time to experiment.

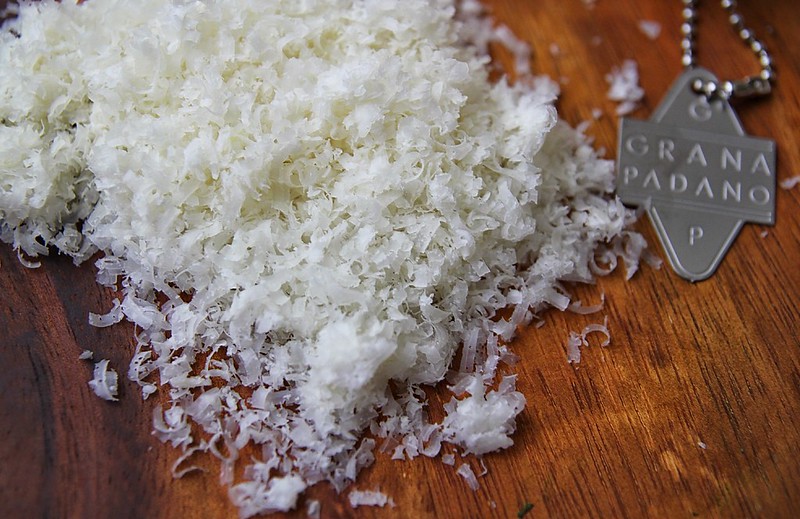
PS: I think my favourite kitchen equipment as of now is the microplane grater. OMG its the best and i have been putting it to good use. Thank you Grana Padano for opening my eyes to the world of micro grating :)

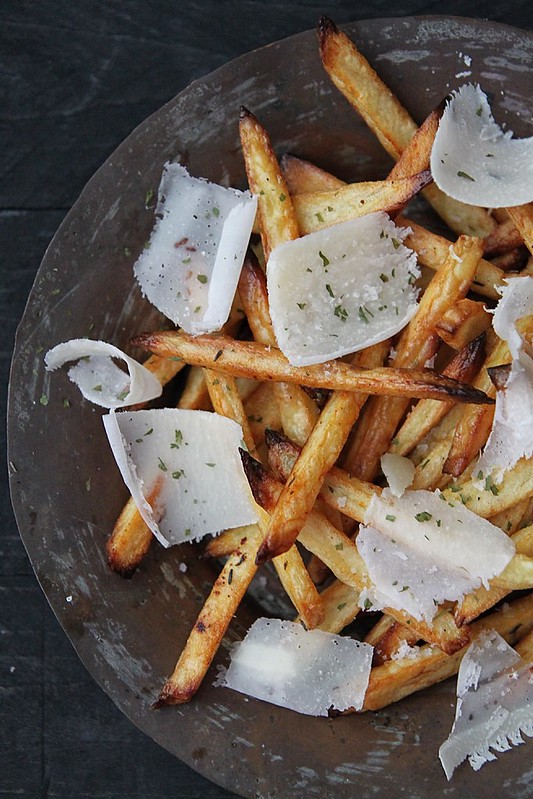
Truffle chips with Grana Padano (Serves 2 as a starter)
IMG_8135
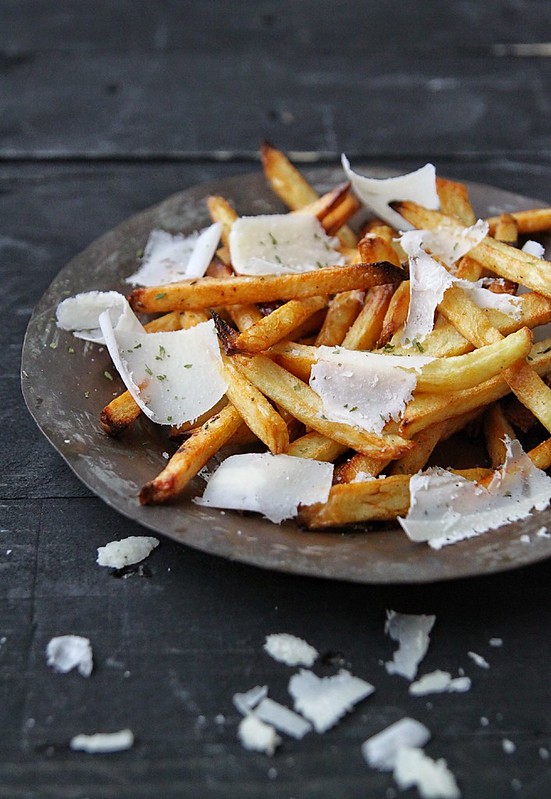
The truffle chips turned out so so good. I first tried it at the gorgeous bar at the Renaissance Hotel in St Pancras and have been meaning to try it at home ever since. They were a breeze to make and was delicious, not to mention all posh with the truffle oil and cheese. Very happy with how it turned out and the cheese was most certainly the star of this dish. 

Potato- 300 gms, peeled and sliced into thin strips
Olive oil- 2 tbsp
Salt- to taste
Truffle oil- 2 tbsp
Parsley- 1/2 tsp (fresh or dried)
Grana Padano shavings- 1/4 cup
Coarse sea salt- to season
IMG_8149
Preheat oven to 200C and line a baking tray with silver foil.
Toss together the potato, olive oil and salt in a mixing bowl and arrange them on the baking tray. Make sure they don't overlap.
Bake for about 30 minutes, flipping the potato strips after about 15 minutes and spraying/ brushing on some more oil if required.
The potatoes are done when a fork goes through easily, and are crisp, but not burnt.
Toss the potatoes with the truffle oil (generously rather) and parsley and transfer to a serving plate.
Top with the Grana Padano shavings and garnish with sea salt and serve warm.

Notes: For a spicy kick, toss the potatoes with some red chilli flakes. Another flavour would be garlic which would work really well with the cheese and truffle flavour
You can also jazz up your frozen fries like this.

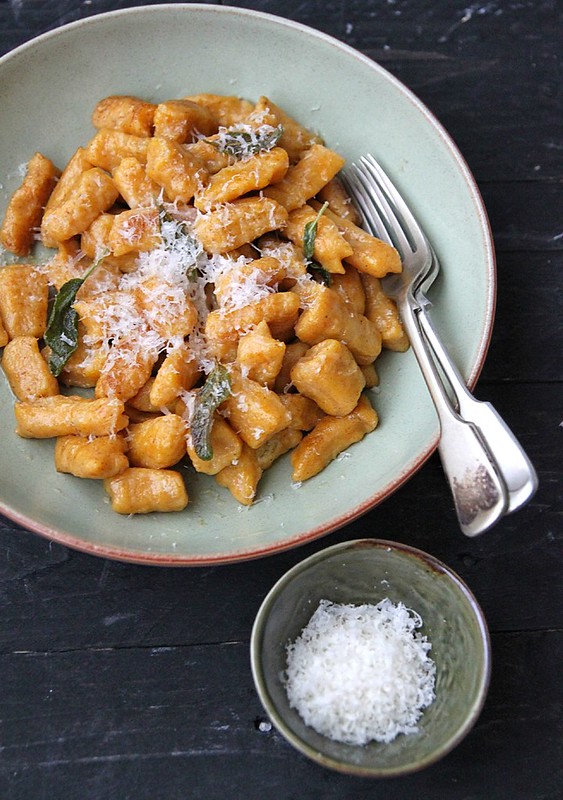
Butternut squash gnocchi with brown butter and sage (recipe adapted from Bon Appetit Magazine Oct 2010 issue)
IMG_8184
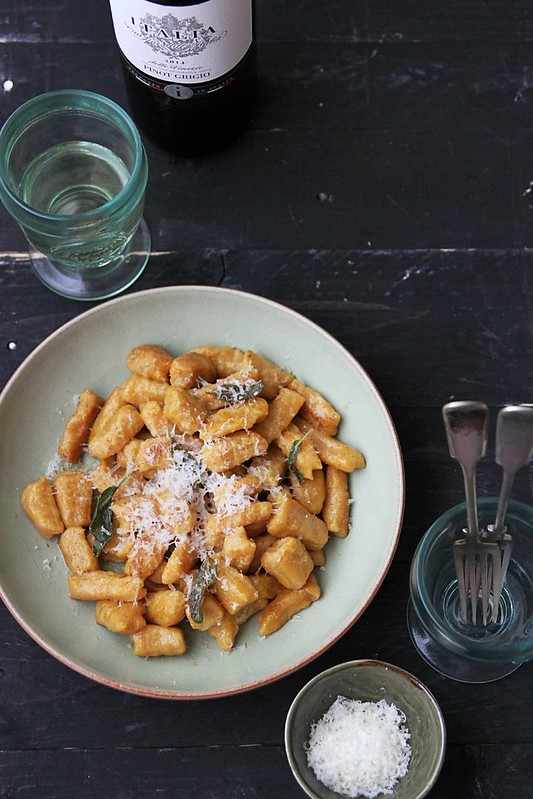
The gnocchi proved to be quite a bit of work but I'm glad i tried it. The sage and butter combo is a unique one and not everyone's cup of tea (the husband hated it) so if you are sceptical, add in a dash of cream, season with salt and pepper and let the grated Grana Padano flavours do all the work.

Butternut squash- 500 to 600 gms
Olive oil- 1 tbsp
Garlic powder- 1 tsp
Thyme- 1/4 tsp (dried or fresh)
Potato- 500 gms
Grated Grana padano cheese- 3/4th cup
Egg- 1
Nutmeg powder- 1 1/2 tsp
Salt- 1 tsp
Plain flour- 1 3/4 cup + more for dusting

Butter- 3 tbsp
Fresh sage leaves- 5 to 6
Grated Grana Padano cheese- to garnish
IMG_8116
Preheat oven to 220C and line a baking tray with silver foil.
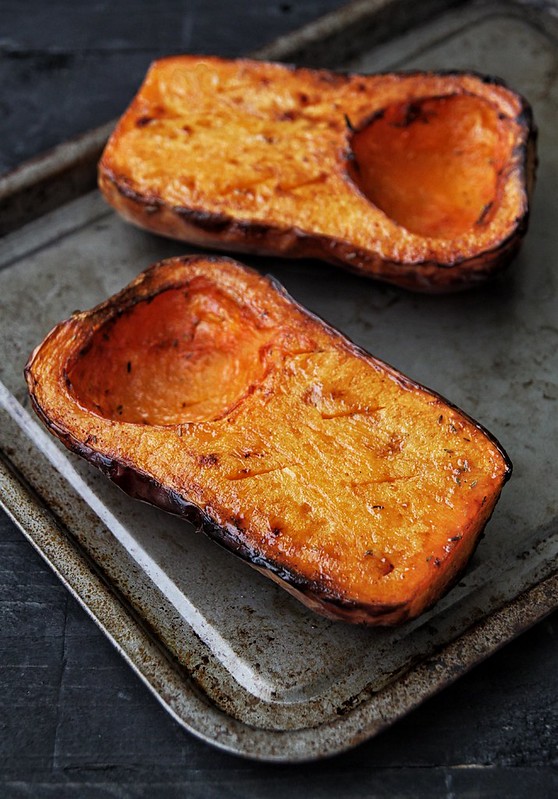
Slice the butternut squash in half and discard the seeds.
Mix together the olive oil, garlic powder and thyme.
Place, cut side up, on the baking tray and pour over or brush on the olive oil mix.
Roast until tender, for around 1 hr. (Check by inserting a knife inserted into the middle of the squash, and it should go through easily)
Keep aside to cool and then scoop out the flesh and transfer to a sauce pan and puree either using an immersion blender or alternatively you can do so in a food processor.
Cook the puree over medium heat for about 10 to 15 minutes or till all the moisture has evaporated.
Transfer 1 cup of the puree into a large mixing bowl.

While the squash is cooking, get started on the potatoes.
Peel and slice the potato into big chunks and place in a microwave safe bowl.
Cover and cook on high in the microwave for about 6 to 7 minutes or in boiling water until very tender.
Drain and pass the potato through and potato rice or use a grater and grate the potato finely. Measure 2 cups and transfer to the mixing bowl with the squash puree.
Once cool, add the remaining ingredients- cheese, egg, nutmeg and salt and flour and mix together using a wooden spoon till they all come together. Add more flour if its too sticky.
Lightly flour a surface and knead the dough till just smooth. Don't over work it.
Place it back in the bowl and refrigerate to make it easier to work with it.
IMG_8198
Line a large baking tray with baking paper and lightly flour it. Also flour the work surface.
Divide the dough into 8 and working with one piece at a time roll the dough out into a 1/2 inch thick rope.
Cut the rope into 3/4th inch pieces and working with one piece at a time, roll it on the back of a fork to have the ridges in tact. This takes a bit of time, but worth it.
Transfer them to the baking sheets and once you done with all of the dough, cover loosely with a cling film and refrigerate till ready to cook.

Boil water in a large pot, season with salt.
Cook the gnocchi in batches until tender, around 15 minutes.
Use a slotted spoon and transfer them on to a kitchen towel. Cool and use as needed.
IMG_8160
Melt the butter in a frying pan until golden brown, stirring continuously.
Add the sage and stir for a minute after which you add the gnocchi and cook for about 10 minutes or so, making sure they are coated with the butter.
Season with salt and pepper and transfer to a serving bowl.
Generously sprinkle some more Grana Padano and serve hot.

Notes: I didn't use up the entire batch, maybe 2 cups of gnocchi for both of us. I froze the remaining.
There was about a cup of squash left and i used it up in a cake.

With thanks to Grana Padano for the ingredients, welcome kit and grocery voucher sent over to undertake this challenge.

Thursday, 24 October 2013

Jamie Oliver 20 minute meals app review and his recipe for chilli corn chowder

IMG_1625
I love Jamie Oliver! Like seriously. I think he's one of those chefs who you develop a liking towards right from the start- so down to earth and simply a sweetheart. I used to watch his 30 minute meals on telly and have even given some of the recipes a shot (obviously I take more than 30 minutes). They are absolutely easy to follow and his photographs (courtesy David Loftus) are to die for. I love how he presents his final dishes on his shows, and the props he uses, sigh!

I was asked to review an app on the Google Nexus 7 tablet available at Argos here- a gadget we have both been religiously using for all our browsing and other nonsensical stuff like watch videos, chat, etc etc. I still am not too sure why people need tablets at all, because it really cant do anything your smart phone cant (techies and gadget freaks, kindly excuse). Of course size matters but I think I would have survived without one. However, now that we have it in our life, its being put to regular use. I even carry it around to our Bloggers Buzz meetings looking all important, and it does make life a wee bit more easier. If you do want to pick up a tablet (among other cool things) then Argos is the place to go to.

Coming to the app. I did break my head about which app to pick up and after some research I decided to go with good ol Jamie (first name basis and all after 2 paragraphs). The tablet is a good thing to have on your kitchen counter but what kept bugging me was the fact that I had to keep switching it on each time the screen turned off when not in use (I don't even know if that's the right term to use, but you get the point right?). My tablet doesn't have a stand, so I had to keep cleaning my hands properly to pick it up and do the same. These may be irrelevant to most of you, but to me it kind of makes a difference and is a bit of a hindrance. I am trying to use the tablet more for my recipes while cooking instead of dragging my ginormous laptop on to a small kitchen counter, so ask me about it a few months from now and maybe I would have a different opinion.
221

Pro's
  • The step by step pictures are fabulous, not to mention beautiful photography. It guides you through the entire cooking process.
  • There are basic videos of Jamie showing is how to chop an onion, basic knife care, cooking the perfect steak and so on..something we all may know, but its kind of informative.
  • The shopping list is pretty cool, in fact its my favourite feature. You can send it directly from the app to your email, making life a whole lot easier. Yes, I just had to send it to Ro.
  • Navigating through the app is easy. Nothing techy about it.
Cons
  • GBP 4.99 for an app is pretty steep. You do get 60 recipes for it, but still I find it a little on the expensive side. 
  • It keeps crashing!!! Apparently that's been an issue with the app for a while. This definitely needs to be fixed as it gets annoying after a while.
The app is a good one, but not a great one. I mean it wont be something id miss if it was taken off and I think id find most of his recipes in his book or show. But if you are a big Jamie fan and need to hear his voice once in a while, then just buy the app..really, his videos and the way he cooks is just pure entertainment :) 

That said, his chilli corn chowder from the app was excellent. It was my first time with corn chowder (soup to be precise) and was completely surprised at how nice it tasted. Of course i couldn't complete it in 20 minutes (what with me checking fb and whatsapp and a million other 'apps' in between) but it was a winner. Ro gets to taste it today and he can give his verdict. Serve it with some garlic bread and its perfect for an autumn night in,

Chilli corn chowder (Adapted from Jamie's 20 minute meals Android app. Serves 2)
22
Vegetable stock- 700ml
Onion- 1 small, roughly chopped
Celery- 1 stick, diced
Chilli- 2, slit (de-seed if you cant handle the heat)
Butter- 1 tbsp
Olive oil- a dash
Thyme- 1 small stalk
Potato- 1 small
Frozen sweetcorn- 200 gms (approx. 1 1/2 cups)
Double cream- 2 tbsp (optional)
Spring onions- 2 small, finely chopped
Cheddar cheese- 25 gms, grated
Sour cream- 75ml
Salt and pepper-  to taste
IMG_1623
Fill a saucepan with the vegetable stock and bring to a gentle simmer over medium heat.
While that's simmering away, slice the onion, celery and chilli.
Heat a large deep pan on medium heat and melt the butter along with a generous dash of olive oil.
Add to it the chopped vegetables with a splash of water, stir well and cover and cook on medium-low heat for about 10 minutes or until the vegetables start to soften.
Pick the thyme leaves and add to the pot of simmering stock. Let it continue to simmer for a few more minutes.
Peel and roughly grate the potato and add to the vegetable stock.
By now the vegetables would have wilted enough. Open the lid and throw in the sweetcorn. Stir it in and cook for about 2 to 3 minutes.
Carefully pour in the vegetable stock along with potato and bring everything to a boil.
Reduce heat, pour in the double cream and let it simmer for about 5 minutes after which you can take the pan off heat.
In the meat time, slice the spring onions and grate the cheddar.
Once the chowder has cooled down a bit, pulse with an immersion blender, but still retaining the texture. Don't make it too smooth.
Taste and season with enough salt and pepper and cover the pot with a lid and keep aside.
When ready to serve, spoon ladles full of the chowder into slightly warmed bowls, top with a spoon on sour cream, sprinkle over the cheddar followed by a generous sprinkling of spring onions.
(Add some chopped chillies if you are brave)
IMG_1634 
Notes: The original recipe called for just one chilli, half of which needed to be added with the vegetables and half used as garnish. Adamant that it wouldn't be spicy, I added two whole chillies to the chowder and skipped the garnish. It was SPICY and apparently, one chilli would have been enough. 
The cream is completely optional, but i had some left over cream that desperately needed to be used and so chucked it in. Worked for me.

The post is in conjunction with Argos

Sunday, 19 September 2010

Spiced apple loaf

Is it apple time or what??? I can see them on trees and even worse, squashed on the road side and I think its now a hindrance more than a 'pretty sight'. Last year we went to an apple orchard, well it was actually a cider tasting trip, and honestly, I've never seen so many apples in my life!!! If you don't believe me, take a look at these...

We were done eating so many varieties of apples, not to mention the amount of cider we drank:)

I have never made an apple pie or strudel or galette or anything because we get so many yummliscious pies at the super market...pop it in the oven for 15 mins and there you have amazing hot pie, with custard and cream on the side. It was a fav of ours when we had just moved to UK...and Pub lunches are never ever complete without apple pie and custard. Also, I'm very wary when it comes to working with dough, which has actually put me off pies and tarts. The next best thing to make with apple was a cake and that, I'm always game to do. So a spiced apple cake it was and boy it came out super duper moist and majestic with bits of apple slices and the cinnamon-nutmeg-clove flavour nicely blended in. So here is another dessert or tea time snack to welcome Autumn.

All purpose flour- 200 gms
Baking powder- 1/2 tsp
Baking soda- 1/2 tsp
Salt- a pinch
Cinnamon powder- 1/2 tsp
Ground cloves- a pinch
Ground nutmeg- a pinch

Granulated Sugar- 100 gms
Brown sugar- 50 gms
Butter- 45 gms
Egg- 1 large
Vanilla extract- 1/2 tsp
Bramley apple- 1 cup, cored, peeled and diced
Apple sauce- 3/4 cup

In a large bowl sift together the dry ingredients. Keep aside.
In a mixing bowl cream the butter and sugars (brown and white) with a hand held electric mixer or using a whisk till light and fluffy.
Add the egg and vanilla extract and mix again till well combined.
Now fold in the dry ingredients, alternating with the apple sauce*..starting and ending with the flour mix.
Fold in the diced apples as well.
Get a loaf pan ready, do the buttering, lining and the works and pour the batter into it. Its not really runny, so you'd have to smoothen it out to the edges a bit.
Pop it into an oven pre heated at 180C and bake for about 1 hr or till a skewer comes out clean.
Take it out and after about 5 mins, insert on to a cooling rack. 
Serve with a dab of vanilla ice cream.
Notes: *Now I didn't have apple sauce and I wasn't really in the mood to make it, so used flavourless oil instead...super moist it turned out to be.
Bramley apples can be substituted with Granny Smith if you prefer that
I used self raising flour, so omitted the soda bicarb.
You can make the same in muffin cases as well..you'd probably yield about 12.

Friday, 10 September 2010

Welcoming Autumn with Chicken pot pie

Autumn is definitely here, I can vouch for that. Restaurants have even started advertising Christmas lunches and I have started seeing meat pies and the like in supermarkets.

After a spectacular and busy summer, we are back to gloomy, windy and rainy days. As strange as it sounds, I must say, I LOVE IT. Its time for soups, stews and one pot meals which brings us to this brilliant British delicacy....Chicken pot pie. This is one of Nigella Lawson's super easy recipes and I'm completely in love with the outcome. One thing I like about her is how she makes the process so simple, yet the outcome is extraordinary. This is an awesome brunch dish especially if you have a roll of puff pastry at hand. If you serve them in individual ramekins, its a perfect one pot dish. Yummeeeee!

Chicken breasts/ thighs- 250gms, boneless, cut into bite size pieces
Plain flour- 2 1/2 tbsp
Dried thyme- 1/2 tsp
Bacon rashers- 3 to 4
Onion- 1, roughly chopped
Butter- 1 tsp
Chestnut mushrooms- 125 gms, washed and dried
Green peas- 100 gms
Chicken stock- 325 ml
Freshly ground pepper- to taste
Salt- to taste
Olive oil- 1 tsp
Puff pastry- 2 rectangular size sheets, rolled
Put the diced chicken breasts, flour and dried thyme together in a zip lock bag and coat the chicken as evenly as possible. Keep aside.
Meanwhile, slice the bacon rashers with a pair of scissors and fry them till well done. Reserve the oil, but drain the pieces on a kitchen towel if you are feeling a bit psyched about the excess oil.
In a heavy bottomed pan heat the olive oil and bacon oil and sauté the onions till light brown.
Use the same scissors and slice the mushrooms and drop them directly into the pan along with the onion. Let them sweat it out for a while in there.
Add the fried bacon to this and sauté for about a minute or so. Season with salt and pepper if required.
In goes the butter. Once that melts, add the chicken slices and green peas and stir around a bit so that the flour and the onion mix are all well combined.
Add the chicken stock and on medium heat let it simmer for about 5 minutes.
Add more thyme if required at this stage. I did!
Get the pastry ready by that time. If you need to roll it out do so. I used already rolled out puff pastry, cut it in half and used it.

Assembling:
Divide the chicken gravy between individual ramekins (or a big casserole dish) till about 3/4th full.
Wet the rims with water, cut a few thin strips off the pastry and crown the ramekins (as shown in the pic below).
Cut a rough circle from the remaining pastry and place them carefully over the ramekin, covering the top fully.
With a fork, make pretty designs around it just to let the pastry puff up and also, like Nigella says, it looks pretty.
Its ok if the puff pastry is uneven, the more rustic the better. It gives that homely look you know :)
Make sure you pierce a few holes to let off steam.
Place the ramekins on a baking tray and shove it into an oven pre-heated at 220C for about 30 minutes or till the pastries are nice and puffed.
Break the crunchy pastry into the hot chicken gravy, and dig in I say :)
You can of course add a few slices of garlic bread as well.
Notes: The veg. version would be to omit the chicken and probably add spinach or corn.
If you want it a wee bit spice, feel free to add some chilli powder :)