Showing posts with label Chinese. Show all posts

Saturday, 25 September 2021

Chilly pork

Pork- 500 gms, cut into cubes (equal quantity of belly pieces and shoulder or just belly is also fine)
Chinese 5 spice seasoning- 1/2 tbsp
Dark soy sauce- 1/2 tbsp
Ginger garlic paste- 1/2 tbsp
Pepper- 1 tsp
Salt- to taste

Oil- 1 tbsp
Ginger- 1 tbsp, grated
Garlic- 1 tbsp roughly chopped
Green chillies- 2, slit (adjust according to taste)
Spring onions- 3, chopped (just the white bits, keep the green aside for garnishing)
Tomato- 1 small, finely chopped
Bell pepper- a little more than 1/4 cup, cut into 1 inch squares
Onions- 1 small, petals separated and cut into 1 inch squares
Dark soy sauce- around 1/2 tbsp
Chilli sauce- 1 tsp (optional)

Mix all the ingredients from pork to salt in a pressure cooker and cook until done. I dont add any water, but if you want you can add a dash.
I cook on high till one whistle and then reduce heat to low and cook for a further 12 to 13 minutes. Wait for the pressure to release and then open the lid.
Once you open, if you find a lot of water, cook it off on high heat with just a wee bit of gravy remaining, around 1/4 cup liquid.

In a large wok, heat the oil and throw in ginger, garlic green chillies and spring onion whites till fragrant around 4 to 5 minutes on medium high heat.
Add the chopped tomato and cook for a further 3 minutes.
Add the bell pepper and onions and mix it all well. Cook for 5 minutes.
Add the cooked pork along with all the juices and give a mix with all the vegetables.
Reduce heat to medium, add the dark soy sauce and chilli sauce (and salt if needed) and fry the pork.
Keep stirring in between and cook till the oil surfaces and the pork is roasted well.
Garnish with spring onion greens and serve with your favourite noodle or fried rice.

Notes: This dish is best with belly pork as the fat renders the taste.
Roasting the pork on medium heat till the oil surfaces is key.
Leave a bit of the pork in the wok and add a cup of cooked rice to it and stir fry on high for a few minutes to get an incredibly flavourful fried rice.

Tuesday, 19 November 2013

Minced pork and egg fried rice and Cooking with Kikkoman Masterclass

IMG_1968
I know...been almost a month since I posted here. I'm not going to give excuses blaming work, weather, this, that etc etc. Instead, I'm going to jump right into it and talk about the 'Cooking with Kikkoman masterclass'  I attended a month back at the fabulous Matsuri St James restaurant. Kikkoman is a leading brand of soy sauce and I regularly use it for all my Asian cooking. We networked over cocktails at the foyer before being escorted into the restaurant and seated around a Teppan table. Bing-yu Lee, Manager for Kikkoman UK gave a talk on Kikkoman- how it is made, how its different from the usual ones and we even did a blind tasting between two different types of soy sauces.
20131015_183731
Michelin Starred Chef, Simon Hulstone then took over and demonstrated how to use Kikkoman in a mean broccoli and scallop dish which we all got to taste. After a sushi making demo and a theatrical teppan-yaki meal cooked in front of our eyes we went on to enjoy our meal, full on, paired perfectly with wine.
20131015_185133
In our goody bag was a Kikkoman cook book and this fried rice is adapted from that. There are so many easy recipes and even though i made this rice a week after the event, it didn't make it to the blog because I wasn't happy with the pictures. I thought id make it again and take better pictures, but nope, that never happened and so you are gonna have to just believe me when I say the fried rice tasted simply good. Its really really simple to make and you should give it a go.

I went a bit crazy with the stir frying and that's why it looks like tiny grain. Its just that the rice broke while I got carried away. So be careful when you do the final mixing.

Recipe adapted from the Kikkoman cook book (serves 2)
IMG_1958 
Basmati rice- 1 cup
Water- to cook the rice
Oil- 1 tbsp
Minced pork - 300gms
Ginger- 1 1/2 tbsp, peeled and grated
Garlic- 2 tbsp, peeled and finely chopped
Spring onion- 1/4 cup, finely chopped (reserve a few greens for garnish)
Green chilli- 1, finely chopped
Salt and pepper- to season
Kikkoman soy sauce- 2 tbsp
Eggs- 2
Coriander leaves- 1 tbsp, finely chopped (optional)
IMG_1969
Cook the rice al dente. Drain and keep aside. Make the rice a day ahead and store in the refrigerator. This would make it drier- perfect for fried rice
Heat the oil in a non stick wok and add the minced pork. Stir fry on high heat till the meat changes colour.
Throw in the ginger, garlic, spring onion and green chilli and fry till the pork is cooked through.
Season with salt and pepper and 1 1/2 tbsp of Kikkoman soy sauce. Mix well and cook till the meat turns a bit brown.
Add the rice and stir fry on high heat continuously.
Whisk together the egg and remaining 1/2 tbsp soy sauce in a bowl.
Move aside a bit of the rice from the wok and add the egg. Scramble a bit, turn off the heat and leave covered for about a minute or two for the eggs to set.
Just before serving, garnish with the remaining spring onion greens and coriander leaves.

Notes: The original recipe called for chicken breasts. If using chicken (around 2 medium), dice them into cubes and do as above.

With thanks to Kikkoman for inviting me to the event and the goody bag.

Friday, 15 March 2013

Food and wine pairing {Chablis food blogger challenge}

IMG_7402
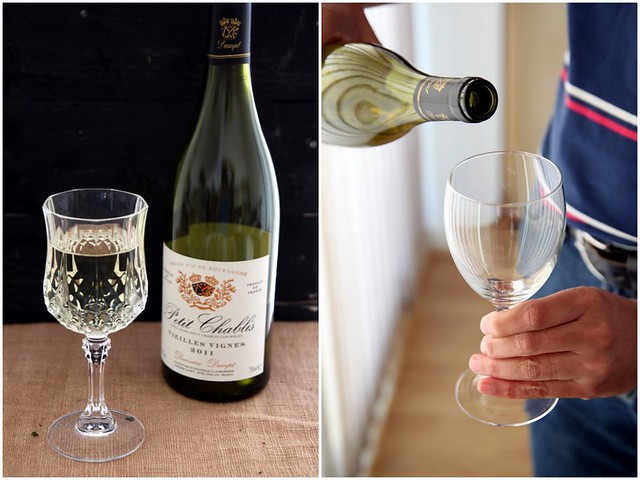
I have always wanted to do wine pairings on my blog and am completely in awe of those who can actually do so with ease. I mean I have evolved from being a fan of the really sweet wines, to the more drier ones and particularly the reds which we now order online and always have stash at home. That said, I crave for the occasional white wine and when I do, I savour it like no business. Its like drinking a can of coke after ages and you realise how incredibly awesome it tastes. Its also the whites that I would prefer for an afternoon drink or a BBQ. So when I was sent two bottles of Chablis wines to sample, I was over the moon. For one, I could introduce food and wine pairing on my blog and two, it had been a while since I'd had a good bottle of white wine and I couldn't wait to give it a go. I read up extensively about Chablis- thanks to the great tasting notes and info sent along with the wine and the plethora of info on the Chablis website- its opened my eyes on a whole lot of things. Do read up more on Chablis here

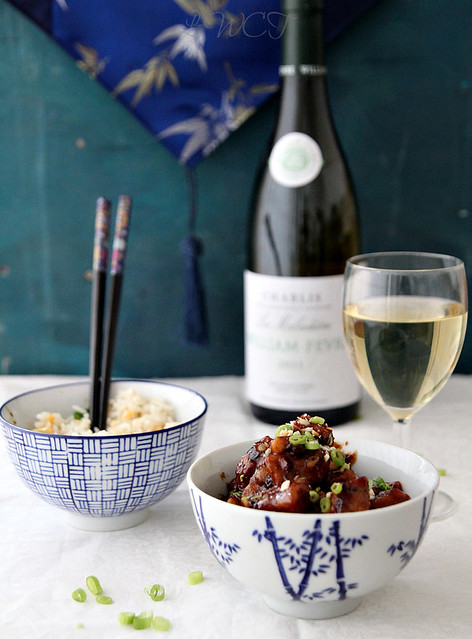
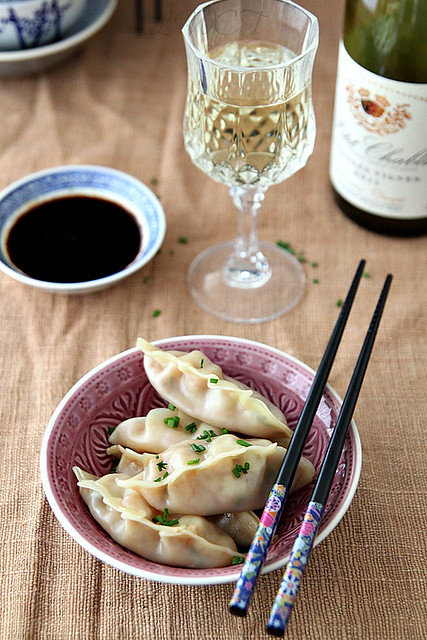
The challenge put forth was to recommend a take away pairing for the wine. I gave it a little thought and decided it had to be Chinese food. We love Chinese food and if it wasn't for our favourite take away joint around the corner, we would never have tasted authentic Chinese grub. I have always wondered what sort of wine would go with Chinese food and I'm proud to say that I made the Chablis work for us. I mean, I am no expert at wine pairings or even, wine tasting for that matter, but what I can definitely do is differentiate a great wine from a lot. We order Chinese take away every other week and almost always go back to a certain few dishes on the menu. After some brain storming sessions, I decided that along with the takeaway, I'd make two of my favourite dishes from the restaurant and present it here. I paired the Petit Chablis with steamed prawn and chive dumplings and the Chablis La Maladiere with spicy Kung Pao Pork (a take on the much known Kung Pao Chicken)
04 
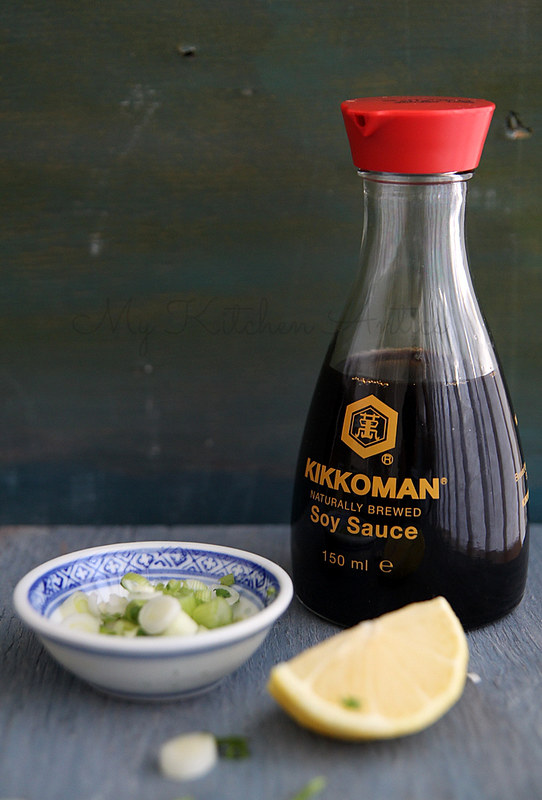
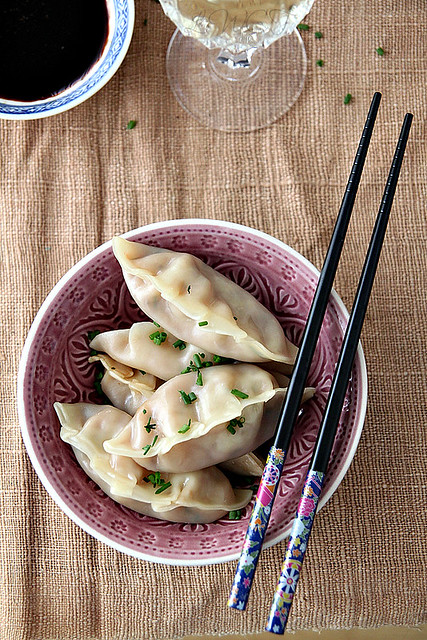
The dimsums at this place are too good, and I thought the prawn and chive dumpling with simple flavours would bring out the best in the wine, and vice versa. The slight chalky taste (I don't know if I was imagining it) and acidic taste went well with the coastal tones of the dumpling, and the fresh, slightly sweet tasting notes paired well with the heat from ginger, garlic and chives, all brought together by the saltiness of the soy sauce. The smell, absolutely fragrant and the colour a clear gold. These dumplings on a sunny afternoon, with a glass of Petit Chablis, would definitely make it to my favourite list.

The Chablis La Maladiere was a drier wine, which if you ask me, was my favourite among the two. I could just enjoy a glass or two on its own. But since we are talking food pairing, the spicy Kung Pao Pork was a good choice- a very exotic wine had to be paired with an exotic dish. I would think the wine would go well with spicy Indian food as well. A bite of the spicy pork, followed by a sip of the wine and the freshness hits you. It has a very unique taste and yes, its a wine I would buy again.

Pairing wine and food is certainly an art and thanks to Chablis, I was able to kick start the series on my blog. Here is the recipe for the two take away dishes we love the most.

Kung Pao Pork (recipe adapted from here, originally from Easy Chinese Recipes by Bee Yinn Low)
IMG_7684 
Pork- 250 gms, cut into bite size cubes (I used diced pork leg)
Rice wine- 1 tsp
Corn flour- 1 tbsp
Sichuan peppercorn oil- 1 tsbp (recipe follows)
Garlic- 2 pods, peeled and finely chopped
Ginger- 1 inch piece, peeled and finely chopped
Dried red chillies- 7 to 8, de-seeded and slit
Peanuts- 2 tbsp, roasted
Spring onions- 2, cut into round + enough for garnish
Oil- 2 tbsp
Water- 1/4 cup

Sichuan peppercorn oil
Sichuan peppercorns- 5 gms
Oil- 1/4 cup

Sauce
Dark soy sauce- 1 1/2 tbsp
Rice vinegar- 1 tsp
Rice wine- 1/2 tsp
Sugar- 1 tsp
Black pepper- 1/2 tsp
Water- 2 tbsp
Corn flour- 1 tsp
Salt- to taste
IMG_7702 
Make the Sichuan peppercorn oil first. Have the peppercorns ready in a heat proof bowl and heat the oil to smoking point (white smoke swirls are visible and you'd know its good to go). 
Pour it onto the peppercorns  stir well to release all that flavour and keep aside to cool for at least an hour or so for flavours to develop. The smell is divine.
Marinate the pork with rice wine and cornflour and keep aside for about 10 to 15 minutes.
Mix all the ingredients for the sauce in a bowl. Test for salt and add more if required.

When ready to cook, add 1/2 tbsp of oil into a wok on high heat.
When hot, throw in the marinated pork and stir fry on high heat till the pork is 3/4th cooked. It should be nice and charred outside. Keep stirring otherwise you might burn the pork.
Remove from wok and drain on paper towels.
Reduce heat to medium and add the remaining oil plus the sichuan peppercorn oil.
Once hot, into it add the garlic, ginger and dried red chillies. Stir fry till they are fragrant. Take care to not burn them though.
Return the fried pork to the wok and mix it all together.
Pour the sauce and water, stir well to coat the pork.
Cover and cook till the pork is done. About 8 to 10 minutes. Keep stirring in between and add more water if the sauce dries up.
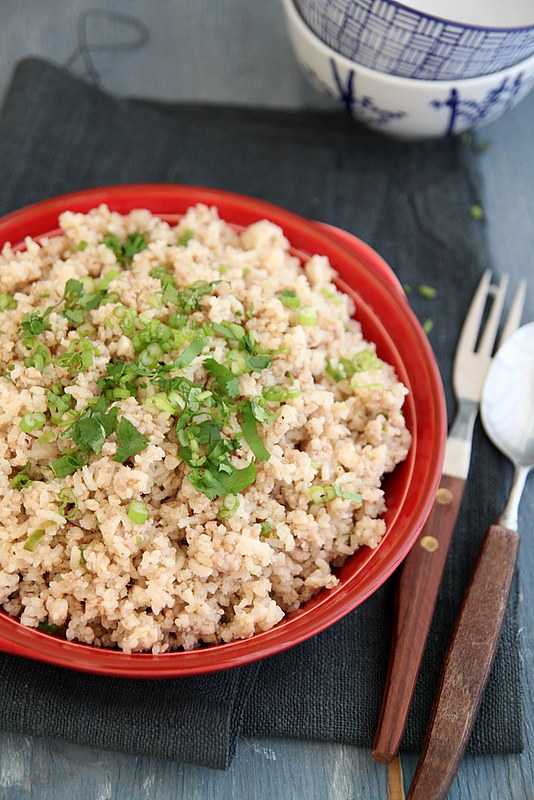
Just before taking it off the fire, stir in the roasted peanuts and spring onion, give a final stir and serve hot with fried rice or plain jasmine rice.
IMG_7668
Notes: Original recipe called for chicken. Follow same method for chicken.
Original recipe called for light soy sauce, but I didn't have any and used a smaller quantity of dark soy. Hence the deep colour of the dish.
The dish is crazy spicy, reduce the red chillies if you don't want it hot.
Pork takes longer to cook, so make sure the pieces are not too big and they are as even in size as possible

Steamed prawn and chive dumplings (makes around 20)
IMG_7725 
Prawns- 250 gms, finely chopped
Ginger- 1 tbsp, peeled and finely chopped
Garlic- 2 tbsp, peeled and finely chopped
Green chilli- 1 small, finely chopped 
Oyster sauce- 1/2 tbsp
Dark soy sauce- 1 tbsp
Chinese chives- 1 1/2 tbsp
Black pepper- 1/4 tsp
Salt- to taste
Dumpling wrappers- 20
15
Into a large mixing bowl, add all the ingredients, except dumpling wrapper. Mix well.
Place a spoon full of the filling into the centre of each wrapper, wet the edges and seal the wrapper well. Make tiny pleats with the edged, although this step is completely optional.
Place a well oiled baking paper in a bamboo steamer and arrange the dumplings in it, without touching each other. (my bamboo steamer can take 5 dumplings at one time).
Bring some water in a wok or shallow skillet to boil and place a bamboo steamer on it. Make sure that the water level is not too much. The dumpling layer should sit above the level of water.
Close with the lid and steam for 10 to 12 minutes or till the wrappers become translucent and the prawns are cooked through.
IMG_7734 
Notes: You can replace dark soy with 1 1/2 tbsp of light soy
If Chinese chives are not available, use normal chives
The dumplings can be boiled as well. Drop them into boiling water and when they rise to the top, take them out with a slotted spoon and leave to drain. 
If you don't have bamboo steamer, a regular steamer works fine.

With thanks to Chablis for sending me the samples. 

Thursday, 4 November 2010

Sweet and spicy Asian dipping sauce with Tibetan Momos

I was first introduced to Momos by my college mates in Chennai. I had three Tibetan friends in my class and they used to rant and rave about these, and invariably all of us ended up liking it so much we started harassing them to throw Momo parties. Even for our culturals there used to be Momo stalls and needless to say we absolutely loved gorging on those with the sauce topping it all.

I have no idea what came over me yesterday, but I had to make some Momos and I put in a message on one of these friends' FB page asking him for the recipe. He had not replied and my lack of patience didn't let me back out. So I harassed my best friend on gtalk asking for the recipe because she had made it once long back after seeing it in some mag. She gave me a-lil-bit-of-that a lil-bit-of-this recipe and I soooo knew I was gonna screw up and that's when I realized, why not head to the Chinese store and just buy the wrapper (which is where I usually screw up) and use the remaining mince meat which I'd frozen, as the filling. Oh how clever am I? Yes, clever indeed and ran to the Chinese store only to realize there were at least 4 varieties of dumpling wrappers and another 4 varieties of wonton wrappers. After a failed attempt at trying to understand what the store keeper was trying to explain, I called Ro, who was working from home, to check it up online and let me know. He just confused me even more (no surprises there). Anyway, picked the one I thought was apt and ran back home.

The focus here, however, is the kick-ass sauce I whipped up surprising me altogether. I usually don't experiment when it comes to food and follow a recipe religiously, but this time, I just threw in a few things and came up with this dipping sauce which I'm sure teams well with almost any Asian appetizer and maybe Indian ones like samosas and I'd even serve them as a dip for normal chips.
Filling:
I used this recipe for the mincemeat filling. I know its not authentic but by now you'd already know be familiar with my lack of patience and so had to make do with this. But my mom-in-laws spring roll filling is a good enough one I'd assume and so please do follow that for a more authentic recipe. 

Wrapping and cooking:
Now wrapping it up...I just blindly followed this video and it is actually as simple as that. But where I think I screwed up was the steaming bit which I either kept for too long or too short and it was a wee bit rubbery. If you guys have some knowledge about it please clear it for me. Is 20 minutes too short or too long a time to steam the dumplings??? 

Dipping sauce:
(The quantity is for a very small bowl of sauce, so adapt it to how much ever you'd like)
Tomato- 1/2 of one medium sized tomato, thinly sliced
Onion- 1 shallot, thinly sliced
Dried red chillies- 3 to 4 (or even more if you want it really spicy)
Chopped coriander leaves- 1 tbsp
Tomato ketchup- 1/2 tbsp (if you want it sweeter, add a wee bit more but not too much)
Cumin powder- a pinch (optional)
Soy sauce- a dash (Its optional , but if adding add very little)
Salt- to taste
Oil- 1/2 to 1 tbsp (yes I know its a lot for such small quantities, but it just worked for me. Reduce if you are not comfortable)
EVOO- a dash (optional)

In a saucepan, heat the oil and throw in the onions and red chillies. Sauté till they turn light brown.
Add the tomatoes, cumin powder, soy sauce and salt to this and on medium heat cook till the oil separates.
Add the tomato ketchup and coriander leaves and mix well for about a minute or so.
Take it off the fire and leave aside to cool a bit.
Now using either an immersion blender (oh how I love you immersion blender) or a pestle and mortar, grind/crush this till it becomes more or less mushy....not too paste like. Pulse it two or three times if using a blender.
Pour into a sauce bowl, add a dash of olive oil, mix well and serve with just about anything.
Notes: Adding garlic to this makes it even tastier, but I just didn't have time. Next time for sure.
Its like a tomato chutney, but with a sweetness attached to it.
I think I've found the perfect and easiest sauce for all my fried stuff.

Since the first batch didn't turn out well, I fried a few just to see if it would be any different. Well compared to the steamed ones, the fried ones were better but that is simply not an option for me cos I detest fried stuff. This is how it looked like:
Sending the sauce over to the Food Palette Red Event over at Torviewtoronto

Monday, 4 October 2010

Indo-Chinese Chilli Fish

That name itself cracks me up...Indo-Chinese, cuisines far apart, yet so incredibly tasty when put together or so I thought till I tasted authentic Chinese grub. I never missed 'Indo- Chinese' food to be honest, when we moved to the UK. Everyone harped on how the authentic Chinese was so not good and the Indian inspired ones were way better and Ro and myself used to thoroughly cherish the authentic 'far cry from Indian' Chinese food at the Chinese restaurant very close to where we live. Everything from the prawn crackers to the huge orange wedges they serve as dessert (on the house, BTW) appeal to me. I love the fact that it doesn't taste half Indian. I like it an awful lot, that this Indian inspired chilli fish tasted quite bleh to me and I vow to hence forth stick as close to the original as possible.

I came across this recipe on you tube and its by Lekshmi Nair. Did a few tweaks here and there and although the end result looked nothing like hers, it made up for dinner on a cold, rainy and windy night.

Tuna fish steak- 500 gms (or any firm fish), cleaned and cut into medium size chunks

For the marinade
Pepper powder- 1/2 tsp
Dark soy sauce- 1 tsp
Salt- to taste

For the batter
Corn flour- 1/4 cup
Plain flour- 1/4 cup
Egg- 1, lightly beaten
Water- a lil less than 1/4 cup
Salt- a pinch
Oil- enough to shallow fry the fish

For the sauce
Green chillies- 4, slit lengthwise
Chopped garlic- 1 tbsp
Chopped ginger- 1 tbsp
Spring onions- 1/4 cup, whites and greens separated
Onions- 2, roughly chopped
Capsicum/ bell pepper- 1, roughly chopped
Kashmiri chilli powder- 1 tsp 
Chilli sauce/ ketchup- 2 tbsp
Soy sauce- a dash
Corn flour- 1 tbsp
Water- 1 1/2 to 2 cups
Salt- to taste
Marinate the fish pieces with pepper powder, soy sauce and salt. Keep aside and get all the other things ready..the chopping, peeling etc.
Heat the oil in a frying pan and get the batter ready.
Mix together the corn flour, plain flour, salt and egg. Add enough water to this mix to make a thick batter.
Add the marinated fish pieces to this batter and mix well to coat them more or less evenly.
Fry the fish in batches and drain on paper towels. I preferred to shallow fry them. I also ended up eating quite a few of it..yummeee :)

In a wok, heat some oil. Use the remaining oil from frying for this.
Sauté the ginger, garlic and green chillies till nice and fragrant.
Add the white part of the spring onions, give it a stir and then add the onions and sauté till slightly translucent.
Once the mix becomes a bit wilted, add the chopped capsicum and sauté for about 3 to 4 minutes, it doesn't really have to lose its crunchiness.
Add the chilli powder and mix well.
Pour the water, stir and then add the chilli sauce. Leave it on medium- high heat to slightly boil. Add the soy sauce and salt, if required, at this stage.
Throw in the fried fish pieces and mix thoroughly. Keep it on medium flame and simmer for a few minutes.
Dilute the corn flour with very little water and add to the mix, to make a thicker gravy. Stir and keep on medium flame for a few more minutes.
Add the green bits of the spring onions, give a final stir and take it off the flame.
Serve hot with fried rice, noodles or even roti.

Notes: The original recipe called for sugar, red food colour and celery. I omitted all these, and added the spring onions instead of the celery. She didn't add ginger as well. I just couldn't think of Chinese food without ginger:)
The chilli sauce she used was that yellow one, which I didn't have, so used chilli ketchup instead.

Wednesday, 8 September 2010

Steamed rice with chicken

Saturday night dinner out was sorta like a tradition when we were small and there is this hotel in Trivandrum (where I'm from) called Horizon which was our favourite joint at that time. We used to go there every other week and had this standard fare we'd order one of which was, 'Steamed rice with chicken.'

Then we grew up, went to college and was too embarrassed for family dinners. The Taj and the Leela's set their foot in Trivandrum and Horizon was long forgotten, well at least my brother and myself did. On our visits back to Trivandrum, we always chose Taj or the newer hang outs over Horizon and always complained about the food. Horizon had the yummiest Chinese grub and my dad, till today, would only agree for a dinner out if it was at Hotel Horizon. We used to always argue with him saying we needed variety and what was so great about Horizon, any way.

I got the answer yesterday when it was pouring outside and one of those Horizon dinners came to my mind. I had this weird craving for some steamed rice with chicken and immediately called up home, in spite of it being 11pm in India. My mom had tried to recreate it at home quite a few times and even though it wasn't exactly the same, we were all mighty pleased with the outcome. Mom gave me the recipe and procedure and I created the Horizon masterpiece yesterday at home. All through dinner I kept telling Ro that the next time we head to Trivandrum, we are definitely going to Horizon and gorge on their tasty Chinese food. Dad, if you are reading this, I will never question you about Horizon ever again :)
For the marinade:
Chicken breasts- 300gms, cleaned and cut into bite size cubes
Dark sauce sauce- a generous dash
Pepper powder- 1 tsp
Salt- to taste

Ginger- a fat 1 inch piece, julienned
Garlic- 4 big pods, roughly chopped
Carrot- 1 medium size, chopped in circles
Green chillies- 2, slit lengthwise
Chicken stock- 2 cups
Corn flour- 2 tsp
Spring onions- 3 medium size stalks, trimmed, greens and whites chopped lengthwise
Celery- 1 stick (optional)
Soy sauce- 1 tsp
Pepper powder- to taste
Salt- to taste
Oil- 1 tbsp

Basmati rice- 1 1/2 cups, cooked as per instructions, with enough salt
These chubby chillies are from my garden..well er, actually I now have a garden because I flicked a whole lotta plants from my cousin relocating to Aussie land ;)

Marinate the chicken pieces with soy sauce, salt and pepper and keep in the refrigerator for at least an hour.
In a wok, heat the oil and add the ginger, garlic and green chillies, sauté till they turn a light brown.
Add the soy sauce and let it lightly start to boil and at that stage add the sliced carrots and mix it all together.
Add the marinated chicken pieces and on high heat stir fry for 4 to 5 minutes till they become light brown.
Reduce heat to medium, cover and cook the chicken till well done.
Mix the corn flour with the stock and add to the wok.
Season with salt (check and then add) and pepper, stir well and cook on high.
Add half of the spring onions and celery (if adding) and continue cooking till the gravy thickens a bit.
Just before you take it off the flame, add the remaining spring onions, give one final stir and serve on top of the steamed rice.
Its a perfect Autumn meal I would say:)
Notes: Its OK if you don't have time to marinate the chicken for an hr...the 15 minute or so you take to prepare the previous steps is sufficient enough
I used 2 Maggi chicken cubes, diluted it in 2 cups warm water and used as stock. Veg stock is good enough
I didn't have so omitted it.
Be very careful while adding salt, because the stock and soy sauce may have enough and more. If its too much, reduce the salt that goes into the rice.
For a veg. option, use mushrooms and corn, but whatever it is add loads of spring onions which impart that particular flavour,

Tuesday, 31 August 2010

Chinese Spring Rolls (lumpia)


My mother in law used to freeze these spring rolls and send it down through various people when we were in Chennai. She is such an expert at making these and I had to ask her for the recipe. Its been over a year since I got the recipe, but it was just a couple of weeks back that I finally got down to making them. 
Since I decided to buy the wrapper, it wasn't that difficult at all and came in handy on those rainy evenings when you wanted to have something hot with your tea.
Thanks mama for the wonderful recipe, it definitely is a keeper.

On another note: How is my new header??? A cousin told me he didn't feel like it was a food blog and to incorporate something on to my header so I spent a whole day figuring out a photo shop like software called GIMP on my comp and this is the best I could come up with. I seriously lost it after a while and just didn't care. There are still so many options I have and it seriously requires patience to go through those numerous tutorial pages and figure out how the darn thing works. So don't be surprised if I keep playing around with the fonts and colours and header once in a while...You haven't navigated to another page or anything...just another of my antics, that's all :)

For the wrapper:
Cornflour- 1 tbsp
All purpose flour/ maida- 2 tbsp
Eggs- 4
Water- 1/4 cup
Salt- to taste

Filling:
Chicken- 1/2 cup, boiled and shredded. I used chicken breasts
Cabbage- 1 cup minced
Carrot- 1 cup grated
Celery- 1 cup minced
Onion- 1 cup
Soy sauce- 1 tbsp
Pepper powder- 1/2 tsp
Oil- 2 tbsp  + enough to fry
Getting the wrapper ready:
Beat the eggs and mix all the other ingredients into that. (Keep a wee bit aside for the egg wash)
Smear a saucepan with oil and make medium size pancakes.

For the filling:
Fry the onions in oil till translucent and then add all the vegetables, soy sauce and cover and cook for about 2 to 3 minutes.
Add salt and pepper, mix well and remove from fire. Keep aside to cool.

Assembling:
Smear the edges with some egg, put the filling in the centre, fold the sides , roll and deep fry in hot oil.
Drain on paper towels and serve with some chilli sauce.
I used store bought spring roll wrapper which was huge and square, rather than circular which the recipe would yield. I had to cut them a bit, but it still was much easier and tasted just the same. This is a pictorial representation of my hard labour. (Please ignore the shabby kitchen).

Notes: The same an be done in a veg version by avoiding the chicken. Use paneer instead.
You can freeze them in zip lock bags for as long as you want.
Baking them is a good idea, but I would have to explore that option another time
I also didn't deep fry it, but shallow fried it, and it was good enough.
Pardon the picture, I had no patience to fancy it after that laborious effort.

Sunday, 18 April 2010

Lime-chilli marinated scallops in a black bean sauce

Again one of Ro's Saturday Kitchen Live (SKL) preparations this is. I woke up on Saturday, pretty late that is, to a very happy, chirpy Ro brimming from ear to ear saying, 'I know what I want for lunch.' 'Good for you baby, I know I want coffee,' was my sleepy reply. While i settled down with my coffee in front of the telly, Ro was all ready to go out shopping for his lunch. Thanks to BBC SKL, Scallops had won over the bet with Monk Fish Tail (yuck!) and thanks to BBC SKL, it turned out pretty yummy indeed!
The inspiration was SKL, but Ro ended up doing his own thing, as usual.

Scallops- 350gms
To marinate:
Lime juice- 1 tsp
Red chilli- 2, thinly sliced (less if you please)
Salt- to taste
Pepper- to taste
Corn Flour- 2 tbsp

Ginger- 3 tbs
Black bean sauce- 150ml (we used the Sainsbury's sachet, but here is a fairly straight forward recipe)
Oil- 1 tbsp
Spring onions- 2 stalks, roughly chopped

Mix all the ingredients in the 'to marinate' section add the scallops. Keep aside for 10 to 15 minutes.
Heat oil in a pre heated wok, add the ginger and stir fry for a minute or so till the raw smell goes.
Add the marinated scallops and stir fry till they start to brown.
Pour in the black bean sauce and stir fry for two minutes or until the sauce starts to bubble, all this on high heat.
Add the spring onions, stir for a few more seconds, take it off the flame and serve hot with rice or noodles.
Notes: The black bean sauce was very salty and so if you are using that, then you might want to go easy on the salt when you marinate the scallops.

Tuesday, 2 February 2010

Chicken in a spicy garlic sauce

We have a Chinese restaurant/take away just around the corner and we frequently visit the same. The chicken and beef in black bean sauce and the seafood/meat in garlic sauce are incredible that we keep ordering the same again and again. I tried to recreate the chicken in garlic sauce recipe here, but failed miserably. Its nowhere close to what i had at the restaurant, but it tasted delicious anyway.

Boneless, skinless chicken breasts- 1 lb (450gms), cleaned and cut into bite size cubes

To marinate
Dark soy sauce- 2 tbs
Chilli powder- 3/4 tbs
Salt- to taste

English shallots- 2, julienned
Pepper powder- 1 tsp
Garlic- 6 pods, chopped fine
Ginger- 1 inch piece, chopped fine
Chicken Stock cube- 1 (I use Knorr)
Water- 3/4 cup, slightly warm
Corn flour- 1 tbs
Spring onions- 1/4 cup (greens and bulbs) + 2 tbs to garnish (just the greens)
Oil- 2 tbs

Marinate the chicken with the soy sauce, chilli pwd and little salt. Keep aside for 15 to 20 minutes.
In 3/4 cup warm water, dilute the stock cube. Add the cornflour. Mix well and keep aside
In a frying pan, heat the oil and sautee the shallots, garlic and ginger till soft and fragrant.
Add the marinated chicken pieces and pepper pwd and cook on high till the chicken changes colour.
Cover and cook on medium heat till they are cooked.
Once the water starts separating, open the lid, add the chicken stock , mix well and cook open on high flame till the gravy reduces to about half.
Add the spring onions and stir well. The chicken pieces should be well coated.
Garnish with the remaining spring onions before serving.


Notes: The chicken stock cube is really salty, so watch before you add more salt
Don't over cook the garlic and ginger. The sauce really emits a nice garlicky flavour

PS: I got myself a neat studio corner with efficient lighting and background. So now i dont need to worry about taking pics with table lamps and decor lights. I am still perfecting the art of shadow less lighting, diffuser etc. So pics are still a bit bleak. I however went ahead and clicked a few extra pics, just cos i was darn excited:)
Oh and the new DSLR adds to the quality of the pics..I'm loving the EOS 500D

Monday, 19 October 2009

Gobi/ cauliflower Manchurian

We are in the process of adding broccoli and cauli's to our daily food and i must say i hate broccoli and so does Ro but he tries hard to eat it and doesn't complain. We try to include it in our soups and its still raw and horrible. For me, its more like keeping the one and only broccoli floret till the last gulp and then try and chuck it without Ro looking. But he manages to catch me just before that and i have to chew it like a mincing machine and swallow it with great difficulty. Cauli's also are not that great in soups, but not as bad as broccoli so i manage to eat that. We had left over caulis from one of the soup sessions and i couldn't handle it raw again. So i tried out a Manchurian recipe which turned out great, although Ro was eating my head while i was preparing it saying, 'I'm hungry whats there to eat, il die of hunger etc.' So pardon the 'not so presentable pic' which i had to hurry through.
I mixed the recipe from mariasmenu and from another blog and came up with this. Also, Swarhas an interesting recipe for gobi Manchurian on her blog.

Cauliflower florets- 2 cups

To marinate:
Corn flower- 2 tbs
Maida- 1 tbs
pepper pwd- 1/2 tsp
Water- enough to make a loose paste
Salt- to taste
Oil- enough to fry

Bell pepper- 1, sliced into cubes
Onion- 1, thinly sliced
Green chillies- 2, slit lengthwise
Ginger garlic paste- 1 tsp
Soy sauce- 2 tbs
Tomato sauce- 1 tbs
Chilli sauce- 1 tbs (i didn't have any so i made a paste of 1/2 tsp of vinegar and 1 tsp of Kashmiri chilli pwd)
Pepper pwd- 1 tsp
Spring onions- to garnish
Salt- to taste

Boil the cauliflower florets for about 5 minutes, drain it completely and dry on kitchen towels. It must be completely moisture-free
Mix all ingredients in the 'to marinate' section with enough water to make a loose paste (not too watery though). Dip the florets in this mixture and deep fry in hot oil. Drain on paper towels.
In a frying pan, heat some oil (leftover from frying) and sautee the onions, bell pepper and green chillies till they become soft. To this add the Ggp and sautee well, till the raw smell goes. Next, add all the sauces, pepper and salt and mix well. In goes the fried florets and combine well with the sauces and masala. It must be well coated. Add some spring onions to enhance the taste, or just garnish it when you are ready to serve.

Notes: I don't like the florets completely coated with cornflower, so i don't over do it
Bell pepper is optional, but it brings an authentic Chinese taste to it, i think!
I marinated the florets in the refrigerator for over an hour which was quite accidental, but i guess it was for the best.
Fry the marinated florets in oil till crunchy brown and serve it with garlic mayo mixed with a bit of tomato ketchup and it serves as a great starter. Have tried it a lot of times.

Wednesday, 19 August 2009

Chilli Prawns/ Prawn Tempura with a pungent dipping sauce

I had some left over prawn and was sick of the usual dry preps and the curry...never comes out right for me. I was searching online for some easy prawn recipes and came across this from mariasmenu. I wouldn't say this was a damn easy dish to prepare, but a damn tasty and addictive one at that. It can be served as an appetiser with a dip or as a side to Chinese mains. I didn't have green peppers and so omitted them. Made a few changes here and there too.

Prawns- 250gms (cleaned and deveined)

To marinate:
Plain flour- 3 tbs
Cornflour- 2 tbs
Fresh ground pepper- 2 tsp
Salt- to taste
Egg- 1

Spring Onions- 2 big ones, thinly chopped
Ginger garlic paste- 1 tbs
Chilli pwd- 1/2 tsp
Ground pepper- 1/2 tsp
Soy sauce- 2 tbs
Oil- to fry
Salt- to taste
Lime juice- to sprinkle

Make a paste with plain flour, corn flour, pepper powder, egg, salt and water and marinate the prawns for about half an hour in this paste. the prawns should be well coated. Deep fry the prawns in hot oil, drain on paper towels and keep aside.
In a frying pan, heat about 1 tbs oil (use the left over oil from frying) and sautee the spring onions and Ggp till they become soft and fragrant. To this, add chilli pwd and pepper pwd and mix well. Add the soy sauce and salt required and sautee well. Finally add the fried prawns, sautee for a few more minutes till it becomes dry. Sprinkle some lime juice, garnish with spring onions and dig in. If you need a dipping sauce to accompany the appetiser, here goes:

Soy sauce- 2tbs
Grated ginger- 1 tsp
Balsamic vinegar- 1 tsp
Sugar- a pinch

Mix all this together, season with a little ground pepper and you are ready to go.

Notes: If you add tomato sauce along with the soy, i guess it tastes even better. I somehow dislike the tomato sauce. So i avoided it.
If you have king prawns/tiger prawns and beer, add the beer to the batter and deep fry till crisp and golden and you have prawn tempura.