Showing posts with label spicy dip. Show all posts

Tuesday, 24 February 2015

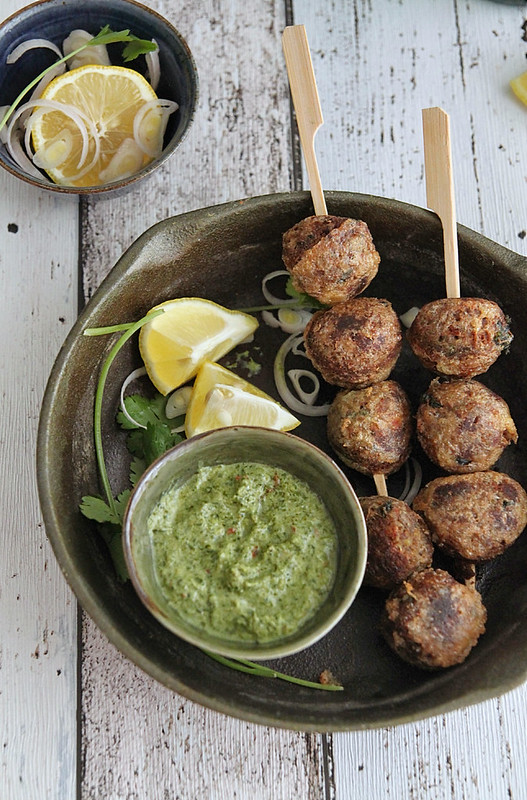
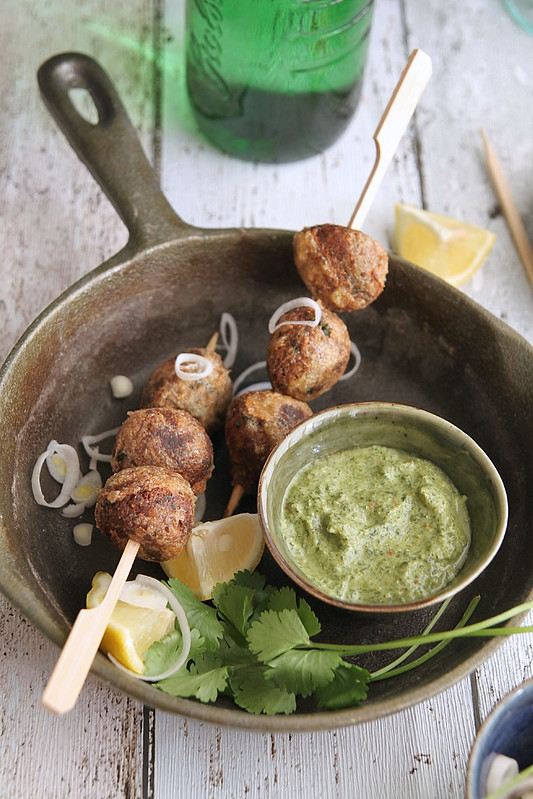
Shami kebabs with coriander-mint chutney

IMG_5572 
I love kebabs, and its a pity we don't get them as frequently as we did back home. We had this really nice tandoori restaurant near home and my dad would so often go pick up tandoori chicken, seekh kebabs, chicken tikka and the like from there. Even now when i go back home, he gets me the kebabs and it tastes just as nice, but i just haven't had anything close to that here. I mean Tayyabs is good and so is Kadiri's but they are so far away, and i miss those corner kebab places you find in abundance in India.

So the next best thing is to try and make your own. I have a few favourites that i have proudly mastered, like the Afghani murgh malai kebabs, the beef seekh kebabs and chicken tikka, and they make it to the table at most of my parties because they are so easy to make. Shami kebabs on the other hand is a bit difficult to make, i admit, but so frikking tasty and def up there on the kebab list. Like seriously melt-in-the-mouth types.
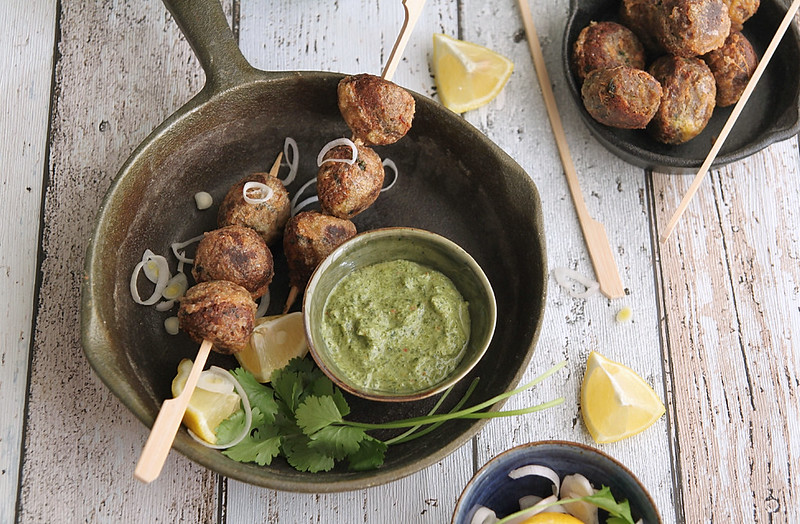
IMG_5540
I had some friends over last weekend and I made these kebabs as starters and served them with a spicy coriander mint chutney, which i must say came out so well. The one time i previously made them, they were bitter...its a problem i always seem to face with coriander leaves when ground. I started putting it together with a plan b in mind, 99 percent sure it wasn't going to turn out nice, but then, it just did...and i decided to post it here before i forgot the measurements.

The recipe is from Maya's Yummy O Yummy, a blog i religiously follow for all my mallu recipes. She's really got some amazing stuff up there so do drop by and check them out. 

Makes 25 to 30 small patties
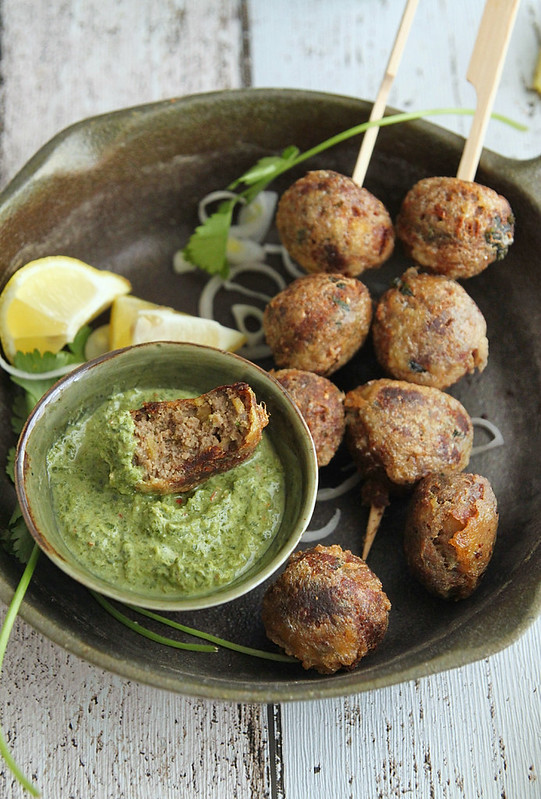
IMG_5557
Ground beef- 1/2 kg
Chana dal- 1/2 cup, rinsed
Ginger- 1 1/2 tsp, peeled and chopped
Garlic- 2 tsp, peeled and chopped
Onion- 1 cup, roughly chopped
Dried red chillies- 2
Salt- to taste
Water- 1/2 cup

To grind
Coriander seeds- 1 tbsp
Cumin seeds- 1 1/2 tsp
Whole peppercorns- 1 tsp
Cinnamon stick- 1/2 inch
Cardamom- 2 pods
Cloves- 4

Coriander leaves- 1/2 cup, washed and roughly chopped
Mint leaves- 25 (around 1/4 cup packed)
Onion- 1/2 cup, roughly hopped

Oil- enough to shallow fry the patties
Egg- 1, beaten
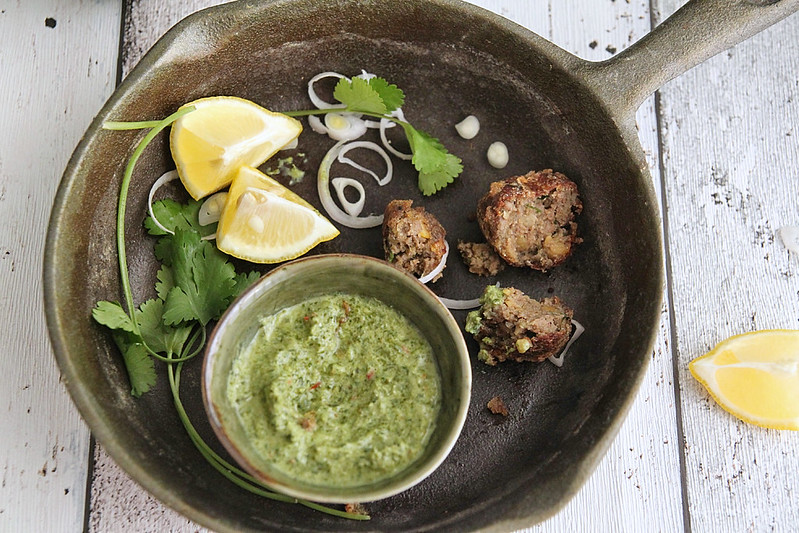
IMG_5576
Into a pressure cooker throw in the ground beef, chana dal, ginger, garlic, onion, red chillies and salt.
Break the meat down, while mixing in the other ingredients as well.
Pour in the water and cook on medium heat for about 15 minutes or for around 2 to 3 whistles.
Once the pressure releases, open the cooker and add the ground mix.
If there is any water, put it back on medium-high heat and cook till the water completely evaporates, while stirring continuously.
Keep aside to cool.

Once cool, transfer the contents of the cooker into a food processor/ blender along with the coriander, mint leaves and onion and grind to a paste.
(I do not have a food processor and my spice mill is too small, I'd have to grind it multiple times, so i used my immersion blender which surprisingly worked fine. I think I've solved my minced meat dilemma for cutlets)
IMG_5538 
Transfer the ground meat to a large bowl and start making small lime size balls and flatten.
You can freeze the patties at this point and continue with the next step once you take them out of the freezer.
When ready to cook, heat oil in a pan, dip the patties in the egg and fry till brown on both sides.
Drain on paper towels and serve hot with the chutney.

Notes: The shami kebabs are traditionally made with ground mutton, but i went with beef. Feel free to use the exact measurement of ground lamb.
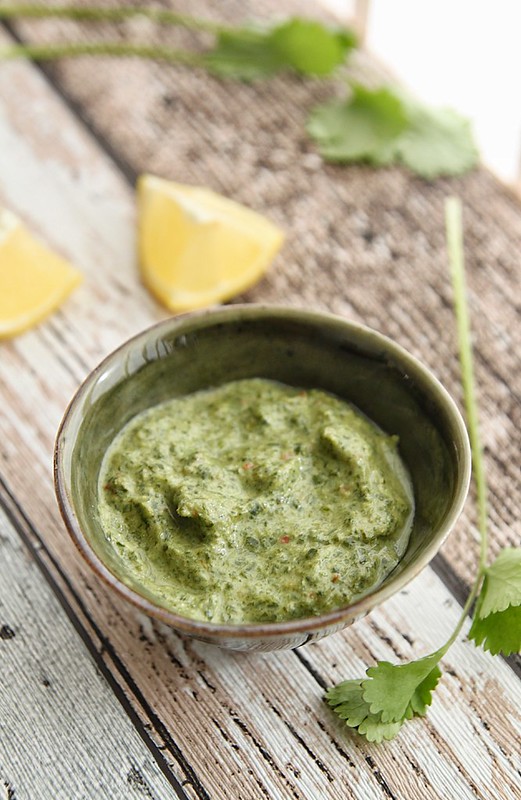
The kebabs weren't spicy at all, and so i made the chutney a wee bit spicy, which worked well.

Coriander-mint chutney
IMG_5510 
Coriander leaves- 1/2 cup, roughly chopped
Mint leaves- 1/4 cup
Cumin powder- 1/4 tsp
Lemon juice- a generous dash
Green chilli- 1, chopped
Salt- to taste
Yoghurt- 2 heaped tbsp

Blend together all the ingredients, except yoghurt, in a food processor (I used my spice mill).
Transfer to a bowl and stir in the yoghurt.
Adjust seasoning if required.
The chutney stays in the refrigerator in an air tight container for about 5 days.

Sunday, 23 June 2013

Baba ghanoush (Moutabel)

IMG_9237
Let me say this over and over again. The best part about blogging are the friends you make in the process. Friends who have now become such an essential part of your life, that even if you stop blogging, they wont just disappear. I have been lucky enough to meet some of the UK-based food bloggers and most of us try and catch up once in a while.

Last week, Suchi of Kitchen Karma invited Manjiri (Slice off me) and me over to her place and we had such a blast. She'd made a Mediterranean spread for lunch and everything tasted fab. The baba ganoush she'd made from scratch was the winner for me, closely followed by the Moroccan braised chicken. Got the recipe links from her the next day and made myself a Mediterranean feast for dinner :)

I am a big fan of Mediterranean food. In fact, a breakfast staple for us is hummus and toast. But I've never really tried making any of this at home, simply because I thought I'd never get the taste spot on. Suchi totally inspired me to give it a go at home and I'm surprised at how a few common ingredients prepared in a different way bring about awesome flavours. Talking of which, I recently got myself a citrus juicer from this really cool online store called Red Candy. Yes, all these years I was painstakingly squeezing limes and lemons and oranges, till the gorgeous red coloured beauty made an appearance. I love it to bits and its made my life so much easier. Previously I used to waste a lot of the juice, but now (like for example in Mediterranean cooking, a lot of lemon juice is used), I squeeze the heck out of the fruit and it gives me immense pleasure :)
IMG_9200
The really cool thing about the store is that it is dedicated to the colour red. Be it home furnishing, interior accessories, kitchen stuff or gifts, red is the colour you'll get them in. They have some really innovative products and designs and some of them make really cool gifts. I got myself the citrus juicer, the pretty red and white tea towel and a nice churn jug. Hint: you know where to go for your Valentines day gifts right??? :)

Back to the recipe...To be honest, I had no idea baba ganoush and moutabel were the same thing. Its one of those dishes we religiously order at our favourite restaurant on Edgware Road, and till now thought it was a complicated recipe with speciality ingredients. Well, I couldn't be more wrong. The only ingredient I actually had to buy was the Tahini paste, which is now easily available in all the grocery stores. If it wasn't for my flat glass hob I would have charred the aubergine on fire and would have taken only half the time. Not complaining! It was yum and Ro is so thrilled I made food from his second favourite cuisine in the world (first being Chinese, no kidding!).

Recipe adapted from here 
IMG_9245
Aubergines- 3 large, cut in half lengthwise
Garlic- 4 cloves (read notes)
Lemon juice- from one small lemon
Tahini paste- 3 tbsp 
Olive oil- 3 tbsp
Pepper- two grinds (around 1/4 tsp)
Salt- to taste
Chilli powder- to sprinkle (optional)
IMG_9219
Preheat the grill/ broiler and line a baking tray with silver foil.
Pierce the aubergine halves with a fork, rub them with about a tsp of olive oil all over and place them, cut side down, on the baking tray.
Place the tray on the top most rack (closest to the broiler) and cook for about 30 minutes or till the aubergines are charred nicely on the outside. Keep checking half way through to avoid burning.
Once done, remove them carefully from the tray and chuck into a zip lock bag and zip it up. Keep aside for about 15 minutes, so that the aubergines can steam in their skins.

Scoop out the flesh from the charred skin (it comes off easily) and place in a bowl. 
Add the garlic, lemon juice, tahini, 2 tbsp olive oil and salt and pepper and pulse using an immersion blender or just whisk vigorously using a fork till they all come together.
Transfer the goodness into a serving bowl, swirl the remaining olive oil on top, sprinkle the chilli powder and serve with pita bread, vegetable sticks, bread or even tortilla crisps.
IMG_9224
Notes: The original recipe called for only 2 cloves of garlic, but i had 4 peeled ones lying around and used that. Bad idea, as it was very garlicky. Id stick to two the next time.
I don't like chunky pieces of aubergine in my dip, so I blended it to a smooth consistency. Feel free to leave some of the texture in your dip by just mashing it with a fork.
You can also char the aubergines in the oven. Follow the above prep. methods but instead of grilling just bake them in an oven preheated at 200C for about 40 minutes.

With thanks to Red Candy for sending me the red props to review :)

Wednesday, 9 January 2013

Jalapeño popper dip

IMG_6098
I had major plans of starting off the new year on a sweet note, but 2 cake baking disasters back to back left me disinterested in the same. I am pretty sure I've lost my cake baking mojo and poor Ro is bearing the brunt of it, along with eating the severely dry mocha cupcakes I baked (and couldn't get myself to dump).

Instead I thought I'll blog one of my recent favourites, the jalapeno popper dip. I love Jalapeno poppers, but unlike the US, its very difficult to get your hands on some fresh Jalapenos and even if you do its ridiculously expensive. But when I do have this craving for poppers I head on over to Borough market and pick some up, but of late I have been using the pickled jalapenos for my cooking requirements. It cant be used to make poppers, but I do generously use them in my Mexican dishes as well as dips and such. 
07
Penn State Snacks had sent me their Christmas (pretzel) range to review a while back and their challenge was to incorporate it into a recipe. They sent me 3 different flavours, each good it its own way. The sour cream and chive was deemed my favourite and I can very proudly say I myself finished off 3/4th of the pack. Their popular salted giant stars were perfect for Christmas entertaining and I served it with a sweet apricot chutney at one of my Christmas parties. The kids enjoyed it and that does say a lot about the flavour doesn't it :). Their brand new flavour- Maple bacon pretzel knots were used in this jalapeño popper dip and I must say it was a pleasant discovery. Instead of using bread crumbs to sprinkle on top of the dip, I crushed the maple bacon pretzels and used that instead. The subtle sweetness of the maple was a good addition to the creaminess of the cheese and heat from jalapenos. I still have half a pack of pretzels left and I may use it up to coat some chicken drumsticks and bake them. 

The jalapeño dip was served as a starter along with some carrots and cucumber sticks and tortilla chips at a party we had at home and everyone loved it. I wouldn't claim this dip to be healthy in any way, but serving it with some chopped veggies kinda makes it a wee bit acceptable. Oh well, who am I kidding, its an uber cheesy dip- hot and spicy- and I don't think anyone would say no to it. So go on, give it a try and see what I'm talking about.

Recipe adapted from here (serves 8, as a starter)
IMG_6125 
Cream cheese- 225 gms, at room temperature (I used Philadelphia cream cheese)
Mayonnaise- 1/2 cup
Cheddar cheese- 1/2 cup (coarsely grated)
Parmigiano Reggiano- 1/4 cup (coarsely grated)
Pickled jalapeños- 90 to 100 gms, drained and roughly chopped
Maple bacon pretzels- 3 tbsp (crushed *)
Parmigiano Reggiano- 2 tbsp (finely grated)
IMG_6094
In a mixing bowl mix together the cream cheese, mayo, cheddar and parmiggiano reggiano until well combined.
Add the chopped jalapeños and continue mixing till you get a smooth-ish mix. 
Transfer this mix into a baking dish and smoothen out the top as much as possible. Keep aside.
Meanwhile, preheat the oven to 175C.
*Transfer the pretzels into a zip lock bag and using a rolling pin crush them as finely as possible. Alternatively, transfer them into a spice grinder and grind till fine. 
Mix the Parmigiano cheese into the pretzel mix and sprinkle over the cheese mix, as evenly as possible. Tap the bowl on the kitchen counter to evenly distribute it,
Place on a baking tray and chuck into the oven for about 20 to 25 minutes or till the cheese starts bubbling from the sides and the crushed mix on top becomes a light golden colour.
Serve right out of the oven.
IMG_6134
Notes: Replace the maple bacon pretzels with equal amount of bread crumbs. I have tried it both ways and cant pick a favourite. Love both equally. You can also use any other crisp/ chips in its place as well.
I dont like too fine a crumb so I left a few chunks here and there.
Feel free to halve the recipe and bake it for only about 12 to 15 minutes.
Use more jalapeños if you want it spicier. Add one fresh one along with the pickled ones for some extra kick. The heat was just perfect for us.
Add flavourings like garlic powder, thyme etc. to give it more oomph.

With thanks to Penn State Snacks for sending me a sample pack of pretzels